
Related Manuals for Philips SA1MUS32K/02


Summary of Contents for Philips SA1MUS32K/02
- Page 1 Register your product and get support at www.philips.com/welcome EN User manual SA1MUS08 SA1MUS16 SA1MUS32...
-
Page 2: Table Of Contents
Contents 1 Important safety information General maintenance Recycling the product 2 Your new MUSE What’s in the box 3 Getting started Overview of the controls and connections Overview of the main menu Install software Connect and charge Connect MUSE to a computer Play while MUSE charges Battery level indication Battery level indication... - Page 3 Supported picture file formats Supported audiobook file formats 19 Glossary Need help? Please visit www.philips.com/welcome where you can access a full set of supporting materials such as the user manual, the latest software updates, and answers to frequently asked questions.
-
Page 4: Important Safety Information
• Back up your files. Ensure that you retain the original files you have downloaded to your device. Philips is not responsible for any loss of data if the product becomes damaged or not readable / legible. • Manage (transfer, delete, etc.) your music files only with the supplied music software to avoid problems. - Page 5 Microsoft Corporation in the United States and/or other countries. Be responsible! Respect copyrights. Philips respects the intellectual property of others, and we ask our users to do the same. Multimedia content on the internet may have been created and/or distributed without the original copyright owner’s authorization.
-
Page 6: Recycling The Product
Data logging Philips is committed to improving the quality of your product and enhancing the Philips user experience. To understand the usage profile of this device, this device logs some info / data to the non-volatile memory region of the device. - Page 7 Please inform yourself about the local rules on separate collection of batteries. The correct disposal of batteries helps prevent potentially negative consequences on the environment and human health. Notice for the European Union This product complies with the radio interference requirements of the European Union.
-
Page 8: Your New Muse
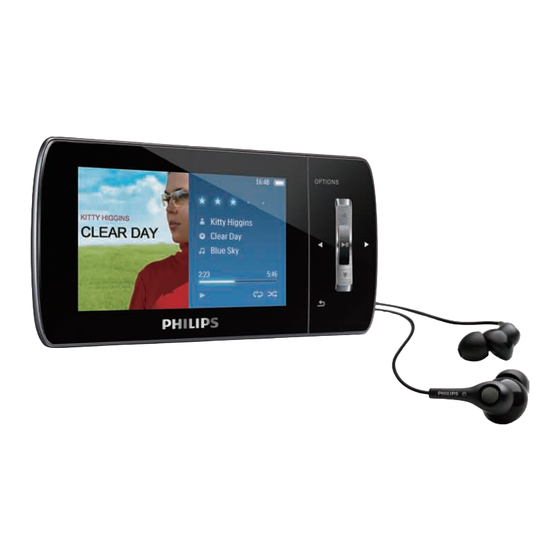
Check that you have received the following items: Player Earphones USB cable Pouch CD-ROM Quick start guide Philips GoGear audio player Quick start guide Note • The images serve as reference only. Philips reserves the right to change color/design without notice. -
Page 9: Getting Started
3 Getting started Overview of the controls and connections display slide: activate/deactivate active noise-cancelation press: scroll up/down press and hold: scroll up/ down at high speed press: increase/decrease the volume press and hold: increase/ decrease fast OPTIONS view available options press: skip to next/previous press and hold: scroll back/ forward at high speed... -
Page 10: Install Software
Install software MUSE comes with the following software: Philips Device Manager (helps you get • firmware updates for MUSE) • Media Converter for Philips (helps you convert and transfer video files for MUSE) Windows Media Player (helps you • convert and transver music and picture files for MUSE) •... -
Page 11: Battery Level Indication
Battery level indication The display indicates the approximate levels of the battery status as follows: 100% A flashing battery screen indicates that » the battery is low. The player saves all settings and switches off within 60 seconds. Battery level indication Note •... -
Page 12: Use Muse To Carry Files
4 Use MUSE to carry files MUSE allows you to carry files in Windows Explorer. With MUSE connected to the USB port of the computer, open Windows Explorer. Create folders in MUSE. Use drag and drop actions to sort your files into the folders. -
Page 13: Napster Player (Available In The Uk And Germany Only)
5 Napster Player (available in the UK and Germany only) Napster online music service offers a variety of purchase and subscription models. Napster player supplied with MUSE helps you • search Napster for music by name • browse the Napster catalogue •... - Page 14 © 2003-2009 Napster LLC, Napster, Napster To Go and the Napster logos are trademarks of Napster LLC, that may be registered in the UK and/or other countries. Portions utilize Microsoft Windows Media Technologies. Copyright © 1999-2002 Microsoft Corporation. All Rights Reserved. Music recognition technology and related data are provided by Gracenote®.
-
Page 15: Music
6 Music Listen to music From the main menu, select music mode. Navigate the sub-menus to select your music. Press to play. • Press to toggle between pause and play. Reduce background noise MUSE incorporates an active noise canceling feature that lets you listen to your music and videos with less background noise. -
Page 16: Delete Music Tracks
[Album art] • Alphanumerically listed album art [Albums] • Alphanumerically listed albums • Tracks listed in album order [Genres] • Alphanumerically listed genres • Alphanumerically listed artists • Alphanumerically listed albums • Tracks listed in album order [Playlists] [Playlist-on-the-go] • •... -
Page 17: Windows Media Player
7 Windows Media Player 11 (WMP11) Install Windows Media Player 11 (WMP11) Insert the supplied CD into the CD-ROM drive of your computer. Follow the on-screen instructions to complete the installation of WMP11. Transfer music and picture files to WMP11 library By default, WMP11 automatically loads all the music and picture files that are stored in your computer. -
Page 18: Switch Between Music And Pictures Library In Wmp And Muse
Switch between music and pictures library in WMP and MUSE Click the arrow on the top left of WMP11,then select the category. Rip songs from a CD You can transfer music from a CD to MUSE. The transfer requires that you create a digital copy of the music on your computer first. -
Page 19: Buy Music Online
By default, WMP11 starts to rip all the songs from the CD. » To modify this option, click the down arrow beneath the Rip tab and select Rip CD Automatically When Inserted > Never. Click on the check boxes to select the songs that you want to rip. -
Page 20: Set Up Muse For Wmp11
The playlists you select sync to MUSE every time you connect MUSE to the computer. Click the down arrow beneath the Sync tab and select Philips MUSE > Set Up Sync. » The Device Setup dialog box appears. -
Page 21: Select Files And Playlists For Manual Sync
In the Playlist to sync pane, select the Priority arrows to arrange them in the order that you want them to sync. If MUSE is full before sync is complete, » the files and playlists that are lower in priority on the list are omitted from sync. -
Page 22: Copy Files From Muse To Your Computer
MUSE to your computer with WMP11. Start WMP11. Turn on MUSE. Connect MUSE to the computer. Click on Philips MUSE in the left Navigation pane. » The content on MUSE is listed in the Contents pane. Navigate to the file or playlist you want to copy from MUSE to the computer. -
Page 23: Edit Playlist
Click on the underlined words to refine your criteria. Click the second and third green plus signs to select and define more criteria for your auto playlist. Click OK button when done. Edit playlist You can edit your existing playlists at any time. In the left Navigation pane, click on Playlists. -
Page 24: Delete Files And Playlists From Wmp11 Library
WMP11. You can delete files or playlists, just like any other files displayed in WMP11. In the left Navigation pane, click on Philips MUSE. You can browse the contents of MUSE in a variety of views, such as Recently Added or Artists. -
Page 25: Format Muse With Wmp11
Format MUSE with WMP11 Caution • This procedure reformats the storage on MUSE and erases all data. Start WMP11. Turn on MUSE. Connect MUSE to the computer. Click the down arrow beneath the Sync tab, then select Philips MUSE > Format. -
Page 26: Playlists
8 Playlists Add music tracks to a playlist In music play mode, press OPTIONS. to select [Add to playlist], Press then to confirm. Press to select the playlist, then to confirm. The current track is added to the » selected playlist. Play music tracks from a playlist From the main menu, select... -
Page 27: Audiobooks
9 Audiobooks MUSE supports books in audio format. The use of this feature requires that you download AudibleManager from audible.com. With AudibleManager you can manage the digital contents of your audiobooks. Visit audible.com/gogear and register. The onscreen instructions guide you through AudibleManager software download process. -
Page 28: Adjust Audiobook Play Speed
Adjust audiobook play speed In audiobook play mode, press OPTIONS. to select [Playback Press or , then speed]. to select [Slower], Press or , then [Normal], or [Faster]. • To exit, press Add a bookmark in an audiobook In audiobook play mode, press OPTIONS. -
Page 29: Bbc Iplayer
With BBC iPlayer you can now catch up on your favourite BBC programs from the past 7 days on MUSE. Here is how to use BBC iPlayer on Philips MUSE: On your computer, open your browser and go to www.bbc.co.uk/iplayer Click on a program to select it. - Page 30 A Transfer with Windows Explorer During transfer, the following Windows prompt may pop up. Click on Yes or Yes to All to continue. Note • Each BBC iPlayer program is protected with a digital license and can only be synchronized up to 5 times to any portable device.
-
Page 31: Video
11 Video Download, convert and transfer videos MediaConverter™ for Philips enables you to • download videos from the Internet to your PC at the click of a button. • convert video files on your PC to the correct screen size of MUSE. -
Page 32: Pictures
12 Pictures View pictures MUSE supports a range of picture formats (see section Supported formats in this user manual). From the main menu, select picture mode. Press or , then to navigate and select. View slideshow While in mode, you can view your pictures as a slideshow: OPTIONS Press... -
Page 33: Radio
13 Radio Listen to FM radio Connect earphones. From the main menu, select radio mode. • The earphones cable acts as FM antenna. Auto-tune preset radio station The auto-tune feature of MUSE helps you find radio stations and save them under the preset numbers. -
Page 34: Recordings
14 Recordings Record from FM radio From the main menu, select radio mode. Select radio station (preset). OPTIONS Press to view options menu. Select [Start FM radio recording]. • Press to toggle between pause and record. Press to stop. » The screen prompts you to save the recording. -
Page 35: Listen To Voice/Audio Recordings
Listen to voice/audio recordings menu, select [Recordings From the library] > [Voice]. Select a recording. Press to play your recording. Upload your recordings to a computer Connect MUSE to the computer (see section Connect and charge in this user manual). On the computer, in Windows®... -
Page 36: Settings
15 Settings This is how you customize MUSE: From the main menu, select to enter settings mode. In the menu, navigate as follows: Press to select an option. Press to confirm a selection and go to the next level (when available). Press to return to the previous level. - Page 37 [Display [Theme] settings] [Brightness] [Backlight timer] [Screensaver] Font size • Small • Normal (default) • Large [Date and Date time] Date format Time Time format Show time in header [Slideshow [Time per slide] settings] [Repeat] [Shuffle] [Language] • Czech • German •...
- Page 38 [PC connection • MSC (default) preference] • [Information] • [Capacity:] • [Free space:] • [Firmware version:] • [Model:] • [Support site:] [Factory [Restore factory settings? settings] (Files transferred to player will not be affected.)] • [Yes] • [No]...
-
Page 39: Update Muse
(see section Connect and charge for instructions). On your computer, click Start > Programs > Philips Digital Audio Player > Muse Device Manager to launch Philips Device Manager. Click Update » Philips GoGear Muse Device Manager checks for updates and installs new firmware from the Internet, if available. -
Page 40: Troubleshooting
MUSE with the Philips Device Manager: On your computer, select Start > Programs > Philips Digital Audio Player > Muse Device Manager > Philips Device Manager to launch the Philips Device Manager. Turn off MUSE before you continue. -
Page 41: Technical Data
18 Technical data Power Power supply: 750 mAh Li-ion polymer internal rechargeable battery Play time¹ (music): 25 hours Play time¹ (video): 5 hours Connectivity Headphone 3.5 mm USB 2.0 High speed Sound Channel separation: 45 dB Frequency Response: 20 Hz - 18 kHz Output power: 2 x 1.4 mW Signal to noise ratio: >... -
Page 42: Supported Music File Formats
Supported music file formats MUSE supports the following music formats: • .mp3 • .wma • .aac • .ape • .flac • .ogg • .wav • .ra / .rm Supported video file formats MUSE supports the following video formats: • .avi • .mp4 • .rmvb • .wmv Supported picture file formats MUSE supports the following picture formats:... -
Page 43: Glossary
FullSound FullSound™ is an innovative technology designed by Philips. FullSound™ faithfully restores sonic details to compressed music, enhancing it to provide a full sound experience without any distortion. JPEG A very common digital still picture format. - Page 44 Windows Media Player 10 and Windows XP. The PlaysForSure* logo assures the consumer that the music purchased at an online shop with this logo is compatible with the Philips GoGear player. Shuffle A feature that plays audio files (tracks) in random order.
- Page 45 WMA (Windows Media Audio) An audio format owned by Microsoft, is a part of Microsoft Windows Media technology. Includes Microsoft Digital Rights Management tools, Windows Media Video encoding technology, and Windows Media Audio encoding technology. WMV [Windows Media Video] Refers to a video compression technology developed by Microsoft Corporation.
- Page 46 © 2009 Koninklijke Philips Electronics N.V. SA1MUS_02_UM_V2.0 All rights reserved. wk9265...