Table of Contents
Advertisement
Quick Links
Register your product and get support at
www.philips.com/welcome
EN User manual
DA Brugervejledning
DE Benutzerhandbuch
EL Εγχειρίδιο χρήσης
ES Manual del usuario
Käyttöopas
FI
FR Mode d'emploi
Manuale utente
IT
NL Gebruiksaanwijzing
NO Brukerhåndbok
PT Manual do utilizador
SV Användarhandbok
TR Kullanım kılavuzu
HTS9221
HTS9241
Advertisement
Table of Contents

Related Manuals for Philips HTS9221/12


Summary of Contents for Philips HTS9221/12
- Page 1 Register your product and get support at www.philips.com/welcome EN User manual DA Brugervejledning DE Benutzerhandbuch EL Εγχειρίδιο χρήσης ES Manual del usuario Käyttöopas FR Mode d’emploi Manuale utente NL Gebruiksaanwijzing NO Brukerhåndbok PT Manual do utilizador SV Användarhandbok TR Kullanım kılavuzu...
-
Page 3: Table Of Contents
Contents Using help Navigate the onscreen help Help and support Update your onscreen help Tutorials FAQs Contact Philips Notice Open source software Trademarks Important Safety Care for your product Care of the environment 3D health warning Your home theater Main unit... -
Page 4: Using Help
Using help Philips is committed to develop products that contribute to a greener environment. To save paper and the environment, access the help on your home theater through the onscreen interface. The onscreen help contains all the information that you need to set up your home theater. -
Page 5: Help And Support
and find answers to many frequently answered questions (FAQs) on your product at www.philips.com. Update your onscreen help Philips continually tries to improve its products. To make sure that your onscreen help is up to date with the latest information, update your home theater with the latest onscreen help. -
Page 6: Tutorials
Contact Philips If you contact Philips, you will be asked for the model and serial number of your product. The model number and serial number are on the back or bottom of your product. Note the numbers before you call Philips: Model No. - Page 7 Java and all other Java trademarks and logos are trademarks or registered trademarks of Sun Microsystems, Inc. in the United States and/or other countries. BONUSVIEW™ ‘BD LIVE’ and ‘BONUSVIEW’ are trademarks of Blu-ray Disc Association. ‘AVCHD’ and ‘AVCHD’ logo are trademarks of Matsushita Electric Industrial Co., Ltd and Sony Corporation. ‘x.v.Colour’ is a trademark of Sony Corporation. Manufactured under license under U.S. Patent #’s: 5,451,942; 5,956,674; 5,974,380; 5,978,762;...
-
Page 8: Important
Secure the wall mount to a wall that can support the combined weight of the product and the wall mount. Koninklijke Philips Electronics N.V. bears no responsibility for improper wall mounting that results in accident, injury or damage. -
Page 9: Care For Your Product
• Never place the product or any objects on power cords or on other electrical equipment. • If the product is transported in temperatures below 5°C, unpack the product and wait until its temperature matches room temperature before connecting it to the power outlet. •... -
Page 10: Health Warning
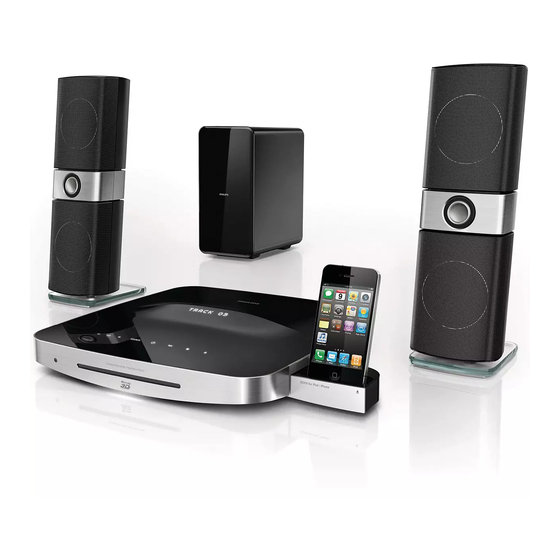
Your home theater Congratulations on your purchase, and welcome to Philips! To fully benefit from the support that Philips offers, register your home theater at www.philips.com/welcome. Main unit Display panel +/- (Volume) Increase or decrease volume. -
Page 11: Remote Control
• Color buttons: Select tasks or options for Blu-ray discs. • DISC: Switch to disc source. • DOCK for iPod: Switch to Philips dock for iPod or iPhone. • HELP: Access the onscreen help. • SOURCE: Select an audio input source or radio source. - Page 12 (Mute) Mute or restore volume. +/- (Volume) Increase or decrease volume. (Stop) / (Eject/ Open/Close) • Stop play. • Press and hold for three seconds to open or close the disc compartment, or eject the disc. (Play) Start or resume play. (Previous/Next) •...
-
Page 13: Connect Your Home Theater
This section helps you connect your home theater to a TV and other devices. For information about the basic connections of your home theater and accessories, see the quick start guide. For a comprehensive interactive guide, see www.connectivityguide.philips.com. Note • For identification and supply ratings, refer to the type plate at the back or bottom of the product. -
Page 14: Connectors
Connectors Connect other devices to your home theater. Side left MUSIC iLINK Audio input from an MP3 player. (USB) Audio, video or picture input from a USB storage device. Side right DOCK for iPod/iPhone iPod or iPhone dock. Rear left TO SUBWOOFER Connect to the supplied subwoofer. -
Page 15: Connect To Tv
Connect to TV Connect your home theater to a TV to watch videos. You can listen to audio from TV programs through your home theater speakers. Use the best quality connection available on your home theater and TV. Option 1: Connect to TV through HDMI (ARC) Best quality video Your home theater supports HDMI version 1.4 - Audio Return Channel (ARC). If your TV... -
Page 16: Connect Audio From Tv And Other Devices
Option 3: Connect to the TV through composite video Basic quality video If your TV does not have HDMI connectors, connect your home theater to the TV through a composite connection. A composite connection does not support high-definition video. With a composite connection, you need an additional audio cable to play the audio from the TV through your home theater (see ‘Connect audio from TV and other devices’ on page 16). -
Page 17: Computers And The Internet
If necessary, read documentation that accompanies the network components. Philips is not responsible for lost, damaged, or corrupt data. Wired connection Connect your home theater to your router through a network cable. -
Page 18: Wireless Connection
Connect the home theater to a network router through a wired connection (see ‘Wired connection’ on page 17). Turn on your TV, and switch to the correct source for the home theater. Press (Home). Select [Setup], and then press OK. Select [Network] > [Network Installation] >... -
Page 19: Name Your Home Theater
Name your home theater To easily identify your home theater on a network, name your home theater. Turn on your TV, and switch to the correct source for the home theater. Press (Home). Select [Setup], and then press OK. Select [Network] > [Name your Product:], and then press OK. -
Page 20: Discs
Auto volume Turn the auto volume on to keep the volume constant when you switch to a different source. SOUND SETTINGS. Press Select AUTO VOLUME, and then press Press the Navigation buttons (up/down) to select ON or OFF. Press OK to confirm. Sound mode Select predefined sound modes to suit your video or music. - Page 21 • To avoid flickering, change the brightness of the display (see ‘Display panel’ on page 37). Play buttons Button Action Navigation Navigate menus. buttons Confirm an entry or selection. (Play) Start or resume play. Pause play. Stop play. Skip to the previous or next track, chapter or file. Fast backwards or fast forwards. Press repeatedly to change the search speed. Navigation Rotate the picture clockwise buttons (up/...
- Page 22 BD-Live on Blu-ray On Blu-ray discs with BD-Live content, access additional features, such as internet chats with the director, the latest movie trailers, games, wallpaper, and ringtones. What you need • a Blu-ray disc with BD-Live content • an internet connection • a storage device: • a USB storage device, with at least 1 GB of memory, or •...
-
Page 23: Usb Storage Devices
Disable BD-Live To restrict access to BD-Live, turn on the BD- Live security. Press (Home). Select [Setup], and then press OK. Select [Advanced] > [BD-Live security] > [On], and then press OK. » BD-Live access is restricted. Note • You cannot restrict internet access on commercial Blu-ray discs. USB storage devices Enjoy pictures, audio and video on a USB storage device. -
Page 24: Audio, Video, And Picture Options
VOD code for DivX Before you purchase DivX videos and play them on your home theater, register the home theater on www.divx.com using the DivX VOD code. Press (Home). Select [Setup], and then press OK. Select [Advanced] > [DivX® VOD Code], and then press OK. - Page 25 • [Subtitle Language]: Select subtitle language for video. • [Subtitle Shift]: Change the subtitle position on the screen. • [Info]: Display information about what is playing. • [Character Set]: Select a character set that supports the DivX subtitle. • [Time Search]: Skip to a specific part of the video by entering the time of the scene.
-
Page 26: Radio
Radio Listen to FM radio on your home theater, and store up to 40 radio stations. What you need • FM antenna. Note • AM and digital radio are not supported. • If no stereo signal is detected, you are prompted to install the radio stations again. -
Page 27: Use Smartphone
Download the Philips application, MyRemote (MyRemote) to your smartphone. This application is free. Note • Philips MyRemote is only available for iPhones and Android smartphones. Tap the App Store (App Store) icon on the iPhone or the Market (Market) icon on the Android smartphone. -
Page 28: Browse Pc Through Dlna
Use your smartphone as a remote control The virtual remote control is displayed in multiple screens on the smartphone. To access the buttons, swipe the smartphone screen to the left or right. Only the control buttons that are relevant to the play mode are enabled on your smartphone. - Page 29 Click the Library tab, and then select Media Sharing. The first time you select Media Sharing on your PC,a pop-up screen appears. Check the Share my media box and click OK. » The Media Sharing screen is displayed. In the Media Sharing screen, make sure that you see a device marked as Unknown Device.
- Page 30 Click Turn on media streaming. » You return to Windows Media Player screen. Click the Stream tab and select More streaming options. » The Media streaming options screen is displayed. Make sure that you see a media program in the Local network screen. »...
-
Page 31: Browse Net Tv
Use Net TV to access variety of internet applications and specially adapted internet websites. For interactive discussions on Net TV services, visit the Net TV forum at www.supportforum.philips.com Note • Koninklijke Philips Electronics N.V. bears no responsibility for content provided by Net TV service providers. -
Page 32: Rent Online Video
Press the play buttons on your remote control to play, pause, search, or stop the video. Multiview You can watch two video sources side by side on some of the Philips TVs. The sources can be: • video from your home theater, • TV broadcasts, and •... -
Page 33: Easylink
EasyLink The home theater supports Philips EasyLink, which uses the HDMI-CEC (Consumer Electronics Control) protocol. EasyLink-compliant devices that are connected through HDMI can be controlled by a single remote control. Philips does not guarantee 100% interoperability with all HDMI-CEC devices. What you need • HDMI-CEC compliant devices. • An HDMI connection between the connected devices. -
Page 34: Change Settings
Change settings This section helps you to change the settings of your home theater. Caution • Most of the settings are already configured with the best value for your home theater. Unless you have a reason to change a setting, it is best to leave it at the default value. Note •... -
Page 35: Sound
Sound Change the sound settings to suit your preference. HDMI audio To hear an HDMI audio output from your TV, connect your home theater to the TV through an HDMI cable. Press (Home). Select [Setup], and then press OK. Select [Audio] > [HDMI Audio], and then press OK. -
Page 36: Parental Control
Disc subtitle Press (Home). Select [Setup], and then press OK. Select [Preference] > [Subtitle], and then press OK. Select a subtitle language for discs, and then press OK. Disc menu Press (Home). Select [Setup], and then press OK. Select [Preference] > [Disc Menu], and then press OK. -
Page 37: Apply Factory Settings
If it does not, disconnect the power cord for a few seconds and then reconnect it. Note • If the home theater cannot connect to the Philips server, press (Home), and then select [Setup] > [Network] > [Network Installation] to set up the network. -
Page 38: Update Software Through Usb
An archive utility that supports the ZIP file format (for example, WinZip® for Microsoft® Windows® or Stufflt® for Macintosh®). Step 1: Download the latest software Connect a USB flash drive to your computer. In your web browser, go to www.philips. com/support. At the Philips Support website, find your product and locate the Software and drivers. » The software update is available as a zip file. -
Page 39: Product Specifications
10 Product specifications Note • Specifications and design are subject to change without notice. Region codes The type plate on the back or bottom of the home theater shows which regions it supports. Country Europe, United Kingdom Asia Pacific, Taiwan, Korea Latin America Australia, New Zealand Russia, India China Media formats... - Page 40 .avi files in AVI container Audio Video codec codec PCM, DivX 3.11, DivX 4.x, Dolby DivX 5.x, DivX 6.x Digital, core, MP3, MPEG 1, MPEG 2 MPEG 4 ASP H.264/AVC HP@4.1/4.0; MP@3.2/3.1/3.0 WMV9 .divx files in AVI container Audio Video codec codec PCM, DivX 3.11, DivX 4.x,...
- Page 41 Video • Signal system: PAL / NTSC • HDMI output: 480i/576i, 480p/576p, 720p, 1080i, 1080p, 1080p24 Audio • S/PDIF Digital audio input: • Coaxial: IEC 60958-3 • Optical: TOSLINK • Sampling frequency: • MP3: 32 kHz, 44.1 kHz, 48 kHz • WMA: 44.1 kHz, 48 kHz •...
-
Page 42: 11 Troubleshooting
If you have problems using this product, check the following points before you request service. If you still have a problem, register your product and get support at www.philips.com/welcome. Main unit The buttons on the home theater do not work. • Disconnect the home theater from the power supply for a few minutes, then reconnect. - Page 43 The operation is not possible. EasyLink does not work. • Make sure that the home theater is connected to a Philips brand EasyLink TV, and the EasyLink option is on (see ‘EasyLink’ on page 33). When you switch on the TV, the home theater automatically switches on.
-
Page 44: 12 Language Code
12 Language code Abkhazian 6566 Afar 6565 Afrikaans 6570 Amharic 6577 Arabic 6582 Armenian 7289 Assamese 6583 Avestan 6569 Aymara 6589 Azerhaijani 6590 Bahasa Melayu 7783 Bashkir 6665 Belarusian 6669 Bengali 6678 Bihari 6672 Bislama 6673 Bokmål, Norwegian 7866 Bosanski 6683 Brezhoneg 6682... -
Page 45: Index
13 Index 2D video 3D disc in 2D mode 3D safety 3D video advanced BD-Live security enhanced audio restore default settings software update software version amplifier audio formats HDMI audio input mapping language night mode options post processing predefined modes quality settings source specifications subwoofer volume... - Page 46 Internet BD-Live connect to online video stores update home theater software iPod and iPhone dock your iPod or iPhone music Philips dock video and slideshow language 2nd audio language 2nd subtitle language audio disc menu language code onscreen menu...
- Page 47 Net TV online video stores remote control settings parental control password ratings password connect to DLNA media server software Philips Easylink picture options rotate settings slideshows troubleshooting zoom picture options picture-in-picture 2nd audio language 2nd subtitle language play...
- Page 48 radio control buttons FM antenna listen to radio specifications tune stations ratings recycling region codes remote control batteries overview rent video format SD card online video stores troubleshooting repeat safety disposal use of the product watching 3D screen saver SD card settings 3D video audio...
- Page 49 update software check current version electronic user manual from a USB storage device from network USB storage device control buttons options play specifications update home theater software user manual download navigate read update video HDMI deep color online video picture resolution picture settings specifications synchronize picture and sound...
- Page 50 (Year in which the CE mark is affixed / Année au cours de laquelle le marquage CE a été apposé) (DECLARATION DE CONFORMITE CE) We / Nous, PHILIPS CONSUMER LIFESTYLE B.V. (Name / Nom de l’entreprise) (address / adresse) SoundHub Home Theater...
- Page 51 © 2011 Koninklijke Philips Electronics N.V. All rights reserved. sgptt_1137/12_v5...