Table of Contents
Advertisement
Quick Links
Draft 6.1
2012-09-08
Only for Approval
User manual
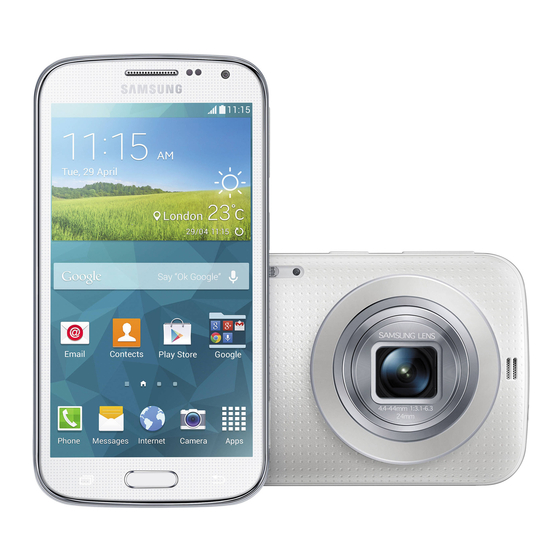
SM-C115
This device is capable of operating in Wi-Fi mode in the 2.4 and 5 GHz bands. The FCC requires that devices operating
within 5.15-5.25 GHz may only be used indoors, not outside, in order to avoid interference with MobileSatellite Services
(MSS). Therefore, do not use this device outside as a Wi-Fi hotspot or in Wi-Fi Direct mode outside when using the 5.15-
5.25 GHz frequencies.
Advertisement
Table of Contents

Related Manuals for Samsung SM-C115


Summary of Contents for Samsung SM-C115
- Page 1 Only for Approval User manual SM-C115 This device is capable of operating in Wi-Fi mode in the 2.4 and 5 GHz bands. The FCC requires that devices operating within 5.15-5.25 GHz may only be used indoors, not outside, in order to avoid interference with MobileSatellite Services (MSS).
-
Page 2: Table Of Contents
Table of Contents Read me first Personalising Switching to easy mode Managing the Home and Apps screens Getting started Changing the screen lock method Setting wallpaper Device layout Changing ringtones Buttons Setting up accounts Package contents Moving contacts from other devices to Installing the SIM or USIM card and your device battery... - Page 3 Table of Contents Motions & usability features Studio Control motions 106 Using Photo studio Toolbox 107 Using Collage studio Increasing touch screen sensitivity 108 Using Shot & more 109 Using Video clip studio 110 Using Video trimmer Contacts Adding contacts Internet &...
- Page 4 Table of Contents Safety Device & data manager 128 Emergency mode 158 Upgrading the device 130 Sending help messages 159 Transferring files between the device and a computer 131 Severe weather notification (Geo News) 160 Backing up and restoring data 161 Performing a data reset Utilities Settings...
- Page 5 Table of Contents 205 Adjusting the sound balance 205 Using mono audio 205 Using auto haptic 206 Using the assistive menus 208 Using the smart scroll feature 208 Setting tap and hold delay options 209 Using interaction control mode 209 Answering or ending calls 210 Using single tap mode 210 Configuring accessibility settings 211 Using other useful features...
-
Page 6: Read Me First
• D efault apps that come with the device are subject to updates and may no longer be supported without prior notice. If you have questions about an app provided with the device, contact a Samsung Service Centre. For user-installed apps, contact service providers. - Page 7 Read me first Instructional icons Warning: situations that could cause injury to yourself or others Caution: situations that could cause damage to your device or other equipment Note: notes, usage tips, or additional information...
-
Page 8: Getting Started
Getting started Device layout Earpiece Front camera Proximity/Light sensor Volume button Touch screen Power button Home button Shutter button Recent apps button Back button Multipurpose jack Microphone Speaker Headset jack Microphone Eyelet for strap GPS antenna Lens AF-assist light NFC antenna (on the battery) Flash Main antenna... -
Page 9: Buttons
Getting started The microphone at the top of the device is active only when you use the speakerphone or take videos. • D o not cover the antenna area with your hands or other objects, except when you are taking photos or videos. This may cause connectivity problems or drain the battery. -
Page 10: Package Contents
• A ppearances and specifications are subject to change without prior notice. • Y ou can purchase additional accessories from your local Samsung retailer. Make sure they are compatible with the device before purchase. • U se only Samsung-approved accessories. Some accessories, such as docking devices, may not have the same water- and dust-resistance certification. -
Page 11: Installing The Sim Or Usim Card And Battery
Getting started Installing the SIM or USIM card and battery Insert the SIM or USIM card provided by the mobile telephone service provider, and the included battery. • O nly microSIM cards work with the device. • S ome LTE services may not be available depending on the service provider. For details about service availability, contact your service provider. - Page 12 SIM card slot, take the device to a Samsung Service Centre to remove the memory card. • U se caution not to lose or let others use the SIM or USIM card. Samsung is not responsible for any damages or inconveniences caused by lost or stolen cards.
- Page 13 Replace the back cover. • E nsure that the back cover is closed tightly. • U se only Samsung-approved back covers and accessories with the device. Removing the SIM or USIM card and battery Remove the back cover.
-
Page 14: Charging The Battery
Use the charger to charge the battery before using it for the first time. A computer can be also used to charge the device by connecting them via the USB cable. Use only Samsung-approved chargers, batteries, and cables. Unapproved chargers or cables can cause the battery to explode or damage the device. - Page 15 • W hile charging, the device may heat up. This is normal and should not affect the device’s lifespan or performance. If the battery gets hotter than usual, the charger may stop charging. • I f the device is not charging properly, take the device and the charger to a Samsung Service Centre.
- Page 16 Getting started After fully charging, disconnect the device from the charger. First unplug the charger from the device, and then unplug it from the electric socket. Do not remove the battery before removing the charger. This may damage the device. To save energy, unplug the charger when not in use.
-
Page 17: Inserting A Memory Card
Getting started Inserting a memory card Your device accepts memory cards with maximum capacities of 64 GB. Depending on the memory card manufacturer and type, some memory cards may not be compatible with your device. • S ome memory cards may not be fully compatible with the device. Using an incompatible card may damage the device or the memory card, or corrupt the data stored in it. - Page 18 Do not remove the memory card while the device is transferring or accessing information. Doing so can cause data to be lost or corrupted or damage to the memory card or device. Samsung is not responsible for losses that result from the misuse of damaged memory cards, including the loss of data.
-
Page 19: Attaching A Hand Strap
Getting started Attaching a hand strap Slide a hand strap through the slot and hook it over the small projection. Turning the device on and off When turning on the device for the first time, follow the on-screen instructions to set up your device. -
Page 20: Holding The Device
Getting started Holding the device Do not cover the antenna area with your hands or other objects. This may cause connectivity problems or drain the battery. Locking and unlocking the device Pressing the Power button turns off the screen and puts the device into lock mode. The device automatically gets locked if it is not used for a specified period. -
Page 21: Basics
Basics Using the touch screen • D o not allow the touch screen to come into contact with other electrical devices. Electrostatic discharges can cause the touch screen to malfunction. • T o avoid damaging the touch screen, do not tap it with anything sharp or apply excessive pressure to it with your fingertips. - Page 22 Basics Tapping and holding Tap and hold an item for more than 2 seconds to access available options. Dragging To move an icon or thumbnail, tap and hold it and drag it to the target position. Double-tapping Double-tap on a webpage or image to zoom in a part. Double-tap again to return.
- Page 23 Basics Flicking Flick left or right on the Home screen or the Apps screen to see another panel. Flick up or down to scroll through a webpage or a list, such as contacts. Spreading and pinching Spread two fingers apart on a webpage, map, or image to zoom in a part. Pinch to zoom out.
-
Page 24: Indicator Icons
Basics Indicator icons The icons displayed on the status bar provide information about the status of the device. The icons listed in the table below are most common. The status bar may not appear at the top of the screen in some apps. To display the status bar, drag down from the top of the screen. -
Page 25: Notifications And Quick Setting Panels
Basics Icon Meaning Vibration mode activated Flight mode activated Error occurred or caution required Battery power level Notifications and quick setting panels Using the notifications panel When you receive new notifications, such as messages or missed calls, indicator icons appear on the status bar. - Page 26 Basics You can use the following functions on the notifications panel. Launch Settings. Activate or deactivate options. Tap and hold options to view View all quick setting buttons. more detailed settings. Launch S Finder. Launch Quick connect. Clear all notifications. Adjust the brightness.
- Page 27 Basics Using the quick setting panel A number of quick setting buttons are available on the notifications panel. To view or access more quick setting buttons, open the quick setting panel. When you open the quick setting panel, you can activate or deactivate various features or configure settings. To open the quick setting panel, drag the status bar downwards with two fingers.
- Page 28 Basics • U .power saving: Activate or deactivate ultra power-saving mode. Refer to Using the power saving feature for details. • T oolbox: Hide or show the toolbox icon. Refer to Toolbox for details. • M obile hotspot: Activate or deactivate the Wi-Fi tethering feature. Refer to Tethering devices and using mobile hotspots for details.
-
Page 29: Home And Apps Screens
Basics Home and Apps screens Home screen The Home screen is the starting point to access all of the device’s features. It displays widgets, shortcuts to apps, and more. Widgets are small apps that launch specific app functions to provide information and convenient access on your Home screen. The Home screen can have multiple panels. - Page 30 Basics Home screen options Tap and hold an area, or pinch your fingers together on the Home screen to access the options available on the Home screen.
- Page 31 Basics Using My Magazine or scroll right on the Home screen to open My Magazine. My Magazine displays live social network updates and news that you are interested in. Access additional options. To select the content to be displayed, tap → Settings, and then select the categories that interest you.
- Page 32 Basics Apps screen The Apps screen displays icons for all apps, including any new apps installed. On the Home screen, tap Apps to open the Apps screen. To view other panels, scroll left or right, or select a screen indicator at the bottom of the screen. To customise the Apps screen, refer to Managing the Home and Apps screens for details.
-
Page 33: Opening Apps
Alternatively, tap Installing or uninstalling apps Samsung Apps Use this app to purchase and download dedicated Samsung apps. Tap Samsung Apps on the Apps screen. This app may not be available depending on the region or service provider. Installing apps Browse apps by category or tap to search for a keyword. - Page 34 Basics Play Store Use this app to purchase and download apps and games that are able to run on the device. Tap Play Store on the Apps screen. This app may not be available depending on the region or service provider. Installing apps Browse apps by category or tap to search for a keyword.
-
Page 35: Entering Text
Text entry is not supported in some languages. To enter text, you must change the input language to one of the supported languages. Suggested keywords Set options for the Samsung keyboard. Delete a preceding character. Enter uppercase. Break to the next line. - Page 36 Basics Changing the keyboard layout , select a language under INPUT LANGUAGES, and then select a keyboard layout to use. On the 3x4 keyboard, a key has three or four characters. To enter a character, tap repeatedly the key corresponding to the character. Using additional keyboard functions Tap and hold to use the following functions.
-
Page 37: Using The Power Saving Feature
Basics Copying and pasting Tap and hold over text. Drag or to select the desired text, or tap Select all to select all text. Tap Copy or Cut. The selected text is copied to the clipboard. Place the cursor where the text is to be inserted and tap → Paste. To paste text that you have previously copied, tap →... - Page 38 Basics Ultra power saving mode Use this mode to extend the device’s battery power. In ultra power saving mode the device performs the following: • D isplays colours on the screen as grey tones. • R estricts the available apps to essential and selected apps only. •...
-
Page 39: Accessing Help Information
Basics To add an app on the Home screen, tap and select an app. To remove an app from the Home screen, tap → Remove, select an app with , and then tap OK. To change network connectivity settings and more, tap → Settings. To deactivate the ultra power saving feature, tap →... -
Page 40: Personalising
Personalising Switching to easy mode Easy mode provides an easier user experience by using a simpler layout and bigger icons on the Home screen. You can access the most popular apps and frequently-used settings, and add shortcuts to your favourite contacts. On the Apps screen, tap Settings →... - Page 41 Personalising Moving and removing an item Tap and hold an item on the Home screen, and then drag it to a new location. To move the item to another panel, drag it to the side of the screen. You can also move frequently-used apps to the shortcuts area at the bottom of the Home screen.
- Page 42 Personalising Managing the Apps screen Changing view mode On the Apps screen, tap → View as and select a sorting method. Hiding apps Hide apps that you do not want to see on the Apps screen. On the Apps screen, tap → Hide apps, select apps, and then tap Done. To display hidden apps, tap →...
-
Page 43: Changing The Screen Lock Method
On the Apps screen, tap Settings → Lock screen → Screen lock, and then select a screen lock method. The device requires an unlock code whenever unlocking it. If the unlock code is forgotten, take the device to a Samsung Service Centre to reset it. Pattern Draw a pattern by connecting four dots or more, and then draw the pattern again to verify it. -
Page 44: Setting Wallpaper
Personalising Setting wallpaper Set an image or photo stored in the device as wallpaper for the Home screen or the locked screen. On the Apps screen, tap Settings → Wallpaper. Alternatively, on the Home screen, tap and hold an empty area or pinch your fingers together on the screen, and then tap Wallpapers. -
Page 45: Setting Up Accounts
Moving contacts from other devices to your device Moving contacts using Samsung Smart Switch You can move contacts to your device from other devices and computers using Samsung Smart Switch. Samsung Smart Switch is not supported on some devices or computers. - Page 46 Before using this feature Ensure that the Smart Switch for computers is installed on the computer. You can download the app from the Samsung Smart Switch website (www.samsungsmartswitch.com). Back up contacts from a previous device to the computer. For details, contact the device’s manufacturer.
- Page 47 Moving contacts using Samsung Kies Import a backup contacts file from your computer via Samsung Kies to restore contacts on your device. You can also back up contacts to the computer via Samsung Kies. Refer to Connecting with Samsung Kies...
-
Page 48: Network Connectivity
Network connectivity Connecting to a mobile network Connect the device to a mobile network to use the Internet when a Wi-Fi network is not available. On the Apps screen, tap Settings → Data usage, and then tick Mobile data. Alternatively, open the quick setting panel and tap Mobile data to activate it. - Page 49 Network connectivity Adding Wi-Fi networks If the desired network does not appear in the networks list, tap Add Wi-Fi network at the bottom of the networks list. Enter the network name in Network SSID, select the security type and enter the password if it is not an open network, and then tap Connect. Activating Wi-Fi Passpoint Wi-Fi Passpoint enables the device to search for and connect to a certified Wi-Fi network.
-
Page 50: Using Smart Network Switch
Network connectivity Using Smart network switch Use this feature to maintain a stable network connection when you browse webpages, download content, and more. Before using this feature, ensure that the mobile data connection and Wi-Fi features are activated. You may incur additional charges when using this feature via a mobile network. On the Apps screen, tap Settings →... - Page 51 Network connectivity Using the mobile hotspot Use your device as a mobile hotspot to share your device’s mobile data connection with other devices. Before using this feature • E nsure that the Wi-Fi feature is deactivated. • E nsure that the device’s mobile data connection is activated. On the Apps screen, tap Settings →...
- Page 52 Network connectivity Using Bluetooth tethering Share the device’s mobile data connection with connected computers and other devices via Bluetooth. Before using this feature • E nsure that your device is paired with the other device via Bluetooth. Refer to Bluetooth for details.
-
Page 53: Phone
Phone Making calls Tap Phone on the Apps screen. Tap Keypad, enter a phone number, and then tap to make a voice call, or tap to make a video call. You can also make calls to phone numbers listed in Logs, Favourites, and Contacts. View call and message logs. - Page 54 Phone Making calls from call logs or contact lists Tap Logs or Contacts, and then drag a contact or a phone number to the right to make a call. To deactivate the call by dragging an icon to the right feature, tap → Settings → Contacts, and then deselect Swipe to call or send msg.
- Page 55 Phone Number prediction Tap Keypad. When entering numbers on the keypad, automatic predictions appear. Select one of these to make a call. Speed dial numbers Tap Keypad. For speed dial numbers, tap and hold the corresponding digit. To assign a contact to a speed dial number, tap and hold an available speed dial number on the keypad, tap OK, and then select a contact.
-
Page 56: Receiving Calls
Phone Receiving calls Answering a call When a call comes in, drag outside the large circle. If you are using an app when a call comes in, tap Answer in a pop-up window. If the call waiting service is activated, another call can be made. When the second call is answered, the first call is put on hold. -
Page 57: During A Call
Phone During a call During a voice call The following actions are available: • : Increase the volume. • A dd call: Dial a second call. • K eypad: Open the keypad. • E nd call: End the current call. •... - Page 58 Phone During a video call The following actions are available: • → Hide me: Hide your image from the other party. • → Outgoing image: Select an image to show it to the other party. • → Capture image: Capture the other party’s image. •...
- Page 59 Motions & usability features Control motions Excessive shaking or impact to the device may result in unintended inputs. Control motions properly. Direct call On the Apps screen, tap Settings → Motions and gestures → Direct call, and then drag the Direct call switch to the right.
- Page 60 Motions & usability features Smart alert On the Apps screen, tap Settings → Motions and gestures → Smart alert, and then drag the Smart alert switch to the right. When you pick up the device after it has been idle for some time or when the screen has turned off, it vibrates if you have missed calls or new messages.
- Page 61 Motions & usability features Turning device over Turn the device over to mute incoming calls or alarms, or to pause media playback. Smart pause Playback pauses automatically when you look away from the screen. It resumes when you look at the screen again.
- Page 62 Motions & usability features Palm swipe to capture On the Apps screen, tap Settings → Motions and gestures → Palm swipe to capture, and then drag the Palm swipe to capture switch to the right. Place the side of your hand on the screen and sweep it across the screen from the right to the left or vice versa to capture a screenshot.
- Page 63 Motions & usability features Increasing touch screen sensitivity Use this feature to operate the screen while wearing gloves. On the Apps screen, tap Settings → Display, and then tick Increase touch sensitivity. Alternatively, open the quick setting panel and tap Increase touch sensitivity to activate it. •...
- Page 64 Contacts Adding contacts Moving contacts from other devices You can move contacts from other devices to your device. Refer to Moving contacts from other devices to your device for details. Creating contacts manually On the Apps screen, tap Contacts → Contacts. and enter contact information.
- Page 65 Contacts Managing contacts Editing a contact On the Apps screen, tap Contacts → Contacts. Select a contact to edit and tap Edit the contact information or tap Add another field to add more contact information. Tap Save. Deleting a contact Select a contact to delete, tap →...
- Page 66 Merge contacts that are saved in the device with your accounts. On the Apps screen, tap Contacts → Contacts. Tap → Merge accounts → Google or Samsung account. Importing and exporting contacts Import contacts from storage services to your device or export contacts from the device to storage services.
- Page 67 Contacts Searching for contacts On the Apps screen, tap Contacts → Contacts. Use one of the following search methods: • S croll up or down the contacts list. • D rag a finger along the index at the right side of the contacts list to scroll through it quickly.
- Page 68 Messages & email Messages Sending messages Send text messages (SMS) or multimedia messages (MMS). You may incur additional charges for sending or receiving messages while you are outside your home service area. Tap Messages on the Apps screen. Add recipients and enter a message. Access additional options.
- Page 69 Messages & email While composing a message, tap to use one of the following options: • Q uick responses: Select a message template and enter a message. • I nsert smiley: Enter emoticons. • A dd subject: Enter a subject. •...
- Page 70 Messages & email Viewing incoming messages Incoming messages are grouped into message threads by contact. Select a contact to view the person’s messages. You may incur additional charges for sending or receiving messages while you are outside your home service area. While viewing a message, tap to use one of the following options: •...
- Page 71 Messages & email Managing messages While viewing the list of messages, tap and use the following options: • S elect: Select messages to delete or to identify them as spam. • D elete: Delete all or selected messages. •...
- Page 72 Messages & email Sending scheduled messages While composing a message, tap → Schedule email. Tick Schedule email, set a time and date, and then tap Done. • I f the device is turned off at the scheduled time, is not connected to the network, or the network is unstable, the message will not be sent.
- Page 73 Messages & email Adding contacts to the priority list Set contacts that you communicate with frequently as priority contacts. Tap → Priority senders → Tap to add priority senders → Enter email or Contacts, enter email addresses or select contacts to add, and then tap OK or Done. To add more contacts to the priority list, tap To remove contacts from the priority list, tap and hold a contact, tap Edit list of priority senders, tap...
- Page 74 Messages & email Reading messages Tap a message to read. Delete the message. Keep the message for long-term Mark the message as unread. storage. Access additional options. Mark the message as a reminder. Reply to the message. Preview attachment.
- Page 75 Camera Launching Camera Use this application to take photos or videos. Tap Camera on the Apps screen. Alternatively, press and hold the Shutter button. Use Gallery to view photos and videos taken with the device. • T he camera automatically shuts off when unused. •...