Table of Contents
Advertisement
Advertisement
Table of Contents

Related Manuals for AEG LAVAMAT 50720


Summary of Contents for AEG LAVAMAT 50720
- Page 1 LAVAMAT 50720 Washing machine Instruction book...
- Page 2 If you require assistance or advice on your appliance, please contact our customer care department by letter or telephone: Printed on environmentally friendly paper. Whoever thinks ecologically also acts ecologically. Customer Care Department AEG Domestic Appliances 55-77 High Street Slough Berkshire SL1 1DZ...
-
Page 3: Table Of Contents
CONTENTS Operating Instructions Safety Instructions ..........Disposal . - Page 4 Contents Program Tables ..........24 Washing .
- Page 5 AEG Service Force ........
-
Page 6: Operating Instructions
OPERATING INSTRUCTIONS Safety Instructions Your safety is of paramount importance, please ensure you read these warnings before installing or using the appliance. If you are unsure about any of the meanings of these warnings, contact the Customer Care Department. Prior to Initial Start-up •... -
Page 7: Child Safety
• Repairs to the washing machine may only be carried out by qualified personnel. Repairs carried out by inexperienced persons may cause injury or serious malfunctioning. Contact your local AEG Service Force Centre. • Never operate the washing machine if the mains cable is damaged or the control panel, work top or base area are damaged allowing inter- nal components to be accessible. -
Page 8: Disposal
Operating Instructions Disposal Packaging • Dispose of the packaging material correctly. All packaging materials are environmentally friendly and can be disposed of without any danger to the environment. • The external plastic covering and bags inside are made of polyethyl- ene (marking >PE<). -
Page 9: Description Of The Appliance
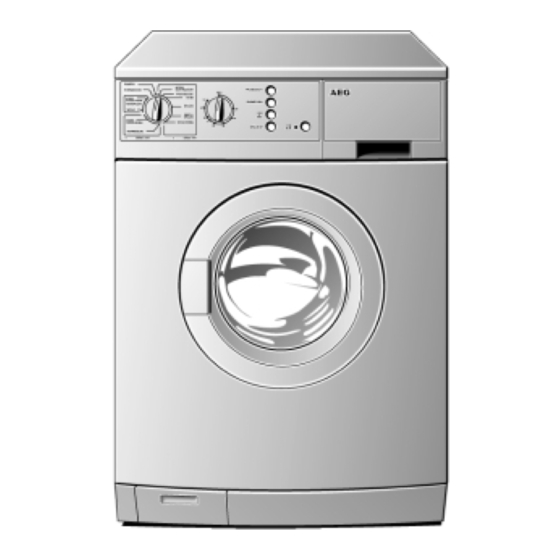
Description of the Appliance Front View Control panel Door with handle Flap in front of drain pump Detergent Dispenser Drawer Pre wash detergent/ soaking agent or stain remover Main wash detergent in powder form and water softenening agent if required Liquid conditioners (fabric softener, starch) Operating Instructions... -
Page 10: Control Panel
Operating Instructions Control panel Program Selector Program Selector Select the type of washing cycle using the program selector. Important! Only turn the program selector clockwise! The various positions have the following effect: COTTONS/LINEN, EASY-CARES (+button) Program Group For cottons/linen: Set the program selector to the desired programme. For easy-care washing: Set the program selector to the desired pro- gramm and then also press the EASY-CARES button. - Page 11 Operating Instructions • RINSE Separate rinse, e.g. for rinsing hand washed fabrics (spinning in accord- ance with the selected washing type or rinse hold). Rinse hold means: the washing is left in the last rinse water, it is not spun. •...
-
Page 12: Temperature Selector
Operating Instructions PRE WASH/SOAKING • PRE WASH Set the program selector to PRE WASH/SOAKING. Pre wash (approx. 15 minutes, temperature limited to max. 40 °C) prior to the main wash, the main wash follows automatically. PRE WASH can only be combined with COTTONS/LINEN or EASY-CARES main wash. -
Page 13: Consumption Data And Time Required
Consumption Data and Time Required The values given in the following table for selected programs were calculated under standard conditions. They provide a useful guide for operation in the home. Tempe- Program Button rature Selector Selector MAIN WASH EASY- CARES DELI- CATES WOOL... -
Page 14: Preparing A Wash Load
Operating Instructions Preparing a Wash Load Sorting and preparing a wash load • Sort washing according to care symbol and type (see "Washing types and care symbols"). • Empty all pockets. • Remove metal objects (paper clips, safety pins etc.). •... -
Page 15: Washing Types And Care Symbols
Operating Instructions Washing Types and Care Symbols Care symbols assist in the selection of the correct washing program. Washing should be sorted according to type and care symbol. The tem- peratures indicated in the care symbols are maximum temperatures. Cottons ç Textiles made from cotton and linen with this care symbol will with- stand maximum wash actions and high temperatures. -
Page 16: Detergents And Conditioners
Operating Instructions Detergents and Conditioners Only use detergents and fabric softeners suitable for automatic washing machines. As a general rule follow the instructions of the detergent manufacturers. Which Detergent? To ensure you obtain the best wash results from your appliance, it is important to use the right detergent in your everyday wash, and only detergents recommended for use in automatic machines. -
Page 17: And In Which Form
Operating Instructions And in which form? Not only are there different types of detergent, but they are also avail- able in different forms. Whether you choose a powder or liquid in traditional or compact form, is down to personal choice. Traditional Powders Pour the powder directly into the dispenser drawer. -
Page 18: How Much Detergent And Fabric Softener
Operating Instructions How much Detergent and Fabric Softener? The amount to be used depends on • the load: If the detergent manufacturer does not make any specifications for small loads, use a third less for half loads, and for very small loads only use half of the amount of washing powder recommended for a full load. -
Page 19: Performing A Washing Cycle
Performing a Washing Cycle Brief Instructions A washing cycle is performed in the following steps: 1. Check whether the water tap is opened. 2. Open the door, load the washing. 3. Close the door. 4. Add detergent/conditioner. 5. Set the correct washing program: –... -
Page 20: Loading The Washing
Operating Instructions Loading the Washing See "Program Tables" for maximum loads. For information about the correct preparation of the washing see "Washing Types and Care Symbols". 1. Sort and prepare washing according to type. 2. Open the door: pull the handle on the door. 3. -
Page 21: Setting The Washing Program
Setting the Washing Program For suitable programs and the right temperature for the relevant type of washing, see "Program Tables". Important! Only turn the program selector clockwise! 1. Set the program selector to the desired washing program. 2. Set the temperature selector to the desired temperature. -
Page 22: Starting The Washing Program
Operating Instructions Starting the Washing Program 1. Check whether the water tap is opened. 2. Switch on the washing machine: Press the ON/OFF button. The ON/OFF indicator illuminates, the washing program starts. Changing the Spin Speed or Selecting Rinse Hold If desired, reduce the spin speed for the final spin or select rinse hold: –... -
Page 23: Wash Complete/Removing The Washing
Wash Complete/Removing the Washing The washing program normally ends with the final spin. After Soaking: Release the SOAKING button (the COTTONS/LINEN or EASY-CARES main wash starts). After a Rinse Hold: After a rinse hold the water must be pumped out, or the washing spun: 1. -
Page 24: Program Tables
Operating Instructions Program Tables Washing The following tables list the most commonly used and most useful programs. Washing Type, Care Symbol Cottons ç Energy Saving Program Cottons ç Linen è ë Easy-Cares ê í î Delicates ì Woollens ì 1) A 10 litre bucket contains about 2.5kg of dry washing (cotton). 2) It is necessary to extend the time of the Energy Saving Program “E“... -
Page 25: Separate Rinsing
Separate Rinsing Type of Washing Cottons/Linen Easy-Cares Delicates Woollens Separate Gentle Rinsing/Starching/Conditioning Type of Washing Cottons/Linen Easy-Cares Delicates Woollens Separate Spinning Type of Washing Cottons/Linen Easy-Cares Delicates Woollens Max. Load Program Selector (dry weight) RINSE 2.5kg 2.5kg GENTLE RINSE Max. Load Program Selector (dry weight) CONDITIONER... -
Page 26: Washing With Pre Wash
Operating Instructions Washing with Pre Wash Type of Washing Cottons/Linen Easy-Cares Washing with Soaking Type of Washing Cottons/Linen Easy-Cares Max. Load Program (dry weight) Selector PRE WASH/ SOAKING 2.5kg Max. Load Program (dry weight) Selector PRE WASH/ SOAKING 2.5kg Temperature Additional Selector Button... -
Page 27: Maintenance And Cleaning
Important! Do not clean the stainless steel drum with descaling agents containing acids, scouring agents containing chlorine or iron or steel wool. AEG Service Force Centre has suitable agents available. (Part no: 849 646 401 5214). Remove rust stains on the drum with a stainless steel cleaning agent. -
Page 28: What To Do When
Operating Instructions What to do when… The whistling noise when spinning may be different to your prevous washing machine which is due to the modern drive system. Trouble Shooting If you call out an engineer and the fault is listed here, a charge is levied even if the appliance is in guarantee. - Page 29 Malfunction Threaded fitting on the water inlet hose is leaking. The inlet hose has a leak. Water runs out from under the washing The drain pump cover is not machine. tight. Washing is caught in the door. Fabric softener is not Suction cap in the fabric added, compartment softener compartment is not...
-
Page 30: If The Washing Results Are Not Satisfactory
Operating Instructions If the Washing Results are not Satisfactory If the washing turns greyish and limescale deposits are present in the drum • Insufficient washing powder has been added. • Incorrect washing powder was used. • Stains were not pretreated. •... -
Page 31: Carrying Out An Emergency Emptying
Carrying out an Emergency Emptying • If the washing machine no longer pumps out the water an emergency emptying must be carried out. • If the washing machine is located in a room in which below freezing temperatures might occur, emergency emptying must be carried out if danger of freezing occurs. -
Page 32: Cleaning The Drain Pump
(It is normal for the pump to turn in steps.) If the impeller cannot be turned at all please contact your local AEG Service Force Centre. 6. Replace the cover (1) (insert the ridges on the cover into the guiding slots) and screw on tightly in a clockwise direction (2). -
Page 33: Service & Spare Parts
S-No. Customer Care For general enquiries regarding your AEG appliance, or further infor- mation on AEG products please contact our customer care department. 55-77 High Street, Slough, Berkshire SL1 1DZ 0870 5 929 929... -
Page 34: Guarantee Conditions
3. Should guarantee repairs be necessary the purchaser must inform the nearest customer service office (manufacturer´s service or authorised agent). AEG reserves the right to stipulate the place of the repair (i. e. the customer´s home, place of installation or AEG workshop). - Page 35 European Guarantee If you should move to another country within Europe then your guarantee moves with you to your new home subject to the following qualifications: – The guarantee starts from the date you first purchased your product. – The guarantee is for the same period and to the same extent for labour and parts as exist in the new country of use for this brand or range of products.
-
Page 36: Installation And Connection Instructions
Installation and Connection Instructions INSTALLATION AND CONNECTION INSTRUCTIONS Installation Safety Precautions • This appliance is heavy, care should be taken when moving it. • When moving, do not tip the washing machine onto it’s front or left hand side (viewed from the front). This is to prevent the possibility of electrical components becoming wet. -
Page 37: Appliance Dimensions
Appliance Dimensions Front and Side Views Rear View Installation and Connection Instructions Hot Water inlet Cold Water inlet... -
Page 38: Appliance Installation
Installation and Connection Instructions Appliance Installation The appliance worktop must not be removed to gain a height reduction when installing under a kitchen worktop. Appliance Transit • To prevent electrical components becoming wet when moving the appliance, do not tip the washing machine onto it’s front or the left hand side (viewed from the front). -
Page 39: Removing Transit Packaging
Removing Transit Packaging Important! Ensure all transit packaging is removed prior to installation. Retain transit packaging for future use. The appliance is supplied with a spanner (H) and plastic caps (E) (2 pcs.) and (G) (1 pc). 1. Remove the hose holder (A). 2. -
Page 40: Installation-Site Preparation
Installation and Connection Instructions Installation-Site Preparation • The installation surface must be clean, dry and level. • Do not install on deep pile carpet. • If the appliance is installed next to heat source (e. g. cooking appli- ance), a heat insulating pad (85 x 57 cm) must be placed between the washing machine and the heat source. -
Page 41: Electrical Connection
Electrical Connection Any electrical work required to install this appliance should be carried out by a qualified electrician or competent person. WARNING - THIS APPLIANCE MUST BE EARTHED. The manufacturer declines any liability should these safety measures not be observed. Before switching on, make sure the electricity supply voltage is the same as that indicated on... -
Page 42: Water Connection
Installation and Connection Instructions Permanent Connection In the case of a permanent connection it is necessary that you install a double pole switch between the appliance and the electricity supply (mains), with a minimum gap of 3 mm between the switch contacts and of a type suitable for the required load in compliance with the cur- rent electrical regulations. -
Page 43: Water Pressure
Inlet Hose Connection The inlet hose provided is 1.2 or 1.3 metres depending on the model. If a longer inlet hose is required contact your AEG Service Force Centre. Under no circumstances should hoses be connected together to provide a longer length. -
Page 44: Hot And Cold Water Connection
The incoming hot water temperature must not exceed 70 °C. If only a cold water supply is available, connect the two hoses to the cold water outlet by means of a “Y“ connection piece. (A “Y“ piece is available from your AEG Service Force Centre, part number 645.430.709.) cold... -
Page 45: Water Drainage
Longer drain hoses are availa- ble in lengths of 2.7 and 4 metres from your AEG Service Force Centre. If you intend the drain hose from the washing machine to... -
Page 46: Technical Data
Area of use Wash cycle drum speed Spin cycle drum speed Water pressure AEG Service Force If you wish to contact your local AEG Service Force Centre for advice or spare parts, telephone: (=10–100N/cm 0870 5 929 929 85x60x60cm 95cm approx. -
Page 47: Index
INDEX Conditioner ... 11 liquid ......9 Cottons . - Page 48 AEG Hausgeräte GmbH Postfach 1036 D-90327 Nürnberg http://www.aeg.hausgeraete.de © Copyright by AEG H 243 282 340 - 01 - 0999...