Table of Contents
Advertisement
Quick Links
Advertisement
Table of Contents

Related Manuals for ADJ ELIMINATOR Stinger Spot 30


Summary of Contents for ADJ ELIMINATOR Stinger Spot 30
- Page 1 Stinger Spot 30 User Manual...
- Page 2 ADJ Lighting, LLC and all affiliated companies hereby disclaim any and all liabilities for property, equipment, building, and electrical damages, injuries to any persons, and direct or indirect economic...
-
Page 3: Table Of Contents
C O N T E N T S General Information Limited Warranty (USA Only) Safety Guidelines Overview Installation Control Panel System Menu DMX Setup DMX Traits Color Wheel | Gobos Cleaning & Maintenance Dimensional Drawings Specifications... -
Page 4: General Information
Please do not discard the shipping carton in the trash. Please recycle whenever possible. CUSTOMER SUPPORT Tel: (323) 582-2650 | Fax: (323) 582-2941 www.adj.com support@adj.com WARRANTY RETURNS All returned service items, whether under warranty or not, must be freight pre-paid and accompanied by a return authorization (R.A.) number. -
Page 5: Limited Warranty (Usa Only)
Eliminator Lighting warranty does not cover items or parts prone to wear and tear: lamps, fuses, brushes and belts. Eliminator Lighting warranty is only valid within the United States. To register your Eliminator Lighting product online, please click here to the ADJ Warranty Registration Page:... -
Page 6: Safety Guidelines
To ensure smooth operation, it is important to follow all instructions and guidelines in this manual. ADJ LIGHTING, LLC is not responsible for injury and/or damages resulting from the misuse of these devices due to the disregard of the information printed in this manual. Only qualified and/or certified personnel should perform installation of these devices, and only the original rigging parts included with these devices should be used for installation. - Page 7 THIS FIXTURE IS COMPOSED OF SOPHISTICATED ELECTRONIC COMPONENTS. TO GUARANTEE SMOOTH OPERATION, IT IS IMPORTANT TO FOLLOW ALL INSTRUCTIONS AND GUIDELINES IN THIS MANUAL. ADJ PRODUCTS, LLC IS NOT RESPONSIBLE FOR INJURY AND/OR DAMAGES RESULTING FROM THE MISUSE OF THIS FIXTURE DUE TO THE DISREGARD OF THE INFORMATION PRINTED IN THIS MANUAL.
-
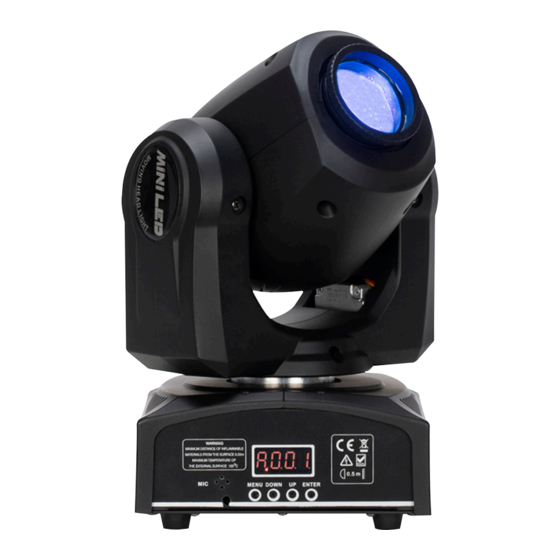
Page 8: Overview
O V E R V I E W Display Screen Menu Down Enter Power Button Button Button Button... -
Page 9: Installation
I N S T A L L A T I O N FLAMMABLE MATERIAL WARNING Keep fixture minimum 5.0 feet (1.5m) away from flammable materials and/or pyrotechnics. ELECTRICAL CONNECTIONS A qualified electrician should be used for all electrical connections and/or installations. MINIMUM DISTANCE TO OBJECTS/SURFACES IS 6.6 FEET (2 METERS). - Page 10 I N S T A L L A T I O N CLAMP INSTALLATION This fixture features mounting clamp attachment points for the fitment of an omega bracket, as well as a safety cable loop, located on the underside of the fixture base, as shown in the illustration below. When mounting the fixture to a truss or any other suspended or overhead installation, be sure to se- cure an appropriately rated clamp (not included) to the clamp attachment point and attach a sepa- rate SAFETY CABLE of the appropriate safety rating to the safety cable rigging point.
- Page 11 This issue is not unique to Eliminator lighting fixtures, but rather it is a common issue with lighting fixtures from all manufacturers. Although there is no true way to completely prevent this issue from happening, the guidelines below can reduce the risk of any potential damage if followed. Contact ADJ Service for more details.
-
Page 12: Control Panel
C O N T R O L P A N E L The fixture includes an easy to navigate system menu control panel display where all necessary set- tings and adjustments are made. (See image below) • MODE: Cycles through the main menu options and/or return to previous menu without making changes. -
Page 13: System Menu
S Y S T E M M E N U 1 Addr 001 - 512 Set DMX address. 2 Ch Md Select DMX channel mode. 12CH Run unit in primary mode. 3 Pr Md Run unit in secondary mode. Select internal program. 4 SH Md SPEd 0 - 10... -
Page 14: Dmx Setup
2 and 3 of a male XLR connector (DATA + and DATA -). This unit is inserted in the female XLR connector of the last unit in your daisy chain to terminate the line. Using a cable terminator (ADJ part number Z-DMX/T) will decrease the chances of erratic behavior. - Page 15 D M X S E T U P 5-Pin XLR DMX Connectors. Some manufacturers use 5-pin DMX-512 data cables for DATA trans- mission in place of 3-pin. 5-pin DMX fixtures may be implemented in a 3-pin DMX line. When inserting standard 5-pin data cables into a 3-pin line a cable adaptor must be used.
-
Page 16: Dmx Traits
D M X T R A I T S CHANNEL FUNCTION VALUES 4CH 12CH 000 - 255 Pan Fine 000 - 255 Tilt 000 - 255 Tilt Fine 000 - 255 Color 000 - 007 Open (White) 008 - 014 015 - 021 Orange 022 - 028... - Page 17 D M X T R A I T S CHANNEL FUNCTION VALUES 4CH 12CH Shutter 000 - 004 Shutter Closed 005 - 250 Strobe Effect, slow to fast 251 - 255 Shutter Open Dimmer, 0% to 100% 000 - 255 Programs 000 - 007 Empty...
-
Page 18: Color Wheel | Gobos
C O L O R W H E E L G O B O S... -
Page 19: Cleaning & Maintenance
Regular inspections are recommended to ensure proper function and extended life. There are no user serviceable parts inside this fixture. Please refer all other service issues to an authorized ADJ service technician. Should you need any spare parts, please order genuine parts from your local ADJ dealer. -
Page 20: Dimensional Drawings
D I M E N S I O N A L D R A W I N G S 6.9in (176.0mm) 5.8in (148.0mm) 6.3in (160.0mm) 5.8in (148.0mm) -
Page 21: Specifications
SPECIFICATIONS Model: Stinger Spot 30 Input power: AC100-240V 50/60 Hz Power consumption: 42 W Output LUX: Max 1700 LUX at 3 meters LED: 1PCS 30W high power white LED DMX channel: 4/12channels Movement: Pan/Tilt - X axis 540 degrees, Y axis 190 degree Control mode: DMX512 / Primary-Secondary / Auto run / sound Display:...