Table of Contents

Related Manuals for Siemens HX9R3AE50


Summary of Contents for Siemens HX9R3AE50
- Page 1 Free standing cooker HX9R3AE50 User manual and installation instructions Register your product on My Siemens and discover exclusive ser- vices and offers. siemens-home.bsh-group.com/welcome The future moving in. Siemens Home Appliances...
-
Page 2: Table Of Contents
en Safety ATTENTION: Observe the applicable regula- Table of contents tions and only set up the appliance in well- ventilated rooms. Read through the instruc- tions before setting up and using the appli- USER MANUAL ance. Warning: The appliance is only used for cook- Safety .............. - Page 3 Safety en Escaping gas may cause an explosion. If the been instructed on how to use the appliance gas pressure in your distributing pipes is safely and have understood the resulting dangers. more than 20% higher than the values spe- cified on the appliance's rating plate, a gas Children must not play with the appliance.
-
Page 4: Safety
en Safety Leaving fat or oil cooking on an unattended Empty cookware becomes extremely hot hob can be dangerous and may lead to fires. when set on gas burners that are operating. ▶ Never leave hot oil or fat unattended. ▶ Never heat up empty cookware. The appliance becomes hot during operation. - Page 5 Safety en The insulation on cables of electrical appli- WARNING ‒ Risk of scalding! ances may melt if it touches hot parts of the The accessible parts of the appliance become appliance. hot during operation. ▶ Never bring electrical appliance cables into ▶ Never touch these hot parts. contact with hot parts of the appliance.
-
Page 6: Preventing Material Damage
en Preventing material damage 1.4 Glass cover 1.6 Halogen bulb WARNING ‒ Risk of injury! WARNING ‒ Risk of burns! The glass cover may crack due to heat. The bulbs in the cooking compartment get very hot. There is still a risk of burning for some time after they have been switched off. ▶... -
Page 7: Environmental Protection And Saving En- Ergy
Environmental protection and saving energy en Sitting or placing objects on the appliance door may Penetrating liquid may cause damage to the appliance. damage it. The area around the appliance must be clean and ▶ Do not place or hang objects on the appliance door. dry. - Page 8 en Installation and connection Saving energy 3.2 Saving energy If you follow these instructions, your appliance will use If you follow these instructions, your appliance will use less energy. less energy. Choose a burner roughly the same size as your pan. Only preheat the appliance if the recipe or the recom- Centre the cookware on the hob.
-
Page 9: Installation And Connection
Installation and connection en WARNING ‒ Risk of explosion! WARNING ‒ Risk of electric shock! Escaping gas may cause an explosion. If the gas pres- There is a risk of electric shock if you touch live com- sure in your distributing pipes is more than 20% higher ponents. - Page 10 en Installation and connection Adjusting the height of the appliance with fixed drawers If your appliance has fixed drawers, set the base height of your appliance as follows. Note: The appliance has height-adjustable feet. This allows the appliance to be raised approx. 15 mm from the ground.
-
Page 11: Familiarising Yourself With Your Appliance
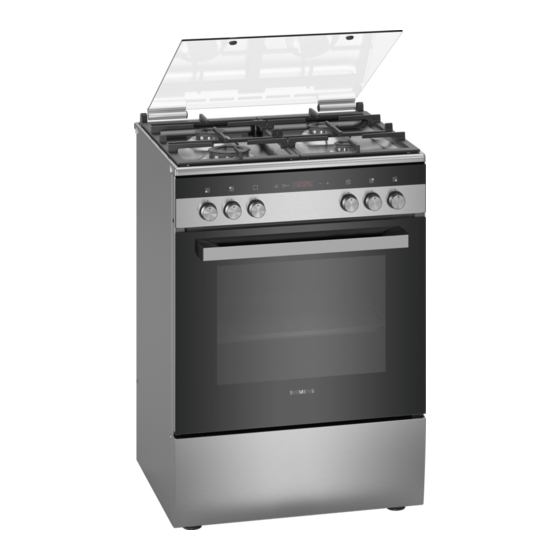
Familiarising yourself with your appliance en 5 Familiarising yourself with your appliance 5.1 Your appliance 5.2 Hob You can find an overview of the parts of your appliance You can view an overview of the hob here. here. Note: On certain models, specific details such as col- Note: On certain models, specific details such as col- our and shape may differ from those pictured. - Page 12 en Familiarising yourself with your appliance Control Explanation Control Explanation Use the function selector Use the temperature se- Function selector Temperature selector to set the types of heating lector to set the temperat- and other functions. ure for the type of heating You can turn the function and select settings for selector clockwise or anti-...
- Page 13 Familiarising yourself with your appliance en Symbol Type of heating What it's used for and how it works Pizza setting Cook pizza or food that requires a lot of heat from below. The bottom heating element and the ring-shaped heating element in the back wall heat the cooking compartment.
-
Page 14: Accessories
en Accessories If the self-cleaning surfaces no longer clean themselves 5.4 Cooking compartment adequately during operation, heat up the cooking com- The functions in the cooking compartment make your partment specifically to the right temperature. appliance easier to use. → "Cleaning self-cleaning surfaces in the cooking com- partment", Page 22 Rails The rails in the cooking compartment enable you to... - Page 15 Accessories vary from one appliance to another. When Baking tray Slide the tray in with the sloping purchasing accessories, always quote the exact E.g.
- Page 16 en Operating the hotplate ¡ Ensure that the size of ¡ Place the cookware on the cookware is suit- the pan supports. able for the burner ¡ Never place the cook- size. ware directly on the ¡ Never use small cook- burner.
-
Page 17: Operating The Hotplate
Operating the hotplate en The burner may go out accidentally. Position the burner lid precisely on the burner head. If the burner's flame accidentally goes out, switch off ▶ the burner's selector and wait at least one minute before igniting the burner again. Open the top cooker cover. -
Page 18: Basic Operation
en Basic operation Example Food Hotplate Power level Heating and keeping Soups Economy burner Small flame warm Steaming* Fish Standard output Between large and small flame burner Braising* Potatoes and miscellaneous ve- Standard output Between large and small flame getables, meat burner Boiling* Rice, vegetables, meat dishes... -
Page 19: Time-Setting Options
Time-setting options en 12 Time-setting options Your appliance has different time-setting options which Cancelling the timer ensure that operation can be controlled. The timer duration can be cancelled at any time. Requirement: is highlighted in the display. 12.1 Overview of the time-setting Use the button to reset the timer duration to zero. -
Page 20: Childproof Lock
en Childproof lock ¡ Food will spoil if you leave it in the cooking com- is highlighted in the display. Requirement: partment for too long. Use the button to delay the end time. ▶ a The appliance applies the change after a few Requirements seconds. -
Page 21: Cleaning And Servicing
Cleaning and servicing en Suitable cleaning agents Only use cleaning agents that are suitable for the differ- Follow the instructions on cleaning the appliance. ent surfaces on your appliance. → "Cleaning the appliance", Page 22 Appliance Surface Suitable cleaning agents Information Stainless steel ¡... - Page 22 en Cleaning and servicing Area Suitable cleaning agents Information Self-cleaning sur- Follow the instructions for self-cleaning surfaces. faces → "Cleaning self-cleaning surfaces in the cooking compartment", Page 22 Glass cover on ¡ Hot soapy water Use oven cleaner to remove very heavy soiling. the oven light Rails ¡...
- Page 23 humidClean cleaning support en Dry with a soft cloth. 14.5 Discoloration of the burners Apply a thin layer of the stainless steel cleaning After long use, the brass burner parts become darker product with a soft cloth. due to natural oxidation. This discolouration does not Tip: You can obtain stainless steel cleaning products affect their usability.
- Page 24 en Rails Clean smooth surfaces in the cooking compartment 15.2 Cleaning the cooking compartment with a dish cloth or a soft brush. Remove stubborn after using it residues with a stainless steel spiral scourer. Remove limescale deposits using a vinegar-soaked ATTENTION! cloth. Wipe this away with clear water and use a soft If the cooking compartment remains damp for too long, cloth to also rub underneath the door seal dry.
- Page 25 Appliance door en 17 Appliance door It is normally sufficient if you clean the outside of the Open the locking levers on the left- and right-hand appliance door. If the appliance door is very dirty on hinges. the inside and outside, you can remove the appliance door and clean it.
- Page 26 en Appliance door To remove the upper cover of the oven door, press Hold the top pane in both brackets and insert it at in the tabs on the left and right using your fingers. an angle towards the back. Pull out and remove the cover. Push the pane into both openings on the underside.
-
Page 27: Top Cover
Top cover en The notch on the hinge must engage on both sides. Close the appliance door. 17.6 Additional door safety Additional safety devices have been fitted to prevent contact with the oven doors. Always attach these safety devices when children could come near the oven. You can purchase this special accessory from after-sales service. -
Page 28: Troubleshooting
en Troubleshooting 19 Troubleshooting You can rectify minor faults on your appliance yourself. Read the troubleshooting information before contacting after- sales service. This will avoid unnecessary costs. WARNING ‒ Risk of injury! WARNING ‒ Risk of electric shock! Improper repairs are dangerous. Incorrect repairs are dangerous. Repairs to the appliance should only be carried out Repairs to the appliance should only be carried out ▶... - Page 29 Troubleshooting en Fault Cause and troubleshooting Burner does not ig- Burner parts are wet. nite. Carefully dry the burner parts. ▶ Food remnants or dirt are located between the ignition plug and the burner. Clean the space between the ignition plugs and burners. ▶...
-
Page 30: Transportation And Disposal
en Transportation and disposal 20 Transportation and disposal You can find out here how to prepare your appliance 20.2 Transporting the appliance for transportation. You will also find out how to dispose Keep the original appliance packaging. Only transport of old appliances. the appliance in the original packaging. - Page 31 How it works en Use the cookware and the accessory listed in the less. Depending on the preparation and food, you recommended settings. can save energy. If you preheat the appliance or Only preheat the appliance if the recipe or the re- open the appliance door before the food has fin- commended settings tell you to do so.
- Page 32 en How it works Notes Topic ¡ When baking on several layers, use hot air. Different You want your cake to ¡ Only grease the base food that is placed in the oven at the same time will rise evenly. of the springform cake not necessarily be ready at the same time.
- Page 33 How it works en Meal Accessory/cookware Shelf posi- Type of Temperature Cooking tion heating in °C time, minutes Sponge cake, 2 levels Universal pan 140–160 30–55 Baking tray Shortcrust tart with dry topping Universal pan 170–190 25–35 Shortcrust tart with dry topping, Universal pan 160–170 35–45 2 levels...
- Page 34 en How it works Biscuits Meal Accessory/cookware Shelf posi- Type of Temperature Cooking tion heating in °C time, minutes Viennese whirls Universal pan 140-150 30-40 Viennese whirls, 2 levels Universal pan 140–150 30–45 Baking tray Viennese whirls, 3 levels 5+3+1 130–140 40–55 Baking tray Universal pan Biscuits Universal pan...
- Page 35 How it works en 22.6 Bread and bread rolls Topic Your cake is unevenly ¡ Reduce the baking The values for bread dough apply to both dough browned. temperature. placed on a tray and dough placed in a loaf tin. ¡ Cut the greaseproof ATTENTION! paper to a suitable When the cooking compartment is hot, any water in-...
- Page 36 en How it works Meal Accessory/cookware Shelf posi- Type of Temperature Cooking tion heating in °C time, minutes Bread rolls, sweet, fresh, 2 levels Universal pan 160–180 15–25 Baking tray Bread rolls, fresh Universal pan 200–220 20–30 Toast with topping, x 4 Wire rack 200–220 15–20 Toast with topping, x 12...
- Page 37 How it works en Recommended settings Bakes and gratins Meal Accessory/cookware Shelf posi- Type of Temperature Cooking tion heating in °C time, minutes Bake, savoury, fresh, cooked ingredi- Ovenproof dish 200–220 30–60 ents Bake, sweet Ovenproof dish 180–200 50–60 Potato gratin, raw ingredients, 4 cm Ovenproof dish 150–170 60–80...
- Page 38 en How it works ¡ Placing half a potato or a small ovenproof container Poultry ¡ For duck or goose, pierce the skin on the underside in the stomach cavity of the fish provides stability. of the wings. This allows the fat to drain out. ¡...
- Page 39 How it works en Food Accessories/cook- Shelf posi- Type of Temperature Cooking ware tion heating in °C/grill time in mins setting Small turkey, 2.5 kg Cookware without lid 180–200 80–100 Turkey breast, boned, 1 kg Cookware with lid 240–260 80–100 Turkey thigh, on the bone, 1 kg Cookware without lid 180–200 90–100...
- Page 40 en How it works Topic Topic Your roasting juices are ¡ Select a smaller item Your roasting juices are ¡ Use a larger item of burnt. of cookware. too clear and watery. cookware so that more ¡ When roasting, add liquid evaporates. more liquid.
- Page 41 How it works en 22.12 Tips for keeping acrylamide levels 22.13 Drying to a minimum when cooking You can achieve outstanding drying results for the food using hot air. With this type of preserving, flavours are Acrylamide is harmful to your health and is produced concentrated as a result of the dehydration.
- Page 42 en How it works Preparing fruit or vegetables for preserving Pour 500 ml hot water (approx. 80 °C) into the uni- versal pan. Thoroughly wash the fruit and vegetables. Use the recommended setting values when config- Prepare the fruit and vegetables, e.g. peel, remove uring the appliance settings.
- Page 43 How it works en Use the recommended settings when configuring 22.15 Proving dough the appliance settings. You can prove yeast dough more quickly in your appli- Only start operation when the cooking compartment ance than at room temperature. has fully cooled down. Do not open the appliance door while the dough is Proving dough proving, otherwise moisture will escape.
- Page 44 en How it works Baking with two springform cake tins: Shelf positions Shelf positions for baking on one level: If you can use your appliance to cook on multiple ¡ Universal pan/baking tray: Shelf position 3 levels, position baking tins either next to one another or offset on different shelves so that they are not directly ¡...
-
Page 45: Installation Instructions
Installation instructions en 23 Installation instructions ¡ After converting the appliance from one The installation instructions contain instructions for the gas connection and for the gas conversion's as- gas type to another, the new gas type must sembly . be labelled on the rating plate. Note: For after-sales service only. - Page 46 en Installation instructions 23.3 Selecting the gas connection side Connection in accordance with EN ISO 228 G½ (TS EN ISO 228 G½) On many appliances, you can carry out the gas con- Insert the new seal in the connecting piece. Ensure nection on the right- or left-hand side. If necessary, you that the seal is seated correctly.
- Page 47 Installation instructions en Secure the connecting piece using a 24 mm span- Fit the safety gas hose and use a pipe union or ner. Use a 24 mm spanner to place the threaded fit- cable clamp to tighten it securely. ting of the gas pipe or safety gas hose on the con- necting piece and tighten it firmly.
- Page 48 en Installation instructions ¡ In the "Technical data – Gas" → Page 51 table, de- Adjusting or replacing bypass nozzles (small termine the correct nozzle diameter. flame setting) ¡ Always use a new seal. You can set the minimum flame height for the burners ¡...
- Page 49 Installation instructions en Removing the control panel Note: To ensure that no scratches are formed on the matte glass plate, do not allow the underside of If the appliance has an upper cover, remove this. the hob to come into contact with objects. To do this, open the hob cover, grip the sides ‒...
- Page 50 en Installation instructions Note: In order to access the bypass nozzles on the At this stage, it is important to test for leaks. You right-hand side, turn the control panel clockwise can find additional information about this in the sec- slightly. In order to access the bypass nozzles on tion entitled "Leak and function test"...
- Page 51 Installation instructions en Follow the same instructions for the part that is 23.7 Checking the correct burner sealed with the blind plug. behaviour Checking the cooker burner nozzles Check the burning and soot formation of each burner after the product has been converted to a different gas Check the leak tightness of each nozzle.
- Page 52 en Installation instructions G20/ G25.3 G30/G31 G30 G2.350 Gas pressure (mbar) 20/25 28– 30/37 Nozzle (mm) 0.97 0.97 0.91 0.94 0.94 0.65 0.58 0.62 1.31 Bypass nozzle (mm) 0.60 0.60 0.60 0.60 0.60 0.60 0.40 0.40 0.40 0.60 0.60 Max. input power 1.75 1.75 1.75...
- Page 56 Valid within Great Britain: Imported to Great Britain by BSH Home Appliances Ltd. Grand Union House Old Wolverton Road Wolverton, Milton Keynes MK12 5PT United Kingdom Manufactured by BSH Hausgeräte GmbH under the trademark licence of Siemens AG *9001678581* 9001678581 (010811)