Table of Contents

Related Manuals for Panasonic SA-PM65MD


Summary of Contents for Panasonic SA-PM65MD
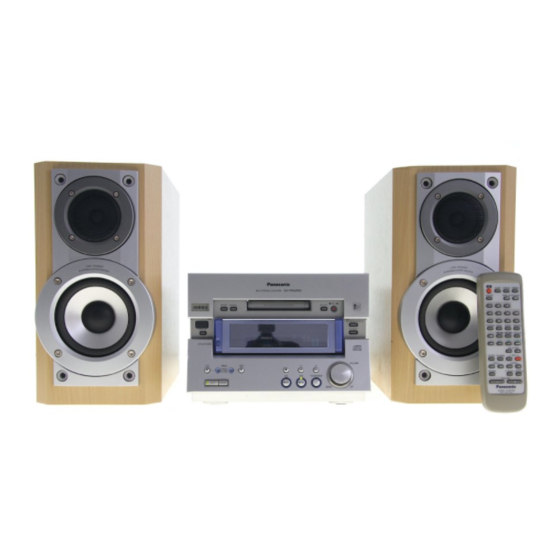
- Page 1 ORDER NO. MD0010161C2 MD Stereo System SA-PM65MD Colour (S)... Silver Type Area (EB)... Great Britain (EG)... Germany and Italy CD SECTION RAE0155Z TRAVERSE DECK SERIES MD SECTION MR3 MECHANISM SERIES SPECIFICATIONS Specification...
- Page 2 Amplifier Section RMS power output THD 10%, both channels driven 2 X 16 W (6 HIGH 2 X 4 W (6 Total BI-AMP power 2 X 20 W Input sensitivity 390 mV EXT IN 390 mV P-MD 100 mV Output sensitivity EXT OUT 390 mV Input/Output impedance...
- Page 3 2. Total harmonic distortion is measured by the digital spectrum analyzer. * US and foreign patents licensed from Dolby Laboratories. Music Center: SA-PM65MD (EB) System: SC-PM65MD (EB) Speaker: SB-PM65 (EG) Music Center: SA-PM65MD (EG) System: SC-PM65MD (EG) Speaker: SB-PM65 (EG) 2000 Matsushita Electronics (S) Pte.
- Page 4 than the indicated rated impedance of the amplifierare used. If this occurs, follow the procedure outlines below: 1. Turn off the power. 2. Determine the cause of the problem and correct it. 3. Turn on the power once again after one minute. Note: When the protection circuitry functions, the unit will not operate unless the power is first turned off and then on again.
- Page 5 FM antenna Plug Adaptor (EB) AM Loop antenna 4. Handling Precautions For Traverse Deck (CD/MD) The laser diode in the traverse deck (optical pickup) may break down due to potential difference caused by static electricity of clothes or human body. So, be careful of electrostatic breakdown during repair of the traverse deck (optical pickup).
- Page 6 board). 4. Do not turn the variable resistor (laser power adjustment). It has already been adjusted. Handling of MD Unit (optical pickup) 1. Do not subject the MD unit (optical pickup) to static electricity as it is extramely sensitive to electrical shock. 2.
- Page 7 Grounding for electrostatic breakdown prevention 1. Human body grounding Use the anti-static wrist strap to discharge the static electricity from your body. 2. Work table grounding Put a conductive material (sheet) or steel sheet on the area where the traverse deck (optical pickup) is placed, and ground the sheet. Caution : The static electricity of your clothes will not be grounded through the wrist strap.
- Page 8 exposed laser diode is dangerous. 2. Do not adjust the variable resistor on the pick up unit. It was already adjusted. 3. Do not look at the focus lens using optical instruments. 4. Recommend not to look at pick up lens for a long time. ACHTUNG : Dieses Produkt enthält eine Laserdiode.
- Page 9 6. Caution for AC Mains Lead...
- Page 10 7. Operation Procedures...
- Page 12 8. Operation Check and Main Component Replacement Procedures “ATTENTION SERVICER” Some chassis components may have sharp edges. Be careful when disassembling and servicing.
-
Page 13: Table Of Contents
1. This section describes procedures for checking the operation of the major printed circuit boards and replacing the main components. 2. For reassembly after operation checks or replacement, reverse the respective procedures.Special reassembly procedures are described only when required. 3. Select items from the following index when checks or replacement are required. -
Page 14: Checking Procedure For Each Major P.c.b
Einheit ausgetauscht werden. 8.1. Checking Procedure for Each Major P.C.B. 8.1.1. Checking for the Transformer P.C.B. and Main P.C.B. - Check the Transformer P.C.B. and Main P.C.B. as shown. 8.1.2. Checking for the Panel P.C.B., CD Loding P.C.B., MD Loding P.C.B. and Tact Switch P.C.B. - Page 15 Step 4 Unscrew all the screws and remove the Motor Assembly. Step 5 Unscrew all the screws and remove the Sliders. Step 5 Unscrew all the screws and release the catches.
-
Page 16: Checking For The Md Servo P.c.b. And Md Connector P.c.b
- Reconnect all the connectors. - Check the Panel P.C.B., CD Loding P.C.B., MD Loding P.C.B. and Tact Switch P.C.B. as shown. 8.1.3. Checking for the MD Servo P.C.B. and MD Connector P.C.B. Step 1 Unscrew all the screws and disconnect the connector (CP901). -
Page 17: Checking For The Cd Servo P.c.b
- Reconnect the connector. - Check the MD Servo P.C.B. and MD Connector P.C.B. as shown. - When checking the IC1 on the MD Servo P.C.B., it can be measured with test point on the MD Servo P.C.B. 8.1.4. Checking for the CD Servo P.C.B. - Page 18 Step 1 Unscrew all the screws. Step 2 Lift up the Main P.C.B., disconnect all connectors as shown and lift up the MD Angle in the direction of arrow shown.
-
Page 19: Checking For The Power P.c.b
Step 3 Unscrew all the screws. - Reconnect all the connectors. - Check the CD Servo P.C.B. as shown. 8.1.5. Checking for the Power P.C.B. -
Page 20: Disassembly Of The Disc Tray
Step 2 Unscrew all the screws. - Check the Power P.C.B. as shown. 8.2. Disassembly and Assembly of the Disc Tray and CD Traverse Unit 8.2.1. Disassembly of the Disc Tray. Step 1 Turn the gear counter clock wise until the CD Tray starts to move out. -
Page 21: Disassembly Of The Cd Traverse Unit
Step 2 Release the 2 claws and remove the clamp plate in the direction of the arrow. Step 3 Lift up the CD Tray to remove it. 8.2.2. Disassembly of the CD Traverse Unit. Step 1 Release the 2 claws and remove the CD Traverse Unit in the direction of the arrow. -
Page 22: Main Component Replacement Procedure
NOTE : 1. Follow the reverse procedure to replace the CD Traverse Unit and CD Tray. 2. Make sure that the 2 gear is in position shown above and the hole on the right gear is align with the hole below it when replacing the CD Traverse Unit and CD Tray. - Page 23 NOTE : Insert a short pin into the flexible cable. Step 4 Push the lever in and turn the gear clock wise fully.
-
Page 24: Replacement For The Magnetic Head And Optical Pick-Up
Step 6 Release the claw and remove the Driver Plate. Step 7 Slide out the Optical Pick-up Unit from the indent opening. NOTE : Do not touch the Lense on the OPU. 8.3.2. Replacement for the Magnetic Head and Optical Pick-up. - Page 25 Step 1 Remove the 2 FFCs from the connector. Step 2 Remove the pressure spring from latch. Step 3 Release the 2 claws and then lift up the holder ass’y. Step 4 Set the holder ass’y and MD mechanism unit at a 60 degree angle and then pull out the holder ass’y.
- Page 26 Step 7 Spread the lugs of head shifter and then release the lugs from boss. Step 9 Release the 2 claws and then remove the REF base.
- Page 27 Step 15 Remove the nut plate spring and nut plate. Notice for installing the optical pickup Step 2 Align the guide portion (A) of optical pickup with the sub shaft. Note : Take care not to bend the FFC.
-
Page 28: Replacement For The Belt And Loading Motor Assembly
8.3.3. Replacement for the Belt and Loading Motor Assembly Step 4 Release the 4 claws. - Page 29 Step 7 Release the 2 claws and then lift up the holder ass’y. Note : When installing the holder ass’y, align the lock lever pin with the main rack slot. Step 8 Set the holder ass’y and MD mechanism unit at a 60 degree angle, and then pull out the holder ass’y.
-
Page 30: Replacement For The Traverse Motor Assembly
- Align the hole of loading motor with the boss of mechanism chassis and then install the loading motor. 8.3.4. Replacement for the Traverse Motor Assembly - Follow Step 1 ~ Step 8 of item 1.3.4 in Main Component Replacement Procedures. Step 3 Spread the lugs of head shifter and then release the lugs from boss. - Page 31 Notice for installing the traverse motor - Align the hole of traverse motor with the boss of mechanism chassis and then install the traverse motor. 9. Self-Diagnostic Display Function This unit is equipped with a self-diagnostic function which, in the event of a malfunction, automatucally display a code indication the nature of the malfunction.
- Page 32 still pressing the STOP button, press the Forward Skip/Search button for at least 2 seconds. The unit enters Self-Diagnostic Mode and display “TEST”.Then an error code (e.g. H01) is displayed, if any. In the case of no error, “TEST” is displayed on 4.
- Page 33 Error Code Problem Condition Possible Cause MD F15 Interval till MD starts Pickup home position sense switch (S8) is defective; check and playing is too long replace if neccessary. MD F26 MD is loaded but Communication error between the servo processor IC and the cannot be played microprocessor IC (system control).
- Page 34 - The magnetic head is a precision unit and is very fragile. Do not deform it. - Laser diode in the optical pickup may be destroyed by the staticelectricity generated in your clothes or body. Be especially careful with the static electricity. - The optical pickup is structured extremely precisely.
- Page 35 10.1.3. Adjustment Procedure 1. Enter “1” using numeric pad on the remote control with no MD loaded. FL display “ROUGH ADJ”. (Read power adjustment mode) 2. Slide sensor cover on the laser power meter. (Fig. 1) 3. Place the sensor on the laser power meter right on top of the optical pickup.
- Page 36 FL display “FINE ADJ” (Write power adjustment mode) 6. Adjust VR1 until reading of the laser power meter is within the standard value. (Fig. 3) [Standard value (write power) : 6.8mW ± 0.1mW] Cautions Do not allow the write power to reach or exceed 7.5mW, even for a moment.
- Page 37 Mark Function CENVD — D signal det. capacitor connection terminal Laser amp output terminal APCPD Photo diode light quantity det. input terminal LD IN Laser amp reverse input terminal APC REF APC amp criterion voltage input terminal TEMP IN Temperature sensor amp input terminal TEMP Temperature sensor amp...
- Page 38 input terminal Mark Function Power supply terminal (+ 27 NRFDET/ NRFDET/off track signal output terminal OFTR NRFLD Serial command latch signal input terminal 29 RF DATA Serial command data signal input terminal RFCK Serial command clock input terminal 31 NRFSTBY Standby control signal input terminal OUT RF...
- Page 39 Mark Function REG B — 3.3V external transistor control terminal (Not used, open) REG M — 3.3V regular output monitor terminal (Not used, connected to GND) — Not used, open Op-amp output terminal Op-amp invert output terminal Op-amp non-invert output terminal (Not used, connected to GND) Power supply terminal...
- Page 40 Mark Function Traverse motor drive input terminal Power cut 2 input terminal Focus drive input terminal Tracking drive input terminal 12.3. IC3 (MN66616RA4) : ATRAC ENCORDER/DECORDER, SERVO SIGNAL PROCESSOR Mark Function ADIP ADIP FM signal input terminal Lens position signal input terminal Focus error signal input terminal...
- Page 41 Mark Function Focus drive signal output terminal Tracking drive signal output terminal Traverse motor drive signal ouutput terminal Spindle motor drive signal output terminal SPON Drive IC spindle ON signal output terminal TVON Drive IC traverse ON signal output terminal Power supply terminal FG input terminal NRECT...
- Page 42 Mark Function SCTSY ADIP synchronous noise output terminal SGSYNC Frame synchronous signal output terminal DVDD1 Power supply terminal IVDD1 — Power supply terminal for I/ O pad DVss1 — GND terminal FS384 384 Fs output terminal Bit clock output terminal Word clock output terminal SDAP Audio data output terminal...
- Page 43 Mark Function — Not used, connected to 82 EXSYSCK — External system clock input terminal (Not used, connected to GND) DVDD2 Power supply terminal Crystal oscillator input terminal (F=16.9344MHz) Crystal oscillator output terminal (F=16.9344MHz) VDss2 — GND terminal RFDAT RF serial data output terminal RFCK RF serial clock output...
- Page 44 Mark Function DACRST DAC reset signal output terminal to IC4 (“L”:Reset) DE emphasis signal output terminal to IC4(“L”:DE emphases) MUTE — AD-DA mute output terminal (Not used, open) AD RST Reset signal output terminal Standby control signal NRFSTBY output terminal (“L”: Standby) Transistor drive signal output terminal (“H”:Power...
- Page 45 Mark Function 19 PROTECT Erase prevention switch signal input terminal MMOD — Connected to GND Reset signal input terminal (“L”:Reset) UNIT Test signal input terminal TEST (Open) Test signal input terminal (Open) SCTSY Micro computer interrupt signal input terminal (SUBQ /ADIP simultaneous signal) MDISY Micro computer interrupt...
- Page 46 Mark Function TEST04 Test signal output terminal (Not used, open) TEST05 CFSYNC ATRACK management frame simultaneous signal input terminal TEST06 Test signal output terminal (Not used, open) TEST07 Connected to rec/play switch signal TOK OK Not used, open HF ON —...
- Page 47 Mark Function Test signal input terminal LOAD (“L”:Without loading mechanism) (Open) 65 SRVTEST Test signal input terminal (“L”:Servo test mode) (Open) LOAD P Test signal input terminal (Open) TEST Test signal input terminal KEY IN (“L”:Unit key mode) (Open) Test signal input terminal LOAD (“L”:Using for servo primary values EEPROM)
- Page 48 12.5. IC72 (M51V4400D7FS) : 4M DRAM Mark Function DRAM data 1 in/output terminal DRAM data 2 in/output terminal DRAM light enable input terminal DRAM low address strobe input terminal DRAM address 9 input terminal DRAM address 0 input terminal DRAM address 1~3 input terminal ~ 12 ~ A3...
- Page 49 Mark Function Tracking signal input 1 Tracking signal input 2 Power supply Focus signal input termianl Focus signal input terminal APC amp input APC amp output RFsumming output RFIN Detector’s input CSBRT Capacitor for OFTR connection Capacitor for HPF amp connection BDO output (“H”...
- Page 50 Mark Function BCLK Bit Clock Output for Serial Data LRCK L/P Clock Signal Output SRDATA Serial Data Output DVDD1 Power Supply Input (for Digital Circuit) DVSS1 Ground (for Digital Circuit) Digital Audio Interface Signal Output (Latches Data at first Transistion) MCLK Microprocessor Command Clock Signal...
- Page 51 TTSTVP, FCLV, SQCK)
- Page 52 Mark Function /RST Reset Signal Input SMCK 1/2 - Divided Clock Signal of Crystal Oscillating at MSEL= “H” (fSMCK=8.4672 MHz) 1/4 - Divided Clock Signal of Crystal Oscillating at MSEL= “L” (fSMCK=4.2336MHz) CSEL Frequency Selection Terminal H= 33.8688 MHz; L= 16.9344 MHz Traverse Forced Feed Output Traverse Drive Output...
- Page 53 (“H”: Detect) Mark Function Off-Track Signal Input (“H”: Off Track) TRCRS Track Cross Signal Input) /RFDET RF Detection Signal Input (“L”: Detect) Dropout Signal Input (“H”: Dropout) LDON Laser on Signal Output (“H”: ON) PLLF2 PLL Loop Filter Characteristic Switching Terminal TOFS/ Tracking Offset DSLF2...
- Page 54 Mark Function VCOF2 VCO loop Filter for 33.8688 MHz Conversion Terminal for 16.9344 Mhz Crystal mode, Must use other Circuit) SUBC Sub-Code Serial Data Output (Not Used, Open) SBCK Clock Input for Sub- Code Serial Data) X1 IN Crystal Oscillating Circuit Input (f= 16.9344 MHz) X2 OUT...
- Page 55 Mark Function DEMPH De-Emphasis DN Signal Output (“H”:ON) RESY Frame Re- synchronizing Signal Output IOSEL Mode Switching Terminal /TEST Test Input AVDD1 Power Supply Input (For Analog Circuit) OUTL Left Channel Audio Signal Output AVSS1 OUTR Right Signal Audio Signal Output RSEL RF Signal Polarity Assignment Input...
- Page 56 Mark Function Motor Driver 92) Input Turntable Motor Drive Signal (“L”:ON) Motor Driver (1) Input — Traverse Motor Drive Signal (“L”:ON) — No connection — No connection — No connection — No connection PGND1 — Ground Conenction (1) for Driver PVCC1 Power Supply (1) for Driver...
- Page 57 12.9. IC801 (MN101C49KAA2) System Microprocessor Mark Function Vref- — A/D Convertor Reference GND ADINO AD I KEY 0 Input ADIN1 AD I KEY 1 Input (N.C) AD I N.C (N.C) AD I N.C RDS_SEL RDS Select (PHOTO/TPS) ADIN5 AD I Power Detect (N.C) AD I N.C (N.C)
- Page 58 Mark Function CD_OPSW CD Tray Open Detect (H: OPEN; L: CLOSE) CR TIMER CR TIMER SEL 1 Function Change 1 SEL 2 Function Change 2 /TUNER_L Non-tuner Function L DIGITAL_L Opt In Mute Control Out (L: Digital in) CD& “H”: CD and Tuner TUNER_H Function SPEED...
- Page 59 Mark Function CD RESET CD Reset Output /RESTSW CD Traverse Limit SW MCLK CD LSI Command Clock MDATA CD LSI Command Data CD LSI Command Load CD_PNL_CL Front Panel Close Control(active H) CD_PNL_OP Front Panel Open Control(active H) MD_PNL_CL Front Panel Close Control(active H) 70 MD_PNL_OP Front Panel Open...
- Page 60 Mark Function LED A LED Control (active H) DES1 Destination Setup 1 DES2 Destination Setup 2 OPEN_H CD Tray Open Control (active H) CLOSE_L CD Tray Close Control (active L) — D/A Converter Reference GND (N.C) (Open) (N.C) (Open) MBP2 MICOM Beatproof Cont2(active H) MBP1...
- Page 61 LOAD TRG detect switch Traverse detect switch S701 Reset switch S901 MD Loading switch S902 CD Loading switch SW751 TIMER REC/PLAY switch SW752 SELECTOR switch SW753 CLOCK TIMER switch SW754 DISPLAY CHARACTER switch SW755 ENTER switch SW756 CANCEL switch SW757 MD EDIT switch SW758 MD REC switch...
- Page 62 TUNE MODE/AREA switch SW775 POWER switch SW776 ECO MODE select switch SW777 CD select, open/close switch SW778 CD select, eject switch SW779 MD select, open/close switch SW780 MD select, eject switch SW781 CD select, play/pause switch SW782 Forward/Skip switch SW783 TUNER/BAND select switch SW784 STOP switch...
- Page 63 internal impedance of the tester or the measuring unit. No mark : Playback << >> : Rec (( )) : CD < > : FM : AM (for MD Servo Circuit) : MD play [1kHz, L+R, 0dB] < > : MD rec. [1kHz, L+R, 0dB] No mark : MD - Importance safety notice :...
- Page 64 16. Wiring Connection Diagram...
- Page 65 17. Troubleshooting Guide...
-
Page 73: Die Lasereinheit Nicht Zerlegen
18. Parts Location and Replacement Parts List Notes: - Important safety notice: Components identified by mark have special characteristics important for safety. Furthermore, special parts which have purposes of fire-retardent (resistors), high-quality sound (capacitors), low noise (resistors), etc are used. When replacing any of these components, be sure to use only manufacturer’s specified parts shown in the parts list. -
Page 74: Die Lasereinheit Darf Nur Gegen Eine Vom Hertsteller Spezifizierte
- Die Lasereinheit darf nur gegen eine vom Hertsteller spezifizierte Einheit ausgetauscht werden. - Capacitor values are in microfarads ( F) unless specified otherwise, P= Pico-farads (pF), F= Farads. - Resistance values are in ohms, unless specified otherwise, 1K= 1,000 (OHM). - The marking (RTL) indicates that the Retention Time is limited for this items. - Page 75 18.1.2. MD Mechanism Parts List...
- Page 76 Ref. No. Part No. Part Name & Description Remarks TRAVERSE DECK RED0047-2 RECORDING HEAD RHD17021 NUT PLATE SCREW RHD17022 RECORDING HEAD SCREW RMC0348 THRUST SPRING RMC0349 NUT PLATE SPRING RML0515 HEAD SHIFTER RMQ0750 REF BASE RMQ0751 NUT PLATE RMS0611 MAIN SHAFT RXJ0021 DRIVE SHAFT ASS’Y RXK0249...
- Page 77 18.2.2. CD Mechanism Parts List...
- Page 78 Ref. No. Part No. Part Name & Description Remarks TRAVERSE DECK RAE0155Z CT100W TRAVERSE RDG0455 TRAVERSE GEAR (A) RDG0456 TRAVERSE GEAR (B) RFKNCT100 TRAVERSE BASE ASS’Y 304-1 RDG0457 LOAD GEAR (A) 304-10 RXQ0632 TRV MOTOR UNIT 304-2 RDG0458 LOAD GEAR (B) 304-3 RDG0459 LOAD GEAR (C)
- Page 80 18.3.2. Cabinet Parts List...
- Page 81 Ref. No. Part No. Part Name & Description Remarks CABINET AND CHASSIS RAN0005EM-2 TUNER PACK RDG0485 TRANSFER GEAR RDG0486 BOTTOM PANEL GEAR RDG0487 UPPER PANEL GEAR (A) RDG0488 UPPER PANEL GEAR (B) RDG0489 BELT PULLEY RDG0490 BOTTTOM PANEL RACK RDG0491 UPPER PANEL RACK (L) RDG0492 UPPER PANEL RACK (R)
- Page 82 Ref. No. Part No. Part Name & Description Remarks RMK0467 GEAR CHASSIS (R) RML0588 ARM (L) RML0589 ARM (R) RMN0203 PCB SUPPORT RMN0539 CONNECTOR HOLDER RMN0566 JACK HOLDER (A) RMN0567 JACK HOLDER (B) RMN0608 FL HOLDER RMN0609 SENSOR HOLDER RMN0610 WIRE SUPPORT RMN0622 RACK SUPPORT...
- Page 83 Ref. No. Part No. Part Name & Description Remarks P.C.B. REP2895A-T MD SERVO P.C.B. SIDE-A/MD SERVO P.C.B. SIDE-B [M](RTL) REP2807C CD SERVO P.C.B. [M](RTL) RDS P.C.B./MAIN P.C.B./MD CONNECTOR P.C.B./MD LOADING REP2996B [M](RTL) P.C.B./CD LOADING P.C.B. RAN0005EM-2 TUNER PACK [M](RTL) REP2997B TACT SWITCH P.C.B./PANEL P.C.B.
- Page 84 Ref. No. Part No. Part Name & Description Remarks 2SK1764KYTR TRANSISTOR 2SB1121ST-TD TRANSISTOR Q401 2SC4081106R TRANSISTOR Q402 2SC4081106R TRANSISTOR Q403 DTA144EUA106 TRANSISTOR Q404 DTA144EUA106 TRANSISTOR Q405 2SC4081106R TRANSISTOR Q406 DTA144EUA106 TRANSISTOR Q407 2SC4081106R TRANSISTOR Q408 DTA144EUA106 TRANSISTOR Q409 DTC144EUA106 TRANSISTOR Q431 2SC1740SLNST TRANSISTOR...
- Page 85 Ref. No. Part No. Part Name & Description Remarks Q955 DTC144EUA106 TRANSISTOR Q961 2SA952LTA TRANSISTOR Q962 2SC4081106R TRANSISTOR Q973 2SA1576A106R TRANSISTOR Q974 2SC4081106R TRANSISTOR DIODES AK03WK DIODE AK03WK DIODE AK03WK DIODE AK03WK DIODE RVD1SS133TA DIODE SC80209TE12R DIODE RVD1SS133TA DIODE SC80209TE12R DIODE RL1N4003N02 DIODE...
- Page 86 Ref. No. Part No. Part Name & Description Remarks D875 1SS355TE17 DIODE D880 UDZSTE175R6B DIODE D901 SB360L6508 DIODE D902 SB360L6508 DIODE D903 SB360L6508 DIODE D904 SB360L6508 DIODE D905 RL1N4003N02 DIODE D906 1D3E DIODE D916 RVD1SS133TA DIODE D920 MTZJ30BTA DIODE D921 UDZTE1716B DIODE D922...
- Page 87 Ref. No. Part No. Part Name & Description Remarks SW781 EVQ21405R SW CD SW782 EVQ21405R SW FF. SKIP SW783 EVQ21405R SW TUNER SW784 EVQ21405R SW STOP SW785 EVQ21405R SW REW SKIP SW786 EVQ21405R SW MD CONNECTORS RJS2A4526T CONNECTOR RJS2A4830T CONNECTOR RJU113W10M 10P CONNECTOR RJS2A4506T...
- Page 88 Ref. No. Part No. Part Name & Description Remarks RLQU2R2MT-W CHIP COIL RLQU2R2MT-W CHIP COIL RLQU100KT-W CHIP COIL RLQU2R2MT-W CHIP COIL RLQP1R8KT2-Y CHIP COIL RLQP1R8KT2-Y CHIP COIL L201 RLQB100KT-1Y COIL L202 RLQB100KT-1Y COIL L415 RLQB100KT-1Y COIL L515 RLQB100KT-1Y COIL L628 RLQB3R3KT-1Y COIL L636...
- Page 89 Ref. No. Part No. Part Name & Description Remarks EYF52BC FUSE HOLDER EYF52BC FUSE HOLDER FUSE PROTECTOR RSFMB50KT-L PROTECTOR RSFMB50KT-L PROTECTOR FP601 RSFMB20KT-L PROTECTOR FP602 RSFMB50KT-L PROTECTOR FP871 RSFMB12KT-L COIL THERMISTOR RRSP33J103CW THERMISTOR JACKS SJS9236-1 JK AC INLET JK602 RJJ36TA03-C JK MD LINK JK603 RJH2603N-2...
- Page 90 Ref. No. Part No. Part Name & Description Remarks ERDS2TJ2R2T 2.2 1/4W ERJ3GEYJ1R0V 1 1/16W ERJ3GEYJ472V 4.7K 1/16W ERJ3GEYJ271V 270 1/16W ERDS2TJ2R2T 2.2 1/4W ERJ3GEYJ474V 470K 1/16W ERJ3GEYJ101V 100 1/16W ERQ16NKW2R2E 2.2 1/6W ERDS2TJ103T 10K 1/4W ERJ3GEYJ223V 22K 1/16W ERD2FCVG100T 10 1/4W ERJ6GEYJ3R3V 3.3 1/10W...
- Page 91 Ref. No. Part No. Part Name & Description Remarks ERJ3GEYJ471V 470 1/16W ERJ3GEYJ471V 470 1/16W ERJ3GEYJ471V 470 1/16W ERJ3GEYJ102V 1K 1/16W ERJ3GEYJ102V 1K 1/16W ERJ3GEYJ220V 22 1/16W ERJ3GEYJ220V 22 1/16W ERJ3GEYJ393V 39K 1/16W ERJ3GEYJ822V 8.2K 1/16W ERJ3GEYJ223V 22K 1/16W ERJ3GEYJ100V 10 1/16W ERJ3GEYJ223V 22K 1/16W...
- Page 92 Ref. No. Part No. Part Name & Description Remarks R135 ERJ3GEYJ272V 2.7K 1/16W R137 ERJ3GEYJ103V 10K 1/16W R145 ERJ3GEYJ221V 220 1/16W R146 ERJ3GEYJ221V 220 1/16W R147 ERJ3GEYJ102V 1K 1/16W R174 ERJ3GEYJ103V 10K 1/16W R205 ERJ3GEYJ101V 100 1/16W R206 ERJ3GEYJ101V 100 1/16W R208 ERJ3GEYJ104V 100K 1/16W...
- Page 93 Ref. No. Part No. Part Name & Description Remarks R458 ERDS2TJ222T 2.2K 1/4W R462 ERJ3GEYJ822V 8.2K 1/16W R463 ERDS2TJ2R2T 2.2 1/4W R464 ERDS2TJ2R2T 2.2 1/4W R471 ERJ3GEYJ333V 33K 1/16W R472 ERJ3GEYJ473V 47K 1/16W R473 ERJ3GEYJ223V 22K 1/16W R474 ERJ3GEYJ333V 33K 1/16W R475 ERJ3GEYJ182V 1.8K 1/16W...
- Page 94 Ref. No. Part No. Part Name & Description Remarks R571 ERJ3GEYJ333V 33K 1/16W R572 ERJ3GEYJ473V 47K 1/16W R573 ERJ3GEYJ223V 22K 1/16W R574 ERJ3GEYJ333V 33K 1/16W R575 ERJ3GEYJ182V 1.8K 1/16W R576 ERJ3GEYJ561V 560 1/16W R577 ERJ3GEYJ472V 4.7K 1/16W R613 ERJ3GEYJ104V 100K 1/16W R614 ERJ3GEYJ334V 330K 1/16W...
- Page 95 Ref. No. Part No. Part Name & Description Remarks R705 ERJ6GEYJ154V 150K 1/10W R706 ERJ6GEYJ102V 1K 1/10W R707 ERJ6GEYJ393V 39K 1/10W R708 ERJ6GEYJ223V 22K 1/10W R709 ERJ6GEYJ683V 68K 1/10W R711 ERJ6GEYJ823V 82K 1/10W R712 ERJ8GEYJ221V 220 1/8W R714 ERJ6GEYJ682V 6.8K 1/10W R715 ERJ6GEYJ102V 1K 1/10W...
- Page 96 Ref. No. Part No. Part Name & Description Remarks R780 ERJ3GEYJ272V 2.7K 1/16W R781 ERJ3GEYJ472V 4.7K 1/16W R782 ERJ3GEYJ682V 6.8K 1/16W R783 ERJ3GEYJ103V 10K 1/16W R784 ERJ3GEYJ223V 22K 1/16W R785 ERJ3GEYJ683V 68K 1/16W R787 ERJ3GEYJ103V 10K 1/16W R788 ERJ3GEYJ103V 10K 1/16W R790 ERJ3GEYJ151V 150 1/16W...
- Page 97 Ref. No. Part No. Part Name & Description Remarks R843 ERJ3GEYJ331V 330 1/16W R845 ERJ3GEYJ223V 22K 1/16W R846 ERJ3GEYJ223V 22K 1/16W R849 ERJ3GEYJ103V 10K 1/16W R850 ERJ3GEYJ331V 330 1/16W R852 ERJ3GEYJ102V 1K 1/16W R853 ERJ3GEYJ102V 1K 1/16W R854 ERJ3GEYJ102V 1K 1/16W R855 ERJ3GEYJ102V 1K 1/16W...
- Page 98 Ref. No. Part No. Part Name & Description Remarks R932 ERDS2TG152T 1.5K 1/4W R933 ERJ3GEYJ103V 10K 1/16W R934 ERJ3GEYJ103V 10K 1/16W R941 ERDS2TJ472T 4.7K 1/4W R943 ERD2FCVG220T 22 1/4W R944 ERJ3GEYJ222V 2.2K 1/16W R946 ERJ3GEYJ223V 22K 1/16W R954 ERJ3GEYJ102V 1K 1/16W R955 ERJ3GEYJ223V 22K 1/16W...
- Page 99 Ref. No. Part No. Part Name & Description Remarks ECUV1H332KBV 3300P 50V ECUV1E123KBV 0.012 25V ECUV1H102KBV 1000P 50V ECUV1H102KBV 1000P 50V ECST0GY106RR 10 4V ECUV1H102KBV 1000P 50V ECUV1H102KBV 1000P 50V ECUV1H181KV 180P 50V ECUVNC104ZFV 0.1 16V ECEV0JA331P 330 6.3V ECST0GY106RR 10 4V ECST0GY106RR 10 4V...
- Page 100 Ref. No. Part No. Part Name & Description Remarks ECUVNC104ZFV 0.1 16V ECST0GY475RR 4.7 4V ECST0GY475RR 4.7 4V ECUVNC104ZFV 0.1 16V ECUV1H102KBV 1000P 50V C100 ECUVNC104ZFV 0.1 16V C101 ECST0GY106RR 10 4V C102 ECUVNC104ZFV 0.1 16V C103 ECST0GY106RR 10 4V C106 ECUV1H102KBV 1000P 50V...
- Page 101 Ref. No. Part No. Part Name & Description Remarks C408 ECUVNE223KBV 0.022 25V C409 ECUV1H101KCV 100P 50V C410 ECA1HAK3R3XB 3.3 50V C412 ECUV1H221KBV 220P 50V C413 ECUVNC473KBV 0.047 16V C414 ECUV1H561KBV 560P 50V C415 ECA1HAK2R2XB 2.2 50V C416 ECUV1H101KCV 100P 50V C417 ECUV1H101KCV 100P 50V...
- Page 102 Ref. No. Part No. Part Name & Description Remarks C508 ECUVNE223KBV 0.022 25V C509 ECUV1H101KCV 100P 50V C510 ECA1HAK3R3XB 3.3 50V C512 ECUV1H221KBV 220P 50V C513 ECA1EAK100XB 10 25V C514 ECUV1H561KBV 560P 50V C515 ECA1HAK2R2XB 2.2 50V C516 ECUV1H101KCV 100P 50V C517 ECUV1H101KCV 100P 50V...
- Page 103 Ref. No. Part No. Part Name & Description Remarks C627 ECBT1H221KB5 220P 50V C628 ECA1EAK100XB 10 25V C629 ECUV1H101KCV 100P 50V C630 ECEA1EKA220B 22 25V C635 ECA1EAK100XB 10 25V C637 ECEA1EKA330B 33 25V C639 ECBT1C103MS5 0.01 16V C671 ECUV1H102KBV 1000P 50V C672 ECUV1H102KBV 1000P 50V...
- Page 104 Ref. No. Part No. Part Name & Description Remarks C731 ECA0JAK221XI 220 6.3V C732 ECEA0JKA221I 220 6.3V C733 ECUV1E104MBN 0.1 25V C734 ECEA1AKA221I 220 10V C735 ECUV1E104ZFN 0.1 25V C736 ECUV1E104ZFN 0.1 25V C737 ECUV1E104ZFN 0.1 25V C738 ECUV1H563KBN 0.056 50V C739 ECUV1H222KBN 2200P 50V...
- Page 105 Ref. No. Part No. Part Name & Description Remarks C873 ECUVNH103KBV 0.01 50V C875 ECEA0JKA220B 22 6.3V C877 ECA0JM101B 100 6.3V C878 ECA1AM331B 330 10V C879 ECUV1H680JCV 68P 50V C880 ECUVNH103KBV 0.01 50V C881 ECUV1E473ZFV 0.047 25V C882 ECUVNC104ZFV 0.1 16V C884 ECUVNC104ZFV 0.1 16V...
- Page 106 Ref. No. Part No. Part Name & Description Remarks RJ724 ERJ6GEY0R00V 0 1/10W RJ726 ERJ6GEY0R00V 0 1/10W RJ727 ERJ6GEY0R00V 0 1/10W RJ728 ERJ6GEY0R00V 0 1/10W RJ729 ERJ6GEY0R00V 0 1/10W RJ731 ERJ6GEY0R00V 0 1/10W RJ732 ERJ6GEY0R00V 0 1/10W RJ734 ERJ6GEY0R00V 0 1/10W TEST JUMPER TJ701 EYF8CU...
- Page 107 Printed in Singapore / G001000001 J/H/K/E/L/FLE...
- Page 108 CD SERVO P.C.B (REP2807C) (RF) TJ701 C727 X701 TJ701 TP19 C725 R714 C716 C726 TP16 C717 C728 R709 TP17 C702 TP26 C744 TP24 R712 C724 TP25 C723 TP18 TP35 TP27 Q703 TP13 IC701 R721 TP14 J723 C730 C732 TP11 Q702 C711 J726 IC702...
- Page 109 TRANSFORMER P.C.B (REP2995B...EG) (REP2995C...EB)
- Page 110 SCHEMATIC DIAGRAM-7 CD SERVO CIRCUIT : +B signal line : CD Signal line TJ701 Q701 2SA1037AKSTX LASER POWER DRIVE OPTICAL PICKUP CIRCUIT C703 6.3V100 CN701 C704 Q701 LASER DIODE R754 C714 6.3V100 LD GND NBOUT GND(GUARD) C713 NAOUT VREF VREF GND(GUARD) IC701 IC701...
- Page 111 SCHEMATIC DIAGRAM-8 : +B signal line : CD Signal line TP13 TP14 TP16 TP19 C727 R717 50V1 TP18 TP17 C728 R718 50V1 C731 6.3V220 C730 C754 470P High Speed Version (RAD3512) 33.8688MHz RSXC33M8S01 X701 R714 C723 6.8K 10V220 C724 61 62 63 64 65 66 67 68 69 70 71 72 73 74 75 76 77 78 79 80 BYTCK LRCK SRDATA...
- Page 112 SCHEMATIC DIAGRAM-9 : CD Signal line : MD Rec Signal line MAIN CIRCUIT : +B signal line : MD Signal line : AUX Signal line R880 Q805 Q807 D880 2SA1576A106R DTC144EUA106 UDZSTE175R6B MUTING MUTING CONTROL <0V>(0.03V) D875 1SS355TE17 ((0V)) R874 <0V>(0V) <4.9V>(4.9V) Q807...
- Page 113 SCHEMATIC DIAGRAM-10 : MD Signal line : +B signal line : AUX Signal line <0V> Q808 R877 Q809 (0.20V) 2SC4081106R 2SC4081106R 100K ((0.27V)) <0V> <0V> MUTING CONTROL (0V) MUTING (0V) <4.90V> ((0V)) ((0V)) (4.90V) ((4.90V)) CD&TUNER_H Q809 <0V> (0V) <0V> Q808 ((0V)) (0V)
- Page 114 SCHEMATIC DIAGRAM-11 : MD Signal line : +B signal line : AUX Signal line VREF+ ECLK RDS_DO RDS_CLK (RDS_ID) PLL_CL PLL_DO PLL_DI PLL_CE PLL DI <0V>(0V)((0V)) <5.19V>(5.18V)((0.01V)) PLL_DO R859 VREF- <4.97V>(4.98V)((4.94V)) <0.08V>(0.08V)((4.97V)) R836 ADIN0 (KEY_IN) 4.7K <4.98V>(4.99V)((4.96V)) <4.81V>(4.83V)((4.79V)) ACCNT ADIN1 (KEY_IN) ACCNT <0V>(0V)((0V))
- Page 115 SCHEMATIC DIAGRAM-12 : AUX Signal line : Main Signal line : CD Signal line : +B signal line : MD Signal line : MD Rec Signal line IC401 BU4052BCF-E2 IC401 FUNCTION SWITCHING R502 8.2K Q910 Q911 2SD592ARTA DTA143XUA106 REGULATOR REGULATOR Q911 FUSE RESISTOR R943...
- Page 116 SCHEMATIC DIAGRAM-13 : -B signal line : Main Signal line : +B signal line : MD Rec Signal line R845 R846 MPXIN RDS_DO RDS_CLK CIRCUIT R616 4.7K (CS602) on SCHEMATIC R620 R622 R623 CP602 DIAGRAM-14 R613 100K CP601 R617 R614 330K C615 1.5K...
- Page 117 SCHEMATIC DIAGRAM-18 : MD Signal line MD CONNECTOR CIRCUIT : +B signal line : MD Rec Signal line R883 IC802 IC802 TC74HCT7007A 3V TO 5V A3.3V C885 0.01 OPIN CDTX LOADSW MD_CS MAIN CIRCUIT MD_REQ (CS608A) on MD_CLK SCHEMATIC DIAGRAM-9 IC803 IC803 TC4050BF...
- Page 118 MD SERVO P.C.B. SIDE-A MD SERVO P.C.B. SIDE-B SCHEMATIC DIAGRAM-1 :+B Signal Line :MD Signal Line Note: MD SERVO CIRCUIT The number which noted at the connectors on the schematic :MD Recording Signal Line diagram as "SCHEMATIC DIAGRAM 1" or "SCHEMATIC DIAGRAM 2"...
- Page 119 SCHEMATIC DIAGRAM-2 :+B Signal Line :MD Signal Line :MD Recording Signal Line 10 H 2.6V 2.6V PLAY T U V W 0.9V TP150 TP149 0.5 s. 0.1V/DIV. TP148 TP52 TP123 TP122 2.2K 0.039 C122 TP36 PLAY 0.2V 0.5 s. 50mV/DIV. PLAY 0.45V 36 35 34 33 32 31 30 29 28 27 26 25...
- Page 120 SCHEMATIC DIAGRAM-3 :+B Signal Line MD SERVO CIRCUIT 2.6V 2.6V 3.3V 3.3V D E F G H I J K L R135 2.7K R104 2.7K R105 2.7K R121 2.7K R122 2.7K R134 2.7K R132 2.7K R130 2.7K TP74 C113 C143 4V10 19 18 17 16 15 14 13 12 11 10 9 8 7 6 5 4 3 2 1 3.3V...
- Page 121 SCHEMATIC DIAGRAM-4 :+B Signal Line 2.6V 2.6V 3.3V 3.3V 4V10 IC72 M51V4400D7FS 4M DRAM DTC114YETL POWER SUPPLY 4.2V CONTROL 3.3V AN8814SB E1 FOCUS/TRACKING COIL, SPINDLE/ TRAVERSE 2SB1295 6 TB MOTOR DRIVE POWER SUPPLY TP103 TP100 TP101...
- Page 122 SCHEMATIC DIAGRAM-5 :+B Signal Line :MD Signal Line :MD Recording Signal Line MD SERVO CIRCUIT 3.3V 3.3V 4V10 2.6V 2.6V 2.6V 3.3V 3.3V RN5RZ26BA TR A W H V T U P REGULATOR C111 1000P 2.2 H 4V10 0.012 6.8K 220P 0.047 1.3V...
- Page 123 SCHEMATIC DIAGRAM-6 :+B Signal Line :MD Signal Line : MD Recording Signal Line C138 6.3V47 3.3V 3.3V 2SB1121ST TD REGULATOR A D C E U V T 3.3V PLAY PLAY 3.2V 4.3V 3.2V 0.5 s. 1V/DIV. T 0.36 s. PLAY 3.2V AK4518VF E2 4.1V...
- Page 124 SCHEMATIC DIAGRAM-16 MD LOADING CIRCUIT : +B signal line IC903 BA6283N MD PANEL DRIVER PW703 S901 RSH1A005-1U MD_OP MAIN CIRCUIT MD_CL (CS703) on SCHEMATIC DIAGRAM-13 L981 RLQB270KT-1Y CD LOADING CIRCUIT IC904 BA6283N CD PANEL DRIVER S902 RSH1A005-1U CD_OP MAIN CIRCUIT CD_CL (CS704) on SCHEMATIC...
- Page 125 SCHEMATIC DIAGRAM-17 : -B signal line POWER CIRCUIT : +B signal line : Main Signal line IC404 AN7194K-LD IC404 LOW CHANNEL POWER AMPLIFIER CP502 10 11 12 13 14 15 16 MAIN CIRCUIT (CS502) on JK606 D636 SCHEMATIC DIAGRAM-13 D637 R635 SP(WOOFER)_L 150K...
- Page 126 SCHEMATIC DIAGRAM-14 : -B signal line RDS CIRCUIT : +B signal line MPXIN RDS_DO MAIN CIRCUIT RDS_CLK 4.332MHZ (CP602) on X201 R206 SCHEMATIC DIAGRAM-13 RSXC4M33S02T C208 6.3V100 XOUT C209 VSSD CS602 0.01 VDDD IC201 RDS-ID C204 RDDA FLOUT 560P VSSA RDCL C203 VDDA...
- Page 127 SCHEMATIC DIAGRAM-15 : +B signal line TACT SWITCH CIRCUIT D752, 753, 754 LNJ301MPUJAD PANEL R793 R790 CIRCUIT JOGB R798 (CS702A) on SCHEMATIC JOGA DIAGRAM-14 ADIN0 R797 VR751 EVEGB2F1524B JOG VOLUME VREF+ CS702B R787 <0.08V> (0.09V) <4.49V> ((0.08V)) (4.65V) ((4.58V)) Q751 D751 Q751 <0.02V>...
- Page 128 IC701 (RF) CD OPTICAL PICKUP AN8839NSBE2 TJ701 SERVO AMP SEMICONDUCTOR LASER RFIN CRBRT OFTR Q701 DET. TENV LASER POWER OFTR DRIVE DET. /RFDET /RFDET DET. LDON VCBA SUBTRACTER FE OUT PHOTO DETECTOR VREF SUBTRACTER VCBA VDET VREF [CH3] LEVEL FOCUS COIL SHIFT LEVEL TRACKING COIL...
- Page 129 TO MAIN UNIT IC702 MN662790RSC SERVO PROCESSOR/DIGITAL SIGNAL PROCESSOR DIGITAL FILTER/D/A CONVERTER CLVS OUTR BLKCK BLKCK /CLDCK SBCK SUBC DEMPH OUTL CD LCH SIGNAL MAIN UNIT SSEL FLAG SQCK SQCK IPFLAG SUBQ SUBQ DIGITAL AUDIO TO MAIN UNIT INTERFACE PLLF DIGITAL AUDIO INTERFACE PLLF2...
- Page 130 AN8772FHQ RF AMP MD OPTICAL PICKUP VREF OFT IN SELECT SERIAL & PARALLEL COMP SIGNAL CONV./GATE OFT O DARK DET. CBD O RF BDO COMP 3T DET. BDO/ NRFDET TRCRS TRCRS AS BDO COMP AS GAIN SELECT AS GAIN SIGNAL COMP 3 TAP AS/MON3T...
- Page 131 IC11 IC72 TC74HCT00AFL Q10,Q11 NAND GATE M51V4400D7FS 4M DRAM L700 HEAD MAGNETIC DRIVE HEAD RN5RZ26BA-TR NEFMON REGULATOR 1,2, 14~48 24,25 9~12 43~46 33~43 DIGITAL MONI0~3 74~77 CHIP CONTROL NREFM 50 MSPMDARST EXTERNAL RAM NRST CONTROL PEFMS APCD APCREF APC GEN. REFM1 EFMMOD/ EFMDEM/...
- Page 132 AK4518VF-E2 AD/DA CONVERTER MCLK FS384 CLOCK AINL RECIN_L(R) CMODE DIVIDER DECIMATION VCML FILTER MODULATOR LRCK AINR SCLK DECIMATION FILTER MODULATOR VCMR SDTO SERIAL I/O VCOM INTERFACE COMMON SDTI VOLTAGE AOUTL MD_LCH SERIAL I/O L.P.F. INTERFACE MODULATOR AOUTR L.P.F. INTERPOLATOR MODULATOR RN5RG33AA-TL REGULATOR REGULATOR...
- Page 133 SUBQ LOADING /RST Q673 5V TO 3V LEVEL SHIFT SQCK STAT JK602 MD LINK D873 Q672 5V TO 3V LEVEL SHIFT D872 BLKCLK Q973 3V TO 5V SWITCH Q974 SWITCH MDATA Q671 Q808, Q809 SWITCH MCLK MUTING D807 D808 Q806 S701 (REST) SWITCH...
- Page 134 FROM CD SIGNAL CD UNIT IC471 BA4558FE2 OP AMP Q407 JK603 (Q507) EXTERNAL OUT LCH MUTING (12) (13) (14) (15) (16) (17) (18) (19) (20) Q408 IC402 MUTING SWITCH BH3857AFV-E2 MATRIX (BASS) SURROUND 1 MATRIX JK603 TONE Q401(Q501) VOLUME SURROUND 2 AUX(1) MUTING (TREBLE)
- Page 135 RECIN_L(R) Q432 (Q532) MUTING LOADSW MD CLK MD REQ MD SYSRST MD DATA_IN IC803 TC4050BF 5V TO 3V D633 IC802 TC74HCT7007A 3V TO 5V JK 604 OPT IN FROM CD UNIT MD CS MD DATA_OUT MD_LCH TO MD UNIT MOTOR MOTOR (RM901) (RM902)
- Page 136 IC403 AN7135 FULL RANGE POWER AMP 11(8) JK605 HEADPHONE 2(5) 12(7) 1(6) JK607 SP (FULL)_L Q613 RIPPLE FILTER/ SWITCH STABILIZER OUT+_R OUT+ _L JK606 JK606 RIPPLE SP WOOFER_L FILTER SP WOOFER_R 64dB 64dB OUT-_L OUT-_R 64dB 64dB IC404 AN7194K-LD LOW CHANNEL POWER AMP D634 Q961,Q962 Q903~Q907...
- Page 137 AN8772FHQ (48P) AN8814SB-E1 AK4518VF-E2 (24P) RN5RG33AA-TL MN66616RA4 (100P) BA5948FPE2 LB1830MS-TLM (10P) RN5RZ26BA-TR MN662790RSC (80P) BU4052BCF-E2 (16P) MN101D03DAA1 (80P) BH3857AFV-E2 (40P) M9202-12BDR3 (64P) LC72721NMTLM (20P) MN101C49KAA2 (100P) AN8839NSBE2 (28P) TC74HCT00AFL (14P) TC7W04FTE12L M51V4400D7FS AN7135 AN7194K-LD TC74HCT7007A (14P) TC4050BF (16P) UPC29M33HF BA4558FE2 BA6283N 2SB1121ST-TD 2SJ278MYTR...
- Page 138 MAIN P.C.B (REP2996B) CS606 CS704 CS703 R677 J392 R852 R853 R684 J393 1 2 3 4 5 6 7 R682 JA42 R676 R679 R688 J182 C676 JA41 R687 JA46 C675 C971 C935 C671 R984 J394 JA17 JA19 R944 J512 IC901 J159 R980 Q955...
- Page 139 TUNER PACK (RAN0005EM-2) (FROM CP601 TO TUNER PACK) CP601 R815 R826 RESET R827 C920 J134 J230 J136 J137 J527 J138 J139 P-MD C612 J140 JA62 C611 JK602 Q805 JA61 C501 C617 C508 R503 J368 Q807 JK604 J369 C871 IC402 J370 R874 R845 C527...
- Page 140 MD SERVO P.C.B SIDE-A ( REP2895A-T ) TP101 R137 C119 TP102 TP100 R103 R110 IC10 R100 R108 R145 C113 C134 C154 TP74 TP77 R107 C155 R60 R55 R146 IC92 (TRAVERSE MOTOR) TP56 (SPLINDLE TP149 MOTOR) TP123 TP150 TP148 TP57 TP54 TP36 (LOADING TP44...
- Page 141 MD SERVO P.C.B SIDE-B (REP2895A-T) R122 R130 C112 R104 R121 R132 R116 C142 R134 R117 R125 R135 C141 R124 IC72 C100 C101 C143 R131 C103 R109 C149 C122 C148 C144 R112 C147 C117 R111 C133 S D G ELECTRICAL PARTS LOCATION Ref.
- Page 142 MD CONNECTOR P.C.B (REP2996B) J559 CS605 J556 R414 C893 R514 J557 L515 J518 JA66 JA54 J553 C878 L415 J517 R887 J554 R883 J516 C514 J528 R889 FP871 J520 1250 R890 C414 JA63 J521 L881 IC802 IC803 JA64 C951 C515 C415 C877 L877 JA67...
- Page 143 TACT SWITCH P.C.B PANEL P.C.B (REP2997B) (REP2997B)
- Page 144 POWER P.C.B (REP2995C...EB) (REP2995B...EG)