Advertisement
Table of Contents
Advertisement
Table of Contents

Subscribe to Our Youtube Channel
Related Manuals for Shark NH130


Summary of Contents for Shark NH130
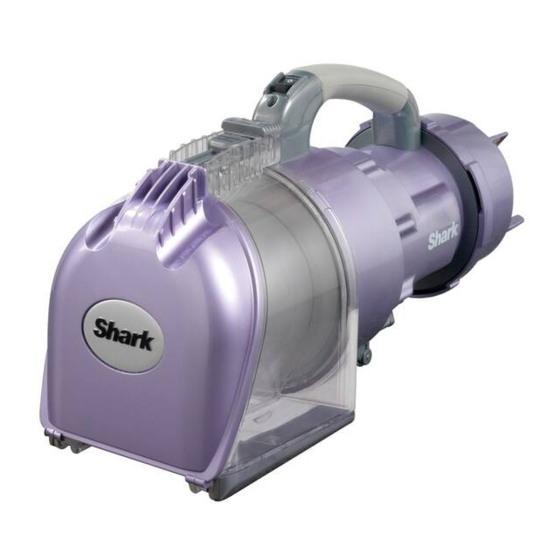
- Page 1 OWNER’S GUIDE NH130...
-
Page 2: Important Safety Instructions
TO REDUCE THE RISK OF FIRE, BE OBSERVED, INCLUDING THE ELECTRIC SHOCK OR INJURY: FOLLOWING: GENERAL ELECTRICAL SAFETY: READ ALL INSTRUCTIONS 1. Unplug from electrical outlet when not in use and before servicing. BEFORE USING YOUR SHARK ® 2. DO NOT use vacuum with a damaged NAVIGATOR PORTABLE POWER cord or plug. If appliance is not working VAC. as it should, has been dropped, damaged, left outdoors, or dropped POLARIZED PLUG:... -
Page 3: Table Of Contents
TECHNICAL SPECIFICATIONS Voltage: 120V., 60Hz. Power: 800 Watts 6.67 Amps TOLL FREE: 1-800-798-7398 Contents Thank you for Getting Started ... 6 purchasing How to Use ... 8 the Shark ® Maintenance ... 10 Navigator Emptying the Dust Cup ... 10 Portable Cleaning the Pre-Motor Filters ..11 Power Vac. Cleaning the Post-Motor Filter... 12 Checking for Blockages ..13 Troubleshooting Guide ... 16 Warranty ..17 Registration ... -
Page 4: Getting Started
Getting Started U se the Portable Power Vac as a stand alone vacuum for spot-cleaning small areas and large piles of debris, or with the Flexible Hose and cleaning tools for above-floor cleaning. FIRST THING’S FIRST, YOU NEED TO KNOW WHAT’S IN THE BOX YOU JUST OPENED: A Portable Power Vac Flexible Hose Hose Connector Pet Hair Power Brush 2-in-1 Crevice/Dusting Tool Long Reach Crevice Tool Storage Bag (not shown) TOLL FREE: 1-800-798-7398 N OTE: Always turn power off before attaching or detaching accessories. FLEXIBLE HOSE With the right cleaning tool in place and the Flexible Hose, you can extend your reach into hard-to-clean areas. -
Page 5: How To Use
How to Use USING THE PORTABLE POWER VAC USING THE PORTABLE POWER VAC WITH FLEXIBLE HOSE AND 1 W hile holding the Vacuum, press ACCESSORIES the Power Button to begin cleaning. For cleaning and dusting above-the- (fig. a) ground and for hard-to-reach places. NOTE: Always hold vacuum by the 4 T urn the Vacuum over and attach the Handle while pressing the Power Hose Connector to the Inlet Opening Button to turn on or off and during by aligning the arrows, pressing the use. Connector down through the slots 2 M ake sure all the three wheels are (fig. -
Page 6: Maintenance
Maintenance T o reduce the risk of electric shock, unplug the unit before performing any cleaning, maintenance, or troubleshooting checks. R eassemble all parts securely before operating vacuum. Dust Cup Empty each time you clean. Pre-Motor Foam Filters (2) Rinse and dry every month under normal use. Pre-Motor Large Felt Filter (1) Rinse and dry every month under normal use. Post-Motor Foam Filters (1) Rinse and dry every 6 months under normal use. Post-Motor Felt Filters (1) DO NOT rinse Post-Motor Felt Filter EMPTYING THE DUST CUP H old Vacuum over a trash receptacle and press the Dust Cup Release The Dust Cup needs to be emptied Button to release the door. Tap each time you vacuum and gently to empty contents. (fig. d) periodically during cleaning, when the Dust Cup appears full. 3 Press the door shut again until it clicks. 1 Remove the Flexible Hose and Hose Connector from the Vacuum by 4 C heck to make sure door is secure pressing and holding the release before turning the Vacuum on. -
Page 7: Cleaning The Post-Motor Filter
Exhaust Foam Filter CLEANING THE POST MOTOR FOAM 7 G rip Exhaust Filter Compartment FILTER and align ‘Unlock’ Symbol with Black Triangle on Handle of the Vacuum. 1 L ay the Vacuum down with the Handle facing up. Push Exhaust Filter Compartment into Vacuum and twist so that the Twist the Exhaust Filter Black Triangle on the Handle aligns Compartment so that the Black with the ‘Locked’ Symbol on the Triangle on the Handle aligns with Exhaust Filter Compartment to lock the ‘Unlock’ Symbol on the Exhaust it into place. (fig. b) Filter Compartment and remove. (fig. a) DO NOT operate the vacuum without ALL the filters in place. 3 Pull out Foam Filter. DO NOT operate the vacuum with 4 R inse only the Foam Filter WET filters. -
Page 8: Troubleshooting Guide
T o reduce the risk of electric shock, 5 F LEXIBLE HOSE AND HOSE unplug the unit before performing CONNECTOR • any cleaning, maintenance, or Remove Hose Connector from the troubleshooting checks. Vacuum. W ARNING: Never insert sharp • Detach the Flexible Hose from the objects into any opening to clear an Hose Connector by squeezing the obstruction. tabs and gently pulling out. (fig. e) IMPORTANT: Damages caused • Check inside the Hose. while clearing or attempting to clear • Check inside the Hose Connector. blockages are not covered under • your product’s limited warranty. Check the Vacuum Inlet Opening. • R eassemble all parts securely before Snap the Flexible Hose back onto operating vacuum. -
Page 9: Warranty
Notes TOLL FREE: 1-800-798-7398 Warranty Your Shark EURO-PRO FIVE-YEAR (5) LIMITED WARRANTY ® Navigator EURO-PRO Operating LLC warrants this product to be free from Portable Power material defects and workmanship for a period of five (5) years Vac comes from the date of purchase when utilized for normal household use, with a Five subject to the following conditions, exclusions and exceptions. - Page 10 Look for these other great Shark at your favorite Shark or on the web at www.sharkclean.com 18 V Pet Perfect ™ II Cordless Hand Vac Steam Pocket Mop ® Full range of Professional Irons TOLL FREE: 1-800-798-7398 ® products retailer ® Please fill out and mail the product registration card within ten (10) days of purchase. The registration will enable us to contact you in the unlikely event of a product safety notification. By returning this card you acknowledge to have read and understood the instructions for use, and warnings set forth in the accompanying instructions. Mail to the following address: • EURO-PRO Operating LLC 4400 Bois Franc, St.Laurent, Québec, Canada H4S 1A7...
- Page 11 U.S.: EURO-PRO Operating LLC Newton, MA 02459 Canada: EURO-PRO Operating LLC 4400 Bois Franc Ville St. Laurent, Québec H4S 1A7 1-800-798-7398 www.sharkclean.com COPYRIGHT© EURO-PRO OPERATING LLC 2009 PRINTED IN CHINA REV. 091224 Illustrations may differ with actual product.
Need help?
Do you have a question about the NH130 and is the answer not in the manual?
Questions and answers
My I Have Information Mailed To Me?