Advertisement
Quick Links
Advertisement

Related Manuals for Nintendo Mv1-7.1

Summary of Contents for Nintendo Mv1-7.1
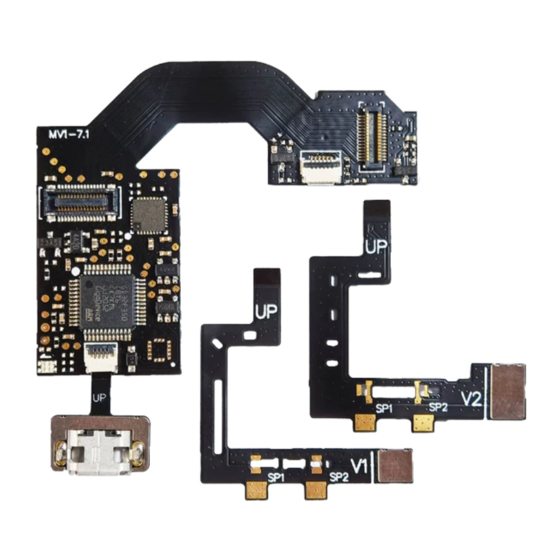
- Page 1 Mv1-7.1 installation manual...
-
Page 2: Required Items
Installation guide Required Items: 1 . M i c r o S D c a r d c o n t a i n i n g a t m o s p h e r i c i n t e g r a t i o n p a c k a g e a n d g e n u i n e S a n D i s k c a r d a r e r e c o m m e n d e d . - Page 9 GENTLY BEND BACK THE CABLE CONNECT IT TO THE CHIP, THEN LAY IT FLAT AGAIN IT SHOULD LINE UP WITH THE NAND PLUP. PRESS DOWN TO SECURE THE CONNECTION...
- Page 10 Cut off part of the metal back plate, and use heat-resistant adhesive Assemble all removed parts again, tape for insulation replace the cleaned heat dissipation protection. Finally, paste, and cut a little antimagnetic the shell will not be tilted wave so that the cable can pass through. after installation.
- Page 11 3. LED display status during the first boot process: yellow light flashes - > pink light flashes - > green light is always on for about 3 seconds 4. After the first startup, the factory setting can be restored by short circuiting the two round holes on Mv1-7.1...
- Page 12 Restore factory settings firmware upgrade methods Short circuiting these two round holes can restore the factory settings Firmware upgrade interface Restore factory settings and firmware upgrade methods: 1. Restore the factory setting method: use tweezers to short circuit the two round holes in the figure, turn on the machine, turn the white light into blue light, and restore the factory setting.