Table of Contents
Advertisement
Advertisement
Table of Contents

Related Manuals for Casio LK-40


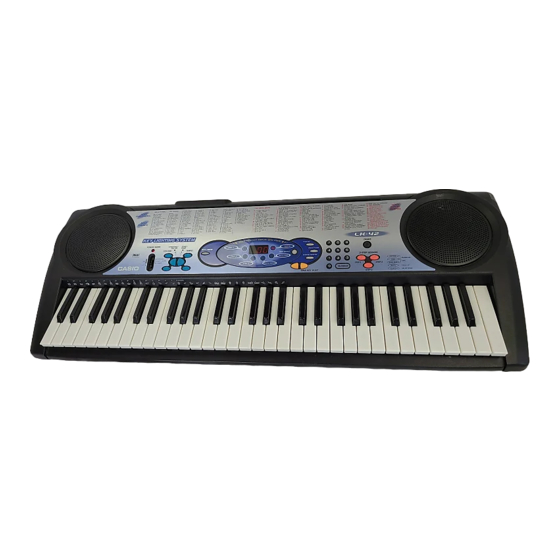
Summary of Contents for Casio LK-40
- Page 1 USER’S GUIDE GUÍA DEL USUARIO LK40/42-ES-1...
- Page 2 • Consult the dealer or an experienced radio/TV technician for help. FCC WARNING Changes or modifications not expressly approved by the party responsible for compliance could void the user’s authority to operate the equipment. CASIO ELECTRONICS CO., LTD. Unit 6, 1000 North Circular Road London NW2 7JD, U.K.
-
Page 3: Welcome
Welcome... To the happy family of satisfied CASIO electronic musical instrument owners! To get the most out of the many features and functions of the keyboard, be sure to carefully read this manual and keep it on hand for future reference. -
Page 4: Safety Precautions
Safety Precautions Symbols Various symbols are used in this operating manual and on the product itself to ensure that the product is used safely and correctly, and to prevent injury to the user and other persons as well as damage to property. Those symbols along with their meanings are shown below. WARNING This indication stipulates matters that have the risk of causing death or serious injury if the product is operated incorrectly while ignoring this indication. - Page 5 They may be hot or battery fluid may be leaking from them. 4. Consult with the dealer where you purchased the keyboard or with an authorized CASIO service provider. Do not disassemble or modify the instrument. • Never attempt of take apart or modify the instrument, its accessories, or separately sold options.
- Page 6 Do not place keyboard on lacquered furniture. • The instrument’s silicone rubber feet may eventually blacken or scar lacquered surfaces. Use felt cloth pads to insulate the feet or preferably use a CASIO musical instrument stand designed for your keyboard.
-
Page 7: Care Of Your Keyboard
Accessories and options • Use only accessories that come with the instrument or authorized CASIO options (sold separately). Use of non-specified accessories or options may cause fire, electrical shock, or malfunction. -
Page 8: Table Of Contents
Contents Welcome..E-1 Main Features ... E-1 Safety Precautions ... E-2 Care of Your Keyboard ... E-5 Contents ... E-6 Control Locations ... E-8 Quick Reference ... E-10 Connections ... E-12 Phones/Output Jack ... E-12 Accessories and Options ... E-13 Power Supply ... - Page 9 Using auto-accompaniment ... E-23 About the accompaniment keyboard ... E-23 Using the CASIO CHORD system ... E-24 To play a CASIO CHORD auto-accompaniment ... E-24 Using standard fingerings ... E-25 To play a FINGERED auto-accompaniment ... E-26 Improvising with the preset patterns ... E-27 Using fill-in rhythm ...
-
Page 10: Control Locations
Control Locations Rear Panel DC 9V PHONES/ MIDI OUTPUT POWER/MODE SYNCHRO/ START/ FILL-IN STOP VOLUME TEMPO FINGERED CASIO CHORD NORMAL POWER/MODE SYNCHRO/ START/ FILL-IN STOP KEY LIGHT VOLUME TEMPO FINGERED CASIO CHORD NORMAL 3-STEP LESSON STEP 1 NUMBER DEMO KEY LIGHT... - Page 11 1 1 1 1 1 POWER/MODE selector 2 2 2 2 2 Power indicator 3 3 3 3 3 VOLUME buttons 4 4 4 4 4 SYNCHRO/FILL-IN button 5 5 5 5 5 START/STOP button 6 6 6 6 6 TEMPO buttons 7 7 7 7 7 KEY LIGHT button 8 8 8 8 8 STEP 1 icon 9 9 9 9 9 STEP 2 icon...
-
Page 12: Quick Reference
3-step lesson feature. See page E-28 for detailed explanations of these steps. Set the POWER/MODE selector to NORMAL. POWER/MODE FINGERED CASIO CHORD NORMAL Play the melody part on the keyboard. <If you pressed the STEP 1 button in Play the notes with the ONE KEY PLAY buttons. - Page 13 Find the tune you want to play in the Song Bank list, and then use the number buttons to input its two-digit number. • To select “20 AMAZING GRACE”, input [2] and the [0]. ghts. START/ FILL-IN STOP KEY LIGHT TEMPO ONE KEY PLAY <If you pressed the STEP 2 button in...
-
Page 14: Connections
Connections I Phones/Output Jack Before connecting headphones or other external equipment, be sure to first turn down the volume settings of the keyboard and the connected equipment. You can then adjust volume to the desired level after connections are complete. [Rear Panel] PHONES/OUTPUT Jack MIDI... -
Page 15: Accessories And Options
Connection Example To keyboard’s PHONES/OUTPUT jack Standard plug Accessories and Options Use only the accessories and options specified for this keyboard. Use of non-author- ized items creates the danger of fire, electrical shock, and personal injury. 478B-E-015B INPUT Keyboard or guitar amp E-13... -
Page 16: Power Supply
Power Supply This keyboard can be powered by current from a standard household wall outlet (using the specified AC adaptor) or by batteries. Always make sure you turn the keyboard off whenever you are not using it. I Using batteries Always make sure you turn off the keyboard before loading or replacing batteries. -
Page 17: Using The Ac Adaptor
Important! Improper handling of batteries can cause them to burst and leak, which creates the danger of personal injury or damage due to contact with battery acid. Be sure to note the following important precautions. • Always make sure that the positive (+) and negative (–) poles are facing correctly as indicated inside the battery compartment. -
Page 18: Auto Power Off
6 minutes. When this happens, move the POWER/MODE selector to the OFF position and then back to NORMAL, CASIO CHORD, or FINGERED to turn power back on. Note • Auto Power Off is disabled (it does not function) when you are using the AC adaptor to power the keyboard. -
Page 19: Basic Operations
I To switch power on and off 1. Set the POWER/MODE selector to NORMAL. POWER/MODE FINGERED CASIO CHORD NORMAL 2. Press the keyboard keys. 3. The VOLUME up and down arrow buttons are used to adjust main volume. • Pressing VOLUME again to change the volume setting. -
Page 20: Keyboard Split Tones
3. Use the number buttons to input the 2-digit number that identifies the tone you want to select. • Always enter two digits for the tone number. If you enter only one digit, the display will automatically return to the previous tone number setting after a few seconds. -
Page 21: Digital Sampling
• There are no sounds assigned to any keyboard keys from B4 onward when the “99 PERCUSSION” tone is selected. Digital Sampling A number of the tones that are available with this keyboard have been recorded and processed using a technique called digital sampling. To ensure a high level of total quality, samples are taken in the low, mid, and high ranges and then combined to provide you with sounds that are amazingly close to the originals. -
Page 22: To Tune The Keyboard
<Keys and their indicators> Key : Display : : Pressing : Pressing <Note Names> Notes • You cannot change the transpose setting while the keyboard is in the Song Bank Mode. • In step 2 of the above operation, you could also use the number buttons [0] to [5] to specify C through F. -
Page 23: Playing The Demo Tunes
Notes • In step 2 of the above procedure, you could also use the number buttons to input a value from 00 to 50. • Pressing both of the TEMPO buttons ( setting to 00. • Pressing the SONG BANK button changes the tuning setting to 00. •... -
Page 24: Playing Rhythms
To select and play a rhythm 1. Set the POWER/MODE selector to NORMAL. POWER/MODE FINGERED CASIO CHORD NORMAL 2. Find the rhythm you want to use in the “Rhythm List” (page A-3) and note its rhythm number. 3. Press the RHYTHM button. -
Page 25: Using Auto-Accompaniment
You get a choice between two different methods for chord play. FINGERED lets you play chords as you normally do, while CASIO CHORD makes it possible to play fully formed chords with one finger. About the accompaniment keyboard The lower (left) 1.5 octaves are reserved for use as an accompaniment keyboard... -
Page 26: Using The Casio Chord System
Using the CASIO CHORD system The CASIO CHORD system lets you easily play the four main types of chords. Play of chords is simplified as shown in the chart below. Keys Chord Type Pressing one Major chord accompaniment Pressing two... -
Page 27: Using Standard Fingerings
4. Press either one or up to four keys on the accompaniment keyboard, and the corresponding accompaniment starts to play automatically. 5. Continue pressing different keys on the accompaniment keyboard to play your chord progression. 6. To stop auto-accompaniment play, press the START/STOP button again. SYNCHRO/ START/ FILL-IN... -
Page 28: To Play A Fingered Auto-Accompaniment
To play a FINGERED auto-accompaniment 1. Use the POWER/MODE selector to select FINGERED. POWER/MODE FINGERED CASIO CHORD NORMAL 2. Select an auto-rhythm as described under “To select and play a rhythm” on page E-22. 3. Start play of the rhythm. -
Page 29: Improvising With The Preset Patterns
You can start the rhythm and accompaniment pattern at the same time, with your play of the accompaniment keyboard. To do this, follow the steps below. 1. Set the POWER/MODE selector to the CASIO CHORD or FINGERED position. POWER/MODE FINGERED... -
Page 30: Three Step Lesson System
Three Step Lesson System I Using Three Step Lesson System Even individuals who cannot play the keyboard at all can follow along with the 100 built-in Song Bank tunes with the ONE KEY PLAY buttons. You can also use the Three Step Lesson System to learn at your own pace. -
Page 31: Three Step Lesson System Tempo Setting
Three Step Lesson System Tempo Setting You can use the procedure in step 6 of the procedure on page E-22 to set the tempo of the left-hand part for Song Bank and Three Step Lesson System play (Step 1 through This means you can use a slower tempo at the beginning, and then increase it as you learn. -
Page 32: Using The Three Step Lesson System With Song Bank Tunes
Notes • Always enter two digits for the Song Bank number. • You can input a Song Bank tune number even while another Song Bank tune is playing. • If you input the wrong first digit for a Song Bank tune number, you can return to the previous setting by pressing the SONG BANK button. -
Page 33: How The Three Step Lesson System Operates In Steps 1 Through 3
How the Three Step Lesson System operates in Steps 1 through 3 When using an auto-accompaniment Song Bank tune with the Three Step Lesson System, the lights indicate not only the note you should play, but how long you should play it (how long you should keep the key depressed). The following de- scribes what illumination of keys indicates. -
Page 34: Turning Off Key Lighting
Turning Off Key Lighting 1. Press the KEY LIGHT button. • Press the KEY LIGHT button again to turn key lighting back on. KEY LIGHT Note • Key lighting turns on automatically in any of the following cases: • When keyboard power is turned on. •... -
Page 35: Step 1: Easy Play
I Step 1: Easy Play You can press the ONE KEY PLAY buttons or any of the keyboard keys to play along with the melody (right hand part) of the Song Bank tune. You do not have to worry about pressing the right key, so you can concentrate on getting the timing right. 1. -
Page 36: Step 3: Normal Play
2. Play the notes indicated by the Three Step Lesson System. • The accompaniment (left hand) part of the tune follows along as you play the melody (right hand) part. • The keyboard key that corresponds to the next note to be played flashes, and lights when you play the note. -
Page 37: To Practice The Left Hand Part
I To practice the left hand part Once you master right hand part play, you can use the two-hand tunes (numbers 85 through 99) to practice left hand part. 1. Press the STEP 1, STEP 2, or STEP 3 button. •... -
Page 38: Midi
MIDI I What is MIDI? The letters MIDI stand for Musical Instrument Digital Interface, which is the name of a worldwide standard for digital signals and connectors that makes it possible to exchange musical data between musical instruments and computers (machines) pro- duced by different manufacturers. -
Page 39: Midi Channels
MIDI Channels MIDI allows you to send the data for multiple parts at the same time, with each part being sent over a separate MIDI channel. There are 16 MIDI channels, numbered 1 through 16, and MIDI channel data is always included whenever you exchange data (key press etc.) Both the sending machine and the receiving machine must be set to the same channel for the receiving unit to correctly receive and play data. - Page 40 I NOTE ON/OFF This message sends data when a key is pressed (NOTE ON) or released (NOTE OFF). A NOTE ON/OFF message include a note number (to indicate note whose key is being pressed or released) and velocity (keyboard pressure as a value from 1 to 127). NOTE ON velocity is always used to determine the relative volume of the note.
- Page 41 I LOCAL CONTROL (Default: on) /GM mapping (Default: off) This setting determines whether or not the keyboard and sound source of this keyboard are connected internally. When recording to a computer or other external device connected to this keyboard’s MIDI IN/OUT terminal, it helps if you turn LOCAL CONTROL off.
- Page 42 I To turn off LOCAL CONTROL While holding down the RHYTHM button, press the SONG BANK button. • This also turns on GM mapping. I To turn on LOCAL CONTROL While holding down the RHYTHM button, press the PART SELECT button. •...
-
Page 43: Technical Reference
2. Volume is set to 0. 3. Headphones are plugged into the keyboard. 4. The POWER/MODE selec- tor is in the CASIO CHORD or FINGERED position. 5. Tone “99 PERCUSSION” is selected and you are press- ing keys that are not as- signed tones. - Page 44 Symptom • Keyboard keys remain lit. • Keyboard is standing by for keyboard play in Step 2. • Keyboard keys light but no • Power on alert is telling you sound is produced. that power is left on. • RHYTHM button does not •...
-
Page 45: Specifications
* Designs and specifications are subject to change without notice. 478B-E-045A 100 presets Adjustable, (216 steps, = 40 to 255), initial value: 120 Two systems: CASIO CHORD, FINGERED Fill-in pattern, Synchro start to C to F: half-note) Adjustable A4 = Approx. 440 Hz, ±50 cents, IN, OUT... -
Page 46: Appendix
Appendix/Apéndice I GM Tone Map List I Lista de asignaciones de sonido GM Tone No./Tone Name Nº de sonido/Nombre de sonido 00 GRAND PIANO 01 BRIGHT PIANO 02 HONKY-TONK 03 E GRAND PIANO 04 ELEC PIANO 1 05 ELEC PIANO 2 06 ELEC PIANO 3 07 ELEC PIANO 4 08 HARPSICHORD... - Page 47 Tone No./Tone Name Nº de sonido/Nombre de sonido 47 SYNTH-BRASS 1 48 SYNTH-BRASS 2 49 SYNTH-BRASS 3 50 SOPRANO SAX 51 ALTO SAX 52 TENOR SAX 53 OBOE 54 CLARINET 55 PICCOLO 56 FLUTE 57 RECORDER 58 FLUTE ENSEMBLE 59 WHISTLE 60 SYNTH-LEAD 1 61 SYNTH-LEAD 2 62 SYNTH-LEAD 3...
-
Page 48: Rhythm List
I Rhythm List I Lista de ritmos POPS I CLUB POP FUNKY POP 1 RAP POP FUNKY POP 2 SOUL BALLAD POP BALLAD LOVE BALLAD FUNKY POP 3 EPIC BALLAD JAZZ/FUSION LITE POP POPS II 16 BEAT SHUFFLE 16 BEAT POP 16 BEAT FUNK 8 BEAT POP 8 BEAT SOUL... - Page 49 478B-E-094A...
- Page 50 478B-E-095A...
- Page 51 478B-E-096A...
- Page 52 478B-E-097A...
- Page 53 478B-E-098A...
- Page 54 478B-E-099A...
- Page 55 478B-E-100A...
- Page 56 478B-E-101A...
- Page 57 478B-E-102A...
- Page 58 478B-E-103A...
- Page 59 This recycle mark indicates that the packaging conforms to the environmental protection legislation in Germany. Esta marca de reciclaje indica que el embalaje se ajusta a la legislación de protección ambiental en Alemania. CASIO COMPUTER CO.,LTD. 6-2, Hon-machi 1-chome Shibuya-ku, Tokyo 151-8543, Japan MA0104-B...