Advertisement
Quick Links
Installation manual
Indoor ventilation
Please read carefully before installation
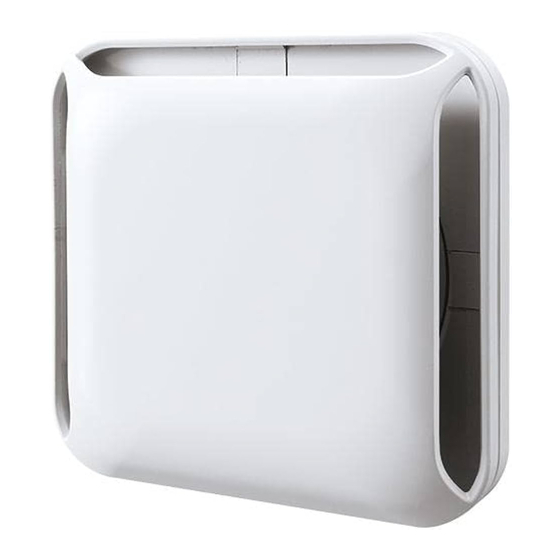
Nasta KS-86PR001FK
Body dimensions: 200mm square
Compatible with 150mm duct
Before installation
Confirm duct is installed, and is the appropriate size for the vent
Ensure duct is straight, without bends, steps, or deformation
Check that the inside of the duct is clean and free of debris
Installation
To prevent air and moisture leaking between the duct and the duct connector, attach the foam
tape to the edge of the connector (before the step). Press firmly, without pulling
NASTA symbol
facing upwards
Precautions for attaching the tape
Wipe any dust or dirt from the duct connector before attaching the foam tape
When attaching, do not pull or stretch the tape
This will reduce the quality of the seal, leading to water or air leaking through
Ensure the ends of the tape overlap at the top of the duct connector
Insert the duct connector into the duct or pipe
Sealant or adhesive may be used if required
Passive air register with pollen filter
Start from the top,
before the step
www.universalfans.com.au
Overlay the ends at
the top of the vent
Duct/pipe
Advertisement

Summary of Contents for Nasta S-86PR001FK
- Page 1 Installation manual Indoor ventilation Passive air register with pollen filter Please read carefully before installation Nasta KS-86PR001FK Body dimensions: 200mm square Compatible with 150mm duct Before installation Confirm duct is installed, and is the appropriate size for the vent Ensure duct is straight, without bends, steps, or deformation...
- Page 2 Pull lightly away from the body Push 2. Remove the body cover Body cover With the Nasta mark engraved on the body facing up, place your finger on the lowest grip. Push down, and pull the body cover away from the body Grip Lift the body cover up and off the body 3.