
Related Manuals for Samsung Jasmine 20


Summary of Contents for Samsung Jasmine 20
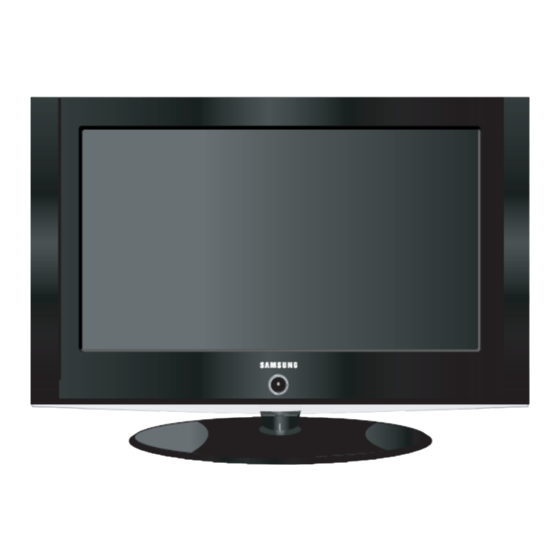
- Page 1 Training Manual for LCD TV “Jasmine 20” Samsung Electronics Visual Display Div. R&D team...
-
Page 2: Table Of Contents
Contents 10. Service Function List 1. Structure of LCD TV 11. Main PBA 2. Remote Control 12. Panel part Description 3. Specification 13. Disassembly 4. TELETEXT 14. EDID Installation 5. Signal Pin Assignments 15. Micom Program Upgrade 6. Display Mode 7. - Page 3 1. Jasmine 20 Front Panel Buttons...
- Page 4 1. Jasmine 20 Rear Panel Jacks...
-
Page 5: Remote Control
2. Jasmine 20 Remote Control... -
Page 6: Specification
3. Specification... - Page 7 4. Using the TELETEXT Feature...
- Page 8 4. Display the Teletext Information...
- Page 9 4. Selecting a Specific Teletext Page...
- Page 10 4. Using Fastext to Select a Teletext Page...
-
Page 11: Teletext
4. Storing Teletext Pages... - Page 12 5. Signal Connections and Pin Assignments If the monitor signal cable is disconnected, the monitor starts the ‘Self-Test’ function 15pin D-sub connector...
-
Page 13: Display Mode
6. Display Modes... -
Page 14: Block Diagram
7. Block Diagram PLUS BLOCK DIAGRAM (For European Model) TDA7266D TUNER TDA150XX Sound Amp TV Processor AV_CVBS TDA7050 S-VHS_Y,C A/V Headphone Amp .IF AV / S-VHS_L,R .SOUND .Comb Scart_CVBS,RGBFB input .Video Decoder RF_CVBS output DDR,Reset .Micro_control ... -
Page 15: Power Flow
8. Power Flow... -
Page 16: Troubleshooting
9. Troubleshooting (No Power) - Page 17 9. Troubleshooting (No Picture)
- Page 18 9. Troubleshooting (No Sound)
-
Page 19: Service Function List
10. Service Function list(1) Function Action method Hidden Service Function(1) Entering Factory Mode 1) To enter “Service Mode” Press the remote -control keys in this sequence : -If you do not have Factory remote – control Service POWER OFF -> MUTE -> 1-> 8 -> 2 -> POWER ON PC Auto Color 2) If you have Factory remote-control ▶... - Page 20 Service Function list(2) Function Action method Hidden Service Function (2) Move to the ( -) / (+) key, select the ‘Enter’ key. 3) PC Auto Color/ Video Auto Color : Service PC Auto Color in case that color of all screen is wrong, ▶...
- Page 21 Service Function list(3) Function Action method Hidden Service Function (3) 6) Dynamic Luma Correction *.When Panel Information selected “-” : RF, AV, S_Video -> all store “+”: RF, AV, S_Video -> separate store DLC/MWE Part NVRAM Reset ▶ DLC- 0-10 MWE- Demo Brightness+...
- Page 22 Service Function list(3) Function Action method Hidden Service Function (3) *.When Panel Information selected 7) Special Function Register SFR Part DCXO Sel. DCXO Tune OVMADAPT OVMTHR IF Demod 0-63 F FI R0:77 R1:71 R2:81 R3:18 R4:0 R5:1F...
- Page 23 Service Function list(3) Function Action method Hidden Service Function (4) 8) Sub Adjust of UOC Ⅲ *.When Panel Information selected Sub Adjust R Blk Lvl+ 0-63 G Blk Lvl+ 0-63 Peak Frq/DLY+0-3 Peak+ 0-63 Soft Clp Lvl- W Limit- 0-15 R White Pnt+ 0-63 G White Pnt+ 0-63 B White Pnt+ 0-63...
- Page 24 Service Function list(3) Function Action method Hidden Service Function (5) 9) UOC Adjustment *.When Panel Information selected BKS : Black stretch Wsx : White stretch UOC Adjust BKS- WSx- 0 20 20 20 20 20 0 20 20 20 19 26 …..
- Page 25 Service Function list(3) Function Action method Hidden Service Function (6) 10) Scaler Adjust *.When Panel Information selected Adjust R Offset G Offset B Offset R Gain G Gain B Gain Sclr Coring+ 0-255...
- Page 26 Service Function list(3) Function Action method Hidden Service Function (7) 11) Service Channel Memory for Factory *.When Panel Information selected Service Suwon + America Samex + America ……. ……. ……. Help Menu : On Auto-Auto : Off...
- Page 27 Service Function list(3) Function Action method Hidden Service Function (8) *.When Panel Information selected 12) Panel Information various function are included in information. ① Monitor On Time : Power On Time Service ② Panel Cycle : Panel On/off time (Power off, Mode change, Monitor 3 Hr Panel Cycle :...
-
Page 28: Main Pba
11. Main PBA 20” TTL Program Download Scart Cable I/P Board AUDIO SCALER TDA15021H TUNER TSU396AWJ FILTER Speaker Function Scart Jack... -
Page 29: Panel Part Description
12. Panel part... -
Page 30: Disassembly
13. Disassembly(1) – LE20S81BX 1. Disassembly stand on the flat desk. 2. Before disassembly set , separate other Cables and Power cord. Separate the screw 1. Separate the screw. (2 point) (11 point) - Page 31 13. Disassembly(2) – LE20S81BX Lamp wire Lamp wire LVDS CABLE LVDS CABLE Power harness Power harness Function harness Function harness Speaker L/R Speaker L/R Disconnect cable from the boards.
- Page 32 13. Disassembly(3) – LE20S81BX 3. Separate the screws 4. Lift up the RPKT...
- Page 33 14. EDID input method SAMSUNG LCD TV support the DDC control JIG. You can see the connection between PC and LCD TV. Monitor PC for JIG...
- Page 34 EDID (Dos Program) input method 1. execute “DDC21.exe” 2. Click “LOAD FILE” 3. Input the File Name -. “VE15.ddc” -. “VC17.ddc” -. “VC20.ddc” 4. Click “ WRITE EEPROM”...
- Page 35 EDID (Dos Program) input method Confirm the “OK” Sign Error Massage : Check the Signal Cable or Interface Board...
- Page 36 EDID (Windows Program) input method 1.Execute Winddc.exe Program at PC. 2. Click the Winddc icon. 3. File open. 4. Select Port#1 5. Load DDC file File Name 15 inch : VE15 17 inch : VC17 20 inch : VC20 6. Click Next (OK) button.
- Page 37 EDID (Windows Program) input method 7. Select enter button (on Key-Board) After Monitor S/N input. 8. Check “DDC OK”.
-
Page 38: Micom Program Upgrade
14. Micom ( TDA15021H) Program Upgrade Program Upgrade Jig Connect the parallel Port... - Page 39 14. Micom ( TDA15021H) Program Upgrade Connect Jig to CN905 on PCB Ass’y...
- Page 40 14. Micom ( TDA15021H) Program Upgrade Click “WISP” Icon on Computer Check “ Automatic mode on”...
- Page 41 14. Micom ( TDA15021H) Program Upgrade Click “Browser” button : Select the Code , Click “Auto Execute” button Check Erase and Write OK In “General” window and check Verify OK in “ISP status” window...
- Page 42 Thank You!