Table of Contents
Advertisement
Quick Links
Advertisement
Table of Contents

Related Manuals for Electrolux EW6F348SA


Summary of Contents for Electrolux EW6F348SA
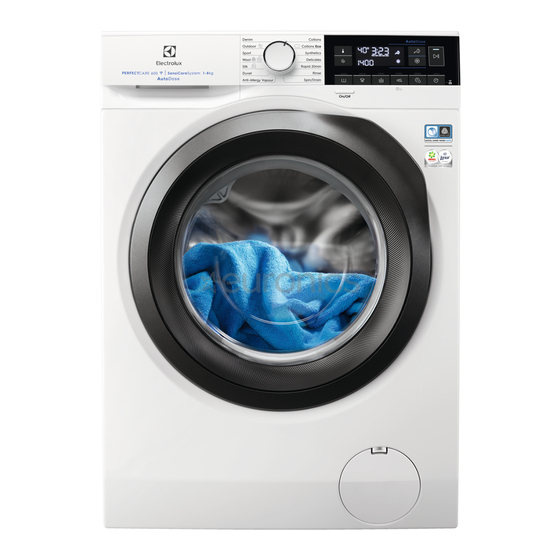
- Page 1 EW6F348SA Washing Machine User Manual...
-
Page 2: Table Of Contents
CONTENTS 1. SAFETY INFORMATION..................3 2. SAFETY INSTRUCTIONS..................5 3. INSTALLATION....................7 4. PRODUCT DESCRIPTION................10 5. CONTROL PANEL................... 11 6. BEFORE FIRST USE..................18 7. THE AUTODOSE TECHNOLOGY (AUTODOSING)........18 8. PROGRAMMES....................24 WI-FI - CONNECTIVITY SETUP..............29 10. DAILY USE..................... 31 11. -
Page 3: Safety Information
ENGLISH WE’RE THINKING OF YOU Thank you for purchasing an Electrolux appliance. You’ve chosen a product that brings with it decades of professional experience and innovation. Ingenious and stylish, it has been designed with you in mind. So whenever you use it, you can be safe in the knowledge that you’ll get great results every time. - Page 4 Children between 3 and 8 years of age and persons • with very extensive and complex disabilities shall be kept away from the appliance unless continuously supervised. Children of less than 3 years of age should be kept •...
-
Page 5: Safety Instructions
If a tumble dryer is stacked on the top of the washing • machine, make sure to use the correct stacking kit approved by ELECTROLUX (see more details in chapter "Accessories - Stacking kit"). 2. SAFETY INSTRUCTIONS 2.1 Installation than 0°C or where it is exposed to the... - Page 6 Service Centre to ensure which • You can extend the drain hose to accessories can be used. maximum 400 cm. Contact the Authorised Service Centre for the 2.2 Electrical connection other drain hose and the extension. • Make sure that there is access to the WARNING! tap after the installation.
-
Page 7: Installation
ENGLISH 3. INSTALLATION WARNING! Refer to Safety chapters. 3.1 Unpacking 1. Remove the external film. If necessary, use a cutter. 5. Remove the polystyrene protection from the bottom. Put the appliance back into an upright position. 2. Remove the cardboard top and the polystyrene packaging materials. - Page 8 CAUTION! Make sure there is no damage to hoses and there are no leaks from the couplings. Do not use an extension hose if the inlet hose is too short. Contact the service centre for a replacement inlet hose.
- Page 9 ENGLISH 2. On the edge of a sink - Fasten the guide to the water tap or to the wall. The end of the drain hose must always be ventilated , i.e. the inner diameter of the drain pipe (min. 38 mm - min.
-
Page 10: Product Description
6. Position the hose directly to a built-in drain pipe in the room wall and tighten it with a clamp. 4. PRODUCT DESCRIPTION 4.1 Special features the laundry load and the type of fabric without consuming more time, energy Your new washing machine meets all and water than necessary. -
Page 11: Control Panel
ENGLISH Drain pump filter Mains cable Feet for levelling the appliance Transit bolts Drain hose Hose support Inlet hose connection 5. CONTROL PANEL 5.1 Control panel description Denim Cottons Outdoor Cottons Eco Sport Synthetics Wool Delicates Silk Rapid 20min Rinse The options are not selectable with all washing programmes. - Page 12 By means of the Spin button you can also set: • Activate the Rinse Hold option . The water of the last rinse is not drained out to prevent the fabrics from creasing. The washing programme ends with water in the drum and the final spin phase is not per‐...
- Page 13 ENGLISH Touch this button to start, pause the appliance or interrupt a running programme. Start/Pause touch button Press this button repeatedly to activate one of the two options or both. The relevant indicator comes on in the display. • Remote start Select this option to connect appliance with App.
- Page 14 With this option you can add a few rinses according to the se‐ lected washing programme. Use this option for people with allergies to detergent residues and with sensitive skin. This option increases the programme duration. Extra Rinse touch button The corresponding indicator above the touch button illumi‐...
- Page 15 ENGLISH Use this option to add a pre-wash phase at 30 °C before the washing phase. The corresponding indicator above the touch button illumi‐ nates. This option is recommended for heavily soiled laundry, espe‐ cially if containing sand, dust, mud and other solid particles. The extra amount of detergent will be added automatically in the prewash phase.
- Page 16 5.2 Display The Temperature area: Temperature indicator . Cold water indicator. Child safety lock indicator. Wi-Fi connection indicator. Remote Start indicator. Door locked indicator. Delay start indicator. The digital indicator can show: • Programme duration: e. g. • Delay time: e. g.
- Page 17 ENGLISH Maximum load indicator (refer to "The SensiCare System load detection " paragraph). It flashes when the laundry load exceeds the maximum declared load of the selected programme. Liquid additives quantity indicator (refer to "The AutoDose Technology (Autodosing)" chapter). AutoDose detergent tank indicator. When it lights, appliance automatically doses the detergent.
-
Page 18: Before First Use
6. BEFORE FIRST USE 2. Make sure that the electrical power is During installation or before available and the water tap is open. first use you may observe 3. Make sure to fill the AutoDose tanks some water in the appliance. - Page 19 ENGLISH 7.2 Detergent dispenser with AutoDose tanks and manual compartments When using detergent and any other treatments, always follow the instructions that you find on the packaging of the detergent products. Anyway, we recommend not to exceed the maximum indicated level in each compartment ( When using liquid detergent, make sure that...
- Page 20 'AutoDose configuration mode' how to change the basic setting, but before: 1. Identify the water hardness level. Check the water hardness level in your area. The levels are generally indicated as: soft, medium and hard. If necessary, please contact your local water authority to check the water hardness in your area.
- Page 21 ENGLISH 7.5 Filling the detergent and 4. Gently pour only liquid softener in the additives on AutoDose system AutoDose fabric softener tank . Fill up to the maximum indicated level Please read "Detergents and other treatments" in "Hints and tips" chapter. We recommend that you do not exceed the maximum indicated level (...
- Page 22 When the activated tank reaches a low • If you need to use different detergent level of detergent, related indicator blinks than ones present in AutoDose tanks, slowly and continuously on the display. you could switch Detergent tank off by...
- Page 23 ENGLISH Do not exceed the maximum indicated level ( 1. Open the detergent dispenser. Manual filling the liquid detergent 1. Insert the container for liquid 2. Put the powder detergent in the detergent. compartment . When using liquid detergent, refer to "Manual filling the liquid detergent".
-
Page 24: Programmes
In such If the machine has not been case, the appliance will immediately be used for more than 4 weeks paused. with filled tanks, detergent/ softener can become If you press the Start/Pause button, viscous or dry out. - Page 25 ENGLISH Programme Reference Maxi‐ Programme description Default tem‐ spin (Type of load and soil level) perature speed load Temperature Spin range speed range [rpm ] 1400 rpm 2 kg All fabrics, except woollens and very deli‐ Rinse (1400- cate fabrics. Programme for rinsing and spin‐ 400) ning the laundry.
- Page 26 Programme Reference Maxi‐ Programme description Default tem‐ spin (Type of load and soil level) perature speed load Temperature Spin range speed range [rpm ] 1200 rpm Outdoor Do not use fabric softener and (1200- 30 °C make sure that there is no soften‐...
- Page 27 ENGLISH Programme Reference Maxi‐ Programme description Default tem‐ spin (Type of load and soil level) perature speed load Temperature Spin range speed range [rpm ] 1200 rpm 4 kg Special programme for Denim clothing Denim (1200 - with delicate washing phase to minimize 30 °C 400) colour fading and marks.
- Page 28 ■ ■ ■ ■ ■ ■ ■ ■ ■ ■ ■ ■ ■ No Spin ■ ■ ■ ■ ■ ■ ■ ■ ■ ■ Rinse Hold ■ ■ ■ ■ Silent ■ ■ ■ ■ ■ Prewash ■...
-
Page 29: Wi-Fi - Connectivity Setup
Max Power <20dBm configuration. 2. Select a programme by turning the programme dial. 9.1 Installing and configuring "My Electrolux" 3. Press and hold the and the buttons simultaneously for a few When connecting the washing machine seconds until a 'click' sounds. - Page 30 The Remote Control deactivated or resets the activates automatically when credentials. you press the Start/Pause 5. Configure the "My Electrolux" app on button to start the your smart device and follow the programme, but it is also instructions to connect the appliance possible to start a washing to your Wi-Fi network.
-
Page 31: Daily Use
ENGLISH 9.4 Over-the-air update 2. Touch the Start/Pause button to activate the Remote Start before the The App may propose an update for indicator stops blinking. downloading new features. The indicators appear on the The update is accepted via App only. programme summary screen and the If a programme is running, the App door is locked. - Page 32 Activating the appliance button is off and doesn't flash (e.g. programme dial on a wrong position). 1. Connect the mains plug to the mains The related indicator stops flashing and socket. stays on.
- Page 33 ENGLISH 2. Touch the Delay Start button The SensiCare detection is repeatedly until the display shows the carried out with complete desired delay time. washing programmes only and if the programme 3. Touch the Start/Pause button duration has not been again to start the new countdown.
- Page 34 If the SensiCare System has The indicator of the Start/Pause completed and the water button goes off. filling has already started, The door unlocks and the indicator the new programme starts goes off. without repeating the SensiCare System. The 1.
-
Page 35: Hints And Tips
ENGLISH 3. When the programme is completed Turn the programme dial to set a new cycle. and the door locked indicator If the dial is rotated to the "Reset" goes off, you can open the door. 4. Press the On/Off button for a few position , the appliance automatically seconds to deactivate the appliance. -
Page 36: Care And Cleaning
11.2 Stubborn stains • Use the recommended detergents for the type and colour of the fabric, the For some stains, water and detergent is programme temperature and the level not sufficient. of soil. We recommend that you pre-treat these 11.4 Ecological hints... - Page 37 ENGLISH 12.5 Cleaning the drum Regular detergents already contain water softening agents, but we recommend to Regularly examine the drum to prevent run a cycle with an empty drum and a unwanted deposits. descaling product occasionally. Rust deposits in the drum may occur due Always follow the to rusting foreign body in the washing or instructions that you find on...
- Page 38 Cleaning procedure is also suggested when brand or type of detergent, fabric softener or additives are changed inside the tanks. 1. Open the detergent dispenser. Press the catch as indicated in the picture and pull the detergent dispenser out.
- Page 39 ENGLISH CAUTION! Do not use sharp or metal brushes and sponges. 6. Turn the dispenser up side down and open the bottom cover as indicated in the picture. WARNING! If some residues remain on the back area of tanks, soak detergent drawer in a warm water.
- Page 40 Place the handle if was To restore the functionality, disassembled. refill tanks with detergent b. Place the bottom cover and and softener. If you place a press till "click" sound. wrong additives in the tanks, c. Place the top cover on the tanks you can easily recover it by compartment and press till "click"...
- Page 41 ENGLISH Proceed as follows to clean the pump: 180˚ WARNING! Make sure that the impeller of the pump can rotate. If it does not rotate, contact the Authorised Service Centre. Make sure also that you tighten the filter correctly to prevent leakages.
-
Page 42: Troubleshooting
12.8 Cleaning the inlet hose and the valve filter 45° 20° 12.9 Emergency drain 3. Put the two ends of the inlet hose in a container and let the water flow out If the appliance cannot drain the water, of the hose. - Page 43 ENGLISH First try to find a solution to the problem (refer to the table). If the problem persists, contact the Authorised Service Centre. WARNING! Deactivate the appliance before carrying out any check. In case of major problems, the acoustic signals operate, the display shows an alarm code and the Start/Pause button may flash continuously: •...
- Page 44 13.2 Possible failures Problem Possible solution • Make sure that the mains plug is connected to the mains socket. • Make sure that the appliance door is closed. • Make sure that there is no damaged fuse in the fuse box.
- Page 45 ENGLISH Problem Possible solution • Make sure that the couplings of the water hoses are tight and there is not water leakages. There is water on the • Make sure that the water inlet hose and the drain hose floor. have no damages.
-
Page 46: Consumption Values
Problem Possible solution The programme dura‐ • The SensiCare System is able to adjust the programme tion increases or de‐ duration according to the type and the laundry load size. creases during pro‐ Refer to "The SensiCare System load detection" in "Dai‐... -
Page 47: Technical Data
ENGLISH Programmes Load Energy Water Approxi‐ Remain‐ (kg) con‐ con‐ mate pro‐ ing mois‐ sumption sumption gramme ture (%) (kWh) (litre) duration (minutes) Cottons 1,89 60°C Cottons 1,20 40°C Synthetics 0,78 40°C Delicates 0,47 40°C Wool 0,26 30°C Standard cotton programmes 0,77 Standard 60°C cotton 0,49... -
Page 48: Accessories
1) Connect the water inlet hose to a water tap with a 3/4'' thread. 16. ACCESSORIES 16.1 Available in www.electrolux.com/shop or from authorised dealer Only appropriate accessories approved by ELECTROLUX ensure the safety standards of the appliance. If unapproved parts are used, any claims will be invalidated. 16.2 Fixing plate kit... -
Page 49: Quick Guide
ENGLISH 16.4 Pedestal with the drawer To raise your appliance and make loading and unloading laundry easier. The drawer can be used for laundry storage e.g.: towels, cleaning products and more. Read carefully the instructions supplied with the accessory. 17. QUICK GUIDE 17.1 Daily use Connect the mains plug to the mains When using AutoDose tanks, the... - Page 50 4. To start the programme, touch the When using a liquid Start/Pause button. detergent in manual 5. The appliance starts. compartment, insert the At the end of the programme, remove the container for liquid laundry. detergent. Push the On/Off button to switch the 1.
-
Page 51: Product Information Sheet In Reference To E.u. Regulation 1369/2017
18. PRODUCT INFORMATION SHEET IN REFERENCE TO E.U. REGULATION 1369/2017 Product Information Sheet Trade Mark ELECTROLUX Model EW6F348SA, PNC914916308 Rated capacity in kg Energy efficiency class A+++ Energy consumption in kWh per year, based on 220 standard washing cycles for cotton programmes at 60 °C and 40 °C at full and partial load, and the con‐... - Page 52 Water consumption in litres per year, based on 220 standard washing cycles for cotton programmes at 60 10000 °C and 40 °C at full and partial load. Actual water con‐ sumption will depend on how the appliance is used.
- Page 53 ENGLISH...
- Page 54 www.electrolux.com...
- Page 55 ENGLISH...
- Page 56 2.0, LGPL-2.1, zLib, MIT, ISC, Apache 2.0 and others. It is possible to display the complete copy of the licenses in the Electrolux App that can be downloaded from the corresponding App store from the License menu section. It is possible to download the source code of the open source software used in the product by searching for Wi-Fi...