Pioneer DVD-V7400 Operating Instructions Manual
Pioneer industrial dvd operating instructions: model dvd-v7400
Hide thumbs
Also See for DVD-V7400:
- Command protocol manual (113 pages) ,
- Service manual (81 pages) ,
- Software manual (39 pages)
Table of Contents
Advertisement
Advertisement
Table of Contents

Related Manuals for Pioneer DVD-V7400


Summary of Contents for Pioneer DVD-V7400
- Page 1 Industrial DVD Player DVD-V7400 Operating Instructions...
-
Page 2: Important Safety Instructions
IMPORTANT The lightning flash with arrowhead symbol, within an equilateral triangle, is intended to alert the user to the presence of uninsulated "dangerous voltage" within the product's enclosure that may be of suffi- cient magnitude to constitute a risk of electric shock to persons. -
Page 3: For Canadian Model
YOUR SECURITY. Before using Thank you for buying this Pioneer product. Please read through these operating instructions before operating your DVD player. After you have finished reading the instructions, put them away in a safe place for future reference. Check Accessories Audio Cord ... - Page 4 Component Features and Functions 1. High-Reliability, high-Endurance Player This DVD player features a high-performance brushless spindle motor. The mechanical components are also sealed against heat and dust, giving this unit improved reliability. 2. NTSC/PAL Dual Playback DVD discs in either the NTSC format or the PAL format are playable (See page 79) 3.
-
Page 5: Table Of Contents
Contents Remote Control Operations ... 10 Playing DVDs, CDs, and Video CDs..10 Chapter (Track) Skip Forward/Skip Back ... 12 Stopping the Playback and Switching Power OFF... 12 Searching For a Desired Scene (SEARCH) ... 13 Still Frame/Frame Advance/Frame Reverse ... 14 Slow Motion Play ... -
Page 6: Operating Environment
÷ When multiple players are connected in parallel, a power surge may pass through the units when external power is first turned ON. Please consult your Pioneer dealer regarding proper power switch ratings. ÷ Do not install the player in an enclosed rack. Internal temperature may build up resulting in internal damage. -
Page 7: Disc Types Compatible With This Unit
Disc types compatible with this unit ÷ The marks shown below are found on disc labels or on disc jackets. ÷ The DVD-V7400 plays discs bearing the marks below without needing an adaptor. ÷ This player can play discs recorded in either PAL or NTSC format. -
Page 8: Names And Functions
TOP MENU button SETUP button Number buttons (0-9, >10) * When using a wired remote control (sold separately: CU-V155), some key labels need updates. Refer to the Pioneer Web page (listed on back cover) for details. STD-BY/ON STOP PLAY REPEAT... -
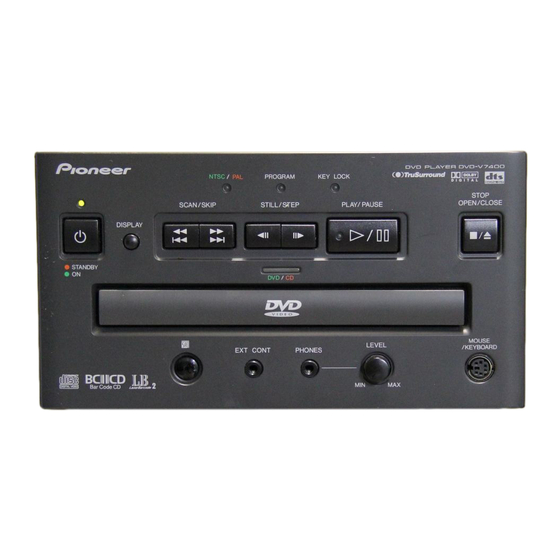
Page 9: Front Panel
EXIT SYNC IN COMPONENT VIDEO OUT Video Output Connector (BNC) Component Video Output Lights when repeat play, program play or command stack function is operating DVD PLAYER DVD-V7300D DOLBY D I G I T A L STOP OPEN/CLOSE STOP OPEN/CLOSE button §... -
Page 10: Remote Control Operations
Basic Operations Remote Control Operations Wireless Remote Operation When operating the remote control, point it at the sensor located on the player’s front panel. The remote control can be used up to 23 feet (7m) from the player, within a 30° angle to each side of the sensor. - Page 11 DVD. Video CD When the Menu Screen is Displayed DVDs and Video CDs usually feature selection menus. This player supports menus for choosing available titles and music from the disc. 7During DVD Playback Press to scroll to an ENTER item and press Example) TITLE MENU JAZZ...
-
Page 12: Chapter (Track) Skip Forward/Skip Back
Chapter (Track) Skip Forward/Skip Back DVD. Video CD Skipping Forward to the Next Chapter (Track) NEXT Press ÷ Press to skip forward to the next chapter or track ÷ ¡ on the front panel has the same function ¢ DVD. Video CD Skipping Back to the Previous Chapter (Track) -
Page 13: Searching For A Desired Scene (Search)
Searching For a Desired Scene (SEARCH) DVD. Direct Search with Title Numbers During Playback TITLE/CHP FRM/TIME Press during playback Title : Selecting Title numbers using the number buttons Title : ÷ When selecting Title 3, simply press ÷ When selecting Title number 10, press SEARCH Press ÷... -
Page 14: Still Frame/Frame Advance/Frame Reverse
Searching for a Desired Scene (SEARCH) DVD. Video CD Searching by Time/Frame Number (Time Search/Frame Search) FRM/TIME Press to select the frame input mode or the time input mode ÷ With Video CD, only time search is available → Frame : 0/219113 Select time/frame numbers with the number buttons... -
Page 15: Slow Motion Play
Slow Motion Play DVD. Video CD Forward Slow Playback STEP Press and hold during playback To change the speed of slow playback During slow playback, the speed can be adjusted to four separate settings by pressing Slow STEP For DVD STEP1 ( ) –... -
Page 16: Program Play
Program Play The contents of one disc can be arranged in order. Programming is possible up to a maximum of 24 steps. DVD. MEMORY Press three times PROGRAM is displayed on the television screen ENTER Press The Program screen is displayed Program Chapter Program Title Current: Title... - Page 17 DVD. Video CD To Stop Program Play CLEAR Press during play Normal playback starts from the Chapter/Track playing currently. Notes ÷ Openning the disc table completely erases the program. To save a program recorded with this player and a DVD disc, refer to age 18.
-
Page 18: Viewing Disc Information
Program Play DVD. Recording the Program (Program Memory) This player can record DVD programs up to a maximum of 24 discs, even if the disc is removed. When a program is recorded, program playback starts when next that same disc is played. When the recorded discs exceeds 24, the programs are auto- matically erased starting with the oldest discs. - Page 19 Viewing Disc Information During Playback DISPLAY Press repeatedly during play When pressed, the following kind of disc information is displayed in the upper part of the screen. DVD. Pressing once reveals the present frame information. Present Title number - Present Chapter number Elapsed time of the Title 1–1 1.19 Play...
-
Page 20: Switching The Angle Of The Image (Multi-Angle)
Switching the Angle of the Image (Multi-Angle) DVD. DVDs featuring pictures shot from different angles provide choices of various viewing prospectives. These discs have a mark printed on the disc jacket. If the mark is displayed during ANGLE playback, press ANGLE Press again to select the desired... -
Page 21: Switching The Audio During Playback
Switching the Audio During Playback DVD. While a DVD with multiple audio streams is playing, the audio can be changed AUDIO Press while the DVD plays The currently selected audio is displayed. AUDIO Press again AUDIO The audio changes each time Dolby Digital Audio :1 Spanish Note... -
Page 22: Index Of The Graphical User Interface (Gui)
Index of the Graphical User Interface (GUI) On this player, various settings can be selected while watching menu screens. Here we will explain how to access menu screens. Because menu screen access differs according to the type of disc being used, or the playback mode (stop mode etc.), refer to the following menu map when accessing. -
Page 23: Operating The Initial Setup Menu
Operating the Initial Setup Menu DVD. Video CD CD.. The basic operatin method for the initial Setup menu and the locations of the appropriate buttons are explained below. 7 Displaying the initial Setup menu STD-BY/ON Press When the power has been turned on, proceed to SETUP Press The initial setup menu is displayed. - Page 24 Displaying any of the following data or menus during playback in the Letter Box or Pan & Scan modes, force the screen to change to the wide-screen mode. ÷ Displaying the Setup menu ÷ Displaying a command stack ÷ Displaying video text DVD-V7400 Settings 4:3 (Letter Box) 4:3 (Pan & Scan) 16:9 (Wide) 4:3 (Letter Box) 4:3 (Pan &...
-
Page 25: Changing Visual Setting
Changing Visual Settings DVD. Switching Still Pictures It is possible to eliminate any blurriness from the picture when a DVD is in Pause mode. SETUP Press The initial setup menu is displayed. Select [Video] Select [Still Picture] Press the arrow button (right direction) Select the prefered item ENTER... - Page 26 Changing Visual Settings DVD. Selecting the Position of the On Screen Display (OSD) The OSD position for the startup screen may be adjusted to fit properly on the display device. Set the screen ratio of a DVD disc to 4:3 (refer to the disc jacket for additional information).
-
Page 27: Setting The Language
Setting the Language Some DVD disks have multiple subtitles and audio tracks. The user is able to choose the appropriate combination. The settings related to the various languages and subtitles (in Language) under the initial Setup menu are reviewed below. DVD. - Page 28 Setting the Language 7 When (Other) is selected for Subtitle language/ Audio language/ DVD language setting Refer to the language code table on page 38. Select [Other] ENTER Press The language setting screen is displayed. Example: Audio Language is displayed Audio1 Video Language...
-
Page 29: Setting The Dvd Menu Language
DVD. Setting the DVD Menu Language Some DVDs have a menu. Select the language from this menu. This setting cannot be set during playback. SETUP Press The initial setup menu is displayed. Select [Language] Select [DVD Language] Press the arrow button (right direction) Select the preferred language ENTER... - Page 30 Setting the Language DVD. Setting the Language of the Subtitles with Enforced Display Some DVDs enforce the display of subtitles even when the Subtitle option is set to OFF. However, the language of the subtitles can still be selected by the normal method. This setting is locked during playback.
-
Page 31: Setting Viewing And Listening Restrictions (Parental Lock)
Setting Viewing and Listening Restrictions (Parental Lock) Some DVDs that contain violent scenes incorporate viewing restriction levels (1-8). This information is listed on the disc jacket. If the level of this player has been set to a level lower than the level of a disc, then the disc fails to play. For example, if the level of the player has been set to 6, a override code number has to be input before discs of levels 7 and 8 can be viewed. - Page 32 Setting Viewing and Listening Restrictions (Parental Lock) DVD. When a DVD with a Set Parental Lock is Loaded Loading a DVD with an active Parental Lock brings up the password input screen if the disc is a higher level then the player.
-
Page 33: Making The Ordinary Settings
Making Standard Settings DVD. Video CD Setting the Screen Saver The screen saver is a function to prevent the burning in (the afterglow phenomenon) of an image when the same image has been displayed for a long time such as during a pause. SETUP Press The initial setup menu is displayed. -
Page 34: Setting The Digital Output
Setting the Digital Output The type of digital signal corresponding to the amplifier can be selected through the player. Improper settings may cause noise or feedback. Review the information below and refer to the Operating Manual for the amplifier. DVD. Dolby Digital Output If the amplifier does not support Dolby Digital*, select the [Dolby Digital 3 PCM] setting. - Page 35 DVD. 96 kHz PCM Output When the connected amplifier supports 96 kHz, set to (96 kHz). This setting is locked during playback. SETUP Press The initial setup menu is displayed. Select [Audio 1] Select [96kHz PCM Out] Press the arrow button (right direction) Select the preferred output ENTER...
-
Page 36: Setting To Optimize The Audio Quality
Setting the Digital Output DVD. Video CD Setting the Digital Output The digital audio output terminal can be set so that the player ignores an audio signal. SETUP Press The initial setup menu is displayed. Select [Audio 1] Select [Digital Out] Press the arrow button (right direction) Select the preferred output... - Page 37 TruSurround and Virtual Dolby Digital This player, by means of the TruSurround* technology, processes surround encoded stereo audio and multi- channel audio as well as providing Virtual Surround through the two front speakers. The Virtual Dolby Digital functions automatically for a surround sound with greater sense of presence than the stereo speaker system.
-
Page 38: Returning To The Default Settings
Returning to the Factory Default Settings from Time of Shipment DVD. Video CD All the settings can be returned to the factory default. Returning the settings to the default values, erases all data stored in the memory simultaneously (page 18). Record any vital information before issuing this command. -
Page 39: Advanced Feature Operations
Advanced Feature Operations For fundimental operations, refer to the beginning of this manual (Basic Operation). This portion details the advanced features on the DVD-V7400 player. ÷ Using the ADV.SETUP Menu In addition to the SETUP menu, this player has an ADV.SETUP menu supporting special functions such as the weekly timer and Power-ON start. -
Page 40: Video Blackboard Function
÷ Video Blackboard Function Use the mouse or keyboard to draw pictures and lines or type characters (alphabet, numbers, symbols) during video playback or to be shown alone. Free-hand lines can be drawn on the picture during playback, and pre-drawn graphics or characters can be superimposed over the image and displayed at a specific point. -
Page 41: Adv. Setup Menu Settings
EXTERNAL SYNC AV SYNC COMPENSATE Above picture indicates the initial settings. In order to set up the unique functions on the DVD-V7400, there are settings for 16 parameters available through the remote control. 1 WEEKLY TIMER A timer for turning the power ON and OFF can be set for each each day of the week;... -
Page 42: Player Control Panel
1-6, STACK GROUP 1-6, TOP MENU, and MENU For more information on External Switch Control, refer Note: to the DVD-V7400 SCSI Command Protocol Manual - Jama control. - SYNC OUT (DURING SQ) This function controls whether a video synchronization sigmal is output to a black screen or to a blue background when the player is not withholding any video output. -
Page 43: Player Control Using A Mouse
Player Control Using a Mouse Connect a PS/2 mouse before turning the power ON. DVD. Video CD Button Selection Use the mouse to select DVD Menu buttons and buttons displayed on the screen. When the cursor is placed on a button, it changes from mark. -
Page 44: Weekly Timer Function Operation/Display
Weekly Timer Function Operation/Display ADV.SETUP page 1/2 WEEKLY TIMER POWER ON START TITLE PLAY MODE Single REPEAT MODE BAUD RATE 4800bps TRAY LOCK BLACKBOARD LOCK STACK MODE OSD REV STEP/REV PLAY VOBU ADV.SETUP page 1/2 WEEKLY TIMER POWER ON START TITLE PLAY MODE Single REPEAT MODE... -
Page 45: Setting The Weekly Timer
00–04–29 08:15.00 (1/3) RETURN ENTER TIMER ON/OFF 1.TOP MENU 2.TITLE 3.BARCODE/COMMAND STACK CLEAR ENTER TIMER ON/OFF 10 30 1.TOP MENU 2.TITLE 3.BARCODE/COMMAND STACK CLEAR ENTER TIMER ON/OFF 10 30 17 45 1.TOP MENU 2.TITLE 3.BARCODE/COMMAND STACK CLEAR ENTER ÷ Select ENTER on the screen to create the setting and exit the screen. -
Page 46: Clearing The Set Time
Weekly Timer Function Operation/Display TIMER ON/OFF 10 30 1.TOP MENU 2.TITLE 3.BARCODE/COMMAND STACK CLEAR TIMER ON/OFF 10 30 1.TOP MENU 2.TITLE 3.BARCODE/COMMAND STACK CLEAR TIMER ON/OFF 10 30 1.TOP MENU 2.TITLE 3.BARCODE/COMMAND STACK CLEAR or reference Memorized data is not erased even power cord is unplugged TIMER ON/OFF 10 30... -
Page 47: Timer Setting
TIMER ON/OFF 10 30 1.TOP MENU 2.TITLE 3.BARCODE/COMMAND STACK 00–04–29 ÷ Select ENTER on the screen to enter the setting and exit the screen. Select RETURN to cancel the setting and return to the previous screen. ADV.SETUP WEEKLY TIMER POWER ON START TITLE PLAY MODE REPEAT MODE BAUD RATE... - Page 48 Weekly Timer Function Operation/Display TIMER ON/OFF 1.TOP MENU 2.TITLE 3.BARCODE/COMMAND STACK Blink CLEAR « Blink TIMER ON/OFF 1.TOP MENU 2.TITLE 3.BARCODE/COMMAND STACK CLEAR « Display changes TIMER ON/OFF 1.TOP MENU 2.TITLE 3.BARCODE/COMMAND STACK CLEAR « TIMER ON/OFF 1.TOP MENU 2.TITLE 3.BARCODE/COMMAND STACK Blink CLEAR...
- Page 49 Example 1: 00–04–29 08:15.00 (1/3) 07 30 12 00 T01 : C01 13 00 17 30 T02 : C01 RETURN List display Example 2: 00–04–29 08:15.00 (1/3) 07 30 17 30 T01 : C01 RETURN List display Example 3: 00–04–29 08:15.00 (1/3) 07 30 07 30...
- Page 50 Weekly Timer Function Operation/Display Example 5: When the following settings are selected for the same day Result Example 6: When the following settings are selected for the same day Result Example 7: When the following settings are selected for the same day Result Example 8: When the following settings are selected for the same day.
-
Page 51: Power On Start Function
1. Barcode Commands designed for CDs are acceptable. However, Barcode Command Stacks are unavailable for CDs and Video CDs. DVD Barcode Commands and Stack Groups function properly on the DVD-V7400. buttons ENTER... - Page 52 Power On Start Function POWER ON START 1.TOP MENU 2.TITLE 3.BARCODE/COMMAND STACK GROUP ADV.SETUP WEEKLY TIMER POWER ON START TITLE PLAY MODE REPEAT MODE BAUD RATE TRAY LOCK BLACKBOARD LOCK STACK MODE OSD REV STEP/REV PLAY Setting a Barcode/Command Stack Group ÷...
-
Page 53: Barcode/Command Stack Function
In the case of regular DVD discs \ Page 54-58 Repeat step 2 for each barcode to play in that specific order WStore the sequence in the DVD-V7400's memory \ Page 60 Execution \ Page 69, 70 Select the group number that was noted in step 1 NOTE: Commands stored in the player’s memory are grouped... -
Page 54: Barcode/Command Stack Setting
Barcode/Command Stack Setting Barcode/Command screen BARCODE/COMMAND BC/COMMAND STACK GROUP 001/001 001 PLAY 002 03:123000–129000 003 05:03–07 ALL CLEAR? YES NO BC/COMMAND STACK GROUP 001: 001 TITLE SEARCH FRAME MARK FRAME SUBTITLE AUDIO ANGLE SAVE DEL EXIT LaserBarcode and DVD barcodes. The stored commands can be recalled for either successive or step-by-step execution. - Page 55 BC/COMMAND STACK GROUP 001: 001 PLAY BC/COMMAND STACK GROUP 004: 006 WAIT 000sec. DVD. Direct Setting Uusing a Barcode Reader Read a barcode with a barcode reader. Send it to the player. Example 1: Read “PLAY” then send it Example 2: Read “Play Title 8 Chapters 5 to 12 with Subtitle 3, Audio 2 and Angle 1”...
- Page 56 Barcode/Command Stack Setting Display shown when the example on the right is input Note A Barcode/Command Stack entry must be 25 frames or greater in length for the command to function. The player refuses commands which set fewer frames. Display shown when the example on the right is input For Reference To play to the end of chapter 7 as shown in Example 4, enter...
- Page 57 BC/COMMAND STACK GROUP 001: 001 TITLE Item display SEARCH FRAME 000000 MARK FRAME - - - - - - SUBTITLE AUDIO ANGLE SAVE DEL EXIT DISPLAY Press to display the following screen BC/COMMAND STACK GROUP 001/ 001 001 SUBTITLE 01 AUDIO 2 ANGLE 3 002 03:10000–15000 List display SAVE DEL...
-
Page 58: To Change A Value During Input
Barcode/Command Stack Setting Example 7: a command to jump to another group 1. When the TITLE number BC/COMMAND STACK GROUP 004: 003 GO TO GROUP - 000 2. The display changes 3. Input the group number To change the group number on a previously input “GO RECALL TO GROUP”, press during Detailed or List display, and... - Page 59 Setting of LaserBarcode-Compatible Discs BC/COMMAND STACK GROUP 001: 001 TITLE SEARCH FRAME 01500 MARK FRAME 01800 VIDEO AUDIO Example screen NOTE: TITLE/CHP FRM/TIME Pressing after step 2 selects Chapter input mode. See page 56 for SEARCH CHAPTER and MARK CHAPTER input methods. NOTE: When “Maintaining Previous Mode”...
-
Page 60: Command Stack
Barcode/Command Stack Setting DVD. Saving A Barcode/ Command Stack After inputting the example, the Barcode Stack/Command Stack input screen appears. When this screen appears, press ENTER (pointer) to SAVE and press ÷ The display disappears and the information is saved NOTES: ÷... - Page 61 DVD. Correcting a Previously Input Barcode Stack/ Command Stack Example: To change the Audio setting of step 003 from Audio 2 to Audio 1 MEMORY Press ÷ “BARCODE/COMMAND” is displayed ENTER Press ÷ Barcode/Command Stack screen displays Select NO with ÷...
-
Page 62: Grouping Some Barcode/Command Stacks
Grouping Some Barcode/Command Stacks DVD. Methods of Grouping BARCODE/COMMAND Grouping Some Barcode/Command Stacks A group can be formed with several Barcode/Command Stacks, more than one group can be formed and stored. To execute a group of commands, select a group from the stored groups and execute them either consecutively or step-by-step. -
Page 63: Deleting A Group
BC/COMMAND STACK GROUP 001/002 001 PLAY 002 03:123000–129000 003 05:03–07 03 2 1 SAVE DEL EXIT PREV NEXT BC/COMMAND STACK GROUP 002/ 002 001 SUBTITLE 01 AUDIO 2 ANGLE 3 002 03:10000–15000 SAVE DEL EXIT BARCODE/COMMAND BC/COMMAND STACK GROUP 001/001 001 PLAY 002 03:123000–129000 003 05:03–07... - Page 64 Grouping Some Barcode/Command Stacks BC/COMMAND STACK GROUP 001/001 001 PLAY 002 03:123000–129000 003 05:03–07 SAVE DEL BC/COMMAND STACK GROUP 001/ 001 001 PLAY 002 03:123000–129000 003 05:03–07 SAVE DEL BC/COMMAND STACK GROUP 001/ 001 001 PLAY 002 03:123000–129000 003 05:03–07 SAVE DEL BC/COMMAND STACK GROUP 001/ 001 SAVE DEL...
-
Page 65: Dividing A Previously Input Group
BARCODE/COMMAND BC/COMMAND STACK GROUP 001/001 001 PLAY 002 03:123000–129000 003 05:03–07 03 2 1 ALL CLEAR? YES NO BC/COMMAND STACK GROUP 001: 004 TITLE SEARCH FRAME 000000 MARK FRAME - - - - - - SUBTITLE AUDIO ANGLE SAVE DEL EXIT BC/COMMAND STACK GROUP 001/001 001 PLAY... - Page 66 Grouping some Barcode/Command Stacks Move the ‰ (pointer) to INS by pressing BC/COMMAND STACK GROUP 001/ 001 001 PLAY 002 03:123000–129000 003 05:03–07 03 2 1 SAVE DEL EXIT Press BC/COMMAND STACK GROUP 001/ 001 001 PLAY ÷ Inserts a step before the selected step and moves all 003 03:123000–129000 other steps down by one 004 05:03–07...
- Page 67 BARCODE/COMMAND BC/COMMAND STACK GROUP 004/004 001 PLAY 002 03:123000–129000 003 05:03–07 ALL CLEAR? YES NO BC/COMMAND STACK GROUP 004: 004 TITLE SEARCH FRAME MARK FRAME SUBTITLE AUDIO ANGLE SAVE DEL BC/COMMAND STACK GROUP 004/004 001 PLAY 002 03:123000–129000 003 05:03–07 SAVE DEL BC/COMMAND STACK GROUP 003/ 004 001 02:000150–002050...
- Page 68 Grouping some Barcode/Command Stacks Move the ‰ (pointer) to DEL by pressing BC/COMMAND STACK GROUP 003/ 004 001 02:000150–002050 the right button 002 06:22–23 SAVE DEL EXIT Press BC/COMMAND STACK GROUP 003/ 003 001 02:000150–002050 ÷ Deletes the group delimiter and joins the current group 002 06:22–23 003 PLAY 004 03:123000–129000...
-
Page 69: Using A Barcode/Command Stacks
Using Barcode/Command Stacks Switching the command group BC/COMMAND STACK GROUP 001: 001 Recall screen Switching the command step BC/COMMAND STACK GROUP 001: 001 Recall screen DVD. Recalling/Executing Bbarcode Commands From Memory To execute a barcode command group: (verify that the disc is loaded) RECALL Press PREV... - Page 70 Using Barcode/Command Stacks BC/COMMAND STACK GROUP 001/ 003 001 PLAY 002 03:123000–129000 003 05:03–07 DVD. 03 2 1 Some titles may not be available for recall and execution. Example: The Search command fails to execute unless a Title contains the Chapter, Time and similar information on the screen screen or with a disc that permits seraches Recalling/Executing a Previously Input Barcode/Command Stack...
-
Page 71: Character Input/Output Drawing (Dvd Video Blackboard)
Character Input/Output Drawing (DVD Video Blackboard) Blackboard screen P IONEER_ Input “PIONEER” P IONEER_ NOTE The system cannot enter this mode while displaying the Player Control Panel Use Video Blackboard to draw characters of pictures on the screen. The images may be displayed alone or superimposed over the video. -
Page 72: Using The Drawing Tools
Character Input/Output Drawing (DVD Video Blackboard) Drawing tool DVD. Using the Drawing Tools ÷ Use the left mouse button to select an icon (LINE): Draws a straight line (BOX): Tool can be switched by clicking COLR SAVE UNDO EXIT between outline of a square/rectangle, filled/solid square/rectangle or a box (hollow) with the outside filled : Fills the inside of a box... -
Page 73: Details On The Blackboard
COLR GROUP 001 DISPLAY AREA AUTO DISP GROUP 001 001 R–3, RED 02-015.29~015.36 A AUTO DISP GROUP 001 001 R–3, RED 02-015.29~015.36 A AUTO DISP GROUP 001 001 R–1, YLW 02-002.41~032.06 002 B–3, GRN 01-027.30~035.08 DVD. Saving Characters or Pictures Click on the screen SAVE... -
Page 74: To Change The Display Mode
Character Input/Output Drawing (DVD Video Blackboard) Notes ÷ It takes time to draw a graphical image. If the image needs to hide part of the video, the image-drawing IN point must be set in advance of the desired scene. Creation time varies according to the type of drawn graphic and to the number of drawings. -
Page 75: Grouping Video Blackboards
Grouping Video Blackboards Step Group GROUP 001 001 R–1, 02-002.41~032.06 002 B–3 01-027.30~035.08 Select the group BLACKBOARD GROUP 001: 000 Select the step BLACKBOARD GROUP 001: 000 NOTE This mode is unavailable while the player displays the Player Control Panel. DVD. - Page 76 Grouping Video Blackboards Select the step Example Time Flow (Start point) ( End point) (Start point) (Start point) (End point) (Start point) (End point) DVD. Select the group GROUP 001 001 R–1, 02-002. 41~032.06 002 B–3, 01-027. 30~035.08 NOTE: Press However, characters and pictures set using the button, AUTO DISP Display of Recalled Characters and Pictures...
-
Page 77: Video Text Retrieval
÷ Input the external synchronizing signal before playback of a DVD disc. Synchronization fails if input happens after playback begins. ÷ In cases where two or more DVD-V7400 units are externally syncronized and their videos are started simultaneously, (for frame-synchronized playback) turn OFF the AV SYNC COMPENSATE on the ADV. SETUP menu. The external sync function only works with DVD play;... -
Page 78: How To Display Total Hours Played And Power On Time
Hours Played and Power ON Time DVD. Video CD The DVD-V7400 displays the total play time and power ON time to provide working condition and maintenance timing information. Refer to the directions below to display the play time and power ON time. - Page 79 100mA. ÷ Some commercially available PS/2 devices and Y cables may not be compatible with this player. For details, For details, please consult with a Pioneer service or support center. “Y” cable...
- Page 80 Connection Example 1 ÷ Television (monitor TV) ÷ Control Computer ÷ Sync Generator ÷ Refer to the TV (monitor TV) manual for additional connection information. Computer RS-232C Set switch to ON when using one player but not connecting to other devices or components.
- Page 81 Connect to the Component Video Input ÷ The description of the component video input connectors may differ depending upon the TV or monitor. ÷ If the color of the picture is dim or off, adjust the color setting on the TV first. Refer to the TV's owner manual for details Audio input BNC cables (sold separately)
- Page 82 Connection Example 2 AV receiver with digital input for Dolby Digital. * For use with Pioneer’s VSX-27TX or VSX-29TX AV receiver ÷ Connect this unit’s digital output PCM/ ÷ Select the coaxial digital output if required for the amplifier’s input jack.
- Page 83 Connection Example 3 AV Amplifier ÷ Connect the player’s audio output jacks to an amplifier’s CD, LD, AUX or other audio input jacks except to the PHONO jacks. ÷ Connect the player’s video output jack to the amplifier’s video input jack. INTERFACE CONNECTOR AUDIO IN AV amplifier...
-
Page 84: Using A Laser Barcode Scanner (Sold Separately)
÷ When the player is operated via barcodes, some on-screen displays Play and Stop are hidd (refer to the DVD-V7400 Command Protocol manual for details) ÷ Barcode commands issued for LD and DVD are ignored when a CD or CD Video disc is loaded. -
Page 85: Troubleshooting
Troubleshooting Please refer to the DVD-V7400 manuals for error code information before seeking support. failures can be traced to many factors. Check the TV, monitor, AV ampliefer, and speakers for compliance. If the situation continues, contact your service personnel, the store where the player was purchased, or the nearest PIONEER Authorized Service Center. -
Page 86: Terms
DVD disc, playback fails. The regional restriction code can be found on the rear panel of the DVD player. Linear PCM This refers to a DVD audio recording format which matches the format for CD audio. -
Page 87: Specifications
Specifications General System ... DVD system , Compact Disc digital video and Compact Disc digital audio system Power requirements ... AC 120 V, 50/60 Hz Power consumption ... 16 W Power consumption in standby mode ... 0.5W Weight ... 4.7 kg (10.6 lb) Dimensions ... - Page 88 Should this product require service in the U.S.A. and you wish to locate the nearest Pioneer Authorized Independent Service Company, or if you wish to purchase replacement parts, operating instructions, service manuals, or accessories, please call the number shown below.