Table of Contents
Advertisement
Quick Links
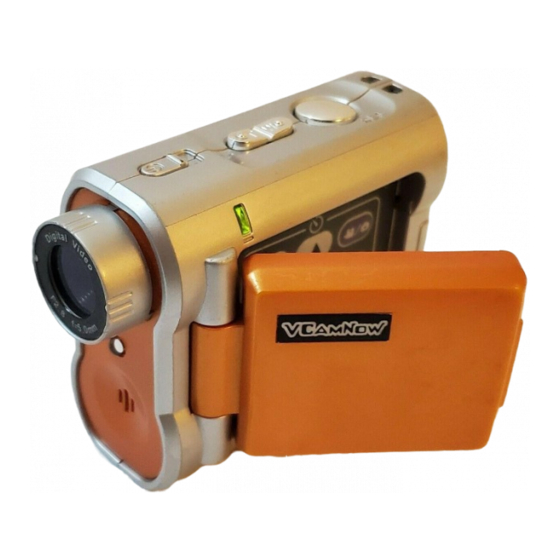
Digital Video
Thank you for purchasing the VCAMNOW Digital Video Camera.
Be sure to read and follow all instructions carefully before using this
product.
Make your own movies anytime, anywhere! Film your friends and
make them the stars of the show, or take pictures and share them with
your friends and family.
CONTENTS:
• VCAMNOW Digital Video
Camera
• Software Installation CD
• USB Cable
• AV Cable
• 2 Blank PVDs [Personal Video
Discs]
• PVD Adaptor
Requires 2 x 1.5V "AA" or R6 size batteries (not included).
Alkaline batteries recommended.
Camera
USER GUIDE
™
76348
Advertisement
Table of Contents

Summary of Contents for Tiger Electronics VCamNow
- Page 1 ™ Digital Video Camera USER GUIDE Thank you for purchasing the VCAMNOW Digital Video Camera. Be sure to read and follow all instructions carefully before using this product. Make your own movies anytime, anywhere! Film your friends and make them the stars of the show, or take pictures and share them with your friends and family.
- Page 2 TO INSERT BATTERIES Open cover. Insert 2 x 1.5V “AA” or R6 size batteries (not included). Alkaline batteries recommended. Close cover. CAUTION: TO AVOID BATTERY LEAKAGE 1. Be sure to insert the batteries correctly and always follow the toy and battery manufacturers’ instructions;...
- Page 3 CAUTION: 1. Always follow the instructions carefully. Use only batteries specified and be sure to insert item correctly by matching the + and – polarity markings. 2. Do not mix old batteries and new batteries or standard (carbon-zinc) with alkaline batteries. 3.
-
Page 4: Table Of Contents
TABLE OF CONTENTS GETTING STARTED Getting to Know Your Digital Video Camera......1 Control Panel ................. 2 Power On/Off ................. 3 Low Battery Power Indicator ..........3 MOVIES How to Record a Movie ............4 How to Playback a Movie .............5 PICTURES How to Take a Picture ............ - Page 5 MAIN FUNCTIONS Movie Screen ................13 Picture Screen...............13 Self-Timer................13 LCD/Viewfinder On/Off ............15 Volume ..................15 Delete One ................16 Delete All................17 MEMORY Memory Full................18 Memory Card Installation (Memory Card not included)..........18 Memory Storage..............19 Memory Card Lock...............19 ADVANCED FUNCTIONS Setup Menu............... …20 Beep On/Off................21 Auto Off ................21 Erasing your Memory Card ..........21 NTSC/PAL ................
-
Page 6: Getting Started
GETTING STARTED GETTING TO KNOW YOUR DIGITAL VIDEO CAMERA Zoom (T-W) Power Speaker Lens Self-Timer LED Tripod Mount (Tripod not included.) Microphone Status LED AV Video Out Port Port MMC/SD Control Panel Card Slot (MMC/SD Card LCD/Viewfi nder Battery Door not included.) -
Page 7: Control Panel
Software Installation CD AV Cable USB Cable CONTROL PANEL Back/Self-Timer Mode Movie/Camera Mode Menu Play/Pause Stop Delete/LCD On/Off Next/Quality Volume/Exposure Value... -
Page 8: Power On/Off
POWER ON AND OFF Slide the Power button to turn your Digital Video Camera ON. It will automatically spring back into place. Slide the Power button again to turn your Digital Video Camera OFF. It will automatically spring back into place. LOW BATTERY POWER INDICATOR If your batteries are running low, you will see a battery icon... -
Page 9: Movies
MOVIES HOW TO RECORD A MOVIE 1. Press the button until you see the movie icon appear on the LCD/Viewfinder. 2. Press the Zoom button, to adjust the frame of your movie. zoom in or zoom out 3. Press to start recording. 4. -
Page 10: How To Playback A Movie
HOW TO PLAYBACK A MOVIE 1. Press the “Mode” button to enter playback mode. 2. Press the on the Zoom button to view multiple images of the movies on the camera. 3. Press the on the Zoom button to view a single image. - Page 11 4. Use the buttons to select the movie you wish to view. 5. Press the button to play the movie. 6. Press the button to pause the movie. 7. Press the button to stop the movie. NOTE: If you have an MMC/SD Card inserted (not included), your movie will be automatically stored to the MMC/SD Card, not the internal memory and will playback from this location.
-
Page 12: Pictures
PICTURES HOW TO TAKE A PICTURE 1. Press the button until you see the camera icon appear on the LCD/Viewfinder. 2. To set the resolution of your picture, press to switch between 1280 x 960, 640 x 480 or 320 x 240. 3. -
Page 13: How To Review A Picture
HOW TO REVIEW A PICTURE 1. Press the “Mode” button to enter playback mode. 2. Press the on the Zoom button to preview one picture or multiple pictures on the LCD/Viewfinder. 3. Press to select the picture that you want to view. NOTE: If you have an MMC/SD Card inserted (not included), your picture will be automatically stored to the MMC/SD Card, not the internal memory and will be reviewed from this location. -
Page 14: Taking A Picture In Dim Light
TAKING A PICTURE IN DIM LIGHT The Exposure Value (EV) feature provides a one second exposure that allows you to take a picture in dim light. 1. Press the button. 2. Press to take a picture. 3. Press the button again to exit. NOTE: Due to the longer exposure, camera movement may cause distortions in your picture. -
Page 15: Computer Connection
2. Follow the on-screen installation instructions. If the CD does not begin automatically, double click “My Computer” then double click the CD icon with the name “VCAMNOW.” Double click the “Install” icon and follow the on-screen installation instructions. HOW TO CONNECT YOUR DIGITAL VIDEO CAMERA TO YOUR COMPUTER 1. -
Page 16: How To Use Your Digital Video Camera Asa Web Cam
HOW TO USE YOUR DIGITAL VIDEO CAMERA AS A WEB CAM Once connected to your computer, your Digital Video Camera can be used as a Web Cam displaying live, real-time action! To use your Digital Video Camera as a Web Cam, press the button on your camera once it’s connected to your computer. -
Page 17: Tv Connection
TV CONNECTION HOW TO CONNECT YOUR DIGITAL VIDEO CAMERA TO YOUR TV 1. Plug end of the AV Cable into the AV Cable Port on the back of your Digital Video Camera. 2. Plug end B (yellow) of the AV Cable into your TV’s Video Port. 3. -
Page 18: Main Functions
MAIN FUNCTIONS MOVIE SCREEN The video number The recording time While you’re filming, the video’s number and the recording timer will be displayed on the LCD/Viewfinder. PICTURE SCREEN Number of picture The picture counter is displayed in the top right corner of your LCD/Viewfinder. - Page 19 MOVIE MODE 1. Press the Timer button. 2. Press to start recording a movie. 3. The Digital Video Camera will wait 10 seconds. 4. Press to stop recording a movie. PICTURE MODE 1. Press the Timer button. 2. Press to take a picture. 3.
-
Page 20: Lcd/Viewfinder On/Off
LCD/VIEWFINDER ON/OFF To conserve battery life, you can turn the LCD/Viewfinder off. While in record “Rec” mode, press the button to turn the LCD/Viewfinder on or off. VOLUME Note: The volume is only adjustable in movie playback mode. During playback mode, press the button and then use buttons to raise or lower the volume of your movie. -
Page 21: Delete One
DELETE ONE This mode allows you to delete one movie or picture at a time. 1. Press the “Mode” button to enter playback mode. 2. Use the buttons to select a specific movie or picture and then press the button. The screen will say “DELETE ONE?”... -
Page 22: Delete All
DELETE ALL This mode allows you to delete all of your pictures and movies at once. 1. Press the “Mode” button to enter playback mode. 2. Press the button twice. The screen will say “DELETE ALL?” 3. Press to confirm the deletion. 4. -
Page 23: Memory
MEMORY MEMORY FULL If your 32MB built-in memory and/or MMC/SD Memory Card is full, you will not be able to take any more pictures or record any more movies. The LCD/Viewfinder will display for 2 seconds. When this happens, you can either delete some of your pictures and movies to make room for new ones, or transfer and save them to your computer, then go back and delete them from the memory. -
Page 24: Memory Storage
MEMORY STORAGE MMC/SD Card is inserted, your pictures and movies will be automatically stored to the 32MB internal memory. Once this is full, you will either need to insert an MMC/SD Card or delete some of your content. If an MMC/SD Card is inserted, your pictures and movies will be automatically stored to the MMC/SD Card. -
Page 25: Advanced Functions
ADVANCED FUNCTIONS SETUP MENU 1. Press 2. Use the buttons to scroll through the setup menu. 3. Press to enter selection. 4. Press to exit setup menu. -
Page 26: Beep On/Off
BEEP ON/OFF Select “BEEP ON” to hear a beep every time you press Set to take a picture or begin recording a movie. Select “BEEP OFF” for silent mode. AUTO OFF Select the “AUTO OFF” feature so that your Digital Video Camera will automatically turn off if it hasn’t been used for 3 minutes. -
Page 27: Ntsc/Pal
NTSC/PAL Use the buttons to select either NTSC or PAL as your TV format and press Set to confirm your selection. NTSC: North America and Japan PAL: UK, Germany, France, Russia and certain European and African countries 50Hz/60Hz Use the buttons to select either 50Hz or 60Hz and press Set to confirm your selection. - Page 28 FCC STATEMENT This device complies with part 15 of the FCC Rules. Operation is subject to the following two conditions: (1) This device may not cause harmful inter- ference, and (2) this device must accept any interference received, includ- ing interference that may cause undesired operation. This equipment has been tested and found to comply with the limits for a Class B digital device, pursuant to Part 15 of the FCC Rules.