Philips DVP5982 User Manual
Dvd video player
Hide thumbs
Also See for DVP5982:
- User manual (57 pages) ,
- Specifications (3 pages) ,
- Service manual (45 pages)
Table of Contents
Advertisement
Quick Links
DVD VIDEO PLAYER
Thank you for choosing Philips.
Need help fast?
Read your Quick Start Guide and/or
User Manual first for quick tips
that make using your Philips product
more enjoyable.
Register your product and
get support at
www.philips.com/welcome
or call
1-888-PHILIPS (744-5477)
while with your product
(and Model / Serial number)
01-57_dvp5982_37_eng3.indd 1
01-57_dvp5982_37_eng3.indd 1
Philips vous remercie de
votre confiance.
Besoin d'une aide
rapide?
Le Guide rapide de début et
Manuel de l'utilisateur regorgent
d'astuces destinées à simplifier
l'utilisation de votre produit Philips.
Enregistrez votre produit et
accédez à l'assistance sur
www.philips.com/welcome
ou formez le
1-800-661-6162 (Francophone)
1-888-PHILIPS (744-5477)
(English speaking)
Veillez à avoir votre produit à
portée de main
(et model / serial nombre)
DVP5982
Gracias por escoger Philips
Necesita ayuda
inmediata?
Lea primero la Guía rápida del
comienzo o el Manual del usuario,
en donde encontrará consejos que
le ayudarán a disfrutar plenamente
de su producto Philips.
Visite
www.philips.com/welcome
para registrar su producto y
obtener información de
contacto y asistencia.
o llame al teléfono
1-888-PHILIPS (744-5477)
y tenga a mano el producto
(y número de model / serial)
2007-06-13 2:12:19 PM
2007-06-13 2:12:19 PM
Advertisement
Table of Contents
Troubleshooting

Related Manuals for Philips DVP5982


Summary of Contents for Philips DVP5982
- Page 1 DVD VIDEO PLAYER Thank you for choosing Philips. Need help fast? Read your Quick Start Guide and/or User Manual first for quick tips that make using your Philips product more enjoyable. Register your product and get support at www.philips.com/welcome or call...
- Page 2 Registering your model with PHILIPS makes you eligible for all of the valuable benefits listed below, so don't miss out. Complete and return your Product Registration Card at once, or register online at www.philips.com/welcome to...
- Page 3 Class II equipment symbol This symbol indicates that the unit has a double insulation system 01-57_dvp5982_37_eng3.indd 3 01-57_dvp5982_37_eng3.indd 3 2007-06-13 2:12:35 PM 2007-06-13 2:12:35 PM...
-
Page 4: Aviso Importante
LEA CUIDADOSAMENTE ESTE INSTRUCTIVO ANTES DE USAR SU APARATO. AVISO IMPORTANTE Philips Mexicana, S.A. de C.V. no se hace responsable por daños o desperfectos causados por: - Maltrato, descuido o mal uso, presencia de insectos o roedores (cucarachas, ratones etc.). - Page 5 This product incorporates copyright protection technology that is protected by method claims of certain U.S. patents and other intellectual property rights owned by Macrovision Corporation and other rights owners. Use of this copyright protection technology must be authorized by Macrovision Corporation, and is intended for home and other limited viewing uses only unless otherwise authorized by Macrovision Corporation.
-
Page 6: Environmental Information
NEVER MAKE OR CHANGE CONNECTIONS WITH THE POWER SWITCHED ON. Specifi cations are subject to change without notice. Trademarks are the property of Koninklijke Philips Electronics N.V. or their respective owners. HDMI, and HDMI logo and High-Definition Multimedia Interface are trademarks or registered trademarks of HDMI licensing LLC. -
Page 7: Language Code
01-57_dvp5982_37_eng3.indd 7 01-57_dvp5982_37_eng3.indd 7 Language Code 2007-06-13 2:12:38 PM 2007-06-13 2:12:38 PM... -
Page 8: Table Of Contents
Contents Care and Safety Information Setup ...10 Cleaning discs ...10 General Information Accessories supplied ... 11 Region codes ... 11 Connections Connecting to television ...12~13 Using Composite Video jacks (CVBS) ...12 Using Component Video jacks (YPbPr) ...12 Using an accessory RF modulator ...13 Connecting the power cord ...14 Optional connections Connecting to a stereo system...15... - Page 9 Angle ...29 Time Display ... 29-30 Preview ...30 Viewing Audio CD playback information ...30 Disc Go To / Track Go To / Track Selection ...30 Special DVD Features ...31 Playing a Title ...31 Changing the Audio Language ...31 Subtitles ...31 Special VCD and SVCD Feature ...31 Playback Control (PBC) ...31 ®...
-
Page 10: Care And Safety Information
Since the optical unit (laser) of the DVD player operates at a higher power than regular DVD or CD players, cleaning CDs intended for DVD or CD players may damage the optical unit (laser). -
Page 11: General Information
01-57_dvp5982_37_eng3.indd 11 01-57_dvp5982_37_eng3.indd 11 General Information Region codes This DVD player is designed to support the Region Management System. Check the regional code number on the disc package. If the number does not match the player’s region number (see table below), the player may be unable to playback the disc. -
Page 12: Connections
To hear sound of this DVD player through your television, use the audio cables (white/red) to connect AUDIO OUT (L/R) jacks of the DVD player to the corresponding AUDIO IN jacks on the television (cable supplied). TIPS: Before making or changing any connections, make sure that all the devices are disconnected from the power outlet. -
Page 13: Using An Accessory Rf Modulator
RF In,) you will need an RF modulator in order to view the DVD playback on the television. See your electronics retailer or contact Philips for details on RF modulator availability and operations. Using an accessory RF modulator Use the composite video cable (yellow) to connect the DVD player’s TV OUT... -
Page 14: Connecting The Power Cord
Never make or change any connections with the power switched on. When no disc is loaded, press STANDBY-ON on the DVD player front panel. “NO DISC” may appear on the display panel. TIPS: Before making or changing any connections, make sure that all the devices are disconnected from the power outlet. -
Page 15: Optional Connections
Connect the COAXIAL jack of the DVD player to the corresponding Digital Audio In jack on your receiver (cable not supplied). Set the DVD player’s digital output to PCM-Only or ALL depending on the capabilities of your receiver (see page 40 {Digital Output}). -
Page 16: Connecting A Usb Flash Drive Or Usb Mass Storage Device
Drive or USB mass storage device Using USB port You can only view the content of following supported USB devices through this DVD player. Connect the supported USB device directly to the USB port on the front panel (as shown on the above illustration). -
Page 17: Hdmi Connections
DVD player’s HDMI OUT to DVI IN on the DVI TV. Tip: – To hear sound from the DVD player, use one of the audio connection on next page as there will be no audio output for DVI TV. -
Page 18: Connecting To An Analog Or Digital Av Receiver
To hear sound via Coaxial/Digital Out, Connect the COAXIAL Digital Out of the DVD player to the Digital Audio In on the AV receiver (cable not supplied). Set the DVD player’s {Digital Output – ALL} and {HDMI Audio Setup – Off} (see page 40). -
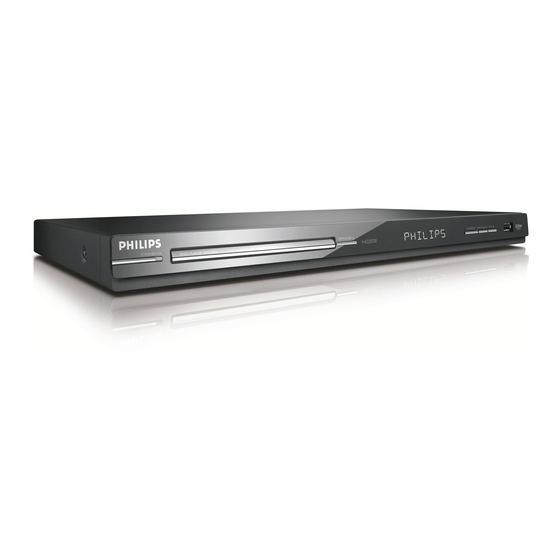
Page 19: Product Overview
OPEN/CLOSE – Opens or closes the disc tray. Display panel – Shows information about the current status of the DVD player. Mains ~ (AC Power Cord) – Connect to a standard AC outlet HDMI OUT – Connect to HDMI compatible... -
Page 20: Remote Control
– Repeat playback a specifi c section on a disc 01-57_dvp5982_37_eng3.indd 20 01-57_dvp5982_37_eng3.indd 20 (continued) – To switch the DVD player to standby mode or ON DISPLAY – Displays information on TV screen during playback – Cursor buttons for moving to the left or right, do a fast forward/reverse search. -
Page 21: Getting Started
If you are using external equipment, (such as audio system or receiver), turn it on and select the appropriate input source for the DVD player output. Refer to the equipment user’s manual for detail. 2007-06-13 2:12:51 PM 2007-06-13 2:12:51 PM... -
Page 22: Step 3: Setting Up Progressive Scan Feature
DVD VIDEO disc in the progressive scan mode. In such a case, turn off the progressive scan feature on both the DVD player and your TV. CANCEL CANCEL 2007-06-13 2:12:51 PM... -
Page 23: Step 4: Tv Color System
Step 4: TV color system The color system of the DVD player, disc and TV should match in order for the disc to play. Video Setup Page TV Type NTSC TV Display Progressive Picture Setting Closed Caption HD JPEG HDMI Video Setup Press SETUP. -
Page 24: Step 5: Setting The Language
On-screen display (OSD) language Select this to change the language of this DVD player screen display menu. The menu language (on-screen display) for the system will remain as you set it. General Setup Page... -
Page 25: Playback From Disc
(Formats 1.0, 1.1, 2.0) Super Video CD TIPS: Some discs cannot be played on this DVD player due to the confi guration and characteristics of the disc, or due to the condition of recording and authoring software that was used. -
Page 26: Playback Features
(see page 49). For more playback features, see pages 26~36. Tips: – Do not overturn the DVD player while disc loading, playing or ejecting. – Do not close the disc tray manually even if the power switched off. -
Page 27: Operations For Video Playback
Operations for video playback Using the Disc Menu Depending on the disc, a menu may appear on the TV screen once you load in the disc. To select a playback feature or item keys or numeric keypad (0-9) on the remote, then press OK to start playback. -
Page 28: Selecting Various Repeat Functions
Playback Features Selecting various repeat functions Repeat play mode The repeat play options vary depending on the disc type. While playing a disc, press REPEAT continuously to choose a repeat options. For DVD – Chapter (currently playing chapter) – Title (currently playing title) –... -
Page 29: Viewing The Disc Playback Information
Viewing the disc playback information Using the OSD menu OSD menu shows the disc playback information (for example, title or chapter number, elapsed playing time, audio/ subtitle language), a number of operations can be done without interrupting disc playback. During playback, press DISPLAY on the remote control. -
Page 30: Preview
Playback Features For VCD/SVCD – Total Elapsed (elapsed playing time of current Disc) – Total Remain (remaining playing time of current Disc) – Single Elapsed (elapsed playing time of current Track) – Single Remain (remaining playing time of current Track) Preview The preview function allows you to reduce the picture of 6 tracks enough to... -
Page 31: Special Dvd Features
Special DVD Features Playing a Title Press DISC MENU. The disc title menu appears on the TV screen. keys or alphanumeric to select a play option. keypad 0-9 Press OK key to confi rm. Changing the Audio Language For DVD Press AUDIO repeatedly to select different audio languages. -
Page 32: Playing A Divx Disc
Playback Features ® Playing a DivX disc This DVD player supports the DivX movie playback that you download from your computer onto a CD-R/RW or DVD±R/RW (see page 38 for more information). ® Load a DivX disc. The data disc menu appears on the TV screen. -
Page 33: Usb Mass Storage Device
USB mass storage device When connecting a USB mass storage device to the DVD player, you can enjoy the device’s stored music through the DVD player. Compatible USB mass storage device: – USB fl ash memory (USB 2.0 or USB 1.1) -
Page 34: Playing From Usb Fl Ash Drive Or Usb Memory Card Reader
Always refer to the instructions supplied with the discs. 01-57_dvp5982_37_eng3.indd 34 01-57_dvp5982_37_eng3.indd 34 (continued) The DVD player will access the USB mass storage device directly when a USB device is plug in and if there is no disc playing. Tip: –... -
Page 35: Playing Mp3/Wma/Jpeg Picture Cd
Playing MP3/WMA/JPEG Picture CD This DVD player can playback MP3, WMA and JPEG fi les on a personally recorded CD-R/RW disc, commercial CD or USB device. IMPORTANT! You have to turn on your TV and set to the correct Video In channel. (See page 21 ‘Finding your viewing channel’). -
Page 36: Playback With Multi-Angles (Jpeg)
Playback Features Playback with multi-angles (JPEG) During playback, press rotate the picture on the TV screen. : fl ip the picture vertically by 180º : fl ip the picture horizontally by 180º : rotate the picture anti-clockwise by 90º : rotate the picture clockwise by 90º Tips: –... -
Page 37: Dvd Menu Options
This DVD Player setup is carried out via the TV, enabling you to customize the DVD player to suit your particular requirement. Using the General setup menu Press SETUP on the remote control. The system setup menu appears. General Setup Page... -
Page 38: Sleep
DVD player automatically after a preset time. In ‘General Setup Page’, press select { Sleep }, then press { 15 Mins } Turn off the DVD player after 15 minutes. { 30 Mins } Turn off the DVD player after 30 minutes. -
Page 39: Using The Audio Setup Menu
Select this option when output delivers sound from only the two front speakers. { LT/RT } Select this option if your DVD player is connected to a Dolby Pro Logic decoder. { V SURR } Allows the DVD player to use virtual surround sound effects. - Page 40 For example, if you use the AUDIO OUT jacks to connect to a TV or stereo system. LPCM Output If you connect the DVD player to a PCM compatible receiver via the digital terminals, such as coaxial or optical etc, you may need to adjust ‘LPCM Output’.
-
Page 41: Sound Mode
Sound Mode The options included in Sound Mode Setup are {3D}, {Movie Mode}, {Music Mode}. In ‘Audio Setup Page’, press select { Sound Mode }, then press Press to select an item, then press to access. to select a setting and press OK to confi rm. -
Page 42: Using The Video Setup Menu
DVD Menu Options Using the Video setup menu Press SETUP on the remote control. The system setup menu appears. Video Setup Page TV Type TV Display Progressive Picture Setting Closed Caption HD JPEG HDMI Video Setup Press to select { Video Setup Page }. -
Page 43: Progressive
In the progressive scan mode, you can enjoy the high quality picture with less fl ickers. It only works when you have connected the DVD player’s YPbPr jacks to your TV that supports the progressive video input. Otherwise, a distorted picture will appear on the TV. -
Page 44: Closed Captions
DVD Menu Options Press to highlight one of the following options. BRIGHTNESS Increase the value to brighten the picture or vice versa. Choose zero (0) for average setting. CONTRAST Increase the value to sharpen the picture or vice versa. Choose zero (0) to balance the contrast. -
Page 45: Hd Jpeg
HDMI peripheral equipment. You can also press HD UPSCALE button on the DVD player front panel to switch between HDMI resolution. { 480p } Progressive output in 480 lines for NTSC { 576p }... - Page 46 – If no display or distorted pictures appears on the TV screen due to unsupported resolution, reconnect any available video output to your DVD player and re-adjust the resolution setting. – When changing the resolution of the DVD player, the HDMI TV will automatically change to fi t the DVD Player resolution.
-
Page 47: Using The Preference Setup Menu
Using the Preference setup menu Press STOP Ç twice to stop playback, (if any), then press SETUP on the remote control. The system setup menu appears. Preference Page Audio Subtitle Disc Menu Parental Mp3 / Jpeg Nav Password Press to select { Preference Page }. -
Page 48: Pbc
DVD Menu Options Rating Explanations { 1.Kid Safe } Childsafe; acceptable for viewers of all ages. { 2. G } General Audience; recommended as acceptable for viewers of all ages. { 3. PG } Parental Guidance suggested. { 4. PG – 13 } Unsuitable for children under age 13. -
Page 49: Changing The Password
Changing the Password You need to enter your six-digit password to play a prohibited disc or if prompted for a password. The same default password is used for both Parental and Disc Lock. In ‘Preference Page’, press { Password }, then press { Change }. -
Page 50: Software Upgrade
Others Software upgrade Periodically Philips will issue software upgrade to enhance your user experience. IMPORTANT! – Power supply must not be interrupted during upgrade! To check the current software version of this DVD player; Press OPEN/CLOSE ç on the DVD player to open the disc tray. -
Page 51: Specifi Cations
TV STANDARD (NTSC/60Hz) Number of lines Playback (NTSC) VIDEO PERFORMANCE Video DAC 12 bit, 108 MHz YPbPr 0.7 Vpp ~ 75 ohm Video Output 1Vpp ~ 75 ohm VIDEO FORMAT Digital MPEG 2 for DVD,SVCD Compression MPEG 1 for VCD DivX ®... -
Page 52: Troubleshooting
(± signs). – Turn on your TV and set to the correct Video In channel for the DVD player. You may go to Channel 1 on your TV, then press the channel down button on your TV’s remote control until you see the TV program. - Page 53 Problem The aspect ratio of the screen cannot be changed. Not able to select some items in the setup/system menu. The DVD player does not start playback. Picture freezes momentarily during playback. Unable to select Progressive Scan on/off. ® Unable to play DivX movies.
-
Page 54: Troubleshooting
HDCP (High Bandwidth Digital Content Protection). Use a separate adaptor (DVI to HDMI) for DVI TV connection (equipped with HDCP). – Make sure the resolution of this DVD player matches the TV device you have connected using the HDMI; 480p/576p/720p/1080i/1080p and this DVD player supports 1080p at 50/60Hz only. -
Page 55: Frequently Asked Questions (Usb)
Frequently Asked Questions (USB) Why does it take so long to display the contents on my USB device? – This could be due to the large numbers of fi les (>500 fi les/folders) or size of the fi les (>1MB.) –... -
Page 56: Glossary
HDMI Working Group that combines multi-channel audio and high defi nition video and that controls signals into a single digital interface for use with DVD player, digital television, and other audiovisual devices. 2007-06-13 2:13:07 PM... -
Page 57: Limited Warranty
Philips is not liable for any damage to or loss of any programs, data, or other information stored on any media contained with- in the product, or any non-Philips product or part not covered by this warranty.