Table of Contents
Advertisement
Quick Links
Advertisement
Table of Contents

Related Manuals for Kawai CN201


Summary of Contents for Kawai CN201
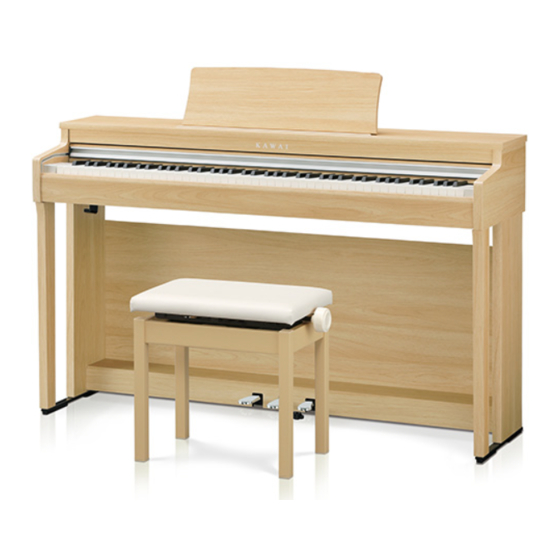
- Page 1 DIGITAL PIANO CN201 Owner's Manual...
- Page 3 Important Information Règles de sécurité (Supplémentairespour le Canada) CONSERVEZ CES INSTRUCTIONS AVERTISSEMENT CAUTION POUR REDUIRE LES RISQUES D’INCENDIE OU D’ELECTROCUTION, RISK OF ELECTRIC SHOCK PROTEGEZ CET APPAREIL DE LA DO NOT OPEN PLUIE OU DE L’HUMIDITE. AVIS : RISQUE DE CHOC ELECTRIQUE - NE PAS OUVRIR.
-
Page 4: Important Information
Important Information Important Safety Instructions SAVE THESE INSTRUCTIONS INSTRUCTIONS PERTAINING TO A RISK OF FIRE, ELECTRIC SHOCK, OR INJURY TO PERSONS WARNING CAUTION TO REDUCE THE RISK OF FIRE OR ELECTRIC SHOCK, DO NOT RISK OF ELECTRIC SHOCK EXPOSE THIS PRODUCT TO DO NOT OPEN RAIN OR MOISTURE. - Page 5 Important Information WARNING - When using electric products, basic precautions should always be followed, including the following. WARNING Indicates a potential hazard that could result in death or serious injury if the product is handled incorrectly. ・ If you are going to use an AC power cord, The product should be connected to 120V 230V...
- Page 6 Important Information Indicates a potential hazard that could result in injury or CAUTION damage to the product or other property if the product is handled incorrectly. Do not use the product in the following areas. Using the product in such areas may result in ・...
- Page 7 Operation is subject to the following two conditions: (1) this device may not cause harmful interference, and (2) this device must accept any interference received, including interference that may cause undesired operation. This applies only to products distributed by Kawai America Corporation.
-
Page 8: Introduction
• The Bluetooth® word mark and logos are registered trade- marks owned by the Bluetooth SIG, Inc. and any use of such This symbol indicates operating precautions. marks by Kawai Musical Instruments Mfg. Co., Ltd. is under li- cense. This symbol describes terminology and provides •... -
Page 9: Table Of Contents
Low Volume Balance ���������� 23 Dual ���������������� 23 4 Hands ��������������� 24 Tuning ��������������� 24 Touch Curve ������������� 24 For more information on MIDI and its operation details, please download the supplementary PDF manual from the Kawai Global website: https://www.kawai-global.com/support/manual/... -
Page 10: Preparation
Preparation Part Names and Functions ① ③ ④ ⑤ ⑥ ⑧ ② ⑦ ⑨ ⑩ ⑪ ⑮ In market locations where Bluetooth functionality is not available, the Bluetooth mark will not be printed. ⑫ ⑬ ⑭ ① [POWER] button ⑨ [DOWN] button This button is used to turn the power on/off. -
Page 11: Opening/Closing The Key Cover
Preparation Opening/Closing the Key Cover ▋ Opening the key cover ▋ Closing the key cover Gently lift the key cover with both hands, then slowly push it Slowly pull the key cover with both hands, then gently lower it downward. back into the instrument’s body. -
Page 12: Power
Preparation Power 1. Connecting the AC adaptor to the main body Plug the supplied AC adaptor into the power cord and insert it into the [DC IN] jack located on the underside of the main body. 2. Connecting the plug into an outlet Connect the AC power adaptor to an AC outlet. -
Page 13: Volume And Headphones
Preparation Volume and headphones ▋ Adjusting the volume Use the [MASTER VOLUME] slider located on the right side of the main body to adjust the volume. Move the slider up to increase the volume and down to decrease the volume. Adjust the volume while listening to the sound by striking the Increase keys. -
Page 14: Basic Operation
Soft pedal Sostenuto pedal Damper pedal ▋ Grand Feel Pedal System This instrument features the Grand Feel Pedal System, which replicates the sustain, soft, and sostenuto pedal weighting of a Shigeru Kawai SK-EX Concert Grand piano. -
Page 15: Metronome
Basic Operation Metronome The Metronome function provides a steady beat to aid practicing the piano. ▋ Turning the Metronome on/off • Press the [METRONOME] button. The LED for the [METRONOME] button turns on and the met- ronome sound begins. • Pressing the [METRONOME] button again will stop the met- ronome and turn off the LED indicator for the [METRONOME] button. -
Page 16: Recorder
Basic Operation Recorder This instrument allows up to three performances to be recorded in the internal memory. ▋ Recording a song 1. Press the [REC] button to enter the Recorder screen. The LED indicator for the [REC] button will start to flash once the Recorder screen opens. -
Page 17: Music Menu
Basic Operation Music Menu Music menu contains three functions consisting of Demo Songs, Lesson, and Concert Magic. ▋ Music menu list Function Description Demo Songs This instrument includes demo songs for each sound. Sound/Demo Songs List Lesson This instrument has a collection of lesson songs stored in memory. Concert Magic This instrument includes 40 Concert Magic songs stored in memory. -
Page 18: Lesson
Basic Operation Lesson ▋ Lesson song books US, Canada, Australasia Rest of the World Alfred’s Basic Piano Library Lesson Book Level 1A Beyer 106 (Vorschule im Klavierspiel, Opus 101) Alfred’s Basic Piano Library Lesson Book Level 1B Burgmüller 25 (25 Etudes Faciles, Opus 100) Beyer 106 (Vorschule im Klavierspiel, Opus 101) Czerny 30 (Etudes de Mécanisme, Opus 849) Burgmüller 25 (25 Etudes Faciles, Opus 100) -
Page 19: Concert Magic
Basic Operation ▋ Practicing by changing the tempo 1. While a song is playing, press the [METRONOME] button. The instrument produces beats corresponding to the song. 2. Press the [UP]/[DOWN] button to set the tempo. • Pressing the [UP]/[DOWN] button simultaneously will restore the default tempo. - Page 20 Basic Operation Setting a Concert Magic song ▋ Playing Mode list Item Description Normal Concert Magic songs will be performed according to their arrangement type. Steady Beat All Concert Magic songs will be performed by tapping the key with a constant beat. ▋...
-
Page 21: Adjustments & Settings
Normal Bluetooth Bluetooth Audio Volume MIDI Settings For information regarding MIDI functions and settings, please download the supplementary PDF manual from the Kawai Global website: https://www.kawai-global.com/support/manual Auto Display Off 5min. Auto Power Off Factory Reset ▋ Entering the Settings menu mode 1. -
Page 22: Reverb
Adjustments & Settings Reverb The Reverb setting adds reverberation to the sound. ▋ Reverb type Type Effect Disables the reverb effect. Room Simulates the reverberation of a performance in a small rehearsal room. Lounge Simulates the reverberation of a performance in a piano lounge. Small Hall Simulates the reverberation of a performance in a small hall. -
Page 23: Low Volume Balance
Adjustments & Settings Low Volume Balance The Low Volume Balance setting enhances pianissimo touches, allowing the piano to be played more naturally when the [MASTER VOLUME] slider is set to a low level. The display shows “Lo Vol Balance”. ▋ Low Volume Balance setting The value can be specified in the range from 1 to 5 or set to off. -
Page 24: Hands
Adjustments & Settings 4 Hands The Four Hands function divides the keyboard into left and right sections, each of which can be played in the same key range. At this time, the damper pedal (right) acts as a damper pedal for the right section, and the soft pedal (left) acts as a damper pedal for the left section. -
Page 25: Virtual Technician Smart Mode
Adjustments & Settings Virtual Technician Smart Mode The Virtual Technician Smart Mode function allows players to make various adjustments on the piano with a single touch of a button. The display shows “Smart Mode”. ▋ Smart Mode settings Name Description Normal Default setting for Smart Mode. -
Page 26: Key Volume
Adjustments & Settings Key Volume The Key Volume function allows players to adjust the volume of each of the 88 keys. ▋ Adjusting the Key Volume 1. On the Key Volume screen, press the [1] button. 2. Press a key to adjust its volume. 3. -
Page 27: Spatial Headphone Sound
Adjustments & Settings Spatial Headphone Sound Special Headphone Sound is a feature that enhances the depth and realism of the acoustic piano sound through earphones or headphones. This feature also reduces auditory discomfort and fatigue when using headphones or earphones for extended periods of time. The display shows “Spatial HP”. -
Page 28: Bluetooth
If "CN201 Audio" does not appear, press and hold the [1] and [2] buttons on the instrument's control panel while the Home screen is shown in the display.After pairing successfully, the instrument will automatically reconnect to the smart device when the power is turned on. -
Page 29: Auto Display Off
Adjustments & Settings Auto Display Off The Auto Display Off function can be used to automatically turn off the display after a specified time has elapsed. ▋ Auto Display Off setting The Auto Display Off setting can be set to 15 seconds, 5 minutes, or 30 minutes. -
Page 30: Appendix
Appendix Troubleshooting ▋ Power (Settings) Problem Possible Cause and Solution Page The instrument does not turn Check to see if the main connector of this instrument, AC adaptor, and power outlet are properly connected. The instrument turned itself off Check to see if the “Auto Power Off” function is not enabled. all of a sudden. -
Page 31: Internal Songs List
Hungarian Rhapsodies No.6 Liszt Upright Piano | Classic Alpenglühen Op.193 Oesten SK-EX Concert Grand Piano | Jazz Original Kawai EX Concert Grand Piano | Pop Original Kawai SK-EX Concert Grand Piano | Mellow Sonata No.30 Op.109 Beethoven EX Concert Grand Piano | Mellow... - Page 32 Appendix ▋ Concert Magic Songs List Children’s Songs American Classics Song Name Composer Type Song Name Composer Type Twinkle, Twinkle, Little Star French folk song When The Saints Go American folk song Marching In I’m A Little Teapot Traditional The Entertainer S.Joplin Mary Had A Little Lamb American folk song...
-
Page 33: Connecting To Other Devices
Appendix Connecting to Other Devices Main body (Front) Main body (Bottom) Main body (Rear) ① ② ③ Pedal cable Computer Smart device Headphones ① PHONES (Headphones jacks) These jacks are used to connect headphones. Up to two sets can be connected. ② PEDAL (Pedal connector) This connector is used to plug the pedal cable attached to the pedal unit. - Page 34 This product supports connection to smart devices and allows players to use application designed for the instrument. Before using this feature, check the latest information on the supported application and operating environment, which is available from the Kawai Global website: https://www.kawai-global.com/support/manual/ ▋...
-
Page 35: Assembly Instructions
Appendix Assembly Instructions The assembly requires two people. When moving this product, make sure to keep it lifted in a horizontal orientation. Be particularly careful to avoid catching hands and fingers in between parts. ▋ Checking the included parts Before attempting to assemble this product, ensure that all the parts listed below are included. Please also prepare a Phillips-head screwdriver. - Page 36 Appendix 1. Attaching B and C to E 2. Attaching D ① Unfasten the pedal cable attached to E (one location only) ① Allow the E assembled with B and C to stand upright as and extend the cable. shown in the figure below. ② Take the screws temporary mounted in E and set each one to Ensure that the adjustor is attached and the floor is the metal groove of B and C, respectively.
- Page 37 Appendix 3. Mounting A onto the stand 4. Fastening A to the stand ① Lift A and carefully place it onto the stand. Position A so that ① Temporarily fasten A and the stand with four screws a (with the metal fitting holes are visible on the rear side of A when flat washer and spring washer).
- Page 38 Appendix 5. Connecting the cables 6. Attaching the headphone hook ① Pass the pedal cable extended from E through the gap of D Attach the headphone hook to the hole shown in the fig- to the rear side of the instrument and insert the cable to the ure, using the two tapping screws (4 x 14 mm) provided in pedal connector on the bottom of A.
-
Page 39: Information About Adaptor Specifications
Appendix Information about Adaptor Specifications This adapter specification table conforms to the requirements of EU Commission Regulation (EU) 2019/1782. Adaptor Type PS-129 PS-154 PS-241 PS-242 Manufacturer’s trademark KAWAI KAWAI KAWAI KAWAI Model identifer PS-129 PS-154 PS-241 PS-242 Input voltage 230 V... -
Page 40: Eu Declaration Of Conformity
Pełny tekst deklaracji zgodności UE jest dostępny pod następującym adresem internetowym: DECLARAÇÃO UE DE CONFORMIDADE SIMPLIFICADA O(a) abaixo assinado(a) Kawai Europa GmbH declara que o presente tipo de equipamento de rádio [ CN201 ] está em conformidade com a Diretiva 2014/53/ Portuguese UE. -
Page 41: Specifications
Appendix Specifications Responsive Hammer III (RHIII) action with Let-Off, Triple Sensor, and Counterweights Keyboard 88 weighted keys with Ivory Touch key surfaces Display 128 × 128 dots OLED Polyphony max. 192 notes Sounds 19 sounds Metronome 1/4, 2/4, 3/4, 4/4, 5/4, 3/8, 6/8 beat Internal Recorder 3 song recorder –... - Page 44 SP00001465 Copyright © 2021 Kawai Musical Instruments Mfg. Co.,Ltd. All Rights Reserved.