
Related Manuals for Daikin EWWQ-KC


Summary of Contents for Daikin EWWQ-KC
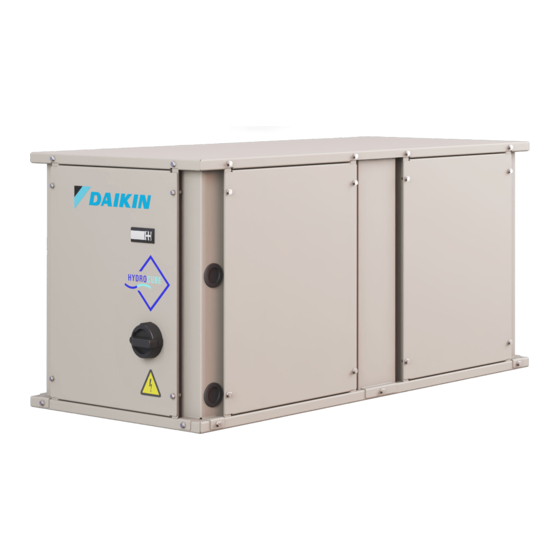
- Page 1 Date 01/2022 Supersedes Installation, Operation and Maintenance Manual D-EIMHP01501-22_00EN PACKAGED WATER-COOLED WATER CHILLERS EWWQ014KCW1N EWWQ025KCW1N EWWQ033KCW1N EWWQ049KCW1N EWWQ064KCW1N...
-
Page 2: Table Of Contents
INDEX INTRODUCTION ..............................4 1.1 Options and features ............................5 OPERATION RANGE ............................6 MAIN COMPONENTS ............................7 SELECTION OF LOCATION ..........................7 INSPECTING AND HANDLING THE UNIT ......................7 UNPACKING AND PLACING THE UNIT ......................7 IMPORTANT INFORMATION REGARDING THE REFRIGERANT USED ..........7 CHECKING THE WATER CIRCUIT ........................ - Page 3 Improper installation or attachment of equipment or accessories could result in electric shock, short- circuit, leaks, fire or other damage to the equipment. Be sure only to use accessories, optional equipment and spare parts made by Daikin which are specifically designed for use with the equipment and have them installed by a professional.
-
Page 4: Introduction
The units are available in 7 standard sizes with nominal cooling capacities ranging from 14 to 64 kW. The EWWQ units can be combined with Daikin fan coil units or air handling units for air conditioning purposes. They can also be used for supplying chilled water for process cooling. -
Page 5: Options And Features
• Low noise operation kit (field installed) • Entering water temperature kit • Master/slave water temperature kit • Modem for Daikin On Site Standard features • Glycol application for chilled water temperature down to –10°C. • Powered Contact • General alarm •... -
Page 6: Operation Range
2. OPERATION RANGE Figure 1- Operating limits on EWWQ014-033 Figure 2- Operating limits EWWQ049-064 • ELWT: Evaporator leaving water temperature • CLWT: Condenser leaving water temperature • 1: Operation with water • 2: Operation with glycol (below ELWT=4°C) D-EIMHP01501-22_00EN 6/20... -
Page 7: Main Components
3. MAIN COMPONENTS Compressor Evaporator Condenser Switchbox Chilled water in Chilled water out Condenser water out Condenser water in Evaporator entering water temperature sensor (as accessory) 10. Evaporator leaving water temperature sensor 11. Condenser entering water temperature sensor (as accessory) 12. -
Page 8: Checking The Water Circuit
8. CHECKING THE WATER CIRCUIT The units are equipped with water inlets and water outlets for connection to a chilled water circuit and to a hot water circuit. These circuits must be provided by a licensed technician and must comply with all relevant European and national regulations. -
Page 9: Table 3-Water Quality Specifications
The flowswitch must be installed in the water outlet pipe of the evaporator to prevent the unit from operating at a water flow which is too low. WARNING It is very important to install the flowswitch as shown in the figure. Observe the position of the flowswitch in relation to the direction of the water flow. -
Page 10: Connecting The Water Circuit
Make sure that appropriate antifreeze protection is always maintained. Failing to follow the instructions above could result in unit damage. Damage caused by freezing is excluded from the warranty, therefore Daikin Applied Europe S.p.A. declines all responsibility. D-EIMHP01501-22_00EN 10/20... -
Page 11: Field Wiring
FIELD WIRING WARNING All field wiring and components must be installed by a licensed electrician and must comply with relevant European and national regulations. The field wiring must be carried out in accordance with the wiring diagram supplied with the unit and the instructions given below. -
Page 12: Operator's Reponsibilities
OPERATOR’S REPONSIBILITIES It is essential that the operator is appropriately trained and becomes familiar with the system before operating the unit. In addition to reading this manual, the operator must study the microprocessor operating manual and the wiring diagram to understand start-up sequence, operation, shutdown sequence and operation of all the safety devices. -
Page 13: Routine Maintenance
MAINTENANCE Table 6-R410A Pressure / temperature table °C °C °C 5.22 12.30 24.95 5.41 12.65 25.56 5.60 13.02 26.18 5.79 13.39 26.81 6.00 13.77 27.45 6.20 14.15 28.10 6.42 14.55 28.77 6.63 14.95 29.44 6.86 15.37 30.13 7.09 15.79 30.84 7.32 16.22 31.55... -
Page 14: Maintenance
the current absorbed by the compressor must be compared to the rated value. Normally the value of the absorbed current is lower than the rated value that corresponds to the absorption of the full load compressor at the maximum operating conditions. -
Page 15: Table 8 - Routine Maintenance Plan For Critical Application And/Or Highly Aggressive Environment
Table 8 – Routine Maintenance Plan for Critical Application and/or Highly Aggressive Environment Monthly Yearly/Seasonal List of Activities (Note 8) Weekly (Note 1) (Note 2) General: Reading of operating data (Note 3) Visual inspection of unit for any damage and/or loosening Verification of thermal insulation integrity Cleaning Paint where necessary... -
Page 16: Service And Limited Warranty
SERVICE AND LIMITED WARRANTY All units are factory tested and guaranteed for 12 months as of the first start-up or 18 months as of delivery. These units have been developed and constructed according to high quality standards ensuring years of failure free operation. However, the unit requires maintenance even during the warranty period, from the time of installation and not just from the commissioning date. -
Page 17: Figure 3- Refrigerant Circuit Scheme Ewwq 014 - 033 Kcw1N
Figure 3- Refrigerant circuit scheme EWWQ 014 - 033 KCW1N Figure 4- Refrigerant circuit scheme EWWQ 049 - 064 KCW1N LEGEND POS. COMPONENT CONNECTION POS. COMPONENT COMPRESSOR-CONDENSER COMPRESSOR L1-1/L2- CONDENSER-THERM.EXP. VALVE CONDENSER (NPHE) DRIER FILTER L1-2/L2- THERM.EXP. VALVE-EVAPORATOR THERMOSTATIC EXPANSION VALVE EVAPORATOR (BPHE) EVAPORATOR-COMPRESSOR BALL VALVE (OPTIONAL) -
Page 18: Before Starting
BEFORE STARTING WARNING The unit should not be started, not even for a very short period, before the following pre-commissioning checklist is filled out completely. Table 9- Standards steps to go through before starting the unit Tick when checked Check for external damage Install main fuses, earth leak detector and main switch. - Page 19 NOTES D-EIMHP01501-22_00EN 19/20...
- Page 20 The present publication is drawn up by of information only and does not constitute an offer binding upon Daikin Applied Europe S.p.A.. Daikin Applied Europe S.p.A. has compiled the content of this publication to the best of its knowledge. No express or implied warranty is given for the completeness, accuracy, reliability or fitness for particular purpose of its content, and the products and services presented therein.