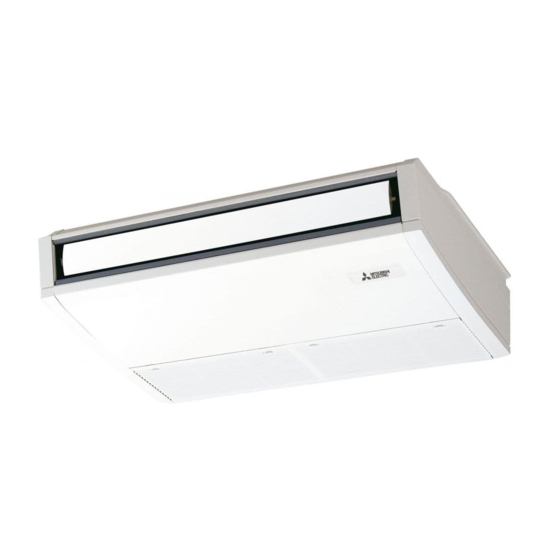
Mitsubishi Electric Mr. SLIM PCA-M50-KA Installation Manual
Hide thumbs
Also See for Mr. SLIM PCA-M50-KA:
- Service manual (52 pages) ,
- Service manual (64 pages) ,
- Installation manual (213 pages)
Advertisement
Quick Links
INSTALLATION MANUAL
For safe and correct use, read this manual and the outdoor unit installation manual thoroughly before installing
the air-conditioner unit.
INSTALLATIONSHANDBUCH
Aus Sicherheitsgründen und zur richtigen Anwendung vor Installation der Klimaanlage die vorliegende
Bedienungsanleitung und das Installationshandbuch gründlich durchlesen.
MANUEL D'INSTALLATION
Avant d'installer le climatiseur, lire attentivement ce manuel, ainsi que le manuel d'installation de l'appareil
extérieur pour une utilisation sûre et correct.
INSTALLATIEHANDLEIDING
Lees deze handleiding en de installatiehandleiding van het buitenapparaat zorgvuldig door voordat u met het
installeren van de airconditioner begint.
MANUAL DE INSTALACIÓN
Para un uso seguro y correcto, lea detalladamente este manual de instalación antes de montar la unidad de
aire acondicionado.
MANUALE DI INSTALLAZIONE
Per un uso sicuro e corretto, prima di installare il condizionatore d'aria leggere attentamente il presente
manuale ed il manuale d'installazione dell'unità esterna.
MANUAL DE INSTALAÇÃO
Para uma utilização segura e correcta, leia atentamente este manual e o manual de instalação da unidade
exterior antes de instalar o aparelho de ar condicionado.
INSTALLATIONSMANUAL
Læs af sikkerhedshensyn denne manual samt manualen til installation af udendørsenheden grundigt, før du
installerer klimaanlægget.
INSTALLATIONSMANUAL
Läs bruksanvisningen och utomhusenhetens installationshandbok noga innan luftkonditioneringen installeras så
att den används på ett säkert och korrekt sätt.
installeres.
FOR INSTALLER
FÜR INSTALLATEURE
VOOR DE INSTALLATEUR
TIL INSTALLATØREN
FÖR INSTALLATÖREN
FOR MONTØR
DLA INSTALATORA
English
Deutsch
Français
Nederlands
Español
Italiano
Dansk
Svenska
Türkçe
Norsk
-
Advertisement

Related Manuals for Mitsubishi Electric Mr. SLIM PCA-M50-KA


Summary of Contents for Mitsubishi Electric Mr. SLIM PCA-M50-KA
- Page 1 INSTALLATION MANUAL FOR INSTALLER English For safe and correct use, read this manual and the outdoor unit installation manual thoroughly before installing the air-conditioner unit. INSTALLATIONSHANDBUCH FÜR INSTALLATEURE Deutsch Aus Sicherheitsgründen und zur richtigen Anwendung vor Installation der Klimaanlage die vorliegende Bedienungsanleitung und das Installationshandbuch gründlich durchlesen.
- Page 2 Manual Download http://www.mitsubishielectric.com/ldg/ibim/ EN Go to the above website to download manuals, select model name, then choose language. DE Besuchen Sie die oben stehende Website, um Anleitungen herunterzuladen, wählen Sie den Modellnamen und dann die Sprache aus. FR Rendez-vous sur le site Web ci-dessus pour télécharger les manuels, sélectionnez le nom de modèle puis choisissez la langue. NL Ga naar de bovenstaande website om handleidingen te downloaden, de modelnaam te selecteren en vervolgens de taal te kiezen.
-
Page 3: Table Of Contents
Contents 1. Safety precautions ..................3 5. Drainage piping work .................8 2. Installation location ..................4 6. Electrical work ...................8 3. Installing the indoor unit ................5 7. Test run ....................14 4. Installing the refrigerant piping ..............7 8. Easy maintenance function ..............18 Note: If you need any information for the other remote controller, please refer to either the installation manual or initial setting manual which are included in these boxes. -
Page 4: Installation Location
1. Safety precautions Caution: water may drip from the indoor unit. Do not install the indoor unit where such areas exposed to high salt content such as the seaside, the performance can dripping can cause damage. sion may result. conditioner to malfunction or breakdown. The air conditioner may also affect damaged by temperature changes or dripping water. -
Page 5: Installing The Indoor Unit
3. Installing the indoor unit The indoor unit should be supplied with the following accessories Accessory name Q’ty Washer 4 pcs Pipe cover Pipe cover Band 4 pcs Joint socket 1 pc Marked with “UNIT” Socket cover 1 pc Drain tubing cover 1 pc Flare nut 3.2.1. - Page 6 3. Installing the indoor unit Using the pattern paper provided for installation, select proper positions for suspen- sion bolts and tubing and prepare relative holes. A Pattern paper B Suspension bolt hole C Indoor unit width ø65 ø100 Secure the suspension bolts or use angle stock braces or square timbers for bolt installation.
-
Page 7: Installing The Refrigerant Piping
4. Installing the refrigerant piping 45 2 to connect the refrigerant pipes. Use refrigerant pipes with the thicknesses and do not contain any harmful contaminants such as sulfuric compounds, oxidants, debris, or dust. Warning: When installing or relocating, or servicing the air conditioner, use only the not mix it with any other refrigerant and do not allow air to remain in the lines. -
Page 8: Drainage Piping Work
5. Drainage piping work downward slope. of the drain tubing. A Drain pan B Plug C Insert the driver etc.in the plug deeply. 5 supplied with the unit to the drain port on the unit with a vinyl chloride adhesive. 2. - Page 9 6. Electrical work 6.1.1. Indoor unit power supplied from outdoor unit The following connection patterns are available. 1 System The outdoor unit power supply patterns vary on models. 1:1 System A Outdoor unit power supply B Earth leakage breaker C Wiring circuit breaker or isolating switch D Outdoor unit E Indoor unit/outdoor unit connecting cables F Remote controller...
- Page 10 6. Electrical work * The indoor power supply terminal kits are required. A Outdoor unit power supply B Earth leakage breaker C Wiring circuit breaker or isolating switch D Outdoor unit E Indoor unit/outdoor unit connecting cables F Remote controller G Indoor unit H Option J Indoor unit power supply...
- Page 11 6. Electrical work 6.2. Remote controller 6.2.1. For wired remote controller 1) 2 remote controllers setting If 2 remote controllers are connected, set one to “Main” and the other to “Sub”. For setting procedures, refer to “Function selection of remote controller” in the operation manual for the indoor unit.
- Page 12 6. Electrical work 6.3. Function settings Service menu Function setting Test run Ref. address Input maintenance info. Unit No. Grp./1/2/3/4/All 1) For wired remote controller Function setting Check Self check Select “Service” from the Main menu, and press the [SELECT] button. Main menu: Monitor: Cursor...
- Page 13 6. Electrical work Changing the power voltage setting CHECK CHECK 1 Going to the function select mode CHECK CHECK button F twice continuously. Press the is lit and “00” blinks. CHECK ON/OFF TEMP temp button C once to set “50”. Direct the wireless remote controller Press the toward the receiver of the indoor unit and press the button A.
-
Page 14: Test Run
7. Test run 7.1. Before test run outdoor units, check for refrigerant leakage, looseness in the power supply Warning: or control wiring, wrong polarity, and no disconnection of one phase in the Do not use the air conditioner if the insulation resistance is less than 1 M . supply. - Page 15 7. Test run Step 5 Stop the test run. Note: If an error is displayed on the remote controller, see the table below. Description of malfunction Description of malfunction Description of malfunction Intake sensor error Communication error between the E0 ~ E5 remote controller and the indoor Indoor unit fan motor error unit...
- Page 16 7. Test run [Output pattern A] Beeper sounds Beep Beep Beep Beep Beep Beep Beep OPERATION · · · Repeated INDICATOR lamp blinking pattern Approx. 2.5 sec. 0.5 sec. 0.5 sec. 0.5 sec. Approx. 2.5 sec. 0.5 sec. 0.5 sec. 0.5 sec.
- Page 17 7. Test run Wired remote Wireless remote controller controller Symptom Remark Beeper sounds/OPERATION Check code INDICATOR lamp blinks Compressor overcurrent interruption U3, U4 Open/short of outdoor unit thermistors U1, Ud Abnormal temperature of heat sink For details, check the LED display of the outdoor controller Outdoor unit fan protection stop board.
-
Page 18: Easy Maintenance Function
Maintenance data, such as the indoor/outdoor unit’s heat exchanger temperature and compressor operation current can be displayed with “Smooth maintenance”. * This cannot be executed during test operation. * Depending on the combination with the outdoor unit, this may not be supported by some models. Check menu Error history Refrigerant volume check...