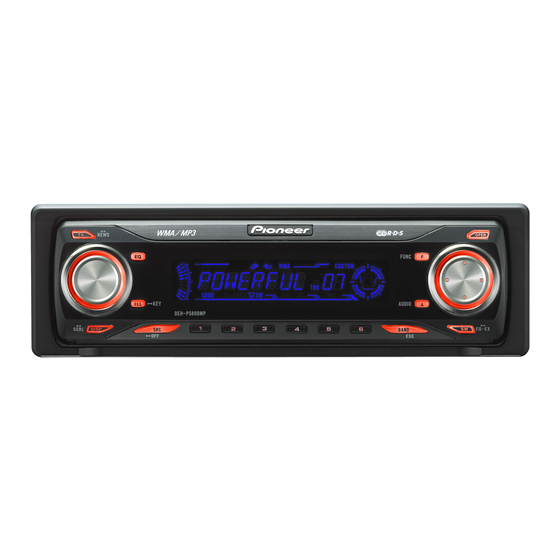
Pioneer DEH-P5800MP Operation Manual
Hide thumbs
Also See for DEH-P5800MP:
- Operation manual (182 pages) ,
- Installation manual (6 pages) ,
- Owner's manual (34 pages)

Related Manuals for Pioneer DEH-P5800MP


Summary of Contents for Pioneer DEH-P5800MP
- Page 1 Multi-CD control High power CD/MP3/WMA player with RDS tuner Operation Manual DEH-P5800MP Visit www.pioneer.co.uk (or www.pioneer-eur.com) to register your product sound.vision.soul...
-
Page 2: Table Of Contents
Contents Thank you for buying this Pioneer product MP3/WMA/WAV Player ....... 18 Audio Adjustments ......25 Playing MP3/WMA/WAV ......18 Introduction of audio adjustments .... 25 Introduction of advanced built-in Compensating for equalizer curves CD player (MP3/WMA/WAV) (EQ-EX) ..........26 Please read through these operating instructions so you will know how to operate your operation .......... -
Page 3: Connecting The Units
Connecting the Units Notes • When an external power amp is being used with this system, be sure not to connect the blue/ • This unit is for vehicles with a 12-volt battery and negative grounding. Before installing it in white lead to the amp’s power terminal. - Page 4 Connecting the Units Connecting cords with RCA pin Mult-CD player Note plugs (sold separately) (sold separately) Depending on the kind of vehicle, the IP-BUS cable Power amp function of 3* and 5* may be different. In this (sold separately) case, be sure to connect 2* to 5* and 4* to 3*. This product Power amp Subwoofer output or non...
-
Page 5: Installation
Installation Notes Removing the Unit • Before making a final installation of the unit, temporarily connect the wiring to confirm that To remove the frame, extend top and bottom of the frame outwards in order to unlock the connections are correct and the system works properly. it. -
Page 6: Fixing The Front Panel
Installation 2. Fastening the unit to the factory radio mounting bracket. 2. Replace the front panel to the unit. Select a position where the screw holes of the bracket and the screw holes of the head unit become aligned (are fitted) and tighten the screws at 2 places on each side. -
Page 7: Before You Start
You can play back MP3 files recorded on CD-ROM/CD-R/CD-RW (ISO9660 Level 1/ bottom of this unit. Level 2 standard recordings). • The Pioneer CarStereo-Pass is for use only in Germany. WMA file playback • Keep this manual handy as a reference for operating You can play back WMA files recorded on CD-ROM/CD-R/CD-RW (ISO9660 Level 1/ procedures and precautions. -
Page 8: About Mp3
• Do not let the remote control fall onto the floor, where it may become jammed under refer to this information in the event of an insurance claim such as loss or theft. the brake or accelerator pedal. • We offer the latest information about Pioneer Corporation on our website. -
Page 9: Protecting Your Unit From Theft
Before You Start What’s What Protecting your unit from theft Head unit The front panel can be detached from the head unit and stored in the provided protective case to prevent theft. • If the front panel is not detached from the head unit within five seconds of turning off the ignition, a warning tone will sound. -
Page 10: Remote Control
– When the AUX (auxiliary input) is set to off (refer to page 30). TUNER button • External unit refers to a Pioneer product (such as one available in the future) that, although Press to select the tuner as the source. -
Page 11: Tuner
Tuner Listening to the radio Introduction of advanced tuner operation These are the basic steps necessary to operate the radio. More advanced tuner Function display operation is explained starting on this page. Shows the function status. This unit’s AF (alternative frequencies search) function can be turned on and off. AF LOC indicator should be off for normal tuning operation (refer to page 13). -
Page 12: Tuning In Strong Signals
Tuner Tuning in strong signals Introduction of RDS operation Local seek tuning lets you tune in only those radio stations with sufficiently strong RDS (radio data system) is a system for providing information along with FM signals for good reception. broadcasts. -
Page 13: Selecting Alternative Frequencies
• PTY information and the frequency of the current station appears on the display for Limiting stations to regional programming eight seconds. When AF is used to automatically retune frequencies, the regional function limits the • If a PTY code of zero is received from a station or the signal is too weak for this unit selection to stations broadcasting regional programs. -
Page 14: Using News Program Interruption
PTY list 4. Press TA while a traffic announcement is being received to cancel the announcement. The tuner returns to the original source but remains in the standby mode until TA is pressed again. Specific Type of program • You can also cancel the announcement by pressing SOURCE, BAND, 8, 2, 4 or NEWS News 6 while a traffic announcement is being received. -
Page 15: Built-In Cd Player
Built-in CD Player Playing a CD Introduction of advanced built-in CD player operation These are the basic steps necessary to play a CD with your built-in CD player. More Function display advanced CD operation is explained starting on this page. Shows the function status. -
Page 16: Playing Tracks In Random Order
Built-in CD Player Playing tracks in random order Using compression and BMX Random play lets you play back tracks on the CD in a random order. Using the COMP (compression) and BMX functions let you adjust the sound playback quality of this player. Each of the functions has a two-step adjustment. The COMP 1. -
Page 17: Searching Every 10 Tracks In The Current Disc
Built-in CD Player Searching every 10 tracks in the current disc 6. Press BAND to return to the playback display. Notes If a disc contains over 10 tracks, you can search every 10 tracks. When a disc contains • Titles remain in memory, even after the disc has been removed from the unit, and are recalled when the disc is reinserted. -
Page 18: Mp3/Wma/Wav Player
MP3/WMA/WAV Player Playing MP3/WMA/WAV 5. Press 8 or 2 to select a folder. • You cannot select a folder that does not have an MP3/WMA/WAV file recorded in it. These are the basic steps necessary to play an MP3/WMA/WAV with your built-in CD •... -
Page 19: Introduction Of Advanced Built-In Cd Player (Mp3/Wma/Wav) Operation
MP3/WMA/WAV Player Introduction of advanced built-in CD player (MP3/WMA/ Playing tracks in random order WAV) operation Random play lets you play back tracks in a random order within the repeat range, FLD and DSC. Function display 1. Select the repeat range. Shows the function status. -
Page 20: Pausing Mp3/Wma/Wav Playback
MP3/WMA/WAV Player Pausing MP3/WMA/WAV playback 2. Press and hold 4 or 6 to search every 10 tracks in the current folder. • If the current folder contains less than 10 tracks, pressing and holding 6 recalls the last track of the folder. Also, if the remaining number of tracks after searching every Pause lets you temporarily stop playback of the MP3/WMA/WAV. -
Page 21: Displaying Text Information On Wav Disc
MP3/WMA/WAV Player Multi-CD Player ® Playing a CD • Depending on the version of iTunes used to write MP3 files onto a disc, comment information may not be correctly displayed. ® • iTunes is a trademark of Apple Computer, Inc., registered in the U.S. and other You can use this unit to control a multi-CD player, which is sold separately. -
Page 22: Introduction Of Advanced Multi-Cd Player Operation
Multi-CD Player Introduction of advanced multi-CD player operation Playing tracks in random order Random play lets you play back tracks in random order within the repeat range, MCD Function display and DSC. Shows the function status. 1. Select the repeat range. RPT indicator Refer to “Repeating play”... -
Page 23: Pausing Cd Playback
Multi-CD Player Pausing CD playback Note • After data for 100 discs has been stored in memory, data for a new disc will overwrite the oldest one. Pause lets you temporarily stop playback of the CD. Playback from your ITS playlist 1. -
Page 24: Erasing A Cd From Your Its Playlist
Multi-CD Player 4. Press 6 to move the cursor to the next character position. Erasing a CD from your ITS playlist When the letter you want is displayed, press 6 to move the cursor to the next position You can delete all tracks of a CD from your ITS playlist if ITS play is off. and then select the next letter. -
Page 25: Scrolling Text Information In The Display
Multi-CD Player Audio Adjustments Introduction of audio adjustments Scrolling text information in the display This unit can display the first 8 letters only of DISC TTL, ART NAME, TRK TTL and ART NAME. When the recorded information is longer than 8 letters, you can scroll the CUSTOM indicator text to the left so that the rest of the title can be seen. -
Page 26: Compensating For Equalizer Curves (Eq-Ex)
Audio Adjustments Compensating for equalizer curves (EQ-EX) Using the equalizer The EQ-EX function accentuates the effects of each equalizer curve. Furthermore, you The equalizer lets you adjust the equalization to match car interior acoustic can adjust bass and treble for each source when CUSTOM curve is selected. characteristics as desired. -
Page 27: Fine-Adjusting Equalizer Curve
Audio Adjustments 3. Press 8 or 2 to adjust the level of the equalizer band. Adjusting bass and treble Each press of 8 or 2 increases or decreases the level of the equalization band. You can adjust bass and treble settings. +6 –... -
Page 28: Adjusting Loudness
Audio Adjustments Adjusting loudness Adjusting subwoofer settings When the subwoofer output is on, you can adjust the cut-off frequency and the output Loudness compensates for deficiencies in the low- and high-sound ranges at low level of the subwoofer. volume. 1. Press AUDIO to select 80: 0. 1. -
Page 29: Adjusting Nonfading Output Level
Audio Adjustments Adjusting source levels Adjusting nonfading output level When the nonfading output is on, you can adjust the level of nonfading output. SLA (source level adjustment) lets you adjust the volume level of each source to 1. Press AUDIO to select nonfading output setting. prevent radical changes in volume when switching between sources. -
Page 30: Initial Settings
Initial Settings Adjusting initial settings Switching Auto PI Seek Using the initial settings, you can customize various system settings to achieve optimal The unit can automatically search for a different station with the same programming, performance from this unit. even during preset recall. Function display 1. -
Page 31: Setting The Rear Output And Subwoofer Controller
Initial Settings Other Functions Setting the rear output and subwoofer controller Switching the display illumination This unit’s rear output (rear speaker leads output) can be used for full-range speaker You can change the color of the display illumination. (R-SP : FUL) or subwoofer (R-SP : S/W) connection. If you switch the rear output * Press ILLUMINATION. -
Page 32: Using The Aux Source
• When a call is made or received using a cellular telephone connected to this unit. press of 2 will display a letter in the • When the voice guidance is output from a Pioneer navigation unit connected to this reverse order, such as Z Y X ... C B A unit. -
Page 33: Cd-R/Cd-Rw Discs
Additional Information • Use only normal, round CDs. If you insert irregular, non-round, shaped CDs they • This unit conforms to the track skip function of the CD-R/CD-RW disc. The tracks may jam in the CD player or not play properly. containing the track skip information are skipped automatically (in case of audio data (CD-DA)). -
Page 34: Mp3 Additional Information
Additional Information • Some audio CDs contain tracks that merge into one another without a pause. When WAV additional information these discs are converted to MP3/WMA/WAV files and burned to a CD-R/CD-RW/ • This unit plays back WAV files encoded in Linear PCM (LPCM) format or MS CD-ROM, the files will be played back on this player with a short pause between ADPCM format. -
Page 35: Terms
Additional Information Terms MS ADPCM This stands for Microsoft adaptive differential pulse code modulation, which is the Bit rate signal recording system used for the multimedia software of Microsoft Corporation. This expresses data volume per second, or bps (bits per second) units. The higher the Multi-session rate, the more information is available to reproduce the sound. -
Page 36: Specifications
Additional Information Specifications General HPF: Frequency ........50/80/125 Hz Power source ..14.4 V DC (10.8 – 15.1 V allowable) Slope ........... –12 dB/oct Grounding system ........Negative type Subwoofer: Max. current consumption ........ 10.0 A Frequency ........50/80/125 Hz Dimensions (W x H x D): Slope ...........