
Related Manuals for Hunter ULTRASONIC 31206


Summary of Contents for Hunter ULTRASONIC 31206
- Page 1 Form# 44064-01 201000506 ©2010 Hunter Fan Co. Ultrasonic Ultrasonic Ultrasonic ©2010 Hunter Fan Company Humidifier Owner’s Guide Model 31206 31207...
-
Page 2: Table Of Contents
Table of Contents At A Glance Warnings and Introduction ... 3 Know Your Humidifier ... 4 Using Your Humidifier Initial Setup and Operation ... 5 Controls ... 6 Maintenance Cleaining and Storage ... 7 Humidifier Assistance Troubleshooting ... 8 Service Parts and Support ... 9 Treatments ... -
Page 3: At A Glance
• You should never leave the unit unattended in a closed room. The room can become saturated and leave condensation on walls and furniture. Always leave a door partially open. Thank you for purchasing The Ultrasonic Humidifier by Hunter Fan Company. Please read and save these instructions to receive the maximum benefit and performance from your humidifier. -
Page 4: Know Your Humidifier
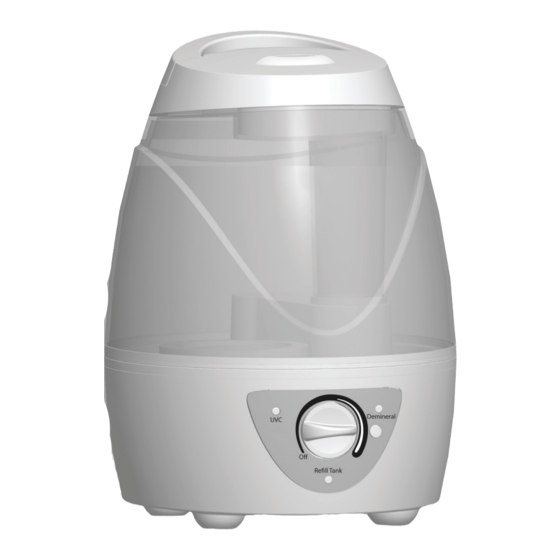
At A Glance Know Your Humidifier Tank Handle Mist Exhaust Water Tank Tank Cap Control Knob Demineralization Cartridge Indicator UVC Indicator Demineral Refill Tank Light Re ll Tank Demineralization Cartridge Reset Button Compartment UVC Bulb 44064-01 • 05/06/2010... -
Page 5: Using Your Humidifier
Warning: Never fill the humidifier with hot water. 8. Place the tank cap back on the tank and turn clockwise till secure. 9. Seat the tank back into the humidifier base making sure the tank is seated securely. nOTe: Failure to ensure the tank is seated correctly could cause the unit to leak water from the tank. -
Page 6: Controls
The humidity knob is a percentage, ranging from 30% at its lowest to 80% at the highest. Turn the knob clockwise to increase humidity output. When the humidifier has reached the set humidity level, it will shut off until the humidity level drops again. To turn the unit off, turn the the humidity knob past the lowest setting to off. -
Page 7: Maintenance
Cap off to allow the Water Tank to dry completely. 6. Wipe the surfaces of the main housing with a soft damp cloth. 7. Once all the parts are clean and dry, reassemble the humidifier, refill the water tank and resume use. - Page 8 Replacing the UVC Bulb Uvc Replacement: Your humidifier is equipped with a UVC bulb to help kill germs and bacteria in the water. This bulb needs to be replaced once a year. These instructions will assist you with bulb replacement.
-
Page 9: Humidifier Assistance
1. Make sure the humidity level is not set to OFF. 2. Adjust the humidity level using the Humidity Knob. Once the room reaches the set humidity level, the humidifier will turn OFF; this is normal. 3. Ensure the UVC bulb compartment is installed properly. -
Page 10: Parts List
30850 Technical Support If you need any assistance with setup, operation, or parts for your new Hunter Humidifier, please call us, our technical support staff is ready to help! USA: 1-888-830-1326 canada: 1-866-268-1936 Hours of operation are from 7:00 am to 7:00 pm Monday - Friday and 8:00 am to 5:00 pm on Saturday, Central Time. -
Page 11: Treatments
Humidifier Accessories Model Product 31955 Cleaning Cartridge 31954 Demineralization Cartridge 31961 Vapor Steam 31956 Vapor Pads 31960 Water Treatment Tablets ©2010 Hunter Fan Company Treatments evaporative Ultrasonic vaporizer Notes Warm Mist... -
Page 12: Warranty
Warranty 3 Year Guarantee The Hunter Fan Company, Inc. makes the following warranty to the original residential user or consumer purchaser of the ultrasonic humidifier: If any part of the ultrasonic humidifier fails during the first 3 (three) years from the date of purchase due to a defect in material or workmanship, we will provide a replacement part free of charge.