U-Line UHWC115 User Manual & Service Manual
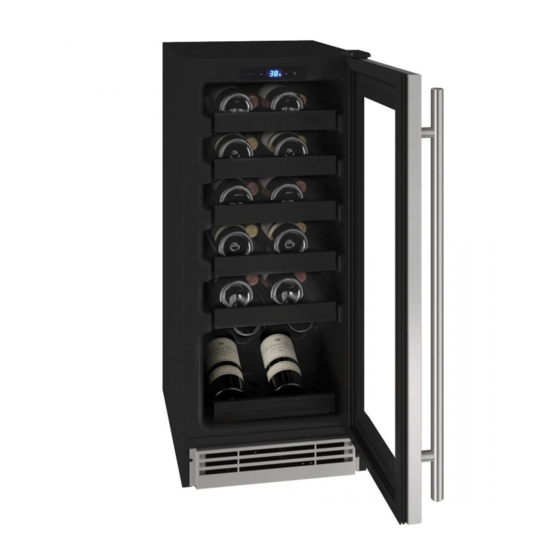
15” wine refrigerator
Hide thumbs
Also See for UHWC115:
- User manual & service manual (25 pages) ,
- User manual & service manual (48 pages) ,
- User manual & service manual (47 pages)
Table of Contents
Advertisement
Quick Links
Advertisement
Table of Contents

Related Manuals for U-Line UHWC115


Summary of Contents for U-Line UHWC115
- Page 1 USER GUIDE & SERVICE MANUAL 1 Class UHWC115 15” Wine Refrigerator ● ●...
-
Page 2: Table Of Contents
USER GUIDE & SERVICE MANUAL u-line.com Table of Contents Intro Safety Safety and Warning Disposal And Recycling Installation Environmental Requirements Electrical Cutout & Product Dimensions Cutout Dimensions Grille Installation Door Adjust Interior Adjustments Maintenance Cleaning Extended Non-Use Operating Instructions Control Operation... -
Page 3: U-Line.com
® to preserve the right product, in the right place, at the right temperature. Since 2014, U-Line has been part of the Middleby family of brands. All products are designed, engineered, and assembled in Milwaukee, Wisconsin, USA, and select products are available worldwide. -
Page 4: Safety And Warning
USER GUIDE u-line.com Safety and Warning DANGER NOTICE This unit contains R600a (Isobutane) which is a Please read all instructions before installing, flammable hydrocarbon. It is safe for regular operating, or servicing the appliance. use. Do not use sharp objects to expedite defrosting. -
Page 5: Disposal And Recycling
USER GUIDE u-line.com Disposal and Recycling DANGER RISK OF CHILD ENTRAPMENT. Before you throw away your old refrigerator or freezer, take off the doors and leave shelves in place so children may not easily climb inside. If the unit is being removed from service for disposal,... -
Page 6: Environmental Requirements
USER GUIDE u-line.com Environmental Requirements This model is intended for indoor/interior applications only and is not to be used in installations that are open/ exposed to natural elements. This unit is designed to operate between 50°F (10°C) and 100°F (38°C). Higher ambient temperatures may reduce the unit’s ability to reach low temperatures and/or reduce... -
Page 7: Electrical
USER GUIDE u-line.com Electrical WARNING SHOCK HAZARD — Electrical Grounding Required. Never attempt to repair or perform maintenance on the unit until the electricity has been disconnected. Never remove the round grounding prong from the plug and never use a two-prong grounding adapter. -
Page 8: Cutout & Product Dimensions
14 ⁄ ” (379 mm) PREPARE SITE Your U-Line product has been designed for either free- standing or built-in installation. When built-in, your unit does not require additional air space for top, sides, or rear. However, the front grille must NOT be obstructed, FRONT 28”... -
Page 9: Cutout Dimensions
SAFETY • INSTALLATION & INTEGRATION • OPERATING INSTRUCTIONS • MAINTENANCE • SERVICE Cutout Dimensions CUTOUT DIMENSIONS PREPARE SITE Your U-Line product has been designed exclusively for a built-in installation. When built-in, your unit does not Preferred location for drain, water require additional air space for top, sides, or rear. -
Page 10: Grille Installation
USER GUIDE u-line.com Grille Installation REMOVING AND INSTALLING GRILLE WARNING Disconnect electric power to the unit before removing the grille. When using the unit, the grille must be installed. Removing the grille Disconnect power to the unit. Slightly loosen three screws on bottom hinge. -
Page 11: Door Adjust
USER GUIDE u-line.com SAFETY • INSTALLATION & INTEGRATION • OPERATING INSTRUCTIONS • MAINTENANCE • SERVICE Door Adjustments DOOR ALIGNMENT AND ADJUSTMENT Align and adjust the door if it is not level or is not sealing properly. If the door is not sealed, the unit may not cool properly, or excessive frost may form in the interior. - Page 12 USER GUIDE u-line.com SAFETY • INSTALLATION & INTEGRATION • OPERATING INSTRUCTIONS • MAINTENANCE • SERVICE 3. Remove bottom hinge from cabinet by removing three 4. Tighten three screws. screws. Support the door and hinge assembly and remove it from the cabinet.
- Page 13 USER GUIDE u-line.com SAFETY • INSTALLATION & INTEGRATION • OPERATING INSTRUCTIONS • MAINTENANCE • SERVICE SHIFTING WINE RACK SPACERS (OPTIONAL) 5. Place the spacer in between the liner and slide. NOTICE Only perform these steps if you require wine rack clearance with a 90° door opening. Doors which are allowed to open past 90°...
- Page 14 USER GUIDE u-line.com SAFETY • INSTALLATION & INTEGRATION • OPERATING INSTRUCTIONS • MAINTENANCE • SERVICE Control Operation Alert Up Down Light Power Used CONTROL FUNCTION GUIDE FUNCTION COMMAND DISPLAY/OPTIONS ON/OFF Press and release Unit will immediately turn ON or OFF.
- Page 15 USER GUIDE u-line.com Interior Adjustments All 5 Class models feature side mounted rack supports with Once removed, retract the slides. 19 adjustment positions. Note: The slides on the rack have a thin coating which is used to block moisture and provide lubrication. Use All Beverage Centers ship with 2 wine racks and 2 Slide care when handling.
- Page 16 USER GUIDE u-line.com Wine Storage Options WINE RACK BOTTLE POSITION Specially designed horizontal wine racks properly position the bottles so the wine remains in contact with the cork, which ensures the cork does not become dry. Racks are designed to accommodate typical 750ml wine bottles as follows: UHWC515 15”...
- Page 17 USER GUIDE u-line.com SLIDE AND SECURE STORAGE BIN ADJUSTMENT Once removed, retract the slides. Slide and Secure Storage Bin Removal Note: The slides on the frame have a thin coating which is used to block moisture and provide Empty and remove bin.
-
Page 18: Cleaning
USER GUIDE u-line.com SAFETY • INSTALLATION & INTEGRATION • OPERATING INSTRUCTIONS • MAINTENANCE • SERVICE To reinstall: Freezer Baskets 1. Align the left and right basket channels with the tracks FREEZER BASKET INSTALLATION & REMOVAL in the cabinet. Ensure an even track engagement on Freezer baskets are removable for cleaning. -
Page 19: Service
USER GUIDE u-line.com SAFETY • INSTALLATION & INTEGRATION • OPERATING INSTRUCTIONS • • SERVICE MAINTENANCE Cleaning Integrated Models To clean integrated panels, use household cleaner per the EXTERIOR CLEANING cabinet manufacturer’s recommendations. Stainless Models Stainless door panels and handles can discolor when... - Page 20 Standpipe Water trough U-Line Ice Machine Cleaner is used to remove lime scale 6. Clean the Interior Bin as follows: and other mineral deposits. Refer to the following steps to initiate the self-cleaning cycle.
- Page 21 Due to variations in water quality or inadequate maintenance your unit may become excessively coated in lime scale or calcium. U-Line offers a cost effective refresh kit which replaces many interior components and will return your unit to like new condition. Refresh kits may be ordered from your local distributor and installed by your local service company.
-
Page 22: Wine Rack Installation
USER GUIDE u-line.com SAFETY • INSTALLATION & INTEGRATION • OPERATING INSTRUCTIONS • MAINTENANCE • SERVICE Wine Rack Installation To insert wine racks in the cabinet: 1. Align the left and right rack channels with the tracks in To remove wine racks for cleaning: the cabinet. - Page 23 USER GUIDE u-line.com Extended Non-Use For questions regarding winterization, please call VACATION/HOLIDAY, PROLONGED SHUTDOWN U-Line at 414.354.0300. The following steps are recommended for periods of extended non-use: CAUTION Remove all consumable content from the unit. Damage caused by freezing temperatures is not covered by the warranty.
- Page 24 Parts U-2260RDCINT-00B Item Description U-Line P/N Anti tip brackets w/screws 80-54012-00 Back panel 80-54086-00 Compressor eletricals only 80-54017-00 Compressor w/electricals 80-54016-00 Condenser 80-54043-00 Condenser fan w/screws 80-54014-00 Crisper 80-54044-00 Display module 80-54007-00 Door assembly w/o hinges 80-54038-00 10 Door gasket...