Table of Contents
Advertisement
Quick Links
Advertisement
Table of Contents

Related Manuals for Hyundai HY Tab


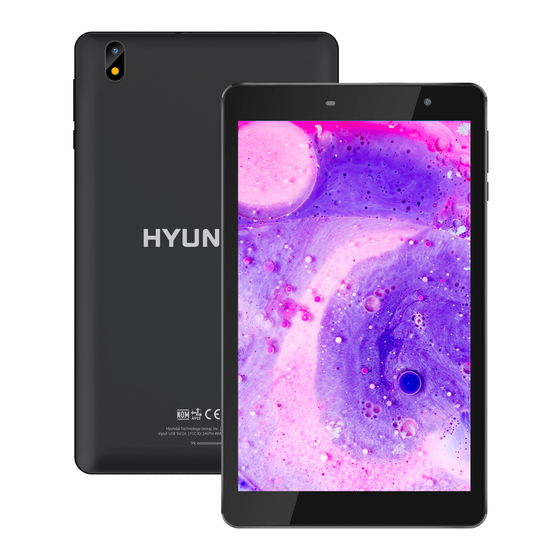
Summary of Contents for Hyundai HY Tab
- Page 1 USER MANUAL...
- Page 2 HYTAB User Manual...
- Page 3 WARRANTY NOTICE Limited Warranty does NOT cover: Any costs associated with the repair or replacement of the Product including labor, installation or other costs incurred by you, and in particular, any costs relating to the removal or replacement of any Product that is soldered or otherwise permanently affixed to any printed circuit board;...
-
Page 4: Table Of Contents
CONTENTS: Assembling Unpack Charge the battery Installing the SIM card Installing the Memory Card Getting started Turn your Device On, Reboot and Powering Off Switch to Flight Mode- Home Screen Task Bar Notification Panel Auto Rotation Locking & Unlocking your Screen Customize your Device Manage Applications Security... - Page 5 Browser Entertainment Camera Tools Calendar Alarm File Manager Audio Recorder Calculator Connectivity USB Connection Wi-Fi Bluetooth Safety Precautions Care & Maintenance Warnings...
-
Page 6: Assembling
ASSEMBLING: Unpack Check your product box for the following items. Tablet User Manual Warranty Card AC Adapter and USB Cable Charge the Battery Before using the device for the first time, you must charge the battery completely. You can charge your device with a travel adapter or by connecting the device to a PC with the included USB cable. -
Page 7: Installing The Memory Card
Installing the Memory Card To store additional multimedia files, you need to insert a memory card. Insert a memory card with the gold contacts facing downwards. Push the memory card into the slot. Notice: Our company uses approved industry standards for memory cards, but some brands may not be fully compatible with your device. -
Page 8: Task Bar
Task Bar The task bar is shown at the top of the screen. It displays commonly used option buttons, battery level indicator, current time and other indicator icons. Indicator Icons Icon Definition Icon Definition Open WiFi available BT connected WiFi connected New email Signal strength Battery power level... -
Page 9: Notification Panel
Notification Panel Pull down to open the top of the notification bar to show the 6 users commonly used shortcut switch, support click on the switch, and long press to enter the corresponding settings. If you continue to pull down the notification bar to display all the quick switch, fast switch in the lower right corner of page will display a “Edit”... -
Page 10: Manage Applications
Manage Applications To manage the applications installed on your device, tap Settings - Apps & Notifications. To uninstall an application, select an item and tap UNINSTALL, tap OK to confirm. To stop or change the settings of an application, select an item and tap the option you need. -
Page 11: Fingerprint Setup
Display Size You can set it up by clicking Settings - Display - Advanced - Display size Data Saver You can set it Settings - Network &internet - Data usage - Data Saver Quick Switch You can switch applications by simply double clicking the “Recents” button Reset Mobile Tablet Device You can reset system and desktop settings to their original values by the following steps:... -
Page 12: Communication
COMMUNICATION: Phone To use calling functions, tap Phone from application list. Make calls To make calls, you can use any of the three ways: Enter numbers by using the virtual numeric keypad on the screen Make a call from call log. Make a call from contacts. - Page 13 Call Settings To change call settings, tap the option button at the lower Right below the dial-up interface. Ringtone & Vibrate You can set different ringtones for incoming calls. Settings - Sound - Select Phone Ringtone to open a list of ringtones, select the desired ringtone, and then select OK to confirm.
-
Page 14: Contacts
Quick Responses Quick response is a feature to reject the call with the predefined messages. Tap one of the pre-written messages to be displayed when you want the call to be rejected, then tap OK. Call Forwarding Call diverting is a network feature to send incoming calls to another number that you specify. -
Page 15: Messaging
Click the edit icon at the upper right. Change necessary fields. Click. Import/Export Contacts Import from the SIM card To import the contacts from the SIM card, click the option button at the upper left and then select Settings - Import - Select SIM - Click OK - Select Contacts - Click. -
Page 16: Email
Click enter NEW MESSAGE. In Type Name or Number field, enter the recipient’s mobile phone numbers manually. If you enter more than one number, separate the numbers with a comma. In Type Test Message field, enter the text of the message. Click Send to send the message. - Page 17 Before you can send or receive mail on your device, you need to set up an email account and define the email settings correctly. You can define more than 1 mailbox. Set Up your Email Click Email from application list. You can use mailbox guide to set up your mailbox, tap Next until it’s done.
-
Page 18: Browser
WEB: Browser Tap Browser from application list to access to the web. Browser Webpages Select Browser to launch a specified homepage. To access a specific webpage, select the URL input field, enter the web address of the webpage, and select Go. Set Homepage Tap the option button at the upper right. -
Page 19: Entertainment
ENTERTAINMENT: Camera ith the camera function, you can capture photos and take videos. Capture a Photo Open the application list and select Camera. Before taking a picture, you need to know some settings. Place two fingers on the screen and spread them apart or move fingers closer together to zoom in or zoom out. -
Page 20: Tools
Record a Video Open the application list and select Camera. Tap to change to video mode. Tap to start recording. The length of the video recording is restricted by the available space on your storage. Tap to stop recording. The video is saved automatically to the folder DCIM. After recording videos, select the image viewer icon at the lower right to view the recorded videos. -
Page 21: File Manager
Set repeat cycle, alarm ringtone, Vibrate, and edit Label message, tap OK after finished. Tap “DISMISS” to shut down the alarm, and tap ”SNOOZE”, then the alarm will stop ringing for a few minutes. Tap the Arrow of one alarm and click to Delete this alarm. File Manager Many features of the device, such as images, videos, documents, received attachments and downloaded files or applications, use memory to store data. -
Page 22: Connectivity
CONNECTIVITY: USB Connection You can connect your device to a PC and use it as a removable disk, which allows you access the file directory. If you want to transfer files from or to device, insert a memory card into the device. -
Page 23: Safety Precautions
You can use Bluetooth headset phone or listening to music. Activate the Bluetooth feature From application list, tap Settings - Connected Devices - Pair New Device. Scan and Connect to other Bluetooth Devices The device automatically search for other Bluetooth devices. Select a device and pair. -
Page 24: Care & Maintenance
Switch off your device when in any area with a potentially explosive atmosphere, and obey all signs and instructions. Sparks in such areas could cause an explosion or fire resulting in bodily injury or even death. Pacemakers and Other Medical Devices Pacemaker manufacturers recommend that a minimum separation of 8 inches be maintained between a wireless device and a pacemaker to avoid potential interference with the pacemaker. -
Page 25: Warnings
Do not use or store the device in dusty, dirty areas. Do not store the device in hot or cold areas. Do not store your device near magnetic fields. Do not store your device with such metal objects as coins, keys and necklace. Do not drop your device or cause impacts to your device. - Page 26 FCC Caution: Any Changes or modifications not expressly approved by the party responsible for compliance could void the user’s authority to operate the equipment. This device complies with part 15 of the FCC Rules. Operation is subject to the following two conditions: (1) This device may not cause harmful interference, and (2) this device must accept any interference received, including interference that may cause undesired operation.
- Page 27 Connect and services are set forth in the express warranty statements accompanying such products and services. Nothing herein should be construed as constituting an additional warranty. Hyundai Technology shall not be liable for technical or editorial errors or omissions contained herein.