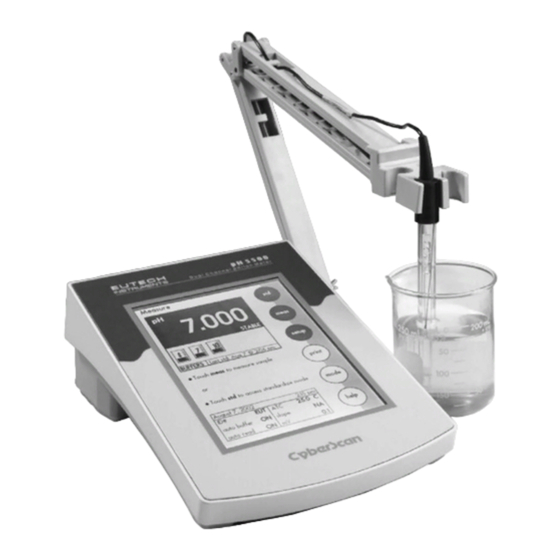
EUTECH INSTRUMENTS CyberScan DO 5000 Instruction Manual
Bench dissolved oxygen meter
Hide thumbs
Also See for CyberScan DO 5000:
- Installation and user manual (40 pages) ,
- Instruction manual (105 pages)

Related Manuals for EUTECH INSTRUMENTS CyberScan DO 5000


Summary of Contents for EUTECH INSTRUMENTS CyberScan DO 5000
- Page 1 All manuals and user guides at all-guides.com Instruction Manual CyberScan DO 5000 Bench Dissolved Oxygen Meter (Also Applicable for CyberScan PCD 5500) 68X292330 Rev. 2 07/03 Technology Made Easy ...
- Page 2 This manual is written to cover as many anticipated applications and uses of the CyberScan DO 5000 Bench meter as possible. If there are doubts in the use of the meter, please do not hesitate to contact the nearest Eutech Instruments’...
-
Page 3: Table Of Contents
All manuals and user guides at all-guides.com TABLE OF CONTENTS 1 INTRODUCTION Introducing the CyberScan Series 2 UNPACKING THE METER 3 GETTING STARTED Connectors Dissolved Oxygen Probe Touch Screen Operation Button functions 4 SYSTEM SETUP Set Date Set Time Set Beeper Status Set Print Configuration 4.4.1 Set Baud Rate... -
Page 4: Introduction
CyberScan DO5000 INTRODUCTION Introducing the CyberScan Series Thank you for selecting a Eutech Instruments CyberScan Bench meter. This manual describes the operation of the CyberScan DO 5000 bench meter. The state-of-art meter that you have purchased is easy to operate and will guide you through the various functions by displaying easy to understand prompts. - Page 5 All manuals and user guides at all-guides.com Instruction Manual CyberScan DO5000...
-
Page 6: Unpacking The Meter
BOD Probe Instruction Manual If any of these items are missing, please contact your nearest Authorized Distributor. Accessory conductivity probes and ion selective electrodes are available and can be ordered by contacting any Authorized Distributor or Eutech Instruments Marketing (65) 67786876. -
Page 7: Getting Started
All manuals and user guides at all-guides.com Instruction Manual CyberScan DO5000 GETTING STARTED Connectors 1. Review the layout and arrangement of the rear connector panel. 2. Connect the power cable to the rear connector panel power jack and to a powers source. -
Page 8: Dissolved Oxygen Probe
All manuals and user guides at all-guides.com Instruction Manual CyberScan DO5000 Dissolved Oxygen Probe This meter is equipped to use the BOD probe. 1. Carefully review the instruction sheet accompanying the probe for setup and conditioning information. 2. Connect the probe to the meter by plugging it into the DIN connector on the back of the meter. - Page 9 All manuals and user guides at all-guides.com Instruction Manual CyberScan DO5000 1. Connect the electrode arm to the base. 2. Connect the power cable to the connector cable to the rear connector panel power jack and to a power source. To connect RS232, see Data Management on Section 9 below, page...
- Page 10 All manuals and user guides at all-guides.com Instruction Manual CyberScan DO5000 Standby screen E U T E C H INSTRUMENTS 11:11 am Touch anywhere to resume...
- Page 11 All manuals and user guides at all-guides.com Instruction Manual CyberScan DO5000 Meter Main Screen E U T E C H INSTRUMENTS CyberScan DO 5000 Select from the options to the right SOUR system...
-
Page 12: Touch Screen Operation
CyberScan DO5000 Touch Screen Operation The CyberScan DO 5000 meter operates with a state of art touch screen. The touch screen makes this the easiest meter on the market to operate and care for. When this meter is first plugged in, the STANDBY screen will appear. -
Page 13: Button Functions
When in standby, the meter will not take measurements. It is in a state of rest. When you touch stdby the meter will return to the standby screen which says “Eutech Instruments” and displays the time. The mode button allows you to switch between the various mode operations of the meter. - Page 14 All manuals and user guides at all-guides.com Instruction Manual CyberScan DO5000 This button accesses the standardization screen from the various measurement modes and initiates standardization of the meter once the standardization screen is accessed. This button is the measure button and directs the meter to meas measure your sample when in the Auto Read mode.
-
Page 15: System Setup
All manuals and user guides at all-guides.com Instruction Manual CyberScan DO5000 SYSTEM SETUP System Setup SYSTEM SETUP OPTIONS Date - Set Time - Set Beeper Status - Set Print Configuration - Set Barcode Configuration edit - Set Operator - Set Display Contrast - Display Meter Information... - Page 16 All manuals and user guides at all-guides.com Instruction Manual CyberScan DO5000 E U T E C H INSTRUMENTS CyberScan DO 5000 Select from the options to the right SOUR system January 15, 2002 11:11 am System Setup SYSTEM SETUP OPTIONS...
- Page 17 All manuals and user guides at all-guides.com Instruction Manual CyberScan DO5000 Access system setup System setup can be accessed from the Setup screen (Page 12). The system setup function allows you to customise the meter display options to meet your personal preference. Once set, these will rarely need to be changed.
-
Page 18: Set Date
All manuals and user guides at all-guides.com Instruction Manual CyberScan DO5000 Set Date Set Date enter Current MM/DD/YY 1-15-02 D/M/Y clear Touch clear to delete current date numeric touchpad to input the new date and then touch enter to accept... - Page 19 All manuals and user guides at all-guides.com Instruction Manual CyberScan DO5000 This screen can be used to set the present date which will be displayed on the measure screens. This date will also be printed on demand and stored in the data storage center of the meter when data is saved.
-
Page 20: Set Time
All manuals and user guides at all-guides.com Instruction Manual CyberScan DO5000 Set Time Set Time enter Current 12HR: 10:40 am 24hr clear Touch clear to delete current time numeric touchpad to input the new time and then touch enter to accept... - Page 21 All manuals and user guides at all-guides.com Instruction Manual CyberScan DO5000 This screen can be used to set the present time which will be displayed on the measure screens. This time will also be printed on demand and stored in the data storage center of the meter when data is saved.
-
Page 22: Set Beeper Status
All manuals and user guides at all-guides.com Instruction Manual CyberScan DO5000 Set Beeper Status Set Beeper Status Current BEEPER STATUS After STABLE Reading - After KEY Touch - On LIMIT Exceeded save arrow keys to highlight beeper option and then touch ON/OFF change Touch... - Page 23 All manuals and user guides at all-guides.com Instruction Manual CyberScan DO5000 This screen allows you to turn on or off the beeper. You may choose to have an audible signal when the meter recognises that the current measurement is stable, each time a function button is touched and/ or when the set limits of a measurement mode have been exceeded.
-
Page 24: Set Print Configuration
All manuals and user guides at all-guides.com Instruction Manual CyberScan DO5000 Set Print Configuration Set Print Configuration Current PRINT CONFIGURATION - Baud Rate 19200 - Number of Bits - Stop Bits - Parity NONE - Serial Output Mode TEXT edit arrow keys to highlight desired print setting and then touch... - Page 25 All manuals and user guides at all-guides.com Instruction Manual CyberScan DO5000 You can adjust the print configuration of this meter from this screen. The configuration of the following screens must match the configuration of the printer or computer to which the data will be sent. To Set Print Configuration 1.
-
Page 26: Set Baud Rate
All manuals and user guides at all-guides.com Instruction Manual CyberScan DO5000 4.4.1 Set Baud Rate Set Baud Rate Current BAUD RATE 1200 2400 enter 4800 9600 19200 38400 This configuration option will control the speed at which the data will be transmitted by the printer. -
Page 27: Set Number Of Bits
All manuals and user guides at all-guides.com Instruction Manual CyberScan DO5000 4.4.2 Set Number of Bits Set Number of Bits enter Current NUMBER OF BITS To Set Number of Bits 1. Access the Set number of Bits screen from the Set Print Configuration screen. -
Page 28: Set Stop Bits
All manuals and user guides at all-guides.com Instruction Manual CyberScan DO5000 4.4.3 Set Stop Bits Set Stop Bits enter Current STOP BITS To Set Stop Bits 1. Access the Set Stop Bits screen from the Set Print Configuration screen. The current number of bits is displayed on the screen. 2. -
Page 29: Set Parity
All manuals and user guides at all-guides.com Instruction Manual CyberScan DO5000 4.4.4 Set Parity Set Parity enter NONE Current PARITY EVEN To Set Parity 1. Access the Set Parity screen from the Set Print Configuration screen. The current Parity is displayed on the screen. 2. -
Page 30: Set Serial Output Mode
All manuals and user guides at all-guides.com Instruction Manual CyberScan DO5000 4.4.5 Set Serial Output Mode Set Serial Output Mode enter Current MODE TEXT DATA To Set Serial Output Mode 1. Access the serial output mode from the set print configuration screen. -
Page 31: Set Barcode Configuration
All manuals and user guides at all-guides.com Instruction Manual CyberScan DO5000 Set Barcode Configuration Set Barcode Configuration enter Current MODE Use this option, as well as Set Print Configuration, to prepare the meter for use with a barcode scanner. Set to “ON” is using a barcode scanner. -
Page 32: Set Operator
All manuals and user guides at all-guides.com Instruction Manual CyberScan DO5000 Set Operator Set Operator enter Current Operator clear... - Page 33 All manuals and user guides at all-guides.com Instruction Manual CyberScan DO5000 This option allows you to identify the user of the meter. This information can be saved in the meter’s memory. It can also be printed out with measurement data on demand. The operator identification can be up to 9 characters.
-
Page 34: Set Display Contrast
All manuals and user guides at all-guides.com Instruction Manual CyberScan DO5000 Set Display Contrast Set Display Contrast lighter darker save Touch lighter darker to adjust contrast and then touch save to accept The value displayed ranges from 0(darkest) to 25 (lightest) - Page 35 All manuals and user guides at all-guides.com Instruction Manual CyberScan DO5000 This option allows you to change the contrast on the screen to improve the readability of the information presented on the screen. The numbering system that appears on the screen is from 0 to 25. The darkest setting is 0 and the lightest setting is 25.
-
Page 36: Display Meter Information
All manuals and user guides at all-guides.com Instruction Manual CyberScan DO5000 Display Meter Information E U T E C H INSTRUMENTS CyberScan DO 5000 Unit Serial Number: XX999XXX Software Revision: 1.04b This screen displays the model number, serial number and current... -
Page 37: Reset To Factory Defaults
All manuals and user guides at all-guides.com Instruction Manual CyberScan DO5000 Reset to Factory Defaults Reset to Factory Defaults You are about to reset all parameters of the meter to factory default settings. Are you sure you want to do this? This screen allows you to reset all functions and setup parameters of the meter of the settings originally programmed at the factory. -
Page 38: O. / Bod/ Our/ Sour Setup
All manuals and user guides at all-guides.com Instruction Manual CyberScan DO5000 D.O. / BOD/ OUR/ SOUR SETUP D.O. Setup D.O. SETUP OPTIONS - Set Sample ID# - Select Calibration Mode - Select Auto Read Mode - Set Stability Criteria - Set Temperature Units - Select Measurement Units... -
Page 39: To Access Setup
All manuals and user guides at all-guides.com Instruction Manual CyberScan DO5000 To Access Setup From the DO, BOD, OUR and SOUR screens 1. Touch DO, BOD, OUR, or SOUR from the main screen to access any of these modes. 2. Touch setup 3. -
Page 40: Set Sample Id
All manuals and user guides at all-guides.com Instruction Manual CyberScan DO5000 Set Sample ID# Set D.O. Sample ID# enter Manual ID# clear... - Page 41 All manuals and user guides at all-guides.com Instruction Manual CyberScan DO5000 When this option is active, each time you touch print on the Measure Screen the DO values along with date/time and the sample ID will be sent to data storage. You can manually enter an alphanumeric identification of up to 9 characters for any sample or you can have the meter sequentially number your samples beginning at the number of your choice.
- Page 42 All manuals and user guides at all-guides.com Instruction Manual CyberScan DO5000 Set D.O. Sample ID# enter Sequential ID# 24hr clear Touch clear to delete current ID numeric touchpad to input the new starting ID and then touch enter to accept...
- Page 43 All manuals and user guides at all-guides.com Instruction Manual CyberScan DO5000 Sequential ID# Assignment 1. Access the Set Sample ID# screen from the Setup screen. 2. Touch seq for sequential ID# assignment. The current ID# is displayed on the screen. 3.
-
Page 44: Select Calibration Mode
All manuals and user guides at all-guides.com Instruction Manual CyberScan DO5000 Select Calibration Mode Select D.O. Calibration Mode enter AUTO Current MODE This mode permits a choice between automatic and manual standardization. In most case, automatic calibration is preferred. However, if the standard is not saturated and the oxygen concentration is known, (by titration, for example), manual calibration offers the user capability of entering the known oxygen concentration via a numeric keypad. -
Page 45: Select Auto Read Mode (Only Available In D.o. Mode)
All manuals and user guides at all-guides.com Instruction Manual CyberScan DO5000 Select Auto Read Mode (Only available in D.O. mode) Select D.O. Auto Read Mode enter AUTO Current MODE You can use this meter when the Auto Read Mode function is active or when it is inactive. -
Page 46: Set Configurations For Bod/ Our And Sour
All manuals and user guides at all-guides.com Instruction Manual CyberScan DO5000 Set Configurations for BOD/ OUR and SOUR (Not applicable in D.O. mode) Set BOD Configuration This option allows the user to select certain parameters that define the criteria for seed and sample acceptance. Theses parameters are Seed Minimum Data DO (DO - DO ). - Page 47 All manuals and user guides at all-guides.com Instruction Manual CyberScan DO5000 Set SOUR Configuration This option allows the user select parameters that define the criteria for the Specific Oxygen Uptake Rate (OUR) test. These include Dilution Factor, Minimum Time (minutes) duration of the test, Maximum Time duration, Minimum Starting DO, Minimum Ending DO, and Solids Weight (g/L).
-
Page 48: Set Stability Criteria
All manuals and user guides at all-guides.com Instruction Manual CyberScan DO5000 Set Stability Criteria Select D.O. Stability Criteria AUTO Current MODE Fast Medium Slow enter This setup screen allows you to choose how quickly the meter will accept a reading as stable. There are three settings: fast, medium, and slow. -
Page 49: Set Temperature Units
All manuals and user guides at all-guides.com Instruction Manual CyberScan DO5000 Set Temperature Units Select D.O. Temperature Units enter Current UNITS 1. Access the Select Temperature Units screen from the DO/ BOD/ OUR/ SOUR Setup screen. The current temperature unit is displayed on the screen. -
Page 50: Set Measurement Units
All manuals and user guides at all-guides.com Instruction Manual CyberScan DO5000 Set Measurement Units Select D.O. Measurement Units Current UNITS %sat mg/L %sat mbar enter 1. Access the Select Measurement Units screen from the DO/ BOD/ OUR/ SOUR Setup screen. 2. -
Page 51: Set The Salinity Value Of Your Sample
All manuals and user guides at all-guides.com Instruction Manual CyberScan DO5000 Set the Salinity Value of Your Sample 1. Access the Set Salinity screen from the DO/ BOD/ OUR/ SOUR Setup screen 2. Touch clear to delete the current value 3. -
Page 52: Set Barometer
All manuals and user guides at all-guides.com Instruction Manual CyberScan DO5000 5.10 Set Barometer Set Barometer enter 668.5 mmHg Current Pressure mbar clear Touch clear to delete current pressure numeric touchpad to input the new pressure and then touch enter to accept... - Page 53 All manuals and user guides at all-guides.com Instruction Manual CyberScan DO5000 The DO 5000 has an internal barometer. When it is no longer reflects the true barometer pressure, it must be calibrated. The Set Barometer option allows you to do this. To Set Barometer 1.
-
Page 54: Set Alarm Limits
All manuals and user guides at all-guides.com Instruction Manual CyberScan DO5000 5.11 Set Alarm Limits Set D.O. Limits Current LIMITS - D.O. Alarm D.O. Minimum 0.00 D.O. Maximum 1500 arrow keys to highlight desired Limit Touch ON/OFF edit to change... - Page 55 All manuals and user guides at all-guides.com Instruction Manual CyberScan DO5000 This option allows you to set alarm limits for the DO/ BOD/ OUR/ SOUR measuring mode. If the DO value of the measurement is outside the boundaries set by the minimum and maximum limits, an audible alarm and/ or a visual warning will appear to let you know that your sample measurement was outside of the set limits.
-
Page 56: Set Print Criteria
All manuals and user guides at all-guides.com Instruction Manual CyberScan DO5000 5.12 Set Print Criteria Set D.O. Print Criteria Current PRINT CRITERIA - Date/Time/Channel - Sample ID - DO Measurement - Temperature - ATC - Last Standardization - Current Standard - Atmospheric Pressure - Salinity save... - Page 57 All manuals and user guides at all-guides.com Instruction Manual CyberScan DO5000 This screen allows you to select which criteria are printed with the measurement when you print the data or send it to the computer. The status of the current print criteria is displayed on the screen. The criteria option is active if “ON”...
-
Page 58: Set Print Interval
All manuals and user guides at all-guides.com Instruction Manual CyberScan DO5000 5.13 Set Print Interval Set D.O. Print Interval enter Current INTERVAL manual stable timed numeric touchpad to input the desired print interval in seconds and then touch enter to accept Touch stable to print upon stable readings... - Page 59 All manuals and user guides at all-guides.com Instruction Manual CyberScan DO5000 2. Touch MAN to set the meter for manual printing. Touch enter to accept the print interval mode and return to the Setup screen. Printing is now done manually by touching print on the Measure screen.
-
Page 60: Set Data Storage Criteria
All manuals and user guides at all-guides.com Instruction Manual CyberScan DO5000 5.14 Set Data Storage Criteria Set D.O. Data Storage Criteria Current DATA STORAGE CRITERIA - Date/Time - Sample ID - measurement - Temperature - ATC - Last Standardization - Current Standard - Atmospheric Pressure - salinity save... - Page 61 All manuals and user guides at all-guides.com Instruction Manual CyberScan DO5000 This screen allows you to select what criteria are stored in the meter’s memory with the measurement when you save the data. Data is stored only if a Sample ID has been assigned. The status of the current data storage criteria is displayed on the screen.
-
Page 62: Set Display Resolution
All manuals and user guides at all-guides.com Instruction Manual CyberScan DO5000 5.15 Set Display Resolution Set D.O. Display Resolution enter Current RESOLUTION high high Select desired display resolution and then touch enter to accept... - Page 63 All manuals and user guides at all-guides.com Instruction Manual CyberScan DO5000 Here you can set the display resolution on the screen. Choose high for two decimal points in mg/L, and for one decimal point in % sat and mbar. Choose low for one decimal point in mg/L and one unit resolution in % sat and mbar.
-
Page 64: Set Display Configuration
All manuals and user guides at all-guides.com Instruction Manual CyberScan DO5000 5.16 Set Display Configuration Set D.O. Display Configuration Current DISPLAY CONFIGURATION - Last Standardization - Date - Time - measurement channel - sample ID - auto cal status - auto read status - temperature save - atmospheric pressure... - Page 65 All manuals and user guides at all-guides.com Instruction Manual CyberScan DO5000 This particular function will allow you to choose what information you would like to be displayed on the DO/ BOD/ OUR/ SOUR Measure screen, particularly the information contained in the data box at the bottom of that screen.
-
Page 66: View Stored Data
All manuals and user guides at all-guides.com Instruction Manual CyberScan DO5000 5.17 View Stored Data View STORED DATA Data POINTS Sample ID Date Operator enter clear arrow keys to highlight desired sort option and then touch enter to accept Touch clear to erase all stored data... - Page 67 All manuals and user guides at all-guides.com Instruction Manual CyberScan DO5000 The meter has memory capacity of up to 250 data points. The view stored data screen allows you to sort and look at specific data points. The stored data can be sorted by sample identification number, date or operator identification number.
- Page 68 All manuals and user guides at all-guides.com Instruction Manual CyberScan DO5000 To sort by Date 1. Access the Date sort option from the View Stored Data screen. 2. Touch clear to delete the current date. 3. Use the numeric keypad to enter the date on which the data points you want to view were saved.
- Page 69 All manuals and user guides at all-guides.com Instruction Manual CyberScan DO5000 If an operator ID is entered and no data points are stored with that operator ID, you will see a message indicating the operator ID was not found. Touch OK to return to the operator ID keypad and enter a new operator ID.
-
Page 70: O. Operation
All manuals and user guides at all-guides.com Instruction Manual CyberScan DO5000 D.O. OPERATION Measure mg/L 8.21 meas STABLE STND Not Standardized setup Touch meas to measure sample Touch to access standardize mode August 12, 2002 9.32am 25.3°C auto cal Salinity 0.0ppt auto read mmHg... -
Page 71: Do Standardization
Instruction Manual CyberScan DO5000 DO Standardization The CyberScan DO 5000 has two standardization modes. There is auto- standardization, merely requiring the touch of a button to complete. There is also manual standardization. Here the DO value, in either % Saturation or mg/L units, of the standard will be entered manually by means of a keypad, which appears on the screen. - Page 72 All manuals and user guides at all-guides.com Instruction Manual CyberScan DO5000 Standardize mg/L 8.21 meas STABLE 97.9 %sat setup 8.15 mg/L STND Last std: Aug 12 @ 8:16 am Touch clear to delete previous standard Insert electrode into standard and stir Touch to standardize mode August 12, 2002...
- Page 73 All manuals and user guides at all-guides.com Instruction Manual CyberScan DO5000 To Standardize the meter in the Automatic Standardization Mode 1. Insert the DO probe into a BOD bottle containing about 1 inch of water. 2. Touch STD on the DO or BOD Measure screen to access the standardized screen 3.
- Page 74 All manuals and user guides at all-guides.com Instruction Manual CyberScan DO5000 Standardize mg/L 8.21 meas STABLE 8.15 mg/L setup 97.9 %Sat STND Last std: Aug 12 @ 8:16 am Touch clear to delete previous standard Insert electrode into standard and stir Touch to standardize mode August 12, 2002...
- Page 75 The meter will then return to the measure screen. Barometer Calibration The CyberScan DO 5000 internal barometer provides pressure compensation for both auto and manual standardization. For most accurate results, the barometer reading should be checked occasionally for accuracy.
- Page 76 All manuals and user guides at all-guides.com Instruction Manual CyberScan DO5000 Measure mg/L 8.21 meas STABLE STND Not Standardized setup Touch meas to measure sample Touch to access standardize mode August 12, 2002 9.32am 25.3°C auto cal Salinity 0.0ppt auto read mmHg...
- Page 77 All manuals and user guides at all-guides.com Instruction Manual CyberScan DO5000 Measuring DO with Auto Read ON The measure screen provides a readout of the current sample measurement. If Auto Read is active, the meter will lock onto a reading until meas is touched. If Auto Read is inactive, the meter will continuously monitor the DO and the reading will indicate any change in the DO level, Regardless of the status of the Auto Read mode, a STABLE message is displayed when the measurement meets the...
- Page 78 All manuals and user guides at all-guides.com Instruction Manual CyberScan DO5000 E U T E C H INSTRUMENTS CyberScan DO 5000 Select from the options to the right SOUR system January 15, 2002 11:11 am Measure mg/L 8.21 meas STABLE...
-
Page 79: Biological Oxygen Demand (Bod) Measurement
All manuals and user guides at all-guides.com Instruction Manual CyberScan DO5000 Biological Oxygen Demand (BOD) Measurement Measure - BOD mg/L 8.21 start 0:00 STABLE STND Not Standardized setup Touch start to begin measurement Touch to access standardize mode August 12, 2002 9.32am 25.3°C autocal... - Page 80 All manuals and user guides at all-guides.com Instruction Manual CyberScan DO5000 With the CyberScan DO 5000, BOD calculations are automatic. When the BOD button is touched, a variety of meter screens will sequentially appear, allowing you to enter information essential to a BOD calculation.
- Page 81 All manuals and user guides at all-guides.com Instruction Manual CyberScan DO5000 To Measure the BOD of the Seed Initial DO Measurement 1. Access the BOD mode from the main mode screen 2. Once the DO reading is stable, touch BOD. 3.
- Page 82 All manuals and user guides at all-guides.com Instruction Manual CyberScan DO5000 5. If the sample is new, the BOD first reading screen appears. Touch SEED. Measure-BOD mg/L 8.21 BOD first reading Is this reading a SEED or a SAMPLE? STND Not Standardized setup Touch...
- Page 83 All manuals and user guides at all-guides.com Instruction Manual CyberScan DO5000 6. Key in a sample description using the alphanumeric touch pad, SEED, for example. 7. Touch enter to accept the sample description. enter Description SEED clear...
- Page 84 All manuals and user guides at all-guides.com Instruction Manual CyberScan DO5000 8. Key in the volume of the SEED sample using the alphanumeric touch pad. Touch enter to accept the SEED volume. SEED volume STABLE Not Standardized exit enter 9. Touch enter to accept the Seed dilution ratio. 10.
- Page 85 All manuals and user guides at all-guides.com Instruction Manual CyberScan DO5000 Final DO Measurement Access the BOD mode from the main mode screen Once the DO reading is stable, touch BOD. Using the bottle ID numeric touch pad, key in a sample bottle ID number Touch enter to accept the bottle ID number.
- Page 86 All manuals and user guides at all-guides.com Instruction Manual CyberScan DO5000 To Measure BOD of a Sample Initial DO measurement 1. Access the BOD mode from the main mode screen 2. Once the DO reading is stable, touch BOD 3. Using the bottle ID numeric touch pad, key in a sample bottle ID number 4.
- Page 87 All manuals and user guides at all-guides.com Instruction Manual CyberScan DO5000 5. If the sample is new, the BOD first reading screen appears. Touch SAMPLE. Measure-BOD mg/L 8.21 BOD first reading Is this reading a SEED or a SAMPLE? STND Not Standardized setup Touch...
- Page 88 All manuals and user guides at all-guides.com Instruction Manual CyberScan DO5000 8. Use the Predilution Ratio touch pad to key in the ml ratio of sample to final volume. If there is no predilution, use the ratio 1:1, and key in the value 1. If the ratio is 1:100, key in 100. Predilution (1 to X) STABLE Not Standardized...
- Page 89 All manuals and user guides at all-guides.com Instruction Manual CyberScan DO5000 BOD Results mg/L Seed ID: 1, SEEDA Predilution: Seed Volume: 3 ml Bottle Volume: 300 ml Initial DO: 8.17 mg/L Final DO: 0.00 mg/L Delta DO: 8.17 mg/L print...
- Page 90 All manuals and user guides at all-guides.com Instruction Manual CyberScan DO5000 At this point, the initial DO and all of the above information about the sample will be stored in the data log. After an incubation period of at least one day, the DO of the sample must be measured again. Final DO Measurement 1.
-
Page 91: Oxygen Uptake Rate (Our) Measurement
All manuals and user guides at all-guides.com Instruction Manual CyberScan DO5000 Oxygen Uptake Rate (OUR) Measurement Measure - OUR mg/L/hr 8.21 start 0:00 STABLE STND Not Standardized setup Touch start to begin measurement Touch to access standardize mode August 12, 2002 9.32am 25.3°C autocal... - Page 92 All manuals and user guides at all-guides.com Instruction Manual CyberScan DO5000 1. Touch OUR on the main mode screen. 2. Touch setup to set parameters essential for the OUR calculation. These include dilution ratio, minimum run time, maximum run time, minimum DO required to end the test. 3.
-
Page 93: Specific Oxygen Uptake Rates (Sour)
All manuals and user guides at all-guides.com Instruction Manual CyberScan DO5000 Specific Oxygen Uptake Rates (SOUR) Measure - SOUR mg/hr/g 8.21 start 0:00 STABLE STND Not Standardized setup Touch start to begin measurement Touch to access standardize mode August 12, 2002 9.32am 25.3°C autocal... - Page 94 All manuals and user guides at all-guides.com Instruction Manual CyberScan DO5000 1. Touch SOUR on the main mode screen. 2. Touch setup to set parameters essential for the SOUR calculation. These include dilution ratio, minimum run time, maximum run time, minimum DO required to start the test, the minimum DO required to end the test and the total solids of the sample in g/L.
-
Page 95: Cleaning
Do not use chemical solvents on the case. TROUBLE SHOOTING The CyberScan DO 5000 displays pertinent error messages to guide you should an error occur with a measurement or meter operation (touch pad and input errors). The messages come with a brief... -
Page 96: Data Management
All manuals and user guides at all-guides.com Instruction Manual CyberScan DO5000 DATA MANAGEMENT Your CyberScan DO 5000 meter is equipped with an RS-232 port for sending measurement data to a printer. The printer must be capable of receiving data within the following guidelines. Baud rates... - Page 97 All manuals and user guides at all-guides.com Instruction Manual CyberScan DO5000 To download data stored in memory to a printer, access the View Stored Data option in the setup screens. Access the desired data point by sorting the data via one of the three sorting options. Touch print on the screen displaying the data.
-
Page 98: 10 Do Fundamentals
CyberScan DO5000 10 DO FUNDAMENTALS Meter Operation The CyberScan DO 5000 meter uses the polarographic method of determining dissolved oxygen concentration. A voltage is maintained across two electrodes (a gold cathode and a silver anode) and an electrolyte separated from the sample solution by an oxygen permeable membrane. -
Page 99: 11 Meter Specifications
All manuals and user guides at all-guides.com Instruction Manual CyberScan DO5000 11 METER SPECIFICATIONS Feature Details 5000 5500 Display 640X480 back-lit dot- matrix LCD Screen size 114.3(W) X 152.4(H) mm Measurement display 19.1 (H) mm height Temp/etc. display height 6.4 (H) mm Menu options Extensive Help screens... - Page 100 All manuals and user guides at all-guides.com Instruction Manual CyberScan DO5000 Feature Details 5000 5500 pH mode ا Range -2.000 to ±20.000 Resolution 0.1/ 0.01/ 0.001 Relative Accuracy ±0.002 Calibration points Incremental methods KA,KS,AA,AS mV mode Range ±1800.0 Resolution Accuracy ±0.1 Ion mode Range...
- Page 101 All manuals and user guides at all-guides.com Instruction Manual CyberScan DO5000 Feature Details 5000 5500 General Password Protection Input/ output DIN/ RS232 2BNC/ 2 socket pin(reference, 2-pin conductivity)/ 2.5mm phono jack(ATC), 2DIN (ISFET, 4- cell or DO) Electrical requirements Input: 115VAC or 230 VAC Output: 12VDC, 500 mA (center negative) Line voltage tolerance...
-
Page 102: 12 Accessories
Replacement Meters and Accessories CODE NO. DESCRIPTION EC-DO5000/12 CyberScan DO 5000 Bench DO/BOD Meter (Touch screen) with self stirring BOD probe (EC-620-SSP) and 110VAC power adapter, 2-flat pin US type (center negative) EC-DO5000/22 CyberScan DO 5000 Bench DO/BOD Meter (Touch... -
Page 103: 13 Warranty
Instruction Manual CyberScan DO5000 13 WARRANTY Eutech Instruments supplies the bench meters with a 3-year warranty and 6-month warranty for probes against manufacturing defects from the date of purchase. If repair or adjustment is necessary and has not been the result of abuse or misuse within the warranty period, please return, freight prepaid, and correction will be made without charge. - Page 104 All manuals and user guides at all-guides.com NOTES...
- Page 105 All manuals and user guides at all-guides.com For more information on Eutech Instruments products, contact your nearest Eutech Instruments distributor or visit our website listed below: Distributed by: Manufactured by: Eutech Instruments Pte Ltd Blk 55, Ayer Rajah Crescent, #04-16/24 Singapore 139949...