Miele CVA 7840 Operating And Installation Instructions
Built-in coffee system
Hide thumbs
Also See for CVA 7840:
- Operating and installation instructions (116 pages) ,
- Installation manual (5 pages) ,
- Operating and installation instructions (112 pages)

Related Manuals for Miele CVA 7840


Summary of Contents for Miele CVA 7840
- Page 1 Operating and Installation Instructions Built-in Coffee System To prevent accidents and machine damage, you must read these instructions before installation or use. en-US M.-Nr. 11 388 890...
-
Page 2: Table Of Contents
Operation......................19 Touch display ...................... 19 Operating actions ....................20 Symbols in the display ..................23 Miele@home....................... 24 Before first use ....................25 Before using for the first time ................25 Turning on for the first time ................. 25 Setting up the bean system ................27 The bean system .................... - Page 3 Contents Parameters......................44 Displaying and changing parameters ..............44 Amount of coffee....................44 Brewing temperature ................... 44 Pre-brewing ground coffee.................. 44 Type of beans ...................... 45 Portion size ......................46 Resetting drinks ....................47 Profiles........................ 48 Creating a profile ....................48 Editing profiles.....................
- Page 4 Automatic cleaning and descaling ..............83 What to ensure before and during automatic maintenance programs....83 Automatic cleaning....................84 The Miele Cleaning Cartridge................84 Replacing the cleaning cartridge................. 85 Automatic descaling.................... 86 The Miele Descaling Cartridge ................86 Maintenance Timer....................88...
- Page 5 Contents Canceling automatic cleaning and descaling............89 Frequently Asked Questions ................90 Messages in the display..................90 Unusual performance of the coffee system ............93 Faults with automatic cleaning and/or descaling ..........97 Unsatisfactory results..................99 Service and warranty ..................102 Contact in the event of a fault ................
-
Page 6: Important Safety Instructions
Miele cannot be held liable for injury or damage caused by non- compliance with these instructions. Keep these operating instructions in a safe place and pass them... - Page 7 IMPORTANT SAFETY INSTRUCTIONS Appropriate use This coffee machine is intended for household use. Do not use the coffee machine outdoors. This coffee machine must not be used at altitudes above 6560 ft (2000 m). The machine is intended only for household use and for the preparation of drinks such as espresso, cappuccino, latte macchiato, tea, etc.
- Page 8 IMPORTANT SAFETY INSTRUCTIONS Safety with children Danger of burning and scalding at the dispensers. Children's skin is far more sensitive to high temperatures than that of adults. Ensure children do not touch hot surfaces of the coffee machine or place parts of their body under the dispensers.
- Page 9 IMPORTANT SAFETY INSTRUCTIONS Technical safety Installation work or repairs should only be carried out by a Miele authorized technician. Unauthorized or incorrect installation work or repairs can pose considerable danger to users. A damaged coffee system could be dangerous. Before building in the machine, check it for any externally visible damage.
- Page 10 If the coffee system is to be built in above another appliance, there must be a full-width, closed shelf between them (except when it is combined with a Miele built-in warming drawer). Only use the coffee system in rooms where the ambient temperature is between +50°F (16°C) and +100°F (38°C).
- Page 11 Pull the plug, not the cord, to disconnect the appliance from the power supply. The manufacturer's warranty may be invalidated if the appliance is not repaired by a Miele approved service technician from Technical Service. Never open the outer casing of the machine. Tampering with...
- Page 12 IMPORTANT SAFETY INSTRUCTIONS Correct use Danger of burning and scalding at the dispensers. The liquids and steam dispensed are very hot. Keep away from the area underneath the dispensers when hot liquids and steam are being dispensed. Do not touch hot components. Hot liquid or steam could spatter from the nozzles.
- Page 13 IMPORTANT SAFETY INSTRUCTIONS Do not use green (unroasted) coffee beans or mixtures of coffee beans which contain green coffee beans. Green coffee beans are very hard and still contain residual moisture. These can damage the coffee machine grinder as soon as grinding begins. ...
-
Page 14: Preparing Your Appliance For An Extended Vacation
This means under the sink for a dishwasher, at the laundry bib for your washer, etc. Accessories and parts Only use genuine Miele accessories. If other parts are used, warranty, performance, and/or product liability claims may be invalidated. ... - Page 15 Miele cannot be held liable for damage that results from not cleaning and/or descaling the machine properly, or from using the wrong cleaning/descaling agent, or an unsuitable solution concentration.
- Page 16 IMPORTANT SAFETY INSTRUCTIONS For machines with stainless steel surfaces: Do not use sticky notes, transparent adhesive tape, masking tape, or other types of adhesive on the stainless steel surfaces. These will damage the stainless steel surfaces, causing them to lose their dirt- repellent protective coating.
-
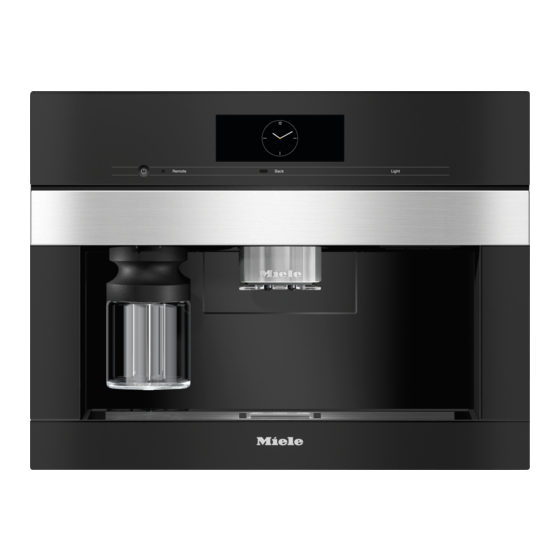
Page 17: Guide To The Appliance
Guide to the appliance Front view 1 2 3 Remote Back Light a On/Off button b Optical interface (for Miele Technical Service only) c Remote sensor button (MobileStart) d Movement sensor e Back sensor button f Touch display g Light sensor button h Door handle... - Page 18 Guide to the appliance Interior view a Bean containers ( Type A Type C b Milk valve c Height-adjustable main dispenser with lighting d Grinder setting e Bean container ( Type B f Fan outlet g Water container h Drip tray with lid i Brew unit j Grounds container k Maintenance container...
-
Page 19: Operation
Operation Touch display The delicate touch display can be scratched by pointed or sharp objects, e.g., pens. Only touch the display with your fingers. The touch display is split into multiple areas. Miele 12:00 Espresso... -
Page 20: Operating Actions
Operation Operating actions All the selectable options are displayed in black or white according to your selected color scheme. Each time you tap a possible option, the relevant characters (word and/or symbol) light up orange. Selecting a menu option Tap the field or value you want in the display. Scrolling You can scroll left or right. - Page 21 Operation Select the value you want: As soon as you enter a valid value, OK turns green. Use the arrow to delete the last entered number. Confirm with OK. Entering a name Letters are entered using a keyboard. It is best to select short names. ...
- Page 22 Operation Help Context-sensitive help is available for certain functions. In this case, Help appears in the bottom line. Tap to display information in text and pictures. Help Tap to return to the previous menu. Close Pull-down menu Among other things, the pull-down menu provides access to a schematic representation of the bean containers and to Expert Mode ...
-
Page 23: Symbols In The Display
This symbol and a fault code will appear if a fault occurs. If Miele@home has been activated for the coffee machine, these symbols represent the quality of the WiFi connection. They indicate the strength of the WiFi connection in ... -
Page 24: Miele@Home
This can cause sporadic or even - the Miele app complete connection failures. - a Miele user account You can create Therefore, the availability of featured a user account via the Miele app. functions cannot be guaranteed. -
Page 25: Before First Use
The choice of location determines how connected to a WiFi network and the time of day is displayed, e.g., in signed into the Miele app, the time will the 12 or 24-hour format, as well as be synchronized based on the location how units are displayed and so on. - Page 26 Before first use Setting up automatic cleaning and descaling Information about automatic cleaning and descaling will appear in the display. Confirm with OK. Tip: Tap to display an illustrated Help guide. Inserting the cleaning cartridge You will now be prompted to insert the cleaning cartridge.
-
Page 27: Setting Up The Bean System
Before first use You can also adjust the start time for automatic cleaning and descaling at a later point. Selecting the Performance Mode You can select the appropriate mode to suit your personal preferences (see “Settings – Performance Mode”). - Eco Mode: This is an energy-saving mode. - Page 28 Before first use - If you are using the same type of beans in 2 or 3 bean containers at the same time (for instance, because you only use one bean type), make sure you name them in the exact same way. Name type of beans for bean container? appears in the display and Type A...
- Page 29 Before first use Tip: Tap All drinks to select all the drinks. You can then deselect the ones you do not want. If you do not allocate the bean containers to the drinks, you will be asked what type of bean you want to use for the coffee as you make it.
-
Page 30: The Bean System
Type of beans these drinks which are different to the standard Miele profiles. Type A Type B Type C Risk of damage to the grinder due to incorrect operation. -
Page 31: Changing How The Bean Containers Are Allocated
Changing how the bean containers are allocated If you have created extra user profiles for coffee drinks in addition to the Miele standard profile, the bean types can be individually allocated to the drinks in each profile. Tap Change allocation If you have set up 1 or more profiles... -
Page 32: Filling The Water Tank
Filling the water tank Risk to health due to contaminated water. Bacteria can develop in water which has been sitting in the water container for too long and is a risk to your health. Change the water in the water container every day. -
Page 33: Switching On And Off
Switching on and off Switching the coffee machine Turning off for longer periods of time Tap the On/Off button . If the coffee machine is not going to be used for a while, e.g., if you are going The coffee machine heats up and rinses on vacation, remember to do the the pipework. -
Page 34: Dispenser Adjustment
Dispenser adjustment The main dispenser cannot be manually adjusted. Before making the drink, the main dispenser moves down and the cup sensor stops it at the optimum height for the cups or glasses being used. When the coffee machine is switched off, the main dispenser will be in the middle position. -
Page 35: Preparing Beverages
Preparing beverages - Capuccino consists of approx. Danger of burning and scalding 2 thirds milk froth and 1 third at the dispensers. espresso. The liquids and steam dispensed are - Latte macchiato consists of 1 third very hot and can cause scalding. each of hot milk, milk froth, and Keep away from the area underneath espresso. -
Page 36: Milk Preparation
Preparing beverages The milk flask Milk preparation Milk is not cooled in the milk flask. Milk or milk alternatives (e.g., soy For high-quality milk froth, always milk) containing added sugar can use cold milk (< 50°F/10°C). clog up the milk pipe and the rest of the milk pipework. -
Page 37: Making A Coffee Drink
Preparing beverages Making a coffee drink Place a container under the main Push the milk flask back into the dispenser. coffee machine until it clicks into Select a coffee drink. place. Preparation will begin and the coffee Tip: It is easier to remove the milk flask will be dispensed into the container with both hands. -
Page 38: Doubleshot
Preparing beverages DoubleShot Select the DoubleShot function if you would like a particularly strong and aromatic coffee. In this case, more coffee beans will be ground and brewed halfway through brewing. The shorter extraction time means that fewer unwanted aromas and bitter compounds will be released. -
Page 39: Coffee Pot
Preparing beverages Coffee Pot You can make several cups of coffee The coffee machine is not intended for one after the other automatically with commercial or scientific purposes. Coffee Pot function (maximum Temperatures given are approximate of 1 liter). and can vary depending on the ambient conditions. -
Page 40: Teatimer
The respective dispensing temperatures coffee machine as normal. After the are the ones that Miele recommends for brewing time has elapsed, an audible making the types of tea concerned. signal will sound and the symbol will flash. -
Page 41: Making Tea
Preparing beverages Tea pot The drinks menu is displayed. The Tea pot function allows you to Tap the Back sensor button. make a large quantity of tea (maximum Select Settings Timer TeaTimer of 1 liter). The type of tea selected determines the preset temperature. ... -
Page 42: Expert Mode
Expert Mode In Expert mode, you can allocate a Expert mode: Changing the bean type temporarily and change the portion size portion size while the drink is being The drinks menu is displayed. made. The setting will not be saved and will only apply to the current drink. -
Page 43: Grinder Setting
Grinder setting The grinder setting determines the contact time between the ground coffee and the water, known as the extraction time. When the ideal grinder setting is selected, the machine dispenses a perfect cup of coffee with a fine, hazelnut-brown crema. The grinder setting you select will be used for all coffee drinks. -
Page 44: Parameters
Parameters Displaying and changing Brewing temperature parameters The brewing temperature must be adapted to the roast of the beans you You can individually adjust the following are using. This is crucial whether you parameters for each drink: are making espresso or coffee. - Bean type Several types are sensitive to high - Amount of coffee... -
Page 45: Type Of Beans
Parameters Type of beans You can display which type of bean is currently being used for this coffee drink or change which bean container is allocated to it. -
Page 46: Portion Size
Portion size You can adjust the amount of water for The drink will now be made. Save will all coffee drinks, hot water, and types of appear in the display as soon as the tea. minimum dispensing amount is reached. The strength of the coffee is determined by the ratio between the amount of ... -
Page 47: Resetting Drinks
Resetting drinks You can reset portion sizes and parameters to their factory default settings for individual drinks or for all drinks. The drinks menu is displayed. Tap the drink you want and keep your finger on it until the context menu opens. -
Page 48: Profiles
Profiles In addition to the Miele drinks menu Setting when the profile should (Miele profile), you can create individual change profiles to cater for different tastes and You can choose between the following preferences. options: Within the profile, you can adjust the... -
Page 49: Profiles: Creating And Processing Drinks
Profiles: Creating and processing drinks You can save frequently made drinks in Renaming, moving, or deleting a profile with your own individual an entry settings (see “Profiles”). Once you have created some drinks, You can also change the names of your you can edit these entries in the context drinks and delete any unwanted drinks menu. -
Page 50: Mymiele
MyMiele You can display frequently made drinks, drinks from profiles, and preferred maintenance programs on the MyMiele screen. Tip: You can also set menu options that you have entered in MyMiele as your start screen (see “Settings – Start screen”). The main menu is displayed. -
Page 51: Mobilestart
MobileStart will be deactivated after You will only be able to use 24 hours. MobileStart if Miele@home has been set up for your coffee machine. If you are making a drink with MobileStart Remote, you will be ... -
Page 52: Settings
If the coffee machine has been connected to a WiFi network and Language signed into the Miele app, the time will You can select the language and, if be synchronized based on the location applicable, your location for all display setting in the Miele app. -
Page 53: Start Screen
Settings Once the coffee machine has come on Start screen automatically three times at the set You can choose which screen appears time without any drinks being when the coffee machine is switched dispensed, it will stop switching on on. For instance, you can use MyMiele automatically. -
Page 54: Maintenance Timer
Settings Maintenance timer You can use the Light sensor button to switch the lighting on or off at any Use the Maintenance Timer to select time, provided that the coffee machine any start time you like for the automatic is switched on. maintenance programs (see “Automatic cleaning and descaling –... -
Page 55: Barista Mode
Settings Barista Mode - Cleaning status messages or cleaning prompts are suppressed This Performance Mode has been and delayed until the machine is next optimized for unadulterated coffee switched on. enjoyment. Users can enjoy coffee- based drinks without any delay as the - The timers are Off at... -
Page 56: Motionreact
Settings Water hardness Calcium Setting Water hardness Calcium Setting content content °dH °dH mg/l Ca mg/l Ca ppm (mg Ca ppm (mg Ca 37–45 38–47 258–321 37–45 46–60 48–62 322–429 46–60 61–70 63–73 430–500 61–70 Tip: If your water hardness is > 21.8 gpg (21°dH), we recommend using bottled drinking water instead (< 150 mg/l Ca ). -
Page 57: System Lock
* This menu option appears if approaches it. Miele@home has been set up and the coffee machine has – where applicable Temporarily deactivating the system – been connected to a WiFi network. lock ... -
Page 58: Supervision
Settings You can change the coffee-machine RemoteUpdate settings, for example, in the Miele app The RemoteUpdate menu option is when remote control is switched on. To only displayed and can only be start making a drink via the app, selected if the requirements for using MobileStart also needs to be activated. -
Page 59: Software Version
Switch the coffee machine on and off again. Press the / - Some software updates can only be carried out by Miele Customer Back button for 5 seconds straight Service. away. Demo mode is activated. Software version Factory default settings The “Software version”... -
Page 60: Cleaning And Care
Cleaning and care Risk to health due to inadequate cleaning. Heat and moisture inside the coffee machine can cause coffee residues to become moldy and/or milk residues to go off and pose a risk to health. Carefully clean the coffee machine regularly. Overview of cleaning intervals Recommended frequency What do I have to clean/maintain? -
Page 61: Clean By Hand Or In Dishwasher
Cleaning and care Clean by hand or in Risk of damage as a result of dishwasher excessively high dishwasher temperatures. The brew unit is not dishwasher Components may be ruined (e.g., safe. may become warped) if washed in a Only clean the brew unit by hand dishwasher at temperatures higher with warm water. -
Page 62: Unsuitable Cleaning Agents
Cleaning and care To avoid damaging the surfaces of your Danger of burning and scalding appliance, do not use: on hot components or by hot liquids. - Cleaning agents containing soda, Components can become very hot ammonia, acids, or chlorides during operation. -
Page 63: Cleaning The Drip Tray And Grounds Container
Cleaning and care Cleaning the drip tray and grounds container Danger of burning and scalding on hot components or by hot liquids. Components can become very hot during operation. Touching hot components can cause burning. The liquids and steam dispensed are very hot and can cause scalding. - Page 64 Cleaning and care Clean the drip tray, lid, and grounds Reassembling the drip tray container in the dishwasher or wash them by hand using warm water and a little liquid dish soap. Dry all parts. Clean the drip-tray recess inside of the coffee machine.
-
Page 65: Cleaning The Drip-Tray Cover
Cleaning and care Cleaning the drip-tray cover Clean and dry the surface that the Remove the drip-tray cover as water container sits on. follows: Apply pressure to the rear edge so that the cover tips forward Fill the water container with fresh, and you can remove it easily. - Page 66 Cleaning and care Pull the main dispenser’s stainless- steel cover forward to remove it. Then clean it. Grip the dispensing unit by the sides and pull it down to remove it. Detach the milk pipework from the dispensing unit as follows: pull the tab ...
-
Page 67: Cleaning The Cup-Rim Sensor
Cleaning and care Reinstall the stainless-steel cover. Close the appliance door. Fit cover to main dispenser will appear in the display. Confirm the message with OK. Cleaning the cup-rim sensor The cup-rim sensor is located under the main dispenser. Clean the cup-rim sensor at least once a week and more often if heavily soiled. -
Page 68: Cleaning The Milk Valve (Daily)
Cleaning and care Both the lid and the glass flask can be cleaned in the dishwasher, or by hand using warm water and a little liquid dish soap. Remove and empty the milk flask. Clean the milk-flask holder on the coffee machine with a damp cloth. -
Page 69: Removing And Cleaning The Milk Valve (Once A Month)
Cleaning and care Open the appliance door. On the top right-hand side of the cover, you will find a pin for swiveling Clean the milk valve with a damp the cover out. cloth/microfiber cloth. Close the appliance door. Removing and cleaning the milk valve (once a month) If the following issues occur during milk... - Page 70 Cleaning and care Press the retainers on the left and Pull the stainless-steel bolt upward right-hand sides of the milk-valve and out. holder and pull the holder forward to Clean the individual components of remove it. the milk valve in the dishwasher. Tip: If there are any dry milk residues on the front, soak the stainless-steel bolt in warm water and a little liquid...
- Page 71 Cleaning and care Connect together the angular molded Tip: If necessary, screw the milk hose and longer milk pipework. Start pipework backward at the connecting by attaching the top of the molded piece on the right-hand side. hose to the main dispenser. The black connecting piece should be pointing to the rear.
-
Page 72: Cleaning The Bean Containers
Cleaning and care Cleaning the bean containers Risk of damage from incorrect use and cleaning. Immersing the bean containers in liquids can result in malfunctions. If they are taken apart, bits may break off or the mechanism may no longer work properly once they are reassembled. -
Page 73: Removing The Brew Unit And Cleaning It By Hand
Cleaning and care Removing the brew unit and cleaning it by hand The moving parts of the brew unit are lubricated. Cleaning agents will damage the brew unit. Only clean the brew unit by hand with warm water. Do not use any cleaning agents. - Page 74 Cleaning and care Replacing the brew unit Proceed in the reverse order: push the brew unit back into the coffee machine. Tilt the brew unit forward a little when doing this. Wipe any remaining coffee off the two filters.
-
Page 75: Cleaning The Interior, Inside Of The Machine Door, And Drip Tray
Cleaning and care Clean the interior and the inside of Cleaning the interior, inside of the machine door by hand with a the machine door, and drip tray clean and slightly damp cloth/ Clean the interior and front of the microfiber cloth. -
Page 76: Maintenance Programs
- Degreasing the brew unit* the milk pipework - Descaling the machine* You can run the maintenance program with the Miele Cleaning Cartridge or * If you have not inserted any cleaning with the cleaning agent for milk and/or descaling cartridges and have... -
Page 77: Degreasing The Brew Unit And Cleaning The Interior
For each cleaning process, you will need 2 sticks of the cleaning agent for milk pipework. It is available to order from the Miele online shop, from Miele Customer Fill the water container to the Service, or from your Miele dealer. - Page 78 Open the appliance door. If you have not inserted a Miele Remove the water container. Cleaning Cartridge, the following message will appear in the display after 200 portions: Degrease the brew unit ...
- Page 79 Cleaning and care Wipe any remaining coffee off the two filters. One filter is located in the Pull the brew unit to the side first funnel and the other to the left of the and then pull out to the front . Tilt funnel.
-
Page 80: Descaling The Appliance
Cleaning and care Dropping a cleaning tablet into the The cleaning process is complete when brew unit the drinks menu appears. Descaling the appliance Risk of damage from splashes from the descaling solution. Sensitive surfaces and/or natural floors can suffer damage. Wipe up any spillages immediately when descaling. - Page 81 Cleaning and care Confirm the message with OK. The descaling tablets are available to order from the Miele online shop, from When the number of remaining portions Miele Customer Service, or from your reaches 0, the coffee machine will lock. Miele dealer.
- Page 82 Cleaning and care residue remains in the water container. Fill the water container with tap water. The descaling process is complete when the drinks menu appears.
-
Page 83: Automatic Cleaning And Descaling
(e.g., rinsing noises) at frequent descaling the machine. For this, the intervals even though the machine is Miele Cleaning and Descaling switched off. Cartridges must be inserted into the coffee machine. If both types of... -
Page 84: Automatic Cleaning
If you have made a drink containing use in this coffee machine. milk, the milk pipework will be cleaned Please note that the Miele Cleaning at least 4 days afterward. Cartridge has a life span of approx. 1 year after it has been If you have made a coffee, the brew unit placed in the coffee machine. -
Page 85: Replacing The Cleaning Cartridge
Automatic cleaning and descaling The first message will appear when the cartridge is approx. 25% full. Cleaning cartridges are available to order from the Miele online shop, from Miele Technical Service, or from your Miele dealer. If no cleaning cartridge has been... -
Page 86: Automatic Descaling
Cartridge for the automatic descaling inside the coffee machine and close program. the machine door. Please note that the Miele Descaling Cartridge has a life span of approx. 1 year after it has been placed in the machine and filled with water for the first time. The date on... - Page 87 The Miele Descaling Cartridge is available to order from the Miele online shop, from Miele Technical Service, or from your Miele dealer. If a descaling cartridge is not...
-
Page 88: Maintenance Timer
Automatic cleaning and descaling If you do not want to insert a descaling cartridge, seal the system with the adapter. Tip: You can seal the descaling cartridge with the cap that can be found on the cartridge. This cap can be easily ... -
Page 89: Canceling Automatic Cleaning And Descaling
Automatic cleaning and descaling The start time is saved. From now on, the automatic maintenance programs will commence at the desired time each day. Canceling automatic cleaning and descaling You can cancel the automatic cleaning programs during the holding time. If the automatic cleaning program is not performed five times in a row, the dispensing of drinks is blocked. -
Page 90: Frequently Asked Questions
Error messages must be confirmed with OK, otherwise the message may reappear in the display even though the problem has been remedied. To address the fault, follow the instructions on the display. If the error message appears in the display again, contact Miele Technical Service. Problem Possible cause and solution F1, F2, There is an internal fault. - Page 91 Frequently Asked Questions Problem Possible cause and solution F73 or The brew unit cannot be positioned correctly or is soiled. It is not possible to press the ground coffee. Check the brew unit Check whether you can remove the brew unit. ...
- Page 92 Frequently Asked Questions Problem Possible cause and solution F233 The cup-rim sensor is not inserted or is incorrectly inserted. If the main dispenser is moving upward and the cup- rim sensor is bumped, e.g., with a cup, the cup-rim sensor loses its reference position. ...
-
Page 93: Unusual Performance Of The Coffee System
Frequently Asked Questions Unusual performance of the coffee system Problem Possible cause and solution The display remains The On/Off button was not held for long enough. dark when the coffee Tap and hold the On/Off button for at least machine is turned on 3 seconds. - Page 94 Frequently Asked Questions Problem Possible cause and solution The sensor buttons do There is an internal fault. not respond. Disconnect the coffee machine from the electricity The coffee machine can supply by removing the plug from the socket or no longer be operated.
- Page 95 Frequently Asked Questions Problem Possible cause and solution Coffee dispensing is re- This is not a fault. peatedly interrupted The brew unit has not detected the ground coffee. and the message Fill the Certain types of coffee produce a small amount of bean container appears in coffee when they are ground.
- Page 96 Frequently Asked Questions Problem Possible cause and solution The display is hard to The display brightness has been set too low. see or not legible. Change this setting (see “Settings”). The display lights up The Demo mode for demonstrating the coffee but the coffee machine machine in stores and showrooms has been does not heat up and no...
-
Page 97: Faults With Automatic Cleaning And/Or Descaling
Drinks cannot be made. For this you will need to use a suitable descaling agent, e.g., Miele Descaling Tablets. Descale the coffee machine using the maintenance program (see “Descaling the machine” in “Cleaning and care”). - Page 98 Frequently Asked Questions Problem Possible cause and solution When the machine is Automatic cleaning could not be carried out five switched on, one of times. these messages ap- If you want the coffee machine to continue cleaning pears: Automatic cleaning the milk pipework and degreasing the brew unit could not be carried out.
-
Page 99: Unsatisfactory Results
Frequently Asked Questions Unsatisfactory results Problem Possible cause and solution The coffee is not hot The cup has not been pre-heated. enough. The smaller the cup and the thicker its walls, the more important it is to pre-heat it. Pre-heat the cup with hot water, for example. The brewing temperature is set too low. - Page 100 Frequently Asked Questions Problem Possible cause and solution The coffee tastes weak. Less coffee is being brewed because insufficient The coffee grounds in coffee beans are getting into the grinder. the grounds container Have you used a dark roast? are sludgy and grainy. This type of coffee bean is often oily.
- Page 101 Frequently Asked Questions Problem Possible cause and solution Coffee drinks trickle/ The brew unit is blocked because the coffee machine dribble slowly out of the has been used very intensively. And/or the brew unit main dispenser. has not been regularly removed and cleaned by hand.
-
Page 102: Service And Warranty
You can register your product and/or Miele dealer or Miele Customer Service. view the manufacturer´s warranty terms and conditions for Miele appliances and You can book a Miele Service Call vacuum cleaners at online at www.miele.com/service. www.mieleusa.com. Contact information for Miele Customer Service can be found at the end of this document. -
Page 103: Accessories
- CJ Jug 1.0 l Insulated flask for coffee or tea (pot function) - Miele Black Edition One for all perfect for making espresso, café crema, and speciality coffee with milk - Miele Black Edition Espresso Whole coffee beans – perfect for making espresso - Miele Black Edition Café... -
Page 104: Packaging Material / Disposal Of Old Machine
Packaging material / Disposal of old machine Disposal of the packing Disposal of your old appliance material Old electrical and electronic appliances often still contain valuable materials. The cardboard box and packing However, they also contain harmful materials protect the appliance during substances that were essential for the shipping. -
Page 105: Installation
The function and operation of the protective measures provided in the domestic electrical installation and in this Miele product must also be maintained in isolated operation or in operation that is not synchronized with the grid power supply, or these... -
Page 106: Installation Dimensions
Installation in a tall cabinet A minimum installation height of 33 7/16" (850 mm) must be observed. Combination with other Miele Built-in Appliances is possible. If the coffee machine is to be built in above another appliance, there must be a full-width, closed shelf between them. - Page 107 *INSTALLATION* Installation Installation and connections Cut-out (at least 20"/508 mm wide) in the niche floor of the tall cabinet for power cord and ventilation Electrical connection No electrical or plumbed-water connection in this area...
-
Page 108: Building In The Coffee Machine
*INSTALLATION* Installation Check that there is a gap of at least Building in the coffee machine 11 3/4" (299 mm) between the wall (or Danger of injury due to incorrect similar) and the coffee machine so that operation. you can open the door wide enough to remove the left-hand bean container A machine that has not been built in (minimum door opening angle of 120°). -
Page 109: Door Opening Limiters
*INSTALLATION* Installation Connecting the electricity supply Observe the information under “Electrical connection”. Connect the coffee machine to the electricity supply. Pushing in and aligning the coffee machine Take care not to trap or damage the electrical connection when pushing the machine into the niche. - Page 110 *INSTALLATION* Installation The door opening limiters can be removed, allowing you to increase the opening angle to approx. 170°. This makes it easier to remove the bean containers, for example. Removing the door opening limiters Make sure that sufficient space is available for the larger door opening angle and that the machine door is not going to hit an adjacent wall.
- Page 111 FCC Declaration of Conformity Electricity consumption in standby: < 1.0 W Electricity consumption in networked < 1.4 W standby: Frequency range 2.412 GHz – 2.462 GHz Maximum transmitting power < 100 mW WiFi module EK037 Contains FCC ID: 2ACUWEK037 Contains IC: 5669C-EK037 This device complies with Part 15 of the FCC Rules and with Industry Canada licence-exempt RSS standard(s).
-
Page 112: Copyrights And Licenses
Copyrights and licenses Miele uses their own and third party software which is not subject to any so-called open source license for the operation and control of the device/appliance. This software/these software components are protected by copyright. The copyright powers of Miele and third parties have to be respected. - Page 115 Customer Service. U.S.A. Canada Miele, Inc. Importer Miele Limited National Headquarters 9 Independence Way Headquarters and Miele Centre Princeton, NJ 08540 161 Four Valley Drive www.mieleusa.com Vaughan, ON L4K 4V8 www.miele.ca Customer Support Phone: 888-99-MIELE (64353) Customer Care Centre info@mieleusa.com...
- Page 116 CVA 7840 en-US M.-Nr. 11 388 890 / 01...