
Summary of Contents for Regent Eurostar 100
- Page 1 OPERATING MANUAL Plow technology Eurostar Titan...
-
Page 2: Table Of Contents
DECLARATION OF CONFORMITY Camber spindle Basic setting Translation of the original instructions! Translation of the original instructions! Subject to technical modifications; no responsibility is accepted for the accuracy of this information. Version 22.01 / Editor: Xaver Hager, Mail: x.hager@regent.at www.regent.at... -
Page 3: General Information
Together with these operating instructions, you will be given a handling over declaration. Please fill out this document completely and re- turn it to Regent within 10 days. If you have not received the document, please contact your specialist dealer. The handover declaration is directly related to the processing of any guarantee or warranty claims. -
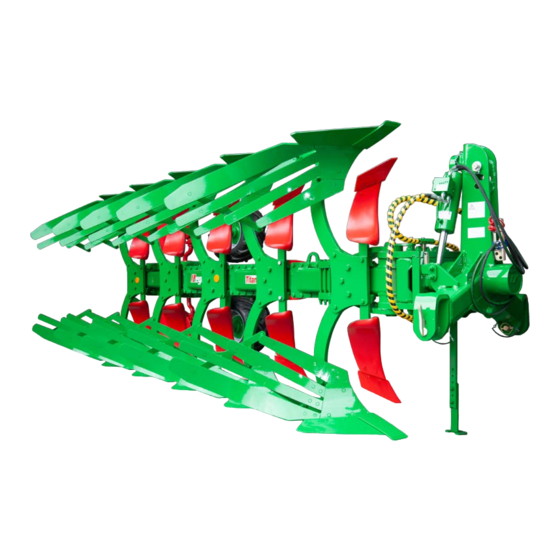
Page 4: Intended Use
Intended Use Reasonably predictable Misuse The intended use of Regent plows includes loosening and turning the ¾ Faulty assembly. arable soil in the area of the working horizon on agricultural areas ¾ Failure to comply with operating or maintenance instructions. -
Page 5: Regulations Of General Security And Accident Prevention
Regent original spare parts stand for high performance, durability and economy. ¾ Secure devices with their own chassis against rolling away whenever they are not used with suitable wheel chocks ¾... -
Page 6: Preparations On The Tractor
(working position, see depth adjustment). In this way, the tire-slip can be reduced to a minimum and the electronic hoist control can work correctly. www.regent.at... -
Page 7: Track Gauge
Lower link Lower link both lower links links ̷ Full pendulum clearance ̶ Restricted pendulum clea- ̷ At the same tire pressure. ̶ Correct plow adjustment available (in the lowered rance. ̷ Measured on a flat surface. not possible. position). www.regent.at... -
Page 8: Coupling And Uncoupling
Switch from work to parking position: ¾ Open lock bolt (C). ¾ Move the support to the desired position. ¾ Working position: Parallel to the plow frame. Parking position: Angled 90 ° to the plow frame. ¾ Snap the locking bolt (C) into place. www.regent.at... -
Page 9: Hydraulic Turning
¾ If the plow is to be turned over to the other side again, the hydr. control unit (port P) is to be switched to neutral for approx. 10 se- conds, then the port P can be pressurized again, the sequence control starts again. www.regent.at... -
Page 10: Cutting Width Adjustment
„SEQUENCE TURN CONTROL“. The cutting width is to set in the same way as for plows without a alignment cylinder, follow the instructions from the section „EUROSTAR - changing the cutting width“. www.regent.at... -
Page 11: Titan- Hydraulic Cutting Width Adjustment
¾ Is used to swing in the frame for the turning process (so that there is more space between the plow and the ground when turning). ¾ Is connected to the reversing valve of the sequence control and is controlled fully auto- matically during the turning process. www.regent.at... -
Page 12: Front Furrow Width
¾ If the slide is to be adjusted several cm, it is helpful to briefly raise the plow and then lower it again. In this way, tension between the hitch and the plow can be reduced. ¾ Adjustments during plowing are not provided, only use the hydraulic front furrow width adjustment when standing still with the plow lowered. www.regent.at... -
Page 13: Plow Pull Line
¾ Insert the locking bolt „D“ and secure it with a linchpin, tighten the screw „E“. ¾ Activate the hydr. control unit of the turn-control until the frame swivel cylinder is fully retracted and rests on the adjustment plates. www.regent.at... -
Page 14: Camber Adjustment
Basically, SKL- slattet bodies are to be used for such conditions. Dry conditions Especially in dry and hard conditions, it is an advantage to turn the plow a little on its tip (turn the camber spindles clockwise). www.regent.at... -
Page 15: Working Depth Adjustment
¾ Remove the broken piece of screw from the plow leg. To do this, use a punch and hammer and knock it out. ¾ Insert a new original Regent - shear bolt and tighten it with the specified tor- que (you can find the correct torque in the table below). -
Page 16: Non-Stop Overload Protection
„E“ and must not be changed under any circumstances. For service work, contact the Regent factory customer service. Only open shut-off valve „C“ to change or control the currently set trigger pressu- re. -
Page 17: Plow Body
In particularly sticky conditions (when soil sticks on to the mould- boards), the deflector plates should be completely removed. If the deflector plates has to be dismantled, a connecting sheet must be screwed between the mouldboard and the mouldboard tip. www.regent.at... -
Page 18: Levelling Bar
„C“ bolt or the plow´s shear bolt (see chapter standard overload protection) breaks and must be replaced immediately. To park the plow, the subsoiler on the ground side must be comple- tely dismantled. www.regent.at... -
Page 19: System V-As-250 „With Locking Pin
To adjust, proceed as follows: ¾ Loosen the screws „A“ and „B“. ¾ Adjust the guide plate by pulling the outer end to move up or down (there is an elongated hole on screw „B“). ¾ Tighten the screws „A“ and „B“. www.regent.at... -
Page 20: Disc Coulter
5 mm of thread must protrude from the nut. The settings for: distance to the plow body, stop clamps and retaining rail are to be done in the same procedure as for “Standard” disc coulters. www.regent.at... -
Page 21: Dual Depth Wheel
¾ Use the adjusting knob to adjust the spindles. ¾ Reduce working depth: Turn the spindle „B“ clockwise ¾ Increase working depth: Turn the spindles „B“ counterclockwise ¾ Always set exactly the same depth on both spindles. www.regent.at... -
Page 22: Version „Sg-Hvs
¾ Check if the wheel could collide with plow components. ¾ The adjusting spindles „C“ are fixed with a lock nut and are not used for depth adjustment. The basic setting of the spindles should only be adjusted if the wheel collides with plow components. www.regent.at... -
Page 23: Depth/Transport -Support Wheel
Check whether the bolt has locked correctly. ¾ Now lower the plow slowly and drive forward at the same time, until the support wheel has swiveled in the pulling direction. ¾ Uncouple the top link from the plow and secure it to the trac- tor. www.regent.at... -
Page 24: Maintenance
¾ Mineral hydraulic oil DIN 51524 HLP 46 Every 50 hours of operation : Bearing grease: ¾ Check ball bearings, replace if necessary. ¾ Semi-synthetic calcium soap grease Divinol TOP 2003 ¾ Check hydraulic actuators for leaks. ¾ Retighten all screws. PERSONAL NOTES www.regent.at... -
Page 25: Declaration Of Conformity
DECLARATION OF CONFORMITY Regent Pflugfabrik GmbH KONFORMITÄTSERKLÄRUNG DEUTSCH Der Hersteller erklärt hiermit, daß die nachstehend beschriebene neue Maschine übereinstimmt mit den Bestimmungen der Maschinen Sicherheitsverordnungen - 2006/42/EG, und damit der durch sie umgesetzten Maschinenrichtlinie RL2013/167/EG in der geltenden Fassung, und zwar mit den folgenden grundlegenden Sicherheitsanforderungen wie - Zubehörteile für... - Page 26 Regent Pflugfabrik GmbH Tel. +43 7674 62661 Bahnhofstr. 105 Fax. +43 7674 62207 4800 Attnang-Puchheim info@regent.at Austria www.regent.at...