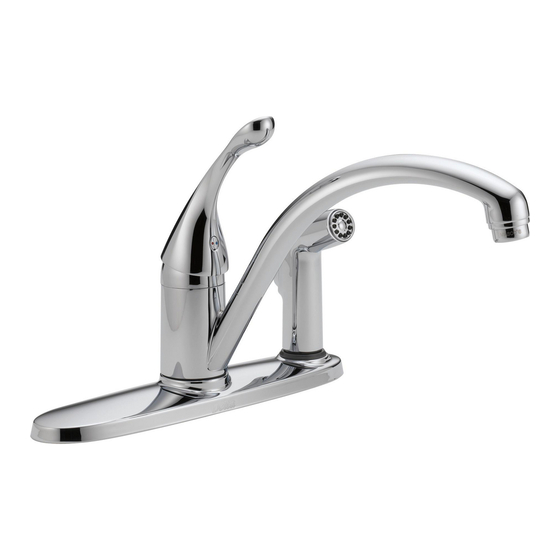
Delta 140-DST Series Installation Manual
Delta single handle kitchen faucet installation guide
Hide thumbs
Also See for 140-DST Series:
- Specifications (1 page) ,
- Installation instructions manual (13 pages) ,
- Manual (12 pages)
Advertisement
Quick Links
U P
®
C
®
ASME A112.18.1 / CSA B125.1
Models/Modelos/Modèles
140-DST, 141-DST, 340-DST,
440-DST & 441-DST
Series/Series/Seria
Write purchased model number here.
Escriba aquí el número del modelo comprado.
Inscrivez le numéro de modèle ici.
For easy installation of your
Delta faucet you will need:
• To READ ALL the instructions completely
before beginning.
• To READ ALL warnings, care, and
maintenance information.
Para instalación fácil de su llave
Delta usted necesitará:
• LEER TODAS las instrucciones
completamente antes de empezar.
• LEER TODOS los avisos, cuidados,
e información de mantenimiento.
Pour installer votre robinet
Delta facilement, vous devez:
• LIRE TOUTES les instructions avant
de débuter;
• LIRE TOUS les avertissements ainsi que
toutes les instructions de nettoyage et
d'entretien;
SINGLE HANDLE KITCHEN FAUCET
LLAVE DE COCINA DE PALANCA
ROBINET DE CUISINE À UNE MANETTE
You may need/Usted puede necesitar/
Articles dont vous pouvez avoir besoin:
T E FLO N
1
T E FLO N
11/1/08 Rev. B
Advertisement

Related Manuals for Delta 140-DST Series


Summary of Contents for Delta 140-DST Series
- Page 1 Write purchased model number here. Escriba aquí el número del modelo comprado. Inscrivez le numéro de modèle ici. For easy installation of your Delta faucet you will need: • To READ ALL the instructions completely before beginning. • To READ ALL warnings, care, and maintenance information.
- Page 2 Delta Faucet Company recommends using a professional plumber for all installation & repair. Delta will replace, FREE OF CHARGE, during the warranty period, any part or finish that proves defective in material and/or workmanship under normal installation, use & service. Replacement parts may be obtained by calling 1-800-345-DELTA (in the U.S.
- Page 3 RP54233▲ Set Screw Tornillo de Ajuste Vis de Calage RP54234 Red/Blue Button Botón: Rojo/Azul Bouton-Rouge/Bleu RP18508▲ 2.2 gpm Aerator Aireador Aérateur RP19754▲ 1.5 gpm Aerator RP21945 Aireador Locknuts Aérateur Contratuercas Ècrous de Blocage RP54269 Spray Cap & O-Ring Casquillo del aerosol y Anillo O Chapeau de jet et Joint torique...
- Page 4 140 Series 140 Series SHUT OFF WATER SUPPLIES. Remove old faucet. Feed tubes (1) down through center hole in sink. Secure faucet to sink with mounting nuts (2) supplied with your faucet. OPTION: If sink is uneven, use silicone sealant under the gasket.
- Page 5 440 Series 440 Series SHUT OFF WATER SUPPLIES. Remove old faucet. Feed tubes (1) down through center hole in sink. Secure faucet to sink with mounting nuts (2) supplied with your faucet. OPTION: If sink is uneven, use silicone sealant under the gasket. 440 Serie CIERRE LOS SUMINISTROS DE AGUA.
- Page 6 141 Series 141 Series SHUT OFF WATER SUPPLIES. Remove old faucet. Make sure gasket and base (1) are properly positioned under new faucet. Feed tubes and shank (2) down through hole in sink. Secure faucet to sink with bracket (3), using nut and wrench (4) supplied with your faucet.
- Page 7 For Sprayer Models Only Pull on clip (1) until disengaged. Pull down on diverter plug (2) to remove. Discard diverter plug. Caution: Do not remove tube clip (3). Para el rociador modela solamente Hale el sujetador o gancho (1) hasta que se desencaje. Hale el tapón del desviador (2) hacia abajo para sacarlo.
- Page 8 Delta is not responsible for tubing that is cut too short or cut in a way that will not allow for a leak-free joint.
- Page 9 Correct method Método Correcto Bonne méthode Custom Fit Connections - Plastic Sleeve Installation Instructions 1. Identify desired length of tube (1). Leave 1" - 2" of extra length to allow for easier installation and cut tube. Ensure cut is straight and burr free. 2.
- Page 10 FLUSH YOUR SYSTEM: Remove aerator (1) and turn faucet handle (2) to the full on mixed position. Turn on hot and cold water supplies (3) and flush water lines for one minute. Important: This flushes away any debris that could cause damage to internal parts.
- Page 11 Setting The Handle Limit Stop (Optional) This faucet includes an integrated handle limit stop that has two positions. Position 1, to the left, allows full handle motion (the full range between “all cold” to “all hot”). The faucet is set in position 1 in the factory. Position 2, to the right, allows half of the normal handle motion (“all cold”...
- Page 12 Maintenance If faucet exhibits very low flow: A. Remove and clean Aerator (1), or B. SHUT OFF WATER SUPPLIES. Replace valve cartridge (2). When reinstalling parts, make sure bonnet nut (3) is tightened securely with a wrench.* If faucet leaks from under handle: Remove handle and unthread trim cap (4). Using a wrench, ensure bonnet nut (3) is tight.