Advertisement
Quick Links
INSTALLATION INSTRUCTIONS
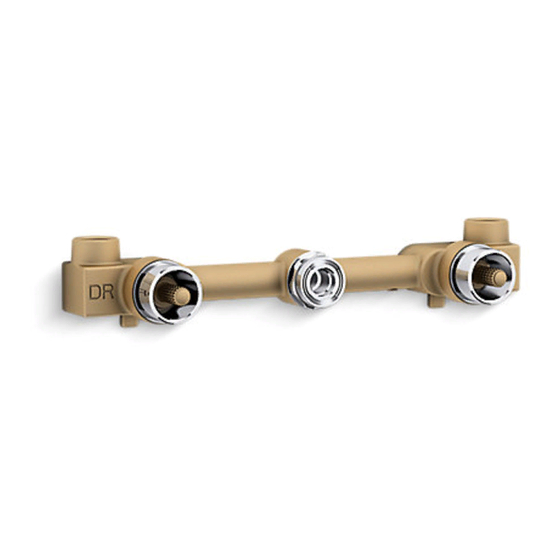
28139T-DR Wall-Mount Dual Handle Lavatory Faucet Valve
BEFORE YOU BEGIN
All information is based on the latest product information available at the time of publication. Kohler Co. reserves
the right to make changes in product characteristics, packaging, or availability at any time without notice.
Please leave these instructions for the consumer. They contain important information.
NOTES:
1. Flush the water supply pipes thoroughly to remove debris.
2. An inline water filter must be used with this product.
3. Inspect the supply tubing for damage. Replace as necessary.
4. Observe local plumbing codes.
5. Check for leaks before covering the pipes, repairs as needed.
6. Please ensure only apply water pressure test on the product, and empty the air in pipe and faucet thoroughly
before the test. Please ensure test pressure below 0.8MPa(8bar) and test duration within 30 minute.
7. All installations should comply with the relevant requirements of AS/NZS 3500.
ROUGH-IN DIMENSIONS
Hot Water Inlet
G1/2˝
CLEANING INSTRUCTIONS
All Finishes: Clean the finish with mild soap and warm water. Wipe entire surface completely dry with clean soft
cloth. Many cleaners may contain chemicals, such as ammonia, chlorine, toilet cleaner etc, which could
adversely affect the finish and are not recommended for cleaning.
Do not use abrasive cleaners or solvents on Kohler faucets and fittings.
1299768-AN2-A
252
Cold Water Inlet
G1/2˝
280
200
Ø35~Ø38
Finished
Wall
Ø35
Ø35~Ø45
Ø34
1
Advertisement

Related Manuals for Kohler 28139T-DR


Summary of Contents for Kohler 28139T-DR
- Page 1 28139T-DR Wall-Mount Dual Handle Lavatory Faucet Valve BEFORE YOU BEGIN All information is based on the latest product information available at the time of publication. Kohler Co. reserves the right to make changes in product characteristics, packaging, or availability at any time without notice.
- Page 2 INSTALLATION The finished wall 51~61 Do not take off the protectors(1) at this moment. Connect the G1/2" water supply pipes(2) to the supply yoke(3). The distance from centerline of the water supplies to the surface of the finished wall must be between 51mm and 61mm.