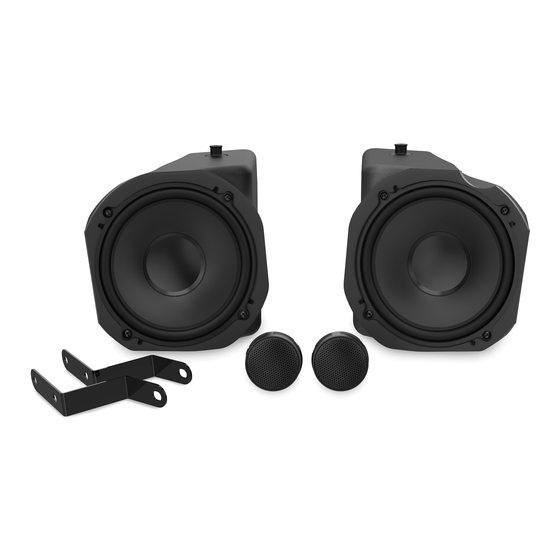
Summary of Contents for MTX PROXP-20-FS
- Page 1 PROXP-20-FS POLARIS PRO XP FRONT SPEAKER PODS ® ® OWNER’S MANUAL M T X . C O M...
-
Page 2: We're Here To Help
MTX! WE’RE HERE TO HELP We’re here to help with any installation or technical support. Visit mtx.com to chat, call 1-800-225-5689 to speak with an MTX Technical Support representative, or visit youtube.com/user/MTXAudioUSA to view product videos. -
Page 3: Specifications
• Installer Friendly Enclosure Design for Easy Installation • Integrated RGB Lighting • Mounts Behind Factory Grille Maintaining OEM Cosmetics • Utilizes Factory Mounting Assembly • Compatible with OEM or MTX Subwoofer Installed SPECIFICATIONS • RMS Power Handling: 75-Watts • Peak Power Handling: 150-Watts •... - Page 4 DISASSEMBLY Step 1 - Remove the speaker grille by removing two (2) T-40 TORX bolts. Note: For vehicles that have the OE speaker pods installed follow these additional steps for removal. Step 2 - Remove four (4) T-25 screws found around the front of the speaker. Step 3 - Remove two (2) T-27 screws found at the back of the speaker pod on the firewall.
- Page 5 Step 4 - Remove one (1) T-40 Bolt from the inside fender well. Step 5 - Disconnect the speaker pod plug and remove the pod from the vehicle. Step 6 - Repeat this process on the other side. Step 7 - With the pods removed, reinstall the T-40 TORX bolt into the fender well location. Step 8 - Repeat process for other side of the vehicle.
- Page 6 Step 9 - Disengage the speaker pod from the top of the dash/ fender panel and slide up the cage tube. Step 10 - Press the dummy plug or OE tweeter if installed from the front and remove from the enclosure from the rear.
- Page 7 Step 11 - If OE tweeter is installed, disconnect the harness connector. Step 12 - Repeat process for other side of vehicle. M T X . C O M...
-
Page 8: Installation
INSTALLATION Step 13 - Locate and install the rear support brackets as shown using the supplied four (4) 15mm T-20 TORX screws. Step 14 - Placing the Speaker enclosure against the dash housing from the rear and holding it in place, loosely install four (4) 30mm T-20 TORX screws from the front into the enclosure housing in the predrilled holes. - Page 9 Step 15 - Align the rear support bracket with the factory screw location in the firewall and install one (1) T-27 TORX screw and tighten. Step 16 - Tighten the four (4) screws on the front of the enclosure. Step 17 - Feed the tweeter harness connector up through the top of the dash. Step 18 - Repeat process for the other side of the vehicle.
- Page 10 Step 19 - Prior to installation, choose your tweeter attenuation preference, 0dB or -6dB, by moving the jumper found on the back of the tweeter housing. Step 20 - Locate and align the key on the body of the tweeter pod to the slot molded into the tweeter opening on the factory housing.
- Page 11 Step 22 - Connect the harness connector from the lower speaker enclosure to the tweeter harness. Step 23 - Repeat the process for the other side of the vehicle. Note: If installing as part of an MTX Thunder kit, route the enclosure harness to the center of the dash and connect to the labeled connector.
- Page 12 Step 24 - Slide the tweeter housing back down and reseat the housing to the fender and dash panel Step 25 - Install the supplied MTX badge to the factory grilles with the supplied hardware. Step 26 - Reinstall the factory grilles using factory hardware removed earlier.
- Page 13 NOTES M T X . C O M...
- Page 14 NOTES M T X . C O M...
-
Page 15: Warranty Period
WARRANTY PERIOD At MTX Audio we engineer products that will stand up to the test of time. We also realize that from time to time a problem may occur. That’s why our products carry a 2-year limited warranty that begins at the time of sale to the end user. - Page 16 Like, Follow, & Subscribe © 2021 MiTek Corporation. All rights reserved. MTX is a trademark of MiTek Corporation. All other trademarks are property of their respective owners. Designed and Engineered in the U.S.A. Due to continual product development, all specifications are subject to change without notice.


