
Related Manuals for Coby Kyros MID7015-4G Series


Summary of Contents for Coby Kyros MID7015-4G Series
- Page 1 For series MID7015-4G Coby® Kyros™ Internet Tablet Instruction Manual ... Page 2 Please read carefully before use...
-
Page 2: Table Of Contents
Table of Contents  Thank You ...4 Package Contents ...4 Features...5 GeTTinG To know The MiD7015 ...6 Unit at a Glance ...6 About the Touchscreen ...9 Protective Film ...9 Using Your Finger Tip ...9 Touchscreen Actions...9 About the Orientation Sensor ... 11 Charging the Tablet ... - Page 3 SeTTinG The SYSTeM opTionS ... 40 Wireless & Networks ... 40 Sound & Display ...41 Location & Security ...42 Applications ... 44 Privacy ... 45 SD Card & Device Storage ... 46 Search ...47 Language & Keyboard ...47 Date & Time ...47 About Device ...
-
Page 4: Thank You
Thank You  Congratulations on your purchase of a Coby® Kyros™ Internet Tablet. This guide is provided to help you get started quickly with your player; please read it carefully and save it for future reference. For detailed instructions, up-to-date information, and helpful tips, please visit the Coby website at www.cobyusa.com. -
Page 5: Features
features Browse the web, watch videos on YouTube, check e-mail, and more on a generous 7.0” LCD screen Intuitive touchscreen controls powered by Android Connect to the Internet wirelessly with high-speed networking support (Wi-Fi 802.11 b/g) Plays popular video, music, and photo formats ... -
Page 6: Getting To Know The Mid7015
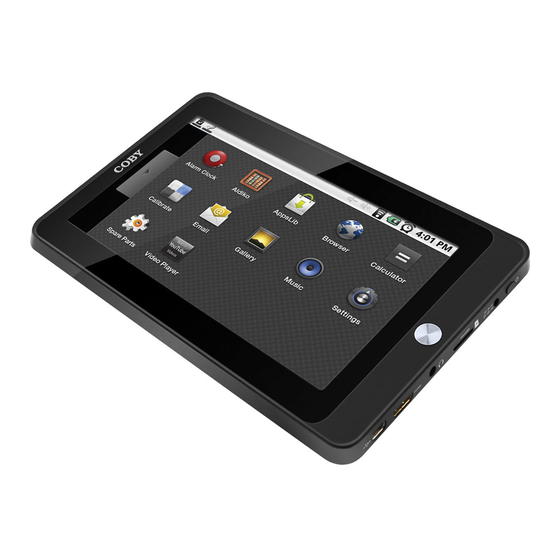
Getting to know the MiD7015 Â unit at a Glance Name Description Stylus Slide the stylus out to use it. Store the stylus here when it is not in use. Home key Press to return to the home screen. Press and hold to view a list of recently used applications;... - Page 7 Name Description Reset key Press to reset the tablet if it freezes or otherwise behaves abnormally. (Use a paperclip or other small object to gently press this key.) Page 7 Getting To Know The Mid7015...
- Page 8 Name Description Power key Press to turn the unit on, or to turn the screen on and off. Press and hold to access the Power Off menu Power jack Charge and power the MID7015 with (DC input) the included power adapter. microSDHC Load external microSDHC memory card slot...
-
Page 9: About The Touchscreen
about the Touchscreen Your tablet comes equipped with an easy-to-use touch- screen which allows access to the tablet’s functions. Use your finger tip (or a stylus) to touch the area of the screen where a control icon is displayed. If you touch and hold the screen, it will register as a continuous button press. - Page 10 You can perform the following actions on the touchscreen using your fingertip or stylus. Touch: To activate an on-screen item (e.g., application icons, buttons, menu items, and the letter/symbols of the on-screen keyboard), simply touch them with your fingertip or stylus. Touch and Some on-screen items have an Hold:...
-
Page 11: About The Orientation Sensor
about the orientation Sensor The tablet contains a sensor that will automatically change the orientation of most screens as you rotate the tablet. The sensor works best when the tablet is rotated perpendicular to the ground (i.e., when the tablet is held upright and not flat on its back). -
Page 12: Inserting A Memory Card
inserting a Memory Card The tablet accepts microSDHC memory cards. Insert a memory card into the microSDHC card slot to: Increase the memory capacity of your tablet Play media files stored on the memory card (e.g., music, video, or photo files). To insert a memory card: Align the memory card with the card slot. -
Page 13: About The Protective Case
about the protective Case The tablet comes preinstalled in a protective case. To remove the tablet from the case: There are 5 tabs around the edge of the tablet that secure it within the case. Identify the smallest tab located by the top-right corner. -
Page 14: Getting Started
Getting Started  Turning the Tablet on and off To turn the tablet on: Power key until the LCD screen Press and hold the turns on. Wait until the Home screen appears; the tablet is now ready for use. To turn the tablet off: Power key until the Device Op- Press and hold the... -
Page 15: Unlocking The Screen
Unlocking the Screen When the screen turns off, you will have to unlock the screen when you turn it back on. To unlock the screen, drag the lock icon across the screen towards the speaker icon. Page 15 If a password has been set, enter the password to finish unlocking the screen. -
Page 16: Home Screen At A Glance
home Screen at a Glance The home screen is the starting point for all of the features of your tablet. Page 16 Name Notification Shows notification icons such as new messages and alarms; drag the bar down to the bottom of the screen to open the full Notifications panel. -
Page 17: Adding Widgets And Icons
Page 17 Name Description Icons Touch an icon to open an application or folder Adding Widgets and Icons For quick access to your information and applications, you can add widgets, as well as shortcuts to applications or folders to the Home screen. Touch and hold an empty spot on the home screen. -
Page 18: Changing Home Screens
Shortcuts, then choose an To add a shortcut, touch application, bookmark, music playlist, or setting. Widgets; then choose a To add a widget, touch widget from the menu. Folders. To add a folder, touch — You can use folders to keep your Home screen tidy. -
Page 19: Removing Widgets And Icons
Removing Widgets and Icons To remove unwanted widgets and icons from your Home screen: Touch and hold the widget/icon. The Launcher tab will change to show a trash can. Without removing your fingertip/stylus from the screen, drag the icon to the trash can. Page 19 about Menus There are two types of menus used by the tablet. - Page 20 Context menus. Context menus contain items related to a specific item on the screen. To view a context menu, touch and hold an item on the screen. Touch & hold All pictures. Page 20 A context menu will appear. Not all items have a context menu; if a menu does not exist, nothing will happen if you touch and hold the item.
-
Page 21: About Notifications
About Notifications The icons that appear in the Notification bar at the top of the screen alerts you when new messages arrive or alarms or other application events occur. View and respond to the notifications by opening the full Notifications panel. Notification bar down to the bottom of ... -
Page 22: Connecting To The Internet
Connecting to the internet  This tablet can utilize Wi-Fi data networks to connect to the Internet. Wireless Wi-Fi technology can provide Internet access at distances of over 300 feet; however, this distance can be affected by your surrounding environment and Wi-Fi router. requirements In order to connect to the Internet, you will need the following:... -
Page 23: Connect To A Wi-Fi Network
Connect to a wi-fi network The Notification bar displays icons that indicate your tablet’s Wi-Fi status. Notification that an open Wi-Fi network is in range. Connected to a Wi-Fi network (waves indicate connection strength). There are no Wi-Fi networks in range, or the [no icon] Wi-Fi radio is off. - Page 24 2. Select an available Wi-Fi network to connect to: In the same Wi-Fi settings menu above, touch a network in the list. If the network is open, the tablet will prompt you to confirm connection to the network. Touch Connect to confirm.
-
Page 25: Connect To A Wi-Fi Network Manually
Connect to a wi-fi network Manually Connect to a Wi-Fi network manually if you want to add a Wi-Fi network when it is not in range, or to connect to a router that has been set to obscure the network name (SSID). - Page 26 Page 26 4. Enter the network information manually. If you do not know this information, contact the admin- istrator/owner of the network. Network SSID: — Enter the name of the network. Security: — If the network is secured, touch the security menu box to select the type of security used.
-
Page 27: Forget A Wi-Fi Network
forget a wi-fi network Remove a saved Wi-Fi network from the tablet if you no longer use it or if you don’t want the tablet to connect to it automatically. Wi-Fi settings menu. Open the Turn on the Wi-Fi radio if it is not already on. Touch and hold the name of the network. -
Page 28: About Applications
about applications  Applications allow your tablet to perform many different functions. To launch an application Touch the application icon on the home screen or in the Launcher. Launcher screen: Page 28 The screen shown above is for illustrative pur- poses only. - Page 29 Perform simple mathematical operations. Optimize the accuracy of the touch- screen. Check your e-mail. View photos and play videos. Play music. Access the Settings menu to adjust the tablet’s options. Page 29 View detailed usage statistics, as well as adjust options that are not available in the Settings menu.
-
Page 30: Installing Additional Applications
installing additional applications You can also download an install additional applica- tions from AppsLib, the web browser, or other sources. Downloading and installing new applications to your tablet can extend its functionality in many ways. The tablet must be set to allow installation of applications from non-Market sources. -
Page 31: Removing Applications
You can learn more about AppsLib, and browse applica- tions by visiting their website at www.appslib.com. Some developers allow you to download and install applications directly from their website. Support for third-party applications is provided by the respective application developer. Coby is not responsible for the behavior of these applications;... - Page 32 Touch the name of the application you want to uninstall; the Application Info screen will open. Page 32 Uninstall. The tablet will prompt you to Touch confirm. OK to uninstall the application. Touch About Applications...
-
Page 33: Browsing The Web
browsing the web  The Browser application lets you visit webpages and find information on the web. Keep up with the news, your friends, or enjoy video from YouTube™, the world’s most popular video-sharing community. To use Browser, the tablet must be connected to the Internet. - Page 34 Some common Browser actions are described below. To go to a webpage. 1. Touch the Address bar at the top of the Browser screen. The keyboard will open automatically. (If the Address bar is not visible, drag the page down to return to the top of the Browser screen.) 2.
- Page 35 4. If desired, you can modify the name of the bookmark or its location (URL address). Otherwise, touch OK to finish adding the book- mark. To go to a bookmarked webpage. 1. Touch the Book- mark icon to the right of the Address bar.
-
Page 36: Optional Connections
optional Connections  Connecting to a Computer Connect the tablet to a computer to transfer files. Connect your tablet to the computer. With the included USB cable: Plug the small end of the cable into the USB 2.0 Hi- speed connector of the tablet. -
Page 37: Connecting To A Tv
Mount the storage drive. Touch USB connected (Internal) to mount the tablet’s built-in storage, then touch Mount when prompted to confirm. When mounted, you can copy files to/from your computer to it. If a memory card is installed, touch USB connected (External) to mount the card, then touch Mount when prompted to confirm. -
Page 38: Connecting Headphones
HDMI Setting, and then touch a resolution Touch option that matches the display capabilities of the TV: 1920 x 1080p 60Hz if your TV is capable Choose of displaying 1080p video. 1280 x 720p 60Hz if your TV is capable Choose of displaying 720p or 1080i video. -
Page 39: Using The Usb Full-Size Adapter
using the uSb full-Size adapter The USB full-size adapter can be used to connect and use USB devices with the tablet. The adapter converts the mini USB port on the tablet into a USB On-the-Go (OTG) connector. Connecting a Keyboard For times when you want to type for an extended period of time, you may want to connect a full-size keyboard to the tablet. -
Page 40: Setting The System Options
Setting the System options  Open the system settings menu to adjust how the tablet looks and functions. Many applications will have their own settings; refer to the documentation provided by the ap- plication developer to learn more. To open the Settings menu: From the Home screen, press the Settings to open the Settings menu. -
Page 41: Sound & Display
Sound & Display Setting Description Sound settings Silent mode Check to disable all sounds except for alarms and media (e.g., video or music that is playing). Alarms and media must be silenced within their respective applications. Ringer volume Drag a slider to set the volume level for system and application notifica- tions. -
Page 42: Location & Security
Setting Description HDMI Setting Select the video output resolution over HDMI. • 1920 x 1080p 60Hz: For use with TVs that support 1080p. • 1280 x 720p 60Hz: For use with TVs that support 720p or 1080i. UI Resolution This option is reserved for future use. Setting Adjusting this option has no function at this time. - Page 43 Setting Description Use visible pattern Check to draw lines between points in the unlock pattern. Passwords Visible passwords Check to briefly display each charac- ter as you enter a password. This can help you verify that the password is being entered correctly. Credential storage Use secure creden- Check to give applications access...
-
Page 44: Applications
applications Setting Description Unknown sources Check to permit installation of ap- plications obtained from locations other than Android Market (e.g., alternate app markets, web sites, email, etc). The included AppsLib market is con- sidered an alternate app market. This setting must be checked in order to install applications from AppsLib. -
Page 45: Privacy
Setting Description Check USB debugging to allow Development debugging tools on a computer to communication with the device via a USB connection. Check Stay awake to prevent the screen from dimming and locking when the device is connected to power or to a USB device that pro- vides power. -
Page 46: Sd Card & Device Storage
SD Card & Device Storage Setting Description SD card Total space Displays the total capacity of any memory card installed in your device. If no card is installed, this setting is dimmed. Available space Displays the amount of capacity free on any card installed in your device. -
Page 47: Search
Search Setting Description Web search Google search set- Configure your Google web search tings options. Quick Search box Searchable items The quick search box can be found on the device’s home screen. Check an item to have it included in device searches. -
Page 48: About Device
about Device Setting Description Battery use See which applications and system components you have been using since the device was last connected to a power source. This list is sorted by the amount of power used. Touch an item in the list to see more information or to access a settings screen. -
Page 49: Specifications
Specifications  Please visit www.cobyusa.com for the latest product information. Design, specifications, and manual are subject to change without notice. Processor ARM1176™ (720 MHz) 256 MB DDR2 Storage 4 GB flash built-in microSDHC card slot (max. 16GB supported) Display 7.0” touchscreen TFT LCD (800 x 480) Wi-Fi Networking IEEE 802.11 b/g... -
Page 50: Support
Support  If you have a problem with this device, please check our website at www.cobyusa.com for Frequently Asked Questions (FAQ) and product updates. If these resources do not resolve the problem, please contact Technical Support. Coby electronics Technical Support Email techsupport@cobyusa.com www.cobyusa.com... -
Page 51: Safety Notices
Safety notices  The lightning flash with arrowhead symbol within an equilateral triangle is intended to alert the user to the presence of uninsulated “dangerous voltage” within the product’s enclosure that may be of sufficient magnitude to constitute a risk of electric shock. The exclamation point within an equilateral triangle is intended to alert the user to the presence of important operation and servicing instructions in the... -
Page 52: Fcc Statement
fCC Statement: This device complies with Part 15 of the FCC Rules. Operation is subject to the following two conditions: (1) This device may not cause harmful interference, and (2) This device must accept any interference received, including interference that may cause undesired operation. Note: This equipment has been tested and found to comply with the limits for Class B digital devices, pursuant to Part 15 of the FCC rules. -
Page 53: Important Safety Instructions
important Safety instructions Read Instructions: All the safety and operating instruc- tions should be read before the product is operated. Retain Instructions: The safety and operating instruc- tions should be retained for future reference. Heed Warnings: All warnings on the product and in the operating instructions should be adhered to. - Page 54 the product does not operate normally by following the operating instructions. Adjust only those controls that are covered by the operating instructions as improper adjustment of other controls may result in damage and will often require extensive work by a qualified techni- cian to restore the product to its normal operation;...
- Page 55 Coby electronics Corp. 1991 Marcus Ave, Suite 301 Lake Success, NY 11042 www.cobyusa.com www.ecoby.com MID7015-4G Coby is a registered trademark of Coby Electronics Corporation. Printed in China. IB v1.6a_20101124-3...