Table of Contents
Advertisement
Table of contents
1 Preface........................................................................................................................ 2
2 Safety..........................................................................................................................4
3 Using your bike........................................................................................................7
3.1 EnergyPak.............................................................................................................................................7
3.1.1 First use...................................................................................................................................... 7
3.1.2 EnergyPak Smart Integrated..............................................................................................7
3.1.3 EnergyPak Smart Compact.................................................................................................9
3.1.4 EnergyPak Smart 250........................................................................................................ 10
3.1.5 EnergyPak Side Release.................................................................................................... 10
3.1.6 EnergyPak Carrier................................................................................................................. 11
3.2 Charger...............................................................................................................................................12
3.2.1 Smart Charger....................................................................................................................... 13
3.2.2 Smart Charger Compact................................................................................................... 15
3.2.3 Fast Charger.......................................................................................................................... 17
3.2.4 Charging..................................................................................................................................18
3.2.5 Charging time...................................................................................................................... 20
3.3 Controls.............................................................................................................................................. 21
3.3.1 RideControl Ergo.................................................................................................................. 21
3.3.2 RideControl Ergo 2............................................................................................................ 25
3.3.3 RideControl Ergo 3............................................................................................................ 29
3.3.4 RideControl Dash................................................................................................................32
3.3.5 RideControl GO....................................................................................................................37
3.3.6 RideDash EVO....................................................................................................................... 41
3.3.7 STI Lever................................................................................................................................45
3.4 Keys.................................................................................................................................................... 45
3.5 Riding range.................................................................................................................................... 46
4 Transport & Storage........................................................................................... 47
5 Maintenance...........................................................................................................49
6 Disposal.................................................................................................................... 51
7 Legal documentation.......................................................................................... 52
7.1 Warranty............................................................................................................................................. 52
7.2 Exclusions......................................................................................................................................... 53
7.3 Conformity........................................................................................................................................ 53
7.4 Disclaimer......................................................................................................................................... 53
7.5 FCC...................................................................................................................................................... 54
Table of contents 1
Advertisement
Table of Contents

Related Manuals for Giant EnergyPak Smart 250


Summary of Contents for Giant EnergyPak Smart 250
-
Page 1: Table Of Contents
3 Using your bike......................7 3.1 EnergyPak.............................7 3.1.1 First use............................7 3.1.2 EnergyPak Smart Integrated....................7 3.1.3 EnergyPak Smart Compact....................9 3.1.4 EnergyPak Smart 250......................10 3.1.5 EnergyPak Side Release....................10 3.1.6 EnergyPak Carrier......................... 11 3.2 Charger...............................12 3.2.1 Smart Charger........................13 3.2.2 Smart Charger Compact....................15 3.2.3 Fast Charger.......................... -
Page 2: Preface
1 Preface Welcome Welcome and congratulations on your purchase of a new Giant, Liv or Momentum E-bike. The fun of pedalling is only moments away! How to use this manual This document is intended as a short introduction to your new e-bike. It contains essential safety information, and provides a first look at some of the e-bike’s main components and... - Page 3 Information resources & downloads GIANT: https://www.giant-bicycles.com/global/manuals LIV: https://www.liv-cycling.com/global/manuals MOMENTUM: https://www.momentum-biking.com/global/manuals For information on other bicycle parts and warranty, consult the general bicycle owner's manual. Service and support This manual is not intended to be an extensive reference book about service, maintenance or repairs.
-
Page 4: Safety
2 Safety Safe use of the bicycle Before using the e-bike on the open road, ride the bike in a secure area to get acquainted with riding a bike with electric pedalling support. Try all settings on the bike and get familiar with the results. - Page 5 NOTICE: When the battery has reached the end of the service life, it should be treated as hazardous waste material. It should not be disposed of in regular household trash. Ask your dealer for advice on proper disposal of the battery. Luggage carrier WARNING: Always make sure that any luggage or child-seat feature fitted to the luggage carrier is securely fitted in accordance with the manufacturer’s...
- Page 6 Accessories CAUTION: • Always follow the child seat manufacturer’s instructions for installation, usage and safety. Never modify any original parts of the E-bike to accommodate a child seat • Never exceed the carrier load capacity and/or total permissible load weight of the E-bike as stated elsewhere in this user manual.
-
Page 7: Using Your Bike
3 Using your bike 3.1 EnergyPak The EnergyPak is the rechargeable battery that powers the e-bike system. EnergyPaks vary in shape, size, energy capacity and compatibility. They can be mounted on different locations on the e-bike, depending on the e-bike model. An EnergyPak should be charged with the original charger that is supplied with the e-bike. - Page 8 Installation & removal NOTICE: Always switch off the power first, before removing the EnergyPak. Removing the EnergyPak (Key Lock Type): • Hold the battery in the frame to make sure it cannot drop when unlocking; • Insert the key and unlock the EnergyPak.
-
Page 9: Energypak Smart Compact
3.1.3 EnergyPak Smart Compact Description EnergyPak Charging socket Energy level indicator Installation & removal NOTICE: Always switch off the power first, before removing the EnergyPak. Removing the EnergyPak: • Hold the battery in the frame to make sure it cannot drop when unlocking; •... -
Page 10: Energypak Smart 250
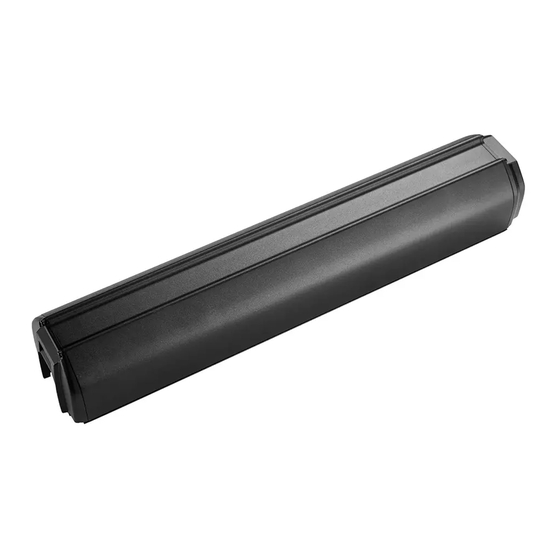
3.1.4 EnergyPak Smart 250 Description EnergyPak NOTICE: The EnergyPak Smart 250 can only be removed or installed by an authorized mechanic. 3.1.5 EnergyPak Side Release Description EnergyPak Charging socket Energy level indicator Installation & removal NOTICE: Always switch off the power first, before removing the EnergyPak. -
Page 11: Energypak Carrier
Removing the EnergyPak: • Hold the battery in the frame to make sure it cannot drop when unlocking; • Insert the key and unlock the EnergyPak • Pull the top of the EnergyPak sideways; • Lift it out to remove the EnergyPak from the bike. -
Page 12: Charger
Removing the EnergyPak: • Insert the key and unlock the EnergyPak • Hold the grip and pull the EnergyPak backwards; • Slide out the EnergyPak. Installing the EnergyPak: • Reverse removal procedure to install the EnergyPak. • Make sure the slots are aligned correctly at the bottom;... -
Page 13: Smart Charger
3.2.1 Smart Charger Description AC socket Charger Button/LED Charge socket Adapter cable Using your bike 13... - Page 14 LED Description Button/LED LED/ Color Behaviour Status Button RED > GREEN > sequence Power on self test (boot) GREEN > RED > OFF No battery connected GREEN blink (0.5 sec. Charging active interval) GREEN blink (1.0 sec. Battery Temp. Time-out interval) GREEN Charging completed...
-
Page 15: Smart Charger Compact
3.2.2 Smart Charger Compact Description AC socket Charger Button Charge socket Adapter cable LED Description Button Using your bike 15... - Page 16 Mode LED/ Color Behaviour Status Button RED > sequence Power on self test (boot) GREEN > No battery connected Regular GREEN blink (0.5 sec. Charging active charge interval) (100%) Regular GREEN blink (1.0 sec. Battery Temp. Time-out charge interval) (100%) Regular GREEN Charging completed...
-
Page 17: Fast Charger
3.2.3 Fast Charger Description AC socket Charger Charge socket LED Description Color Behaviour Status Charging active blink Charging issue GREEN No battery / Battery full Using your bike 17... -
Page 18: Charging
3.2.4 Charging CAUTION: • Always take care to align all connectors properly before connecting. • Charge the EnergyPak battery at room temperature (±20°C/68°F). • Charging below 0°C or above 40°C (32°F~104 °F) can lead to insufficient charging and can have a negative impact on the battery life cycle. •... - Page 19 With the EnergyPak removed from the bike. Start charging: • Remove the EnergyPak from the bike. • Connect the charger to the charge port of the EnergyPak. • Connect the charger to an AC outlet. • The charging process starts. Stop charging: •...
-
Page 20: Charging Time
3.2.5 Charging time Fast charger (4A) time table (110 V / 200-240 V) EnergyPak 300 Wh 400 Wh 500 Wh capacity AC voltage 110 V 200-240 V 110 V 200-240 V 110 V 200-240 V 80% charge 2:20 h 1:45 h 3:00 h 2:00 h 3:40 h... -
Page 21: Controls
3.3 Controls 3.3.1 RideControl Ergo The RideControl Ergo provides an ergonomic layout with easy-to-operate controls including power on/off, assist level, Smart Assist, Walk assist and lighting. Visual feedback comes from bright LED indicators or a screen like the RideDash EVO. Connect the RideControl app on your smartphone with your e-bike to add even more possibilities, which are ever expanding and improving with updates. - Page 22 Power Assist Smart Assist (AUTO): The SyncDrive motor automatically adapts the power output to the circumstances to optimize ride comfort and range. • Press and hold the 'Assistance level up' (C) or 'Assistance level down' button (B) for 2 seconds to activate Smart Assist. •...
- Page 23 • Power assist indicator LED's (F) light up in a back and forth sequence. • Press the 'Assistance level up' button (C) within 3 seconds to engage Walk assist. • Release the 'Assistance level up' button (C) to stop or pause Walk assist. Press again within 3 seconds to re-engage.
- Page 24 • F1 : Battery issues Quick troubleshooting steps: Note which Power assist level indicator is blinking (F1 -F5). Switch off the system. Visually check for any obvious cause. Solve any easy and obvious cause, if safely possible (e.g. reinstall incorrectly placed battery).
-
Page 25: Ridecontrol Ergo 2
3.3.2 RideControl Ergo 2 The RideControl Ergo 2 provides an ergonomic layout with easy-to-operate controls including power on/off, assist level, Smart Assist, Walk assist and lighting and USB charging port lets you recharge conveniently. Visual feedback comes from bright LED indicators or a screen like the RideDash EVO. - Page 26 • If a RideDash is connected, it will show the Smart Assist level as ‘AUTO’ on the screen. • Press the 'Assistance level up' (D) or 'Assistance level down' button (B) to return to manual assist level selection. INFO: Smart Assist mode is not available on all models. Assist level 1-5: Manually select the power assist level.
- Page 27 Lighting • Press and hold the 'Light' button (G) for 2 seconds to switch the bike lights on or off. • Light indicator (J) lights up when the light is switched on. • On S-Pedelecs (high speed E-bikes) the bike lights cannot be switched off. The 'Light / Info' button (G) will switch between low beam and high beam.
- Page 28 • I4: Not applicable • I3: Speed sensor issue • I2: Motor issues • I1 : Battery issues Quick troubleshooting steps: Note which Power assist indicator LED is blinking (I1 -I5). Switch off the system. Visually check for any obvious cause. Solve any easy and obvious cause, if safely possible (e.g.
-
Page 29: Ridecontrol Ergo 3
3.3.3 RideControl Ergo 3 This updated control system features clean buttons that can be integrated with the handlebar grips. The RideControl Ergo 3 on the left handlebar is used to control the Assistance levels and the Walk assist mode. The optional second RideControl Ergo 3 is installed on the right handlebar grip and can be used to control functions like the light, Smart Assist or the display functions of a RideDash EVO,. - Page 30 Power Assist Smart Assist (AUTO): The SyncDrive motor automatically adapts the power output to the circumstances to optimize ride comfort and range. • Press and hold the 'Smart Assist' button (E) or 'Assistance level up' button (A) or 'Assistance level down' button (C) for 3 seconds to activate Smart Assist. INFO: Smart Assist mode is not available on all models.
- Page 31 Lighting • Press the 'Light' button (D) to switch the bike light On or Off. • When switching on the bike light, the backlight of the RideDash EVO screen will be dimmed. • On S-Pedelecs (high speed E-bikes), the bike lights cannot be switched off. The 'Light' button (G) will switch between low beam and high beam.
-
Page 32: Ridecontrol Dash
3.3.4 RideControl Dash The RideControl Dash is a remote with integrated colour display screen that shows extensive bike and ride information from the EnergyPak(s), SyncDrive motor, sensors, lights and other connected e-components. Ergonomically placed at the left handlebar grip, it offers many features of the RideControl Ergo remotes and the RideDash EVO, into a single compact unit. - Page 33 • Press the 'Assistance level up' button (B) and 'Assistance level down' button (A) simultaneously for 2 seconds to activate Smart Assist. Manually select the assist level: • Press the 'Assistance level up' (B) or 'Assistance level down' button (A) to change the assist level.
- Page 34 Data field (I): Data field (I) is a single data field to display specific information. Data field options: • SPEED: Current riding speed (default). • RANGE: Estimated remaining riding range on current assist level. • ODO: Total riding distance since first use. •...
- Page 35 • Press any other button to return to normal riding mode immediately. INFO: If no other action is performed within 3 seconds after pressing 'Walk assist' button (D), the system will return to normal riding mode. Lighting / screen brightness •...
- Page 36 System events A system event warning screen shows when a malfunction occurs: • A warning screen is displayed for 2 seconds. • An event description is displayed for 5 seconds. • The riding screen returns after the warning screen, showing the service indicator in the status bar.
-
Page 37: Ridecontrol Go
LEDs) INFO: It is possible to use the RideControl Go in combination with additional RideControl Ergo types and RideDash screens. Contact your authorized dealer or visit the Giant website for more information. Powering on and off • Press the 'Power on/off' button (A) to switch on the system. - Page 38 • Press the 'Power on/off' button (A) to deactivate Smart Assist and return to the manual assist level selection. INFO: Smart Assist mode is not available on all models. Assist level 1-5: Manually select the power assist level. • Press the 'Power on/off' button (A) to change the assist level. •...
- Page 39 Battery level LED on LED color 80~100% 1+2+3+4+5 White 60~79% 1+2+3+4 White 40~59% 1+2+3 White 20~39% White 10~29% White 4~9% Orange 0~3% Orange blinking NOTICE: When battery power is less than 1%, the Power Assist will switch to off mode. The light system will be still functional for at least 2 hours System events In case of a system event (malfunction), the RideControl Go will show an indication of the event.
- Page 40 • Schedule a service check at an authorized dealer. If the issue returns: • Repeat step 1-5. If the issue persists: • Stop riding. • Contact authorized dealer for diagnosis and repairs. 40 Using your bike...
-
Page 41: Ridedash Evo
3.3.6 RideDash EVO The RideDash EVO gives the rider extensive bike and ride information on a beautiful, large colour screen placed in the centre of the handlebar. Operated by the RideControl Ergo series, it shows clear and large indications of items like speed, distance, battery status, remaining range, and other useful information. - Page 42 Sub data field Sub data field (D) shows detailed information divided over four pages Page 1 (Default): • RANGE: Estimated remaining riding range on current assist level.* • ODO: Total riding distance since first use. Page 2: • DIST: Riding distance since last reset. •...
- Page 43 *Assist levels availability and power ratio per level depend on SyncDrive motor type and factory system settings. The screen shows the new assist level name and estimated remaining riding range for 2 seconds. Then the riding screen will return with an updated level indicator. Settings Changing display units between metric and /imperial.
- Page 44 Visually check for any obvious cause. Solve any easy and obvious cause, if safely possible (e.g. reinstall incorrectly placed battery). Switch the system back on. If the issue is solved: • Normal use may be continued. • Schedule a service check at an authorized dealer. If the issue returns, repeat step 1-4.
-
Page 45: Sti Lever
3.3.7 STI Lever Button functions can be set using the RideControl app. The STI lever can only be used on specific models. STI Lever functions Left STI Lever Assist up Assist down Rear shift up Right STI Lever Rear shift down Rear shift up Rear shift down 3.4 Keys... -
Page 46: Riding Range
3.5 Riding range The range on one charge strongly depends on several circumstances, such as (but not limited to): • The total vehicle weight including the rider, passengers and cargo loaded onto the bike. • Weather conditions, such as ambient temperature and wind. •... -
Page 47: Transport & Storage
4 Transport & Storage Transport CAUTION: • Any removable (electronic) parts, such as the charger and EnergyPak, should always be removed from the e-bike before transport. • Always follow the instructions provided by the manufacturer(s) of the vehicle and/or bicycle carrier being used for transporting the e-bike. NOTICE: •... - Page 48 Battery storage Disconnect and remove the EnergyPak from the bike for long term storage. CAUTION: • Store the EnergyPak in a dry, safe location. • Store the EnergyPak at a temperature between -20°C and 20°C (-4°F ~ 68°F). NOTICE: • Storage at temperatures above 20°C (68°F) can decrease battery health and overall service life.
-
Page 49: Maintenance
5 Maintenance Regular maintenance and cleaning are essential for optimal performance and safety. INFO: Make sure to also read the information on maintenance on the website and in general bike owner's manual. Cleaning Use a soft cloth or brush, optionally with a minimal amount of a neutral cleaning solution, to wipe dirt off. - Page 50 Chain tension Some models have an internal gear hub in the rear wheel. It may also have an automatic chain-tensioner that maintains proper chain tension. If there is too much slack on the chain, the tension may have to be adjusted, or the chain may have worn out and needs to be replaced.
-
Page 51: Disposal
Used batteries must be treated as hazardous waste. • Batteries must be disposed of in accordance with the relevant national environmental protection regulations. • Return batteries to a recycling facility, or an authorized Giant dealer. • In case of uncertainty contact Giant customer service department. Disposal 51... -
Page 52: Legal Documentation
7 Legal documentation 7.1 Warranty Giant/Liv/Momentum warrants for the original owner only the frame, rigid fork, or original component parts of each new Giant/Liv/Momentum brand bicycle to be free from defects in material and workmanship for the following specified periods: Warranty of two years for electronic equipment such as: •... -
Page 53: Exclusions
• Labour charges for part replacement or changeover. Except as is provided by this warranty and subject to all additional warranties Giant/ Liv/Momentum and its employees and agents shall not be liable for any loss or damage whatsoever (including incidental and consequential loss or damage caused by negligence or default) arising from or concerning any Giant/Liv/Momentum bicycle. -
Page 54: Fcc
7.5 FCC This device complies with part 15 of the FCC Rules. Operation is subject to the following two conditions: This device may not cause harmful interference, and This device must accept any interference received, including interference that may cause undesired operation. Please note that changes or modifications not expressly approved by the party responsible for compliance could void the user’s authority to operate the equipment. - Page 55 Legal documentation 55...