Table of Contents
Advertisement
Available languages
Available languages
Quick Links
Advertisement
Chapters
Table of Contents

Related Manuals for AEG SCN91800C1


Summary of Contents for AEG SCN91800C1
- Page 1 SCN91800C1 User Manual Istruzioni per l’uso...
-
Page 2: Table Of Contents
10. TECHNICAL INFORMATION................17 FOR PERFECT RESULTS Thank you for choosing this AEG product. We have created it to give you impeccable performance for many years, with innovative technologies that help make life simpler features you might not find on ordinary appliances. Please spend a few minutes reading to get the very best from it. -
Page 3: Safety Information
ENGLISH SAFETY INFORMATION Before the installation and use of the appliance, carefully read the supplied instructions. The manufacturer is not responsible if an incorrect installation and use causes injuries and damages. Always keep the instructions with the appliance for future reference. -
Page 4: Safety Instructions
Do not use water spray and steam to clean the • appliance. Clean the appliance with a moist soft cloth. Only use • neutral detergents. Do not use abrasive products, abrasive cleaning pads, solvents or metal objects. Do not store explosive substances such as aerosol •... - Page 5 ENGLISH installation. Make sure that there is • Do not freeze again food that has access to the mains plug after the been thawed. installation. • Obey the storage instructions on the • Do not pull the mains cable to packaging of frozen food.
-
Page 6: Operation
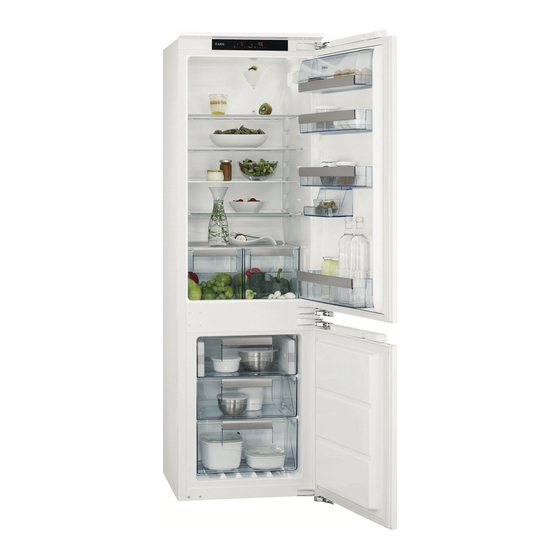
3. OPERATION 3.1 Control Panel Appliance ON/OFF button Freezer Temperature warmer button Fridge Temperature colder button Display Fridge Temperature warmer button It is possible to change predefined sound of buttons by pressing together Mode button Mode button and Temperature colder OK button button for some seconds. - Page 7 ENGLISH 3.9 Holiday mode 2. Press the OK button to confirm. The fridge Off indicator is shown. This function allows you to keep the refrigerator closed and empty during a 3.6 Switching on the fridge long holiday period without the To switch on the fridge it is enough to formation of a bad smell.
-
Page 8: Daily Use
Press any button. bottles placed in the freezer for fast The buzzer switches off. - Page 9 ENGLISH 4.3 Storage of frozen food 4.6 Cold accumulators When first starting-up or after a period One or more cold accumulators are out of use, before putting the products supplied in the freezer; these increase in the compartment let the appliance run the length of time for which food will at least 2 hours on the higher settings.
-
Page 10: Hints And Tips
5. HINTS AND TIPS 5.1 Normal operating sounds • do cover or wrap the food, particularly if it has a strong flavour The following sounds are normal during • position food so that air can circulate operation: freely around it •... -
Page 11: Care And Cleaning
ENGLISH 5.6 Hints for storage of frozen • prepare food in small portions to enable it to be rapidly and completely food frozen and to make it possible subsequently to thaw only the To obtain the best performance from this quantity required;... -
Page 12: Troubleshooting
6.4 Periods of non-operation When the appliance is not in use for long periods, take the following precautions: 1. Disconnect the appliance from electricity supply. 2. Remove all food. 3. Clean the appliance and all accessories. 4. Leave the door/doors open to prevent unpleasant smells. - Page 13 ENGLISH Problem Possible cause Solution The door is left open. Close the door. The temperature in the ap- Contact a qualified electri- pliance is too high. cian or contact the nearest Authorized Service Centre. A square symbol is shown in- Temperature sensor prob- Contact the nearest Author- stead of numbers on the...
- Page 14 Problem Possible cause Solution Water flows on the rear plate During the automatic de- This is correct. of the refrigerator. frosting process, frost melts on the rear plate. Water flows inside the refrig- The water outlet is clogged. Clean the water outlet.
-
Page 15: Installation
ENGLISH Problem Possible cause Solution There is no cold air circula- Make sure that there is cold tion in the appliance. air circulation in the appli- ance. 7.2 Replacing the lamp 2. If necessary, adjust the door. Refer to "Installation". The appliance is equipped with a longlife 3. -
Page 16: Noises
8.3 Ventilation requirements min. 5 cm The airflow behind the appliance must 200 cm be sufficient. min. 200 cm 9. NOISES There are some sounds during normal running (compressor, refrigerant circulation). HISSS! BRRR SSSRRR! SSSRRR! -
Page 17: Technical Information
ENGLISH HISSS! HISSS! CRACK! CRACK! BLUBB! BLUBB! 10. TECHNICAL INFORMATION 10.1 Technical data Dimensions of the recess Height × Width × Depth (mm): 1780 mm x 560 mm x 550 mm Rising time 23 h Voltage 230-240 V Frequency 50 Hz The technical information is situated on cavity depth is smaller, the energy the rating plate on the internal left side... - Page 18 10. DATI TECNICI....................... 34 PER RISULTATI PERFETTI Grazie per aver scelto di acquistare questo prodotto AEG. Lo abbiamo creato per fornirvi prestazioni impeccabili per molti anni, grazie a tecnologie innovative che vi semplificheranno la vita - funzioni che non troverete sulle normali apparecchiature.
-
Page 19: Informazioni Per La Sicurezza
ITALIANO INFORMAZIONI PER LA SICUREZZA Leggere attentamente le istruzioni fornite prima di installare e utilizzare l'apparecchiatura. Il produttore non è responsabile se un'installazione ed un uso non corretto dell'apparecchiatura provocano lesioni e danni. Tenere sempre le istruzioni a portata di mano come riferimento futuro. -
Page 20: Istruzioni Di Sicurezza
Non danneggiare il circuito refrigerante. • Non utilizzare apparecchiature elettriche all'interno • dei comparti di conservazione degli alimenti, ad eccezione di quelli consigliati dal costruttore. Non nebulizzare acqua né utilizzare vapore per pulire • l'apparecchiatura. Pulire l'apparecchiatura con un panno inumidito e •... - Page 21 ITALIANO • Non installare l'apparecchiatura dove specificamente consentito dal sia esposta alla luce solare diretta. produttore. • Non installare questa apparecchiatura • Fare attenzione a non danneggiare il in luoghi troppo umidi o freddi, come circuito refrigerante. Esso contiene aggiunte strutturali, garage o cantine. isobutano (R600a), un gas naturale con un alto livello di compatibilità...
-
Page 22: Uso Dell'apparecchio
• Tagliare il cavo di rete e smaltirlo. personale qualificato. • Rimuovere la porta per evitare che • Controllare regolarmente lo scarico bambini e animali domestici dell'apparecchiatura e, se necessario, rimangano chiusi all’interno pulirlo. L'ostruzione dello scarico può... - Page 23 ITALIANO 3.6 Accensione del frigorifero D) Funzione COOLMATIC E) Funzione Holiday Per accendere il frigorifero è sufficiente F) Funzione FROSTMATIC premere il regolatore della temperatura G) Spia della temperatura del del frigorifero. Per accendere il congelatore frigorifero nell'altro modo: H) Spia del vano congelatore Spia allarme 1.
- Page 24 Per disattivare la funzione ChildLock, La funzione si disattiva ripetere la procedura. selezionando un'impostazione di temperatura per il 3.12 Allarme di alta frigorifero diversa. temperatura 3.9 ModalitàHoliday Un aumento di temperatura nel vano congelatore (per esempio a causa di una...
-
Page 25: Utilizzo Quotidiano
ITALIANO La spia del timer viene visualizzata (min).. Per modificare l'ora durante il conto alla Al termine del conto alla rovescia l'icona rovescia o alla fine, premere il tasto MinuteMinder lampeggia e viene Temperatura. emesso un segnale acustico. A questo Per disattivare la funzione in qualsiasi punto occorre rimuovere le bottiglie momento durante il conto alla rovescia... -
Page 26: Consigli E Suggerimenti Utili
4.4 Scongelamento Prima dell'utilizzo, i cibi surgelati o congelati possono essere scongelati nel vano frigorifero o, per un processo più veloce, a temperatura ambiente. Gli alimenti divisi in piccole porzioni possono essere cucinati direttamente, senza essere prima scongelati: in questo caso, tuttavia, la cottura durerà... - Page 27 ITALIANO • Un lieve scatto dal regolatore della • Frutta e verdura: devono essere pulite temperatura quando il compressore si accuratamente e poste negli appositi accende e si spegne. cassetti. • Burro e formaggio: devono essere 5.2 Consigli per il risparmio chiusi in contenitori ermetici o in sacchetti di polietilene oppure avvolti energetico...
-
Page 28: Pulizia E Cura
5.6 Consigli per la • non aprire frequentemente la porta e limitare il più possibile i tempi di conservazione dei surgelati apertura; • una volta scongelati, gli alimenti si Per ottenere risultati ottimali è deteriorano rapidamente e non consigliabile: possono essere ricongelati;... -
Page 29: Risoluzione Dei Problemi
ITALIANO 6.3 Sbrinamento del 1. Scollegare l'apparecchiatura dalla rete elettrica. congelatore 2. Estrarre tutti gli alimenti 3. Pulire l'apparecchiatura e tutti gli Il vano congelatore è "frost free". Ciò accessori. significa che non si forma brina durante il 4. Lasciare la porta/le porte socchiusa/e normale funzionamento sulle pareti per evitare la formazione di odori interne dell'apparecchiatura o sugli... - Page 30 Problema Causa possibile Soluzione La temperatura all'interno Fare riferimento alla sezione dell'apparecchiatura è trop- "Allarme porta aperta" o po alta. "Allarme di alta tempera- tura". La porta viene lasciata aper- Chiudere la porta. La temperatura all'interno Contattare un elettricista dell'apparecchiatura è...
- Page 31 ITALIANO Problema Causa possibile Soluzione Il compressore non si avvia Ciò è normale, non si è veri- Il compressore si avvia dopo immediatamente dopo ficato alcun errore. un certo periodo di tempo. avere premuto il tasto FROSTMATIC, oppure dopo avere cambiato la tempera- tura.
-
Page 32: Installazione
Problema Causa possibile Soluzione La temperatura all'interno Il regolatore della tempera- Impostare una temperatura dell'apparecchiatura è trop- tura non è impostato corret- superiore/inferiore. po bassa/troppo alta. tamente. La porta non è chiusa corret- Consultare la sezione "Chiu- tamente. sura della porta". -
Page 33: Rumori
ITALIANO di alimentazione è dotata di un apposito contatto. Se la presa di Classe Temperatura ambiente corrente dell'impianto domestico non climati- è collegata a terra, allacciare l'apparecchiatura a una presa di terra separata in conformità alle norme in da +16°C a +32°C vigore, rivolgendosi a un elettricista da +16°C a +38°C qualificato. -
Page 34: Dati Tecnici
SSSRRR! SSSRRR! HISSS! HISSS! CRACK! CRACK! BLUBB! BLUBB! 10. DATI TECNICI 10.1 Dati tecnici Dimensioni nicchia di incas- Altezza x Larghezza x Profondità (mm): 1780 mm x 560 mm x 550 mm Tempo di risalita 23 h Tensione 230-240 V... - Page 35 ITALIANO I dati tecnici sono riportati sulla targhetta dell'apparecchiatura. Se la profondità dei dati, applicata sul lato sinistro interno risulta inferiore, il consumo di energia dell'apparecchiatura, e sull'etichetta dei aumenta leggermente. valori energetici. Si consiglia di mantenere una profondità di 560 mm per la cavità 11.
- Page 36 www.aeg.com/shop...