Table of Contents
Advertisement
• Thank you for purchasing this wired remote controller.
• This manual describes safety measures which should be considered during the use of
this product.
Read this manual carefully and be sure you understand the information provided
before using the product.
Keep this manual where it is readily accessible to all current and future operators.
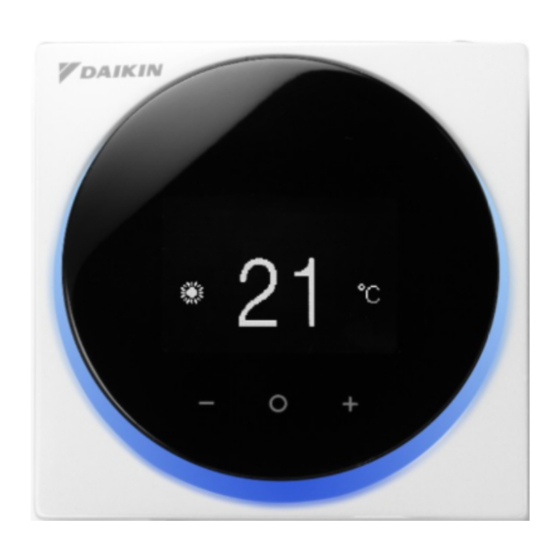
Wired Remote
Controller
Operation Manual
MODEL BRC1H62W/BRC1H62K
Advertisement
Table of Contents

Related Manuals for Daikin BRC1H62W


Summary of Contents for Daikin BRC1H62W
- Page 1 Wired Remote Controller Operation Manual MODEL BRC1H62W/BRC1H62K • Thank you for purchasing this wired remote controller. • This manual describes safety measures which should be considered during the use of this product. Read this manual carefully and be sure you understand the information provided before using the product.
-
Page 2: Table Of Contents
Contents Safety Precautions ............. 2 Button Locations and Descriptions ........4 Overview of Screens ............5 Setting Screen List ............. 6 Names and Functions ............7 Information Screen ............. 9 Setpoint ................13 Ventilation Rate ..............14 User Menu ................ 15 Operation Mode .............. -
Page 3: Safety Precautions
Safety Precautions — Items to be Strictly Observed — This product is not intended for use by children or infirm persons without supervision. Children should be supervised to ensure that they do not play with the product. Read the safety precautions carefully for the proper use of the product. •... - Page 4 Disposal requirements Your product and the batteries supplied with the controller are marked with this symbol. This symbol means that electrical and electronic products and batteries shall not be mixed with unsorted household waste. For batteries, a chemical symbol can be printed beneath the symbol. This chemical symbol means that the battery contains a heavy metal above a certain concentration.
-
Page 5: Button Locations And Descriptions
Button Locations and Descriptions Functions items (i.e., Operation Mode, Fan Speed, and Setpoint) are set from the menu screen. NOTICE • Do not install the remote controller in places exposed to direct sunlight. The LCD may be damaged. • Do not pull or twist the remote controller cord. The remote controller may be damaged. •... -
Page 6: Overview Of Screens
Overview of Screens How to display the screen The following is just an example. The items available for setting vary depending on the indoor unit you are using. If there is no button operation for about 10 seconds, the screen returns to the home screen. -
Page 7: Setting Screen List
Setting Screen List Setting list User Administrator menu menu Icon Name Description Depends on Operation Mode Operation mode setting current setting Depends on Fan Speed Airflow rate setting current setting Depends on Airflow Direction Airflow direction 1 setting ... -
Page 8: Names And Functions
* The Bluetooth® word mark and logos are registered trademarks s Settings menu icon owned by the Bluetooth SIG, Inc. and use of such marks by Daikin industries, LTD. is under license. Other trademarks and trade names are those of their respective owners. - Page 9 INFORMATION Depending on the connected model, some items may not be displayed. The controller is equipped with a power-saving function that darkens the display if there is no operation for a certain period of time. To make the screen light up again, press one of the buttons. Note that pressing one of the buttons will only make the display bright again, not cause remote controller operation.
-
Page 10: Information Screen
Information Screen The functions of the connected indoor unit are displayed as icons. How to display the information screen Home screen Press and hold on the Home screen for 5 seconds. ˚C ˚C Information screen Sensor view Icon view The screen switches to the Information screen. - Page 11 How to exit the information screen Information screen Sensor view Icon view Press or there is no button operation for about 12:34 12:34 10 seconds, the screen 30 ˚C returns to the home screen. 32 ˚C Only displayed when sensor 1050 view is enabled.
- Page 12 About icons on the information screen The items displayed vary depending on the indoor unit you are using. Icon Name Description Indicates an information screen. Information MAIN/SUB remote Displayed when used as the MAIN/SUB remote controller. controller 1=main, 2=sub Bluetooth* Indicates that the controller is communicating with a mobile device, for use with the app.
- Page 13 * The Bluetooth® word mark and logos are registered trademarks owned by the Bluetooth SIG, Inc. and use of such marks by Daikin industries, LTD. is under license. Other trademarks and trade names are those of their respective owners.
-
Page 14: Setpoint
Setpoint The setpoint is the range of the available temperature for the Cooling, Heating, and Auto operation modes. How to set the setpoint Prerequisite: The active operation mode is either “Cooling”, “Heating”, or “Auto”. Home screen The small number above displays the room temperature, and the large number below displays the setpoint. -
Page 15: Ventilation Rate
Ventilation Rate If only a total heat exchanger is connected, set the ventilation rate from the home screen. The ventilation rate can be set in the user menu when linked with an air conditioner. How to set the ventilation rate Home screen The small number above displays the room temperature, and the icon below displays the ventilation rate. -
Page 16: User Menu
User Menu How to display the user menu Home screen Press on the Home screen. ˚C ˚C User menu screen The screen switches to the User menu screen. How to exit the user menu User menu screen Press to select “ ”, then press to apply. -
Page 17: Operation Mode
Operation Mode From the home screen, press to enter the user menu. Use to navigate through the menus. Press again to enter one of the menus. INFORMATION • Available menus are depend on type of indoor unit that user operating. •... - Page 18 About icon list of Operation Modes The indoor unit can operate in various operation modes. Icon Operation mode Icon Operation mode Auto Fan only Icons vary depending on the system. Cool Ventilation + Air Clean Heat Ventilation Air Clean INFORMATION Available operation mode are depend on indoor unit.
-
Page 19: Fan Speed
Fan Speed How to set the fan speed Prerequisite: The active operation mode is either “Cooling”, “Heating”, “Auto” or “Fan”. User menu screen Navigate to the fan speed menu. Depending on the system, this function may not be displayed. Fan speed screen The setting of the fan speeds will vary based upon the indoor unit model. - Page 20 5 fan speeds Auto Medium Low High Medium High Medium • For mechanical protection purposes, it is possible that the indoor unit switches itself to “Automatic fan speed” mode. • If fan stops operating, always not mean system failure. The fan can stop operating at any time. •...
-
Page 21: Airflow
Airflow How to set the airflow direction User menu screen Navigate to the airflow direction menu. Depending on the system, this function may not be displayed. Airflow direction screen to adjust the airflow direction and press to confirm. Airflow direction setting (up/down) Position 0 Position 1 Position 2... - Page 22 • Depending on the type of indoor unit, and/or on system layout and organization, Auto airflow direction may not be available. • For some types of indoor units, the airflow direction setting is unavailable. • If the floor-standing indoor unit does not have vertical airflow, the left and right direction icons are displayed.
- Page 23 How to set the vertical airflow direction Depending on the system, there may be 2 louvers. Set louver 1 via the airflow direction menu, and set louver 2 via the vertical airflow menu, as shown here. During the setting process, decide on a up/down direction via the airflow direction menu and decide on an left/right direction via the vertical airflow menu.
-
Page 24: Energy Recovery Ventilator (Erv)
Energy Recovery Ventilator (ERV) How to set the ventilation mode User menu screen Access to the ventilation mode menu. Depending on the system, this function may not be displayed. Ventilation mode screen Press to adjust the ventilation mode and press to confirm. - Page 25 How to set the ventilation rate User menu screen Access to the ventilation rate menu. Depending on the system, this function may not be displayed. Ventilation rate screen to adjust the ventilation rate and press confirm. 2 fan speeds Auto High Result: The indoor unit changes ventilation rate and the...
-
Page 26: Led Brightness Light Ring On
LED Brightness Light Ring On Changes the brightness of the LED brightness. How to set the LED brightness User menu screen Access to the Adjust LED (ON) menu. Adjust LED brightness during backlight ON to adjust the brightness of the ring around the remote controller, then press to apply. -
Page 27: Led Brightness Light Ring Off
LED Brightness Light Ring Off Changes the brightness of the LED when the power is turned off. How to set the LED brightness User menu screen Access to the Adjust LED (OFF) menu. Adjust LED brightness during backlight OFF to adjust the brightness of the ring around the remote controller, then press to apply. -
Page 28: Setpoint
Setpoint Set the cooling and heating setpoint. How to set the dual setpoint User menu screen Access to the dual setpoint menu. Depending on the system, this function may not be displayed. Dual setpoint screen Press to select the setting items then press 28 ˚C select the item. -
Page 29: Fahrenheit/Celsius
Fahrenheit/Celsius How to set Fahrenheit/Celsius User menu screen Access to the Fahrenheit/Celsius menu. Fahrenheit/Celsius screen Press to choose a display method, then press to apply. Result: The temperature is displayed in the measurement selected and the controller returns to the home screen. -
Page 30: Administrator Menu
Administrator Menu How to display the administrator menu Information screen Press and hold at the same time on the 12:34 information screen for 5 seconds. Administrator menu screen The screen switches to the Administrator menu screen. How to exit the administrator menu Administrator menu screen Press to select “... -
Page 31: Backlight Brightness/Contrast
Backlight Brightness/Contrast How to set the backlight brightness Administrator menu screen Navigate to the backlight brightness menu. Backlight brightness screen Press to adjust the backlight brightness level, then press to apply. Result: The backlight brightness is changed, and the controller returns to the administrator menu screen. -
Page 32: Clock Setting
Clock Setting This function just only allows in basic operation. For advance operation, Please use in mobile application. How to set the clock Administrator menu screen Navigate to the clock setting menu. Clock setting screen When changing the date, if button is pressed, the year will be selected. - Page 33 Clock setting screen Press button, set the day, then press to move to the next field. 2021 / 07 / 01 00 : 00 Clock setting screen Press button, set the hour, then press to move to the next field. 2021 / 07 / 24 00 : 00 Clock setting screen...
-
Page 34: Bluetooth
Bluetooth How to make a Bluetooth connection Prerequisite: Application on mobile device is installed and running. Your mobile device should support Bluetooth version 4.2. Open mobile application and follow the instructions from the app. The remote controller will not process the bluetooth bonding information if it is connecting to the device for the first time. - Page 35 Numeric comparison screen The 6-digit numeric comparison figure will be displayed. Confirm that the same figure is displayed on the smartphone, if both numeric number or remote and smartphone are same, press the button. 123456 If the button is pressed, the controller returns to the home screen without bonding.
- Page 36 Bluetooth setting screen If connection is successful, the status indicator (LED) 12:34:56 blinks green (lights up green during operation). Press the button and the controller returns to the menu screen. Press the button and the bonding information is deleted. If Bluetooth connection was not successful, please delete the bonding information once and then try connecting again.
-
Page 37: About
About How to displaying the administrator information screen Administrator menu screen Access to the about menu. Administrator about screen Remote controller information is appeared. The Administrator about screen has 2 pages. Press the button to scroll through the pages. SW1 XXXXXXXX Press the button to return. -
Page 38: Administrator Password Setting
Administrator Password Setting Password setting for access to administrator screen. • It is recommended to set a 4-digit password so that users cannot enter the Administrator menu easily when starting to use this remote controller. • Be sure to keep the set password secure so that you do not forget it. Also, manage the password so that it is kept secret from others. - Page 39 Sub-menu screen Press button, to select Password and press button. 0 0 0 0 Sub-menu screen Press button, set any password, and then press button. Each time button is pressed, the digit place will 0 0 0 0 change. When the 4th digit on the right end is reached, press button to return to the previous screen.
-
Page 40: Maintenance
Maintenance Maintaining the Unit and LCD Display • Clean the LCD and surface of the remote controller by dry cloth. • If the dry cloth cannot remove the dirty, use a damp cloth to clean the display. Squeeze out excess liquid from the cloth before using. After cleaning, use a dry cloth to remove any moisture. -
Page 41: Filter Sign
Filter Sign How filter sign is displayed Home screen If the filter sign icon is displayed on the Home screen, filter maintenance is necessary. ˚C ˚C User menu screen Access to the filter sign menu. User menu screen The icons are displayed as of the following 4 types. Follow the instruction remove sign. - Page 42 Filter sign/element sign Wash, clean, or replace the filter or element. For details, refer to the operation manual supplied with the indoor unit. Filter sign screen Reset the filter indicator when the filter or element is cleaned or replaced. Press to apply.
- Page 43 Dust box sign Remove the dust in the dust box. For maintenance, see the indoor unit operation manual. Dust Box sign screen Reset the filter indicator when the dust box is emptied. Press to apply. Result: The filter sign will disappeared and the controller returns to the home screen.
-
Page 44: Troubleshooting
Troubleshooting The following cases do not indicate a malfunction. Cause and action • If you change the operation mode to Cooling, Heating or Auto when the power is first turned on, communication between the MAIN remote controller and the SUB remote controller occurs, so the SUB remote controller cannot be operated for about 10 seconds. - Page 45 After-sales Service Warning • Do not disassemble, modify, or repair the remote controller. It may cause electric shocks or a fire. Consult your local dealer. • Do not relocate or reinstall the remote controller by yourself. Improper installation may cause electric shocks or a fire. Consult your local dealer.
- Page 46 EM20A032 [2106] HT...