
Related Manuals for Chevrolet 2012 TDC


Summary of Contents for Chevrolet 2012 TDC
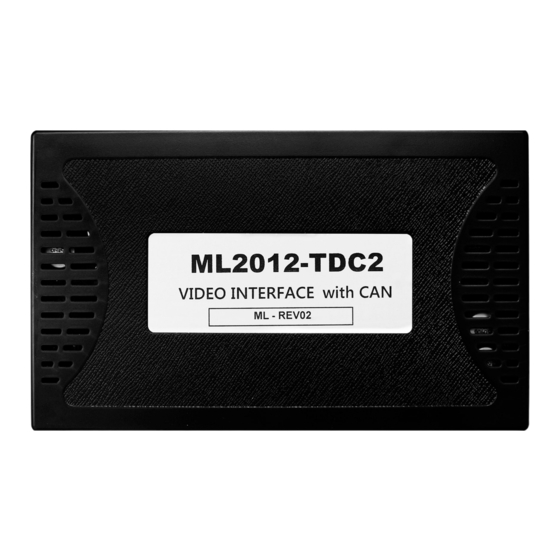
- Page 1 INSTRUCTION MANUAL CHEVROLET 2012 TDC CHEVROLET / BUICK / HOLDEN VIEDO INTERFACE 2021.05.28 DATA. WEBSITE https://kaptrader.com kap@kaptrader.com SHOP https://www.car4play.kr sales@car4play.kr...
- Page 2 INSTRUCTION MANUAL CAR COMPATIBILITY SHEET BRAND MODEL SCREEN YEAR Malibu 7" 2012~2016 CHEVROLET Alpheon 7" 2011~2016 Orlando LaCrosse 7" 2012~2016 BUICK Regal 7" 2012~2016 7" 2012~2016 HOLDEN Commodore 2015~...
-
Page 3: Power Cable
INSTRUCTION MANUAL COMPONENT INTERFACE POWER CABLE LVDS CABLE A/V CABLE RGB NAVI CABLE OSD BOARD MODE SWITCH ▶ Warning ▶ Warning Please contact your dealer if any component is missing. Please contact your dealer if any component is missing. ... - Page 4 INSTRUCTION MANUAL INTERFACE SPEC INPUT • Digital RGB IN (HDMI Port) x 1 • Analog RGB In (7pin) X 1 • CVBS Audio/Video X 2 • CVBS Front Cam In X 1 • CVBS Rear Cam In X 1 • LVDS In Command System X 1 OUTPUT •...
- Page 5 INSTRUCTION MANUAL EXTERNAL DEVICE SPECIFICATIONS LCD IN/OUT DIP SWITCH IMAGE PROGRAM OSD connection Interface error check POWER/CAN RESISTIVE TOUCH DIGITAL RGB ALNALOG RGB 4PIN Touch NAVI IN AUDIO/VIDEO AUDIO/VIDEO IN FRONT CAMERA IN REAR CAMERA IN ...
-
Page 6: Connector Pin Assignment
INSTRUCTION MANUAL CONNECTOR PIN ASSIGNMENT PORT INFORMATION Color Signal Assignment Color Signal Assignment POWER Brown REAR DETECT Blue FRONT DETECT /CAN Green CAN1 LOW Orange CAN1 HIGH Purple CAN2 LOW White CAN2 HIGH Yellow CAN3 LOW Purple CAN3 HIGH Green REAR VCC FRONT VCC Green... -
Page 7: Dip Switch Setting
▲ OFF ▼ ON NAVIGATION Do not use AV1 (DVB-T) Do not use AV2 (DVD) Do not use No function CHEVROLET MALIBU 7" (2012~2016) CHEVROLET ALPHEON 7" (2011~2016) BUICK GL8 7“(800X480) (2012~2016) Car Type BUICK REGAL 7“(800X480) (2012~2016) BUICK LACROSSE 7“(800X480) (2012~2016) -
Page 8: Button Control
INSTRUCTION MANUAL BUTTON CONTROL Change Mode to Interface Screen STEERING WHEEL BUTTONS BUTTON PRESS FUNCTION CALL/VOICE Long press OEM screen to interface screen Interface screen to the OEM screen HANG UP/MUTE Double click SRC UP / DOWN Long press Show OEM screen for 3 seconds ▶... - Page 9 INSTRUCTION MANUAL BUTTON CONTROL Change Mode to Interface Screen CHEVROLET MALIBU BUTTON BUTTON PRESS FUNCTION OEM screen to interface screen HOME / CONFIG Short press Interface screen to the OEM screen VOL / SEEK Long press Show OEM screen for 3 seconds...
- Page 10 INSTRUCTION MANUAL BUTTON CONTROL Change Mode to Interface Screen ALPHEON/LACROSSE BUTTON BUTTON PRESS FUNCTION OEM screen to interface screen CONFIG / NAV Short press Interface screen to the OEM screen VOL / TRACK Long press Show OEM screen for 3 seconds Other Button Short press to OEM screen...
- Page 11 INSTRUCTION MANUAL BUTTON CONTROL Change Mode to Interface Screen REGAL BUTTON BUTTON PRESS FUNCTION OEM screen to interface screen CONFIG / NAV Short press Interface screen to the OEM screen TRACK Long press Show OEM screen for 3 seconds Other Button Short press to OEM screen ▶...
- Page 12 INSTRUCTION MANUAL BUTTON CONTROL Change Mode to Interface Screen GL8 BUTTON BUTTON PRESS FUNCTION OEM screen to interface screen CONFIG Short press Interface screen to the OEM screen TRACK / POWER Long press Show OEM screen for 3 seconds Other Button Short press to OEM screen ▶...
-
Page 13: Touch Control
INSTRUCTION MANUAL TOUCH CONTROL Touch Calibration Select OSD menu> Utility> Calibration. MENU Config NAVI Factory Reset Execute Cancel IR-Ctrl Calibration Execute Cancel Utility Version Interface version Press and hold the display for longer than 10 seconds. On interface Screen (NAVI, AV1, AV2) + Touch according to the shape coordinates ▶... - Page 14 INSTRUCTION MANUAL PARKING CONTROL Parking Line / OPS Display Parking Line Display Parking Line ON Screen Parking Line OFF Screen OPS Display Parking Line ON Screen Parking Line OFF Screen...
- Page 15 INSTRUCTION MANUAL PARKING CONTROL FrontCam Rcv Option FrontCam-RcvOpt : ON (1 - 30s) MENU Option NAVI Config FronrCam-RcvOpt Displays the front camera screen for the set time Option (1 - 30second) Image Screen Parking REAR FRONT OEM or OEM or Camera Camera Interface...
- Page 16 INSTRUCTION MANUAL INSTALL MANUAL DIGITAL NAVIGATION PROGRAM IMAGE DIP_S/W LCD IN/OUT No.1 - ▲ OFF ML2012 TDC2 POWER/CAN TOUCH DIGITAL AUDIO/VIDEO HDMI POWER LVDS OUT NAVIGATION ※ Please set in the OSD menu MENU Option NAVI MENU Option NAVI Config NAVI-RGB “NAVIGATION MODEL”...
-
Page 17: Connection Diagram
INSTRUCTION MANUAL CONNECTION DIAGRAM ANALOG NAVIGATION PROGRAM IMAGE DIP_S/W LCD IN/OUT No.1 - ▲ OFF ML2012 TDC2 POWER/CAN TOUCH DIGITAL AUDIO/VIDEO POWER RESISTIVE ANALOG TOUCH ANALOG NAVIGATION ※ Please set in the OSD menu MENU Option NAVI Config NAVI-RGB “NAVIGATION MODEL” Option DVB-T (DMB) Image... - Page 18 INSTRUCTION MANUAL CONNECTION DIAGRAM DVB-T (DMB) PROGRAM IMAGE DIP_S/W LCD IN/OUT No.2 - ▲ OFF ML2012 TDC2 POWER/CAN TOUCH DIGITAL AUDIO/VIDEO DVB-T-IR ANALOG MODEL ※ Please set in the OSD menu MENU Option NAVI MENU Option NAVI Config NAVI-RGB Config Option DVB-T (DMB) “DMB MODEL”...
- Page 19 INSTRUCTION MANUAL CONNECTION DIAGRAM PROGRAM IMAGE DIP_S/W LCD IN/OUT No.3 - ▲ OFF ML2012 TDC2 POWER/CAN TOUCH DIGITAL AUDIO/VIDEO DVD-IR ANALOG MODEL ※ Please set in the OSD menu MENU Option NAVI MENU Option NAVI Config NAVI-RGB Config Option DVB-T (DMB) Option Image “DVD MODEL”...
- Page 20 INSTRUCTION MANUAL CONNECTION DIAGRAM REAR CAM PROGRAM IMAGE DIP_S/W LCD IN/OUT ML2012 TDC2 POWER/CAN TOUCH DIGITAL AUDIO/VIDEO REAR REAR POWER REAR DETECT REAR CAMERA ※ Please set in the OSD menu MENU Option NAVI Config NAVI-RGB Option DVB-T (DMB) AVM-DIGITAL Image Default Screen...
- Page 21 INSTRUCTION MANUAL CONNECTION DIAGRAM FRONT CAM PROGRAM IMAGE DIP_S/W LCD IN/OUT ML2012 TDC2 POWER/CAN TOUCH DIGITAL AUDIO/VIDEO FRONT FRONT POWER FRONT DETECT ON/OFF SWITCH FRONT CAMERA +12V ※ Please set in the OSD menu MENU Option NAVI MENU Option NAVI Config NAVI-RGB Config...
- Page 22 INSTRUCTION MANUAL INSTALL MANUAL INSTALLATION - LACROSSE • FRONT COVER Desorption • Screw removal • Connect the supplied GVIF cable to the OEM • Connect the provided GVIF cable to the cable monitor CAN - CAN +...
- Page 23 INSTRUCTION MANUAL INSTALL MANUAL INSTALLATION - REGAL...
- Page 24 INSTRUCTION MANUAL INSTALL MANUAL INSTALLATION - REGAL CAN - CAN +...
- Page 25 INSTRUCTION MANUAL INSTALL MANUAL INSTALLATION - GL8...
- Page 26 INSTRUCTION MANUAL INSTALL MANUAL INSTALLATION - GL8 CAN - CAN +...
- Page 27 INSTRUCTION MANUAL INSTALL MANUAL INSTALLATION - GL8...
- Page 28 INSTRUCTION MANUAL INSTALL MANUAL INSTALLATION - GL8 CAN - CAN +...
-
Page 29: Osd Control
INSTRUCTION MANUAL OSD CONTROL Basic information MENU Option NAVI Config RearCam-Type ExtDevice Option RearCam-Power Auto Image RearCam-Det GEAR Screen AV Mode Parking FrontCam-Type ExtDevide OSD(On Screen Display) Menu MENU Mode State Interface Status First Menu Second Menu Third Menu OSD(On Screen Display) Board Control •... - Page 30 INSTRUCTION MANUAL OSD CONTROL First Menu Second Menu Third Menu Description DIGITAL Config NAVI-RGB Setting the Connected NAVI Model : : Default DVB-T(DMB) : Setting the Connected DVB-T Model : Default : Setting the Connected DVD Model : Default RearCam Setting the Connected RearCam Model :...
- Page 31 INSTRUCTION MANUAL OSD CONTROL First Menu Second Menu Third Menu Description Option FINE Set up manufacturer of woodworking device for UART Touch use NAVI COM Disable feature Original Camera RearCam-Type ExtDevice Equipped with external camera + 12V continuous supply RearCam-Power AUTO + 12V supply only in Rear camera mode + 12V off...
- Page 32 INSTRUCTION MANUAL OSD CONTROL First Menu Second Menu Third Menu Description In the OEM, NAVI, AV1, FRONT, and REAR modes, the output of AV OUT is set to AV1 Option In the OEM, NAVI, AV2, FRONT, and REAR modes, the output of AV OUT is AV Out set to AV2 In the OEM, NAVI, FRONT, and REAR modes, output the output of AV OUT...
-
Page 33: Image Brightness
INSTRUCTION MANUAL OSD CONTROL Image First Menu Second Menu Third Menu Description Brightness Adjust the value of brightness Image Contrast Adjust the value of contrast [AV / REAR / FRONT / DVD / DVBT MENU] Saturation Adjust the value of Saturation [AV / REAR / FRONT / DVD / DVBT MENU] Adjust the value of Hue [AV / REAR / FRONT / DVD / DVBT MENU]... - Page 34 INSTRUCTION MANUAL OSD CONTROL Screen First Menu Second Menu Third Menu Description Horizontal Output screen horizontal movement Screen Vertical Output screen vertical movement Scale X Up Reduce / increase output screen width Scale X Down Scale Y Up Reduce / Increase Output Screen Height Scale Y Down Reset Screen menu all reset...
- Page 35 INSTRUCTION MANUAL OSD CONTROL Parking First Menu Second Menu Third Menu Description Show OPS Parking OPS Display Do not show OPS Show parking line Line Display Do not show parking lines Warnings Lang Set warning text language Horizontal Moving a parking line horizontally Vertical Moving a parking line vertically Transparency...
- Page 36 INSTRUCTION MANUAL OSD CONTROL First Menu Second Menu Third Menu Description Horizontal value OSD Menu Horizontal Shift Vertical value OSD menu vertical Shift Display Time value OSD Menu Display Time (in seconds) Transparency value OSD menu transparency Language OSD menu display language Reset Execute Initialize OSD settings...
- Page 37 INSTRUCTION MANUAL OSD CONTROL IR-Ctrl First Menu Second Menu Third Menu Description IR-Ctrl DVB-T(DMB) Learn Cancel Learn Cancel Notice In order to work with the IR learning function, a separate IR cable is required. 1. In DVB-T / DVD menu, select User in Sys (OSD list) or User (learned contents). 2.
- Page 38 INSTRUCTION MANUAL OSD CONTROL First Menu Second Menu Third Menu Description Factory Reset Execute Initialize all settings Utility Calibration Execute Touch calibration mode P5D300KRX-200534 Version (Check for future upgrades) Hardware Special Software Software Software Motor Model PIP Model National Version Version Year Month...
-
Page 39: Question And Answer
INSTRUCTION MANUAL Question and Answer If there is a problem with the interface • First, check the LED - Green LED blinking: No problem - Red LED: Bad interface - No LED: Check power and CAN connection If the screen is black •...