Table of Contents
Advertisement
Available languages
Available languages
Quick Links
Advertisement
Table of Contents

Related Manuals for Rotel CONVECTORHEATER761CH1


Summary of Contents for Rotel CONVECTORHEATER761CH1
- Page 1 CONVECTORHEATER761CH1 CONVECTORHEATER762CH1 U761CH1 = 500 / 1000 W U762CH1 = 1000 / 2000 W • GEBRAUCHSANWEISUNG • MODE D’EMPLOI • ISTRUZIONI PER L’USO • INSTRUCTIONS FOR USE U761CH1_U762CH1_BED_DFIE_Rev03_2021-06-23 Gebrauchsanweisung ○ Mode d’emploi ○ Istruzioni per l’uso ○ Instruction for use...
-
Page 2: Verkauf Und Service
Verkauf und Service Distribution et service après-vente Reparto vendita e servizio clienti Sales and Service Schweiz: France: Rotel AG Rotel France SARL Parkstrasse 43 313 route du Nant 5012 Schönenwerd ZA de Magny Tel. +41 62 787 77 00 01280 Prevessin-Moëns office@rotel.ch... -
Page 3: Table Of Contents
Inhaltsverzeichnis / Table des matières / Indice / Table of contents Verkauf und Service ........................2 Distribution et service après-vente ....................2 Reparto vendita e servizio clienti ....................2 Sales and Service ..........................2 Deutsch ..............................6 • Sicherheitshinweise ......................... 6 •... - Page 4 • Utilisation ............................26 Mise en service ..........................26 Activation des touches de réglage / mode veille ................26 Réglage de l'heure ......................... 26 Réglage de la température ......................26 Réglage de la chaleur élevée / basse .................... 27 Réglage de la sécurité enfants....................... 27 Fonction ECO ..........................
- Page 5 Annullamento del timer (giorno e settimana) ................40 • Pulizia e Cura dell’Apparecchio ..................... 41 • Smaltimento ..........................41 English ............................... 42 • Safety instructions ......................... 42 • Assembling ............................ 48 Wall mounting ..........................48 Stand mounting ..........................48 • Control Panel ..........................
-
Page 6: Deutsch
Deutsch • SICHERHEITSHINWEISE Lesen Sie erst alle Hinweise, bevor Sie das Gerät in Be- trieb nehmen. o Dieses Produkt ist nur für gut isolierte Räume oder für den gelegentlichen Gebrauch geeignet. o Dieses Gerät kann von Personen mit eingeschränk- ten physischen, sensorischen oder geistigen Fähig- keiten oder einem Mangel an Erfahrung und/oder Wissen verwendet werden, wenn sie beaufsichtigt werden oder bezüglich des sicheren Gebrauchs des... - Page 7 o Behindern Sie den Luftstrom am Luftein- oder –aus- lass in keiner Weise, da das Gerät überhitzen und zu einer Brandgefahr werden kann. o Decken Sie die Lüftungsschlitze und die Luftein- und - ausgänge nicht ab, indem Sie das Gerät an einer Fläche anbringen.
- Page 8 o Das Gerät nicht in Flüssigkeiten tauchen oder in das Geräteinnere Wasser laufen lassen, da dies zu einer Stromschlaggefahr führt. o Greifen Sie nicht nach einem Gerät, dass ins Wasser gefallen ist. Strom im Haushalt ausschalten und den Netzstecker unmittelbar ziehen. o Betreiben Sie das Gerät nicht mit einem beschädig- ten Netzkabel, Netzstecker, nachdem das Gerät eine Fehlfunktion hatte, fallen gelassen wurde oder...
- Page 9 o Schließen Sie das Gerät nicht an die Stromversor- gung an, bevor es vollständig zusammengebaut und montiert wurde. o Das Gerät ist nicht für den Außengebrauch be- stimmt. o Verwenden Sie das Gerät nicht in der unmittelbaren Umgebung einer Badewanne, einer Dusche, eines Schwimmbeckens oder anderen Flüssigkeiten und stellen Sie sicher, dass keine stromführenden Teile mit Wasser in Kontakt treten können.
- Page 10 o Dieses Gerät eignet sich nicht zur Benutzung auf Langhaarteppichen oder Flokativorlegern. o Lassen Sie das Netzkabel während des Betriebs nicht mit heißen Oberflächen in Berührung kom- men. o Verlegen Sie das Netzkabel nicht unter Teppichen, Vorlegern, Läufern usw. Legen Sie das Netzkabel au- ßerhalb von Gehbereichen, so dass niemand dar- über stolpert.
- Page 11 o Alle Gehäuseabdeckungen dieses Gerätes haben den Zweck, den direkten Zugang zu den Heizele- menten zu verhindern und müssen angebracht sein, wenn das Gerät eingeschaltet ist. o Die Heizung nicht abdecken! Überlastungsgefahr! o Um die Gefahr eines Stromschlags zu vermeiden, das Gerät und das Netzkabel nicht in Wasser tau- chen, dem Regen, der Feuchtigkeit oder anderen Flüssigkeit aussetzen, als der, die zum Betrieb des...
-
Page 12: Montage
• MONTAGE Wandmontage Standfuss-Montage Gebrauchsanweisung ○ Mode d’emploi ○ Istruzioni per l’uso ○ Instruction for use... -
Page 13: Bedienfeld
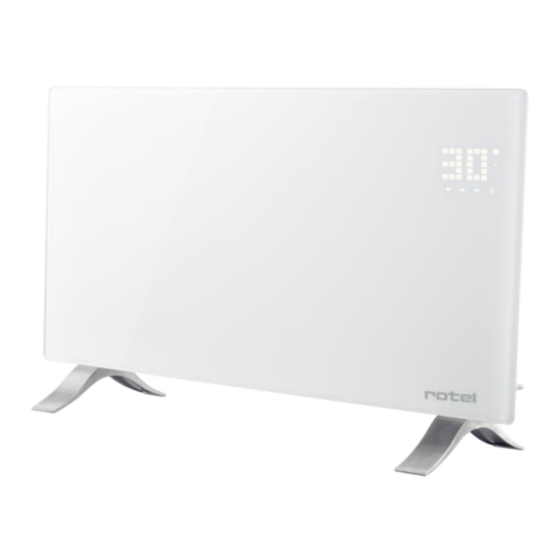
• BEDIENFELD 1) Fenster offen-Anzeige 12) Betriebslampe Heizelement 2) Wochentimer-Anzeige 13) Taste Ein/Aus 3) Tagestimer-Anzeige 14) Pfeiltaste „Runter“ 4) Zeitspannenanzeige 15) Pfeiltaste „Hoch“ 5) Stundenanzeige 16) Taste für Einstellungen 6) Wochenanzeige 17) Zahlenanzeige LED 7) Minutenanzeige 18) Taste für Einstellungen 8) Temperaturanzeige 19) ECO (LED-Anzeige ein/aus) 9) Anzeige für die Zeitschaltuhr... -
Page 14: Bedienung
• BEDIENUNG Inbetriebnahme Nehmen Sie das Gerät vorsichtig aus dem Karton. Heben Sie den Karton für die Lage- rung außerhalb der Saison auf. Achten Sie darauf, dass die Ein/Aus-Taste ausgeschaltet ist, bevor Sie das Gerät an- schließen. Die Heizung muss nach der Montageanleitung vollständig zusammengebaut und montiert sein. -
Page 15: Temperatur-Einstellung
Temperatur-Einstellung Drücken Sie die Taste " ", die Temperatureinstellung wird aktiviert und die Tempe- raturanzeige (17) blinkt. Stellen Sie die Temperatur durch Drücken von " " oder " " ein und drücken Sie dann " ", um die Einstellung zu speichern, oder nach 5s wird die Einstellung auto- matisch gespeichert. -
Page 16: Tag-/Wochen-Timer-Umschaltung (Fernbedienung)
Tag-/Wochen-Timer-Umschaltung (Fernbedienung) Drücken Sie die Taste "W/24H" auf der Fernbedienung, um zwischen Tagestimer- & Wochentimer-Einstellungen umzuschalten. Im Tagestimer-Modus leuchtet die Anzeige "Day Timer". In diesem Modus kann die Ausschaltzeit eingestellt werden. Im Wochentimermodus leuchtet die Anzeige "Week Timer". In diesem Modus kön- nen für jeden Wochentag 4 Heizphasen programmiert werden. -
Page 17: Reinigung Und Pflege
• ENTSORGUNG Zur ordnungsgemässen Entsorgung geben Sie das Gerät bitte an einen Händler, den Kundendienst oder Rotel AG zurück. Die Richtlinie 2012/19/EU über Elektro- und Elektronik-Altgeräte (WEEE) legt fest, dass Haushaltsgeräte nicht mit dem normalen Hausmüll entsorgt werden dürfen. Alt- geräte sind getrennt zu sammeln, um einerseits Wiederverwertung und Recycling zu... -
Page 18: Français
Français • CONSIGNES DE SÉCURITÉ Veuillez lire toutes les instructions avant la mise en ser- vice de l’appareil. o Ce produit ne peut être utilisé que dans des locaux bien isolés ou de manière occasionnelle. o Cet appareil peut être utilisé par des personnes aux capacités physiques, sensorielles ou intellectuelles limitées ou manquant d’expérience ou de connais- sance si elles sont sous surveillance ou ont été... - Page 19 o Ne recouvrez pas les fentes d’aération et les entrées et sorties d’air en plaçant l’appareil trop près d’une surface. Tous les objets doivent se trouver à un mètre minimum vers l’avant, les côtés et l’arrière de l‘appareil. o Ne placez pas l’appareil à proximité d’une source de chaleur.
- Page 20 o Ne touchez pas un appareil qui est tombé dans l’eau. Coupez immédiatement l’alimentation do- mestique et débranchez la fiche de la prise. o Ne faites pas fonctionner l’appareil si son câble d’alimentation ou la fiche du câble sont endomma- gés, ou après une panne, une chute ou un dommage quelconque de l’appareil.
- Page 21 o N’utilisez pas l’appareil à proximité immédiate d’une baignoire, d’une douche, d’une piscine ou d’autres liquides et assurez-vous qu’aucune partie conductrice de courant ne puisse entrer en contact avec l’eau. o Utilisez toujours l’appareil en position verticale. o Débranchez l’appareil et laissez-le refroidir avant de le déplacer.
- Page 22 o Ne camouflez pas le câble d’alimentation sous des tapis, paillassons, ou voies de passage etc. Installez le câble loin des voies de passage, de façon à ce que personne ne risque de trébucher. o Ne tordez pas le câble secteur, ne le pliez pas et ne l’enroulez pas autour de l’appareil, car cela affaiblit l’isolation du câble et peut la conduire à...
- Page 23 o Pour éviter le risque d’un choc électrique, ne plon- gez ni l’appareil ni son câble d’alimentation dans l’eau, ne le mettez pas sous la pluie, ne l’exposez pas à l’humidité ni à aucun autre liquide que ceux qui sont indispensables au fonctionnement de l‘ap- pareil.
-
Page 24: Montage
• MONTAGE Montage mural Montage du support Gebrauchsanweisung ○ Mode d’emploi ○ Istruzioni per l’uso ○ Instruction for use... -
Page 25: Panneau Contol
• PANNEAU CONTOL 1) Affichage de fenêtre ouverte 12) Témoin de fonctionnement du chauffage 2) Affichage de minuterie semaine 13) Touche marche/arrêt 3) Affichage de minuterie jour 14) Touche fléchée „bas“ 4) Affichage des périodes 15) Touche fléchée „haut“ 5) Affichage d'heure 16) Touche de réglage 6) Affichage de la semaine 17) Affichage numérique LED... -
Page 26: Utilisation
• UTILISATION Mise en service Sortez délicatement l’appareil du carton d’emballage. Conservez le carton pour con- server l’appareil dehors de la saison d’utilisation. Veillez à ce que le bouton de marche/arrêt soit sur la position arrêt avant de brancher l’appareil. Le radiateur doit être installé... -
Page 27: Réglage De La Chaleur Élevée / Basse
Réglage de la chaleur élevée / basse Pour passer du réglage de chauffage élevée (voyant " " allumé) au réglage de chauf- fage basse, appuyez sur le bouton " ". Pour passer du mode de chauffage basse (voyant " " allumé) au mode de chauffage élevée, appuyez sur le bouton "... -
Page 28: Minuterie Jour (Heure D'arrêt)
Minuterie jour (heure d'arrêt) L'indicateur "Day Timer" est allumé. Appuyez sur le bouton "Set" de la télécommande et l'indicateur d'heure (5) clignote. Réglez l'heure en appuyant sur " " ou " ", puis appuyez sur "Set" et l'indicateur des minutes (7) clignote. Réglez les minutes en appuyant sur "... -
Page 29: Nettoyage Et Soins
• ÉLIMINATION Pour une élimination dans les règles de l’art, veuillez remettre l’appareil à un reven- deur, un responsable du service après-vente ou Rotel SA. Selon la directive européenne 2012/19/UE relative aux déchets d’équipements élec- triques et électroniques (DEEE), les appareils électroménagers ne doivent pas être éliminés avec les déchets solides urbains normaux. -
Page 30: Italiano
Italiano • AVVERTENZE DI SICUREZZA Prima dell'uso leggere tutte le istruzioni. o Il presente prodotto è adatto solo a ambienti cor- rettamente isolati o ad un uso occasionale. o Questo apparecchio può essere usato da persone con ridotte capacità fisiche, sensoriali o mentali, o con insufficiente esperienza e conoscenza, a condi- zione che siano sotto sorveglianza o che abbiano ri- cevuto istruzioni sull'uso sicuro dell'apparecchio e... - Page 31 o Non coprire le prese d‘aria posizionando il disposi- tivo contro una superficie. Assicurarsi che tra il di- spositivo e altri oggetti ci sia almeno 1 metro di spa- zio libero sulla parte frontale, ai lati e sul retro. o Non posizionare il dispositivo vicino a fonti di calore. o Non utilizzare il dispositivo in un ambiente in cui sono conservati benzina, vernici o altri materiali in- fiammabili.
- Page 32 o Non mettere in funzione il dispositivo se il cavo di alimentazione è danneggiato, se la spina è danneg- giata, se il dispositivo non funziona correttamente oppure se è caduto o è danneggiato in qualche modo. Far controllare il dispositivo da un tecnico per la manutenzione o la riparazione.
- Page 33 o Prima di spostare il dispositivo, farlo raffreddare. o Non utilizzare il dispositivo con il cavo attorcigliato poiché la formazione del calore può comportare dei pericoli. o Si sconsiglia l´uso di prolunghe con questo disposi- tivo. o Non staccare la spina dalla presa prima di aver spento il dispositivo.
- Page 34 o Non conservare il dispositivo quando questo è an- cora caldo. o Non posizionare il dispositivo immediatamente sotto una presa a muro. o Non utilizzare il dispositivo con timer esterni o altri apparecchi che accendono o spengono il disposi- tivo. Non coprire l´elemento riscaldante per evitare il pericolo di incendio.
- Page 35 o Utilizzare il dispositivo solo per lo scopo previsto, come descritto nel manuale di istruzioni. Si sconsi- glia ogni altro utilizzo poiché ciò può comportare il pericolo di incendio, scosse elettriche o di infortuni. o Il dispositivo non è per un uso commerciale o indu- striale bensì...
-
Page 36: Montaggio
• MONTAGGIO Montaggio a parete Montaggio del supporto Gebrauchsanweisung ○ Mode d’emploi ○ Istruzioni per l’uso ○ Instruction for use... -
Page 37: Pannello Di Controllo
• PANNELLO DI CONTROLLO 1) Indicatore di finestra aperta 12) Spia dell’elemento riscaldante 2) Indicatore del timer settimanale 13) Tasto on/off 3) Indicatore del timer giornaliero 14) Tasto freccia „giú“ 4) Indicatore del periodo di tempo 15) Tasto freccia „su“ 5) Indicatore dell'ora 16) Tasto impostazioni 6) Indicatore della settimana... -
Page 38: Utilizzo
• UTILIZZO Messa in funzione Togliere con cautela il dispositivo dalla confezione. Conservare la confezione originale per riporre il dispositivo al termine della stagione. Assicurarsi che il tasto on/off sia spento prima di collegare alla corrente il dispositivo. Il dispositivo deve essere assemblato e montato seguendo le istruzioni. Non collegare altri apparecchi a potenza elevata alla stessa presa per evitare di so- vraccaricare il circuito elettrico. -
Page 39: Impostazione Del Livello Di Riscaldamento Alto/Basso
Impostazione del livello di riscaldamento alto/basso Per passare dall'impostazione di alto riscaldamento (spia " " accesa) all'imposta- zione di basso riscaldamento, premere il pulsante " ". Per cambiare dall'impostazione di riscaldamento basso (spia " " accesa) all'imposta- zione di riscaldamento alto, premere il pulsante " ". O cambiare l'impostazione del riscaldamento premendo "... -
Page 40: Timer Giornaliero (Tempo Di Spegnimento)
Timer giornaliero (tempo di spegnimento) L'indicatore "Day Timer" è acceso. Premere il pulsante "Set" sul telecomando e l'indicatore delle ore (5) lampeggia. Impostare l'ora premendo " " o " ", quindi premere "Set" e l'indicatore dei minuti (7) lampeggia. Impostare i minuti premendo " " o " ", quindi premere "OK" per salvare l'imposta- zione. -
Page 41: Pulizia E Cura Dell'apparecchio
• SMALTIMENTO Per lo smaltimento corretto, la macchina deve essere restituita al rivenditore specia- lizzato, al servizio di assistenza o alla ditta Rotel AG. La Direttiva UE 2012/19/CE sui rifiuti di apparecchiature elettriche ed elettroniche (WEEE) sancisce che gli elettrodomestici non possono essere smaltiti usando il nor- male ciclo di rifiuti solidi urbani. -
Page 42: English
English • SAFETY INSTRUCTIONS Please read all instructions before using the device. o This product is only suitable for well insulated spaces or occasional use. o This appliance can be used by persons with reduced physical, sensory or mental capabilities or lack of ex- perience and knowledge if they have been given su- pervision or instruction concerning use of the appli- ance in a safe way and understand the hazards in-... - Page 43 o Do not cover grilles, block entry or exhaust of air- flow by placing appliance against any surface. Keep all object at least 1 meter from the front, side and rear of the appliance. o Do not place the appliance close to a radiant heat source.
- Page 44 o Do not operate any appliance with a damaged cord, plug or after the appliance malfunctions or has been dropped or damaged in any manner. Return to a qualified electrical person for examination, electri- cal or mechanical adjustment, service or repair. o Do not operate appliance with wet hands.
- Page 45 o Switch off and let cooling before moving. o Do not operate with cord set coiled up as a build up of heat is likely, which could be sufficient to become a hazard. o The use of an extension cord with this appliance is not recommended.
- Page 46 o The appliance must not be located immediately be- low a socket-outlet. o Do not use this appliance with another program- mer, timer or any other device that switches the heater on automatically, since a fire risk exists if the appliance is covered or positioned incorrectly.
- Page 47 o CAUTION: In order to avoid a hazard due to inad- vertent resetting of the thermal cutout, this appli- ance must not be supplied through an external switching device, such a timer, or connected to a cir- cuit that is regularly on and off by the utility. o Use this appliance only as described in this manual.
-
Page 48: Assembling
• ASSEMBLING Wall mounting Stand mounting Gebrauchsanweisung ○ Mode d’emploi ○ Istruzioni per l’uso ○ Instruction for use... -
Page 49: Control Panel
• CONTROL PANEL 1) Open Window Indicator 12) Heating Element Indicator 2) Week Timer Indicator 13) ON/OFF Switch 3) Day Timer Indicator 14) Decrease Button 4) Time Period Indicator 15) Increase Button 5) Hour Indicator 16) Setting Button 6) Week Indicator 17) Temperature Indicator 7) Minute Indicator 18) Setting Button (remote control) -
Page 50: Operation
• OPERATION Starting Take out the heater from the carton carefully. Please save the carton for off-season storage. Make sure the power switch is in the OFF position before plugging it in. Ensure the heater is fully assembled according to the Mounting Guide. It is better not to use the same electric outlet with other high wattage electrical ap- pliances in order to avoid overloading your circuit. -
Page 51: High / Low Heat Setting
High / Low Heat Setting To change from High Heat Setting (indicator light “ ” on) to Low Heat Setting, press the button “ ”. To change from Low Heat Setting (indicator light “ ” on) to High Heat Setting, press the button “... -
Page 52: Day Timer (Switch-Off Time)
Day Timer (switch-off time) The indicator “Day Timer” is lit. Press button “Set” on the remote control and the Hour Indicator (5) flashes. Set the hour by pressing “ ” or “ ”, then press “Set” and the Minute Indicator (7) flashes. -
Page 53: Cleaning And Care
• DISPOSAL For proper disposal, please return device to a retailer, a service agent or Rotel AG. European Directive 2012/19/EC concerning Waste Electrical and Electronic Equip- ment (WEEE) states that household appliances should not be disposed of using the normal solid urban waste cycle. -
Page 54: Mandatory Statement According To 2015/1188/Eu
With working time limitation [no] With black bulb sensor [no] Contact details: Rotel AG Parkstrasse 43 CH-5012 Schönenwerd Remark: For electric local space heaters, the measured seasonal space heating energy efficiency ηs cannot be worse than the declared value at the nominal heat output of the unit. - Page 55 With working time limitation [no] With black bulb sensor [no] Contact details: Rotel AG Parkstrasse 43 CH-5012 Schönenwerd Remark: For electric local space heaters, the measured seasonal space heating energy efficiency ηs cannot be worse than the declared value at the nominal heat output of the unit.
-
Page 56: D / F / I / E
Transport costs are to be borne by the purchaser. Remember to specify your address to your sending, as well as a short decla- ration about the failure, shall the defect not be obvious. Schweiz: France: Service: Rotel AG Rotel France SARL Service après-vente: Parkstrasse 43 313 route du Nant Servizio clienti: 5012 Schönenwerd...