Advertisement
Quick Links
E-BIKE HEADLIGHT
HL-EB570G
Connector specifications
Instruction Manual for E-Bike Dealers
Design Pat. Pending
Copyright© 2021 CATEYE Co., Ltd.
1
HLEB570G-210521
• This instruction manual is intended for use
by E-Bike specialists.
Do not attempt to install this headlight if
you are not experienced with E-Bikes.
Consult your dealer for more information.
• After mounting the headlight, dealers are
expected to explain how to use the light and
to provide this instruction manual to the
customer.
WARNING!!!
(Risk of death; Prevention of accidents)
• Do not look directly at the light source. In addition,
when mounting the light unit, ensure that the light
will not dazzle other road users. Position the visor
of the head unit to the top of the headlight.
• Before your trip, please make sure the light is
firmly mounted to the bracket and it lights up. The
light must not be obscured.
• Do not disassemble or modify the light or any of the
included items.
CAUTION!
(Prevention of injury, damage, or property damage)
• Operating the light while riding is dangerous.
Always ride safely.
• Note that the light becomes hot while illuminated.
Do not block the lens or cover the light.
• Due to the variability of LEDs, the color and
brightness may differ even between devices with
the same model number.
• Do not place it within children's reach.
• Do not remove the E-Bike adapter when the light is on.
• Do not attach the E-Bike adapter if water droplets,
dust, or other foreign matter is attached to the unit.
Also, do not touch the terminals.
• Never use a high-pressure hose to clean the light.
• This device is rated IPX4 based on JIS C0920. Do
not immerse the device in water. Doing so may
cause a malfunction. Wipe off any moisture after
using the device in rainy weather.
• Do not subject the light to strong vibrations,
impacts, or excessive force. Discontinue use if any
abnormality occurs.
• Do not charge or use the battery at any voltage or
polarity other than that specified. Do not short-cir-
cuit the battery.
• Do not drop the light into a fire or heat the light.
• If the light unit or parts become dirty with mud,
etc., clean with a soft cloth which is moistened with
mild soap. Never apply paint thinner, benzine or
alcohol; damage will result.
GE100 FEATURES
ENG
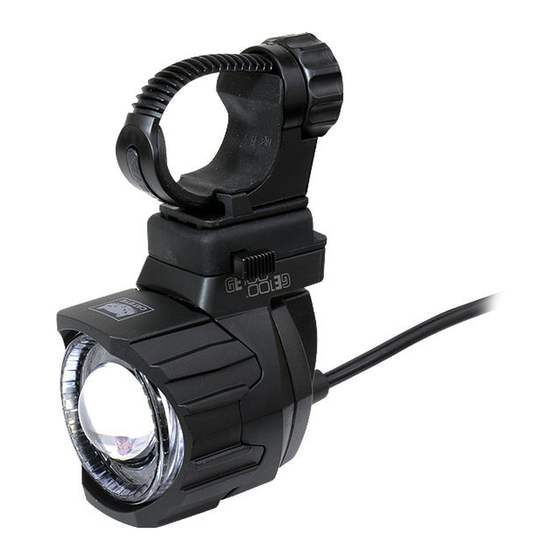
The GE100 headlight connects directly to the E-Bike
K 1808
drive unit for use. The headlight includes a visor to
direct the light distribution, allowing the unit to be
mounted on the top or bottom of the handlebar.
See "2. Mounting the headlight" for how to change
the mounting position of the E-Bike adapter. The
e-bike light GE100 can also be used as a battery
light via the optionally available battery. See
"Removing & optional use as battery light" for more
information.
1
HOW TO MOUNT TO A BICYCLE
Mounted below
1. Mounting the bracket
* This section explains how to mount the light unit below the
handlebar.
Rubber pad
Bracket
Wrap the strap around the
handlebar.
CAUTION!:
• Be sure to tighten the dial by hand. When you tighten it too hard with a tool, the screw thread may be
stripped.
• Check the dial and screw (*1) on the bracket periodically, and use them without any loosening.
• Round off the cut edge of the bracket strap to prevent injury.
2. Mounting the headlight
Always mount the light with the visor facing upwards so
that the low beam is correctly aligned.
Removing
Headlight
Turn the E-Bike adapter counterclock-
wise to separate the adapter from the
headlight and the bracket holder.
CAUTION!:
• When attaching or removing the E-Bike adapter, be sure to hold the headlight to prevent it from
dropping and becoming damaged.
• Do not attach the cartridge battery if water droplets, dust, or other foreign matter is attached to the
unit, and do not touch the terminals.
• Never position the visor to the bottom of the headlight.
Doing so will dazzle oncoming traffic.
Mounted above
1
Strap
Attach the dial.
Bracket holder
Mounting
2
E-Bike adapter
1
Turn the bracket holder and align the grooves on the E-Bike
adapter to the grooves on the headlight, and turn clockwise
until the adapter stops.
Included Items
Light unit
Bracket holder
E-Bike adapter
Headlight
FlexTight™ bracket
(H-34N)
Handlebar diameter :
Mounting height
2
*1
Dial
Securely tighten the dial.
Mounted above
Visor
3
Relay cable
Connector
Protective cap
GP bracket
Φ
22 – 35 mm
: 400 – 1200 mm
Cut
3
Strap
Screw
(Horizontal adjustment)
Dial (Vertical adjustment)
Mounted below
Click
4
Advertisement

Summary of Contents for Cateye GE100
- Page 1 See “2. Mounting the headlight” for how to change E-Bike adapter the mounting position of the E-Bike adapter. The Protective cap Headlight e-bike light GE100 can also be used as a battery HL-EB570G Connector specifications GP bracket light via the optionally available battery. See FlexTight™...
- Page 2 HOW TO MOUNT TO A BICYCLE ( Continue ) 3. Attaching/removing the light Removing Adjusting the lighting angle Mounting Horizontal Release button Click Slide When mounting the light unit, ensure that the light will not dazzle other road users. To adjust the angle, loosen the dial or the screw (*1) to the point that the bracket moves slightly, make the adjustment, and then tighten the screw to fix the light unit in place.
- Page 3 2 years from original purchase. If the product fails to work during normal use, CatEye will repair or replace the defect at no charge. Service must be performed by CatEye or an authorized retailer. To return the product, pack it carefully and enclose the warranty certificate (proof of purchase) with instruction for repair.


