Table of Contents
Advertisement
Available languages
Available languages
Quick Links
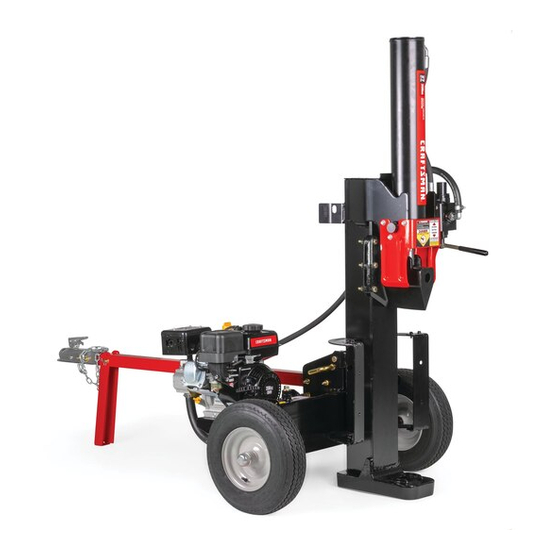
LOG SPLITTER
Model Nos.
CMXGLAM1143200
IF YOU HAVE QUESTIONS OR COMMENTS, CONTACT US.
SI TIENE DUDAS O COMENTARIOS, CONTÁCTENOS.
1-888-331-4569
Before using this equipment, read the manual and follow all safety rules and operating instructions.
NOTE: This Operator's Manual covers several models. Features may vary by model. Not all features in this manual are applicable to all models and the model depicted may differ
from yours.
CRAFTSMAN® is a registered trademark of Stanley Black & Decker, Inc., used under license.
CRAFTSMAN® es una marca registrada de Stanley Black & Decker, Inc., utilizada bajo licencia.
© 2018 CRAFTSMAN U.S. & Canada Only
CRAFTSMAN.com
INSTRUCTION MANUAL | MANUAL DE INSTRUCTIONES
CAUTION
WWW.CRAFTSMAN.COM
Form No. 769-16590
(July 19, 2018)
Advertisement
Chapters
Table of Contents

Related Manuals for Craftsman CMXGLAM1143200


Summary of Contents for Craftsman CMXGLAM1143200
- Page 1 NOTE: This Operator’s Manual covers several models. Features may vary by model. Not all features in this manual are applicable to all models and the model depicted may differ from yours. Form No. 769-16590 CRAFTSMAN® is a registered trademark of Stanley Black & Decker, Inc., used under license. CRAFTSMAN® es una marca registrada de Stanley Black & Decker, Inc., utilizada bajo licencia. (July 19, 2018) ©...
-
Page 2: Table Of Contents
Warranty Statement ....Separate Supplement PRODUCT SPECIFICATIONS MODEL NUMBER Engine Oil: See Separate Engine Manual Model Number ________________________________ Fuel: Unleaded Gasoline Serial Number _________________________________ Engine: Craftsman Date of Purchase _______________________________ Record the model number, serial number, and date of purchase above. -
Page 3: Safe Operation Practices
SAFETY INSTRUCTIONS WARNING DANGER This symbol points out important safety instructions which, if not This machine was built to be operated according to the safe operation followed, could endanger the personal safety and/or property of practices in this manual. As with any type of power equipment, yourself and others. - Page 4 SAFETY INSTRUCTIONS • Always operate this machine from the operator zone(s) specified in the • Do not operate machine while under the influence of alcohol, drugs, or manual. See Figure 1. medication. • Never allow anyone to operate this machine without proper instruction. Vertical •...
- Page 5 SAFETY INSTRUCTIONS MAINTENANCE AND STORAGE DO NOT MODIFY ENGINE To avoid serious injury or death, do not modify engine in any way. Tampering • Stop the engine, disconnect the spark plug and ground it against the engine with the governor setting can lead to a runaway engine and cause it to before cleaning, or inspecting the machine.
- Page 6 SAFETY INSTRUCTIONS SAFETY SYMBOLS This page depicts and describes safety symbols that may appear on this product. Read, understand, and follow all instructions on the machine before attempting to assemble and operate. Symbol Description READ THE OPERATOR’S MANUAL(S) Read, understand, and follow all instructions in the manual(s) before attempting to assemble and operate WARNING —...
- Page 7 ASSEMBLY Secure the jack stand in position with the clevis pin and spring clip. See WARNING Figure 2. Use extreme caution unpacking this machine. Some components are very With the log splitter still secured to the bottom of the crate, remove two heavy and will require additional people or mechanical handling equipment.
- Page 8 ASSEMBLY Lift and slide the cylinder up to the top of beam and place the cylinder WARNING trunnions into the cylinder mount brackets as shown in Figure 7. Take extra care when raising and lowering the beam as it is heavy. Having a second person assist with raising or lowering the beam is recommended.
-
Page 9: Set-Up
ASSEMBLY The control handle is shipped hanging from the valve on the handle link. Remove the clevis pin and bow-tie cotter pin from the control handle. See Remove oil fill dipstick. Figure 9. Check the oil level making certain not to rub the dipstick along the inside walls of the oil fill tube. - Page 10 ASSEMBLY Remove the vented dipstick, which is located in front of the engine on top of WARNING the reservoir tank. See Figure 12. An adult should fuel this engine. NEVER allow children to refuel this engine. Gasoline (fuel) vapors are highly flammable and can explode. Fuel vapors can spread and be ignited by a spark or flame many feet away from engine.
-
Page 11: Operation
The vertical beam lock is located on the tank bracket. The horizontal beam Used to start the engine. lock is located on the beam support latch bracket. Meets ANSI Safety Standards Craftsman Log Splitters conform to the safety standard of the American National Standards Institute (ANSI). - Page 12 OPERATION Log Tray To Start Engine The log tray is designed to stabalize the log after it is split. WARNING End Plate The engine must be started by an adult. The end plate holds the log in place while the wedge splits the log. WARNING Tongue Always keep hands and feet clear of moving parts.
- Page 13 OPERATION Using the Log Splitter If the engine fails to start after 3 attempts repeat steps 1 through 8 and try again. NOTE: Read the Operation section in the Safety Instructions section at the beginning When the engine starts: of this manual before operating. Move the choke control to 1/2 CHOKE position until the engine runs Place the log splitter on flat, dry, solid ground.
- Page 14 OPERATION Control Handle Vertical Position Refer to Figure 15 for the following steps. Pull the horizontal beam lock out to release the beam and pivot the beam to the vertical position. NEUTRAL To lock the beam in the vertical position, pull out on the vertical beam lock REVERSE (To stop wedge) and rotate it to secure the beam.
- Page 15 OPERATION Transporting the Log Splitter Operating Tips Always: WARNING Use clean fluid and check the fluid level regularly. Do not tow faster than 45 mph and check local, state, and federal Use an approved hydraulic fluid. Approved fluids include Shell Tellus® S2 M requirements before towing on any public road.
-
Page 16: Service
SERVICE AND MAINTENANCE Maintenance Schedule Follow the maintenance schedule given below. This chart describes service guidelines WARNING only. Use the Service Log column to keep track of completed maintenance tasks. Before performing any type of maintenance/service, disengage all controls To schedule service from an authorized service center, call 1-888-331- and stop the engine. - Page 17 SERVICE AND MAINTENANCE Carefully un-thread the inlet filter and clean it with penetrating oil. See Figure 20. If necessary refill the reservoir within range marked on the dipstick. See Figure 21. Dipstick Inlet Filter Hydraulic Fluid Only Figure 20 Figure 21 Allow the fluid to drain into a suitable container.
- Page 18 SERVICE AND MAINTENANCE Check Engine Oil Hydraulic Filter Stop the engine and wait several minutes before checking the oil level. Change the hydraulic filter every 50 hours of operation. Use only a 10 micron hydraulic filter. Order part number 723-0405. Remove the oil fill dipstick.
- Page 19 SERVICE AND MAINTENANCE Remove the oil drain plug. See Figure 25. Service Air Filter The air filter prevents damaging dirt, dust, etc., from entering the carburetor and being forced into the engine and is important to engine life and performance. WARNING Never run the engine without an air cleaner completely assembled.
- Page 20 SERVICE AND MAINTENANCE Hose Clamps Service Spark Plug Clean the spark plug and reset the gap to .030” at least once a season or Before each use check all the hose clamps to see if they are tight. every 50 hours of operation. Flexible Pump Coupler Clean the area around the spark plug.
-
Page 21: Off-Season Storage
OFF-SEASON STORAGE Fuel Stabilizer Prepare your log splitter for storage at the end of the season or if the log splitter will not be used for 30 days or more. NOTE: Fuel stabilizer is an acceptable alternative in minimizing the formation of fuel gum deposits during storage. -
Page 22: Troubleshooting
TROUBLESHOOTING WARNING Before performing any type of maintenance/service, disengage all controls and stop the engine. Wait until all moving parts have come to a complete stop. Disconnect spark plug wire and ground it against the engine to prevent unintended starting. Always wear safety glasses during operation or while performing any adjustments or repairs. - Page 23 TROUBLESHOOTING WARNING Before performing any type of maintenance/service, disengage all controls and stop the engine. Wait until all moving parts have come to a complete stop. Disconnect spark plug wire and ground it against the engine to prevent unintended starting. Always wear safety glasses during operation or while performing any adjustments or repairs.
- Page 24 NOTES...
-
Page 25: Español
Tipo de aceite del motor: Consulte el manual del Número de modelo _____________________________ motor separado Número de serie _______________________________ Gasolina: Gasolina sin plomo Fecha de compra _______________________________ Motor: Craftsman Registre arriba el número del modelo, el número de serie y la fecha de compra... - Page 26 INSTRUCCIONES DE SEGURIDAD ADVERTENCIA PELIGRO Esta máquina fue construida para ser operada de acuerdo con las reglas La presencia de este símbolo indica que se trata de instrucciones de seguridad contenidas en este manual. Al igual que con cualquier tipo importantes de seguridad que se deben respetar para evitar poner en de equipo motorizado, un descuido o error por parte del operador puede peligro su seguridad personal y/o material y la de otras personas.
-
Page 27: Medidas De Seguridad
INSTRUCCIONES DE SEGURIDAD PREPARATIVOS • Nunca llene en exceso el tanque de combustible. Llene el tanque no más de 1/2 pulgada por debajo de la base del cuello del filtro para dejar espacio para • Siempre use zapatos de seguridad o botas reforzadas. la expansión del combustible. - Page 28 INSTRUCCIONES DE SEGURIDAD • Cuando corte en posición vertical, estabilice el tronco antes de mover la • La válvula de descarga de presión viene preconfigurada de fábrica. No la manija de control. Corte según se indica a continuación: ajuste. Coloque el tronco en la placa del extremo y gírelo hasta que se •...
- Page 29 INSTRUCCIONES DE SEGURIDAD SAFETY SYMBOLS This page depicts and describes safety symbols that may appear on this product. Read, understand, and follow all instructions on the machine before attempting to assemble and operate. Symbol Description LEA LOS MANUALES DEL OPERADOR Lea, entienda y cumpla todas las instrucciones incluidas en los manuales antes de realizar el montaje de la unidad y utilizarla.
-
Page 30: Montaje
MONTAJE Sujete el gato en su lugar con el pasador de horquilla y la abrazadera de resorte ADVERTENCIA Con la máquina rompetroncos todavía sujeta a la base de la caja, extraiga dos Tenga mucho cuidado al desembalar esta máquina. Algunos componentes pernos hexagonales y tuercas hexagonales del soporte del tanque y extraiga son muy pesados y es necesario que colaboren varias personas o que se use el trozo de madera que está... - Page 31 MONTAJE Levante y deslice el cilindro hasta la parte superior de la viga y colocar los ADVERTENCIA muñones del cilindro en los soportes de montaje del cilindro como se muestra Tenga especial cuidado cuando eleve o baje la vigueta dado que es en la Figura 34 bastante pesada.
- Page 32 MONTAJE Controle si hay grapas y extráigalas de la base de la caja ya que pueden NOTA: Es posible que su máquina rompetroncos se envíe con aceite en el motor. Usted DEBE controlar el nivel de aceite antes de hacer funcionar la máquina. Tenga perforar el neumático.
- Page 33 MONTAJE Retire la varilla de nivel venteada que se encuentra delante del motor, sobre ADVERTENCIA el tanque de depósito. Vea la Figura 39. El combustible debe cargarlo un adulto. NUNCA permita que un niño recargue combustible en el motor. Los vapores de la gasolina (el combustible) son sumamente inflamables y pueden explotar.
-
Page 34: Funcionamiento
Se utiliza para encender el motor. ubicado sobre el soporte del sujetador de la vigueta. Cumple con los estándares de seguridad de ANSI Las cortadora de madera Craftsman cumplen con los estándares de seguridad del Instituto Estadounidense de Estándares Nacionales (ANSI). - Page 35 FUNCIONAMIENTO FUNCIONAMIENTO Bandeja para troncos Para Encender el Motor La bandeja para troncos está diseñada para atrapar el tronco después de que se lo ADVERTENCIA rompe. El motor debe ponerlo en marcha un adulto. Placa del extremo La placa del extremo mantiene el tronco en su lugar mientras la cuña lo rompe. ADVERTENCIA Lengüeta Siempre mantenga las manos y los pies alejados de las partes móviles.
- Page 36 FUNCIONAMIENTO FUNCIONAMIENTO Uso de la Máquina Rompetroncos Si el motor no arranca después de 3 intentos, repita los pasos 1 a 8, e inténtelo nuevamente. NOTA: Antes de utilizar el equipo, lea la sección Funcionamiento de la sección Cuando el motor arranca: Prácticas seguras que está...
- Page 37 FUNCIONAMIENTO FUNCIONAMIENTO Manija de control Posición vertical Consulte la Figura 43 para ver los pasos siguientes. Tire del bloqueo de vigueta horizontal hacia afuera para liberar la vigueta y girarla a la posición vertical. Para trabar la vigueta en posición vertical, tire del bloqueo de vigueta NEUTRAL Marcha atras vertical hacia afuera y gírelo para ajustar la vigueta.
- Page 38 FUNCIONAMIENTO FUNCIONAMIENTO Transporte de la máquina rompetroncos Consejos de operación Siempre: ADVERTENCIA Use líquido limpio y controle el nivel de líquido periódicamente. No remolque a velocidad superior a 45 millas por hora, y verifique los Use un líquido hidráulico aprobado. Entre los fluidos aprobados se requisitos locales, estatales y federales antes de realizar el remolque en encuentran fluido hidráulico Shell Tellus®...
-
Page 39: Servicio Y Mantenimiento
SERVICIO Y MANTENIMIENTO Programa de Mantenimiento Siga el programa de mantenimiento a continuación. Esta tabla se describen las ADVERTENCIA pautas de servicio solamente. Utilice la columna Registro de servicio para realizar un seguimiento de las tareas de mantenimiento realizadas. Antes de realizar cualquier tipo de mantenimiento o servicio, desenganche todos los controles y detenga el motor. - Page 40 SERVICIO Y MANTENIMIENTO Con mucho cuidado desenrosque el filtro de entrada y límpielo con aceite Si es necesario, vuelva a llenar el depósito dentro del rango que figura en la penetrante. Vea la Figura 48. varilla de nivel. Vea la Figura 49. Varilla de medición de aceite...
- Page 41 SERVICIO Y MANTENIMIENTO Filtro hidráulico Inspeccione el aceite del motor Cambie el filtro hidráulico cada 50 horas de funcionamiento. Use únicamente un Detenga el motor y espere varios minutos antes de verificar el nivel de aceite. filtro hidráulico de 10 micrones. Haga el pedido del número de pieza 723-0405. Saque la varilla del nivel de aceite.
- Page 42 SERVICIO Y MANTENIMIENTO Asegúrese de que el tapón de llenado del combustible esté puesto y ajustado Una vez que se haya confirmado el nivel de aceite, instale el tapón de de forma segura. llenado/varilla de medición del aceite. Ajuste bien. Limpie el área alrededor del tapón de drenaje del aceite.
- Page 43 SERVICIO Y MANTENIMIENTO Abrazaderas de la manguera Mantenimiento de la bujía Limpie la bujía y ajuste la separación a 0,030” al menos una vez por estación Antes de cada uso, verifique que todas las abrazaderas de mangueras están o cada 50 horas de funcionamiento. ajustadas.
-
Page 44: Almacenamiento Fuera De Temporada
ALMACENAMIENTO FUERA DE TEMPORADA Estabilizador de Combustible Prepare la máquina rompetroncos para su almacenamiento al finalizar la temporada O si la unidad no se utilizará durante 30 días o más. NOTA: El uso de estabilizadores de combustible es una alternativa aceptable para minimizar la formación de depósitos de goma de combustible durante el ADVERTENCIA almacenamiento. -
Page 45: Solución De Problemas
SOLUCIÓN DE PROBLEMAS ADVERTENCIA Antes de realizar cualquier tipo de mantenimiento o servicio, desenganche todos los controles y detenga el motor. Espere a que se detengan completamente todas las piezas móviles. Desconecte el cable de la bujía y póngalo haciendo masa contra el motor para evitar que se encienda accidentalmente. Utilice siempre anteojos de seguridad durante el funcionamiento o mientras ajusta o repara este equipo. - Page 46 SOLUCIÓN DE PROBLEMAS Problema Causa Remedio El motor se detiene 1. Baja potencia/motor débil. 1. Comuníquese con un centro de servicio autorizado. mientras está cortando 2. Sobrecarga de cilindro. 2. No intente cortar madera en sentido transversal a la veta. Si el motor se cala constantemente, comuníquese con un centro de servicio autorizado.
- Page 47 NOTAS...
- Page 48 Product Manufactured by (Producto fabricado por): MTD LLC, P.O. BOX 361131 CLEVELAND, OHIO 44136-0019...