Advertisement
Available languages
Available languages
Quick Links
W35HPC
W70HPC
ENGLISH
ITEMS REQUIRED
(Purchase separately)
• Phillips head screwdriver
• Flat head screwdriver
• Drill with 3/16 in. drill bit
• Weatherproof silicone caulk
WARNINGS AND CAUTIONS
• For outdoor use only.
• cULus LISTED for wet location use.
• Fixture designed for wall mount to an outlet box only. Install fixture to outlet box marked for
use in wet locations.
• Connect fixture to a 120 volt, 60 Hz power source. Any other connection voids the warranty.
• This fixture is designed for outdoor lighting service only and should not be used in enclosed
or improperly ventilated areas with high ambient temperatures.
• Fixture should be installed by persons with experience in household wiring or by a qualified
electrician. The electrical system, and the method of electrically connecting the fixture to it,
must be in accordance with the National Electrical Code and local building codes.
• Always use same wattage and type of bulb that was included with the fixture. Failure to do
so will void the warranty.
Notice: Lamps contain mercury, dispose according to local, state, or federal laws. For
more information, visit: www.lamprecycle.org.
MOUNTING
1. TURN POWER OFF AT MAIN FUSE / BREAKER BOX.
2. Remove the two captive screws (B) that hold the fixture cover (A) to the housing (D).
3. Remove the bulb (H) and set aside.
4. Loosen the two screws that fasten the reflector (C) to the housing (D).
5. Remove the reflector (C) and set aside.
6. Drill holes on housing (D) to match junction box (not provided).
7. Peel the paper from the mounting gasket (E).
8. Feed wires through mounting gasket (E) before securing mounting gasket to housing (D).
NOTE: Make sure to align the holes on the mounting gasket with the holes in the housing (D)
and junction box before securing to the housing.
9. Wire fixture as described in "Wiring Your Fixture."
10. Insert and tighten junction box screws through the housing (D) and into the junction box.
Make sure the junction box screws are securely tightened and the fixture is straight.
11. Replace reflector (C) and tighten screws to hold in place.
12. Install the bulb as described in "Installing the Bulb."
13. Replace fixture cover (A) and tighten the two captive screws (B) into the housing (D) to
hold the fixture cover (A) in place.
Questions? / ¿Preguntas ? 1-800-334-6871 ConsumerProducts@cooperlighting.com
PACKAGING CONTENTS / CONTENIDO DEL PAQUETE
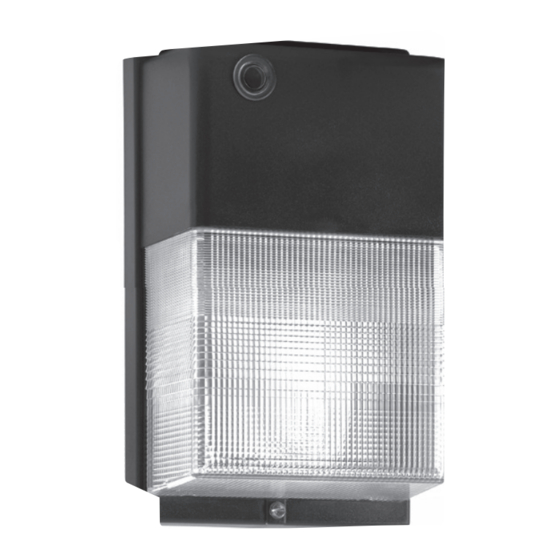
A. Fixture assembly
Ensamblado del accesorio
C. Reflector
B. Captive screws
Reflector
Tornillos cautivos
F. (2) Junction box screws
(2) Tornillos de Caja
de empalme
G. (3) Wire connectors
(3) Conectores de cable
14. Add silicone caulk around fixture to help maintain a weather resistant seal.
15. Turn power back on.
NOTE: During daytime installation, the bulb(s) should turn off after 45 seconds to one minute.
This is normal operation. The bulb(s) will restart at night and operate until dawn. Should you
want to operate the fixture during daylight, cover the light sensor completely with black
electrical tape.
WIRING YOUR FIXTURE
1. TURN POWER OFF AT MAIN FUSE/BREAKER BOX.
2. Connect the black fixture wire to the black supply wire with wire connector (G).
3. Connect the white fixture wire to the white supply wire with wire connector (G).
4. Connect the copper ground fixture wire to an appropriate supply ground or a grounded
junction
box.
NOTE: Be careful to connect the wires correctly. Make sure no bare strands of wire extend
from the wire connector (G) or other approved wire connectors. Improper wiring may result
in ballast failure which voids the warranty.
INSTALLING THE BULB
High Pressure Sodium Bulbs:
1. Screw the bulb securely into socket.
2. Back the bulb out one or two turns, then screw bulb back to insure proper position
in socket.
NOTE: Bulb should glow dimly at first, building to full power in 5-7 minutes.
NOTE: When replacing the bulb(s), you must always use the same wattage and type of bulb
that was originally supplied with the fixture. Failure to do so could result in damage to the
fixture and bulb. This will void the warranty. Always turn off or disconnect power before
servicing to reduce risk of electrical shock.
REPLACING THE LIGHT SENSOR
1. TURN POWER OFF AT MAIN FUSE/BREAKER BOX.
2. Remove the fixture cover (A).
3. Remove the bulb (H) and set aside.
4. Remove the locknut from the light sensor.
5. Remove the reflector (C) and set aside.
6. Remove ballast cover screw and remove ballast cover.
7. Locate light sensor black wire and remove wire connector (G).
• Remove black light sensor wire and replace with new black light sensor wire with
wire with wire connector.
8. Locate light sensor red wire and remove wire connector (G).
• Remove red light sensor wire and replace with new red light sensor wire with
wire connector.
9. Locate light sensor white wire and remove wire connector (G).
• Remove white light sensor wire and replace with new white light sensor wire with
wire connector.
NOTE: When you remove the light sensor, remove the spacer and reinstall it with the new
light sensor.
1
Instruction Manual / Instrucciones
D. Housing
E. Mounting gasket
Alojamiento
Junta obturadora de montaje
H. High pressure sodium bulb
Bombilla de sodio a
alta presión
Advertisement

Related Manuals for Cooper Lighting W35HPC


Summary of Contents for Cooper Lighting W35HPC
- Page 1 D. Housing E. Mounting gasket Reflector Ensamblado del accesorio Tornillos cautivos Alojamiento Junta obturadora de montaje F. (2) Junction box screws (2) Tornillos de Caja de empalme W35HPC H. High pressure sodium bulb W70HPC Bombilla de sodio a G. (3) Wire connectors alta presión (3) Conectores de cable 14. Add silicone caulk around fixture to help maintain a weather resistant seal. ENGLISH 15. Turn power back on. NOTE: During daytime installation, the bulb(s) should turn off after 45 seconds to one minute.
- Page 2 10. Inserte y ajuste los tornillos de la caja de conexiones a través de la caja (D) y en la caja This warranty does not apply to Cooper Lighting products that have been altered or repaired or de conexiones. Asegúrese de que los tornillos de la caja de conexiones estén ajustados that have been subjected to neglect, abuse, misuse or accident (including shipping damages).
- Page 3 11. Vuelva a enroscar la tuerca de seguridad en el sensor de luz. 12. Vuelva a colocar la cubierta del balastro. La reproducción de este documento sin la aprobación previa por escrito de Cooper Lighting, LLC está estrictamente prohibida. 13. Vuelva a instalar el reflector (C).