Table of Contents
Advertisement
Quick Links
INSTALLATION & OPERATING
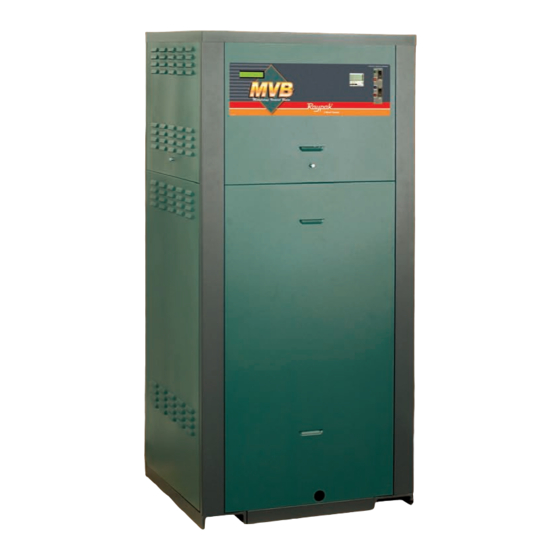
Models
Types H, WH, P & WHP
WARNING: Improper installation, adjustment, alteration, service or maintenance can
cause property damage, personal injury, exposure to hazardous materials* or loss of
life. Review the information in this manual carefully. *This unit contains materials that
have been identified as carcinogenic, or possibly carcinogenic, to humans.
FOR YOUR SAFETY: Do not store or use gasoline or other flammable vapors and
liquids or other combustible materials in the vicinity of this or any other appliance. To
do so may result in an explosion or fire.
WHAT TO DO IF YOU SMELL GAS:
•
Do not try to light any appliance.
•
Do not touch any electrical switch; do not use any phone in your building.
•
Immediately call your gas supplier from a neighbor's phone. Follow the gas
supplier's instructions.
•
If you cannot reach your gas supplier, call the fire department.
Installation and service must be performed by a qualified installer, service agency or
the gas supplier.
This manual should be maintained in legible condition and kept adjacent to the heater or in a safe place for future
reference.
CATALOG NO. 3400.54E
All manuals and user guides at all-guides.com
INSTRUCTIONS
504–2004
Effective: 03-25-10
L
W
Replaces: 03-19-09
P/N 241317 Rev. 6
Advertisement
Table of Contents

Related Manuals for Rheem RAYPAK MVB 504


Summary of Contents for Rheem RAYPAK MVB 504
- Page 1 All manuals and user guides at all-guides.com INSTALLATION & OPERATING INSTRUCTIONS Models 504–2004 Types H, WH, P & WHP WARNING: Improper installation, adjustment, alteration, service or maintenance can cause property damage, personal injury, exposure to hazardous materials* or loss of life.
- Page 2 All manuals and user guides at all-guides.com Rev. 5 reflects the following: Changes to: Air Filter instructions on page 11, minor text changes on pages 13 and 14, Figs. 10 and 11 on page 15,. Fig 12 and Table G on page 16, Fig 13 on page 17, minor text changes on page 20, Fig. 21 on page 22, Figs. 22-28 on pages 25- 30, Table N on page 29, Fig.
-
Page 3: Table Of Contents
All manuals and user guides at all-guides.com CONTENTS Outdoor Installation WARNINGS Controls BEFORE INSTALLATION Product Receipt Heater Sequence of Operation Model Identification WIRING DIAGRAMS Ratings and Certifications START-UP Installations at Elevation Pre Start-up Component Locations Start-Up General Information OPERATION Lighting Instructions GENERAL SAFETY Time/Temperature Relationships in To Turn Off Gas To Appliance... -
Page 4: Warnings
All manuals and user guides at all-guides.com WARNINGS Pay Attention to These Terms Indicates the presence of immediate hazards which will cause severe DANGER: personal injury, death or substantial property damage if ignored. Indicates the presence of hazards or unsafe practices which could cause WARNING: severe personal injury, death or substantial property damage if ignored. -
Page 5: Before Installation
All manuals and user guides at all-guides.com BEFORE INSTALLATION the upper rear jacket panel of the heater. The model number will have the form H7-2004 or similar depend- ing on the heater size and configuration. The letter(s) Raypak strongly recommends that this manual be re- in the first group of characters identifies the application viewed thoroughly before installing your MVB heater. -
Page 6: Component Locations
All manuals and user guides at all-guides.com Component Locations HIGH VOLTAGE ELECTRICAL CONNECTIONS Fig. 3: Component Locations – Rear Panels omitted for clarity Fig. 1: Component Locations – Side Top panel, blower and gas train omitted for clarity Fig. 4: Component Locations – Top General Information Vent MBTUH... -
Page 7: General Safety
All manuals and user guides at all-guides.com GENERAL SAFETY To meet commercial hot water use needs, the high limit safety control on this water heater will shut off the main gas valve before the outlet temperature reaches 210°F. However, water temperatures over 125°F can cause instant severe burns or death from scalds. -
Page 8: Installation
All manuals and user guides at all-guides.com Equipment Base The temperature of the water in the heater can be reg- ulated by using the Raypak Modulating Temperature Control. To comply with safety regulations, the control The heater should be mounted on a level, structurally is set at 120°F when shipped from the factory (Mode 3 sound surface. -
Page 9: Combustion And Ventilation Air
All manuals and user guides at all-guides.com codes and the requirments of the gas supplier. Three sides must be open in the area under the overhang. Roof water drainage must be diverted away from heaters installed under overhangs. The combustion air intake terminal MUST be used for outdoor installations. - Page 10 All manuals and user guides at all-guides.com Fig. 7: Minimum Clearances from Vent/Air Inlet Terminations – Indoor and Outdoor Installations U.S. Installations Canadian Installations Clearance above grade, veranda, porch, 1 ft (30 cm) 1 ft (30 cm) deck, or balcony 4 ft (1.2m) below or to side Clearance to window or door that may be of opening;...
-
Page 11: Conventional Combustion Air Supply
All manuals and user guides at all-guides.com Air Filter or sealed single-wall galvanized ducting. The duct will attach directly to the air collar located on the rear of the heater, using three or four sheet metal screws (not An air filter is supplied standard with the heater. This supplied) equally positioned around the circumference filter is shipped loose for field installation. -
Page 12: Water Piping
All manuals and user guides at all-guides.com the enclosure, shall be provided. The openings 2. For heaters using a barometric damper in the vent shall communicate directly, or by ducts, with the system there shall be a permanent air supply outdoors or spaces (crawl or attic) that freely com- opening(s) having a cross section area of not less municate with the outdoors. - Page 13 All manuals and user guides at all-guides.com feed valve. Test at standard operating pressure for CAUTION: This heater requires forced water at least 24 hours. circulation when the burner is operating. See Table F and Table G for minimum and maximum flow rates 2.
-
Page 14: Hydronic Heating
All manuals and user guides at all-guides.com longer than 7 minutes or where cold water operation is and manually adjusted to achieve an inlet temperature continuous, provisions must be made to mix higher of 120°F (49°C) or higher as adjusted at the minimum temperature outlet water with the colder inlet water temperature in this narrow temperature range (i.e. - Page 15 All manuals and user guides at all-guides.com Input Output 20° ∆T 30° ∆T 40° ∆T Min. Flow Max. Flow Model MBTUH ∆P ∆P ∆P ∆P ∆T ∆P ∆T 11.3 13.8 1104 1100 13.3 18.6 1504 1500 1260 13.3 22.2 2004 1999 1679 26.9...
- Page 16 All manuals and user guides at all-guides.com Three-Way Valves NOTE: If local codes require a vacuum relief valve, acquire locally install valve Three-way valves intended to regulate system water manufacturer’s instructions. temperatures by reducing flow in the boiler should not be used.
- Page 17 All manuals and user guides at all-guides.com The MVB must be equipped with a field-supplied ex- 1. Turn on pump. ternal pump bypass arrangement. This arrangement blends outlet water with the inlet water to 2. Turn on heater and wait until heater goes to full increase the inlet water temperature to a minimum of fire.
- Page 18 All manuals and user guides at all-guides.com Pool/Spa Water Chemistry NOTE: For automatic temperature adjustment, a Cold Water Run (CWR) system can be used instead CAUTION: Corrosive water voids all warranties. of a manual bypass. See Fig. 10. CAUTION: Combustion air must not be contami- NOTE: Chemical imbalance can cause severe nated by corrosive chemical fumes which can damage to your heater and associated equipment.
-
Page 19: Gas Supply
All manuals and user guides at all-guides.com Further advice should be obtained from your pool or The heater must be isolated from the gas supply pip- spa builder, accredited pool shop, or chemical suppli- ing system by closing the upstream manual shut-off er for the correct levels for your water. -
Page 20: Electrical Power Connections
All manuals and user guides at all-guides.com 1 in. NPT 1-1/4 in. NPT 1-1/2 in. NPT 2 in. NPT 2-1/2 in. NPT Model 1104 1504 2004 Natural Gas – 1,000 BTU/ft , 0.60 specific gravity at 0.5 in. WC pressure drop Propane Gas –... - Page 21 All manuals and user guides at all-guides.com WARNING: Using a multi-meter, check the following voltages at the circuit breaker panel prior to connecting any equipment. Make sure proper polarity is followed and house ground is proven. (See Fig. 19.) Check the power source: AC = 108 VAC Minimum, 132 VAC MAX AB = 108 VAC Minimum, 132 VAC MAX BC = <1 VAC Maximum...
-
Page 22: Field Wiring Connection
All manuals and user guides at all-guides.com Venting NOTE: A grounding electrode conductor shall be used connect equipment grounding conductors, the equipment enclosures, and the CAUTION: Proper installation of flue venting is grounded service conductor to the grounding critical for the safe and efficient operation of the electrode. - Page 23 All manuals and user guides at all-guides.com Combustion Exhaust Heater Venting Certified Combustion Air Air Supply Configuration Category Materials Inlet Material Vertical B-Vent Venting Equivalent From Inside Building (Non-Direct Venting) Horizontal Through- Stainless Steel the-Wall Venting AL29-4C Vertical B-Vent Galvanized Steel Venting Equivalent From Outside Building...
-
Page 24: Venting Installation Tips
All manuals and user guides at all-guides.com 1. Vent must terminate at least 4 ft below, 4 ft hori- 5. Within 6 ft (1.8 m) of any gas service regulator zontally from or 1 ft above any door, window or vent outlet. - Page 25 All manuals and user guides at all-guides.com Vertical Vent Air Inlet Certified Combustion Air Model Vent Size Max. Length* (ft) Height (ft) Vent Intake Pipe (in.) Material Material Min. Max. 6” Ø 8” Ø 10” Ø Galvanized 100** Steel, Category I PVC, 1104 (Type B...
- Page 26 All manuals and user guides at all-guides.com common venting system placed in operation, while the Common Venting other appliances remaining connected to the common Manifolds that connect more than one heater to a com- venting system are not in operation. mon chimney must be sized to handle the combined load.
-
Page 27: Engineered Vent Systems
All manuals and user guides at all-guides.com Volume of Model Vent Size 4. Place in operation the appliances being inspected. Flue Products (in.) Follow the manufacturer’s instructions for lighting (CFM) each appliance. Adjust thermostat so appliance will operate continuously. 5. Check the pressure at a pressure tap located 12 in. - Page 28 All manuals and user guides at all-guides.com • 75’ of straight flue pipe NOTE: While a drain connection is required in the • 65’ of straight flue pipe and one elbow vent of all Cat. III horizontal MVB installations, the •...
-
Page 29: Outdoor Installation
All manuals and user guides at all-guides.com Air Inlet Maximum Certified Vent Combustion Air Max. Length** (ft) Model Horizontal Vent Size Intake Pipe Vent Length Material (in.) Material (ft)** 6” Ø 8” Ø 10” Ø Galvanized Steel, PVC, Category III 1104 ABS, CPVC... -
Page 30: Controls
All manuals and user guides at all-guides.com vent cap can condense as they leave the cap. NOTE: The vent cap and air intake hood must be Improper location can result in damage to adjacent furnished by the heater manufacturer in accordance structures or building finish. - Page 31 All manuals and user guides at all-guides.com Deadband: Deadband is a band of temperature sens- ing where no action occurs. All temperature controllers have a deadband and the purpose is to prevent short- cycling of the heater. The on-board temperature controller has a deadband of 2ºF around the differen- tial.
- Page 32 All manuals and user guides at all-guides.com trol operates the boiler burner to maintain the boiler target at the boiler outlet sensor. Mode 7 – Designed for an external input signal with primary/secondary piping. The external input signal ELECTRONIC can be provided from a BMS, an EMS or an external control.
- Page 33 All manuals and user guides at all-guides.com 2-10 VDC 4-20 mA* Boiler Target --- (OFF) RAYPAK MODULATING --- (OFF) TEMP CONTROL 50°F 71.3°F 92.5°F OUTDOOR AIR 113.8°F SENSOR 135°F 156.3°F 177.5°F 198.8°F 220°F *Requires a 500Ω resistor. Table P: 2-10 VDC or 4-20 mA External Input Signal *Maximum 4 times the pipe diameter or 12”, whichever is less.
- Page 34 All manuals and user guides at all-guides.com Boiler (H7) Item Modes Default Setting Range 140°F OFF, 70 to 220°F Boil Target 160°F OFF, 70 to 190°F 5, 7 180°F OFF, 70 to 220°F 2, 5, 7, 8 200°F OFF, 120 to 225°F Boil Max 180°F OFF, 120 to 190°F...
- Page 35 All manuals and user guides at all-guides.com Water Heater (WH1) Item Modes Default Setting Range 140°F OFF, 70 to 190°F Boil Target 3, 7 160°F OFF, 70 to 190°F Boil Max 2, 3, 6, 7 180°F OFF, 120 to 190°F Boil Min 2, 3, 7 135°F...
- Page 36 All manuals and user guides at all-guides.com Rank Item Field Number Field Type Fault Description Error EEPROM error Warning Flame proof warning BOIL OUT Error Boiler outlet sensor short BOIL OUT Error Boiler outlet sensor open BOIL IN Error Boiler inlet sensor short BOIL IN Error Boiler inlet sensor open...
-
Page 37: Heater Sequence Of Operation
All manuals and user guides at all-guides.com Heater Sequence of Operation The optional single-try ignition module will lock out after failing to light one time. To reset it, press and If all limits are satisfied and there is a call for heat: release the small, recessed black push button located inside of the cut-out on the lower right-hand corner of 1. - Page 38 All manuals and user guides at all-guides.com High Limit—Auto Reset (Optional) Modulating Temperature Control This heater may be equipped with an optional adjust- This heater is equipped with a Raypak modulating able auto reset high limit temperature device. temperature control. Refer to information starting on page 30 for information on the setting and use of this The optional adjustable auto reset high limit is located control.
- Page 39 All manuals and user guides at all-guides.com Blocked Vent Switch er valve/regulator performance. The low gas pressure switch automatically shuts down the heater if gas sup- ply drops below the factory setting of 3.0 in. WC for This heater is equipped with a blocked vent pressure natural gas or propane gas.
-
Page 40: Wiring Diagrams
WIRING DIAGRAM - All manuals and user guides at all-guides.com Models H & WH... - Page 41 WIRING DIAGRAM All manuals and user guides at all-guides.com - Models P & WHP...
-
Page 42: Pre Start-Up
All manuals and user guides at all-guides.com START-UP BEFORE OPERATING, smell all around the appliance area for gas. Be sure to smell near the floor because some gas is heavier than air and will settle on the floor. NOTE: The following steps must be performed by a factory-trained technician. -
Page 43: Start-Up
All manuals and user guides at all-guides.com Check Power Supply 3. If the gas pressure is greater than 14.0 in. WC, turn off the main gas shut-off valve, upstream of With multi-meter at incoming power, check voltage the heater. between: Start-Up Hot - Common (≈120 VAC) NOTE: The values in Tables V, W and X represent... - Page 44 All manuals and user guides at all-guides.com with the blower suction within the tolerances spec- CAUTION: Special manifold and air settings may ified in Table T, contact the factory. The reference be required. amp draw reading may help to indicate if there is a problem with the system or if blower adjustment Finishing is required.
- Page 45 All manuals and user guides at all-guides.com Leak Test Procedure: Dual-Seat Gas 7. After no leakage has been verified at all valve seats and test valves, open downstream leak test Valve valve and restore electrical power to the heater. Proper leak testing requires three pressure test points in the gas train.
-
Page 46: Operation
All manuals and user guides at all-guides.com OPERATION for operation as outlined by manufacturer. Burner should be operating and should go off when con- trols are tested. When safety devices are restored, burners should re-ignite after pre-purge time Lighting Instructions delay. -
Page 47: To Turn Off Gas To Appliance
All manuals and user guides at all-guides.com UDB Fault History d. Gas is on at the meter and the heater. e. Incoming dynamic gas pressure to the gas valve is NOT less than 4.0 in. WC for natural To view the fault codes in the UDB history file: gas or propane gas. -
Page 48: Troubleshooting
All manuals and user guides at all-guides.com TROUBLESHOOTING Does the power switch provide Check the switch and/or power to the control panel? line voltage Step 1 Is there a Call For Unit is in standby mode. Heat? Step 2 Is Disable connection intact? Reattach. -
Page 49: Maintenance
All manuals and user guides at all-guides.com MAINTENANCE by local codes. 3. Check that area is free from combustible materi- Suggested Minimum als, gasoline, and other flammable vapors and Maintenance Schedule liquids. 4. Check air filter and replace as necessary. Regular service by a qualified service agency and maintenance must be performed to ensure maximum 5. -
Page 50: Filter Maintenance
All manuals and user guides at all-guides.com Weekly 6. Perform leakage test on gas valves (See Fig. 49.) and procedure on page 45. For low-pressure heaters, test low-water cut-off 7. Test air switch in accordance with manufacturer’s device. (With heater in pre-purge, depress the low instructions. -
Page 51: Filter Replacement
All manuals and user guides at all-guides.com Filter Replacement stainless steel, which is commonly used in high effi- ciency systems. The heater can be supplied with corrosion-resistant, non-metallic intake air vent materi- 1. Remove the filter box cover by loosening and al. -
Page 52: Important Instructions For The Commonwealth Of Massachusetts
All manuals and user guides at all-guides.com Important Instructions for the Commonwealth of Massachusetts The Commonwealth of Massachusetts requires compliance (b) EXEMPTIONS: The following equipment is exempt from with regulation 248 CMR 4.00 and 5.00 for installation of 248 CMR 5.08(2)(a)1 through 4: through –... -
Page 53: Warranty
All manuals and user guides at all-guides.com LIMITED PARTS WARRANTY MVB – TYPES H AND WH MODELS 504-2004 SCOPE Raypak, Inc. (“Raypak”) warrants to the original owner that all parts of this heater which are actually manufactured by Raypak will be free from failure under normal use and service for the specified warranty periods and subject to the conditions set forth in this Wa rranty. - Page 54 All manuals and user guides at all-guides.com LIMITED PARTS WARRANTY MVB – TYPES P & WHP MODELS 504–2004 SCOPE Raypak, Inc. (“Raypak”) warrants to the original owner that all parts of this heater which are actually manufactured by Raypak will be free from failure under normal use and service for the specified warranty periods and subject to the conditions set forth in this Warranty.
-
Page 55: Start-Up Checklist
All manuals and user guides at all-guides.com START-UP CHECKLIST FOR FAN-ASSISTED RAYPAK PRODUCTS This start-up checklist is to be completely filled out by the service technician starting up the Raypak Boiler or Heater for the first time. All information may be used for warranty purposes and to ensure that the installation is correct. Additionally this form will be used to record all equipment operation functions and required settings. - Page 56 All manuals and user guides at all-guides.com www.raypak.com Raypak, Inc., 2151 Eastman Avenue, Oxnard, CA 93030 (805) 278-5300 Fax (805) 278-5468 Litho in U.S.A.