Table of Contents
Advertisement
Advertisement
Table of Contents

Related Manuals for FujiFilm ApeosPort-VII C7773

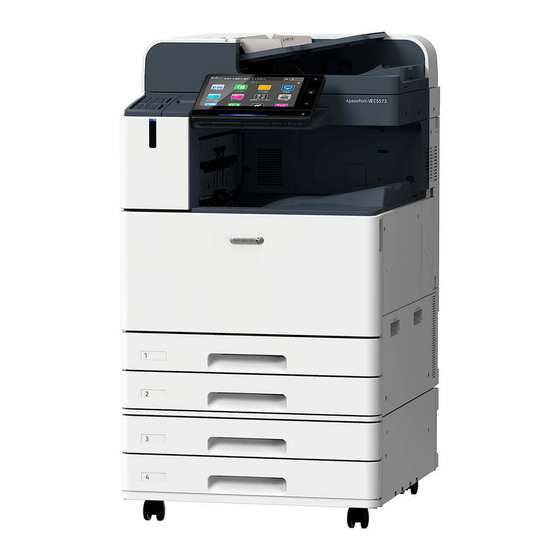
Summary of Contents for FujiFilm ApeosPort-VII C7773
- Page 1 -VII C7773 / C6673 / C5573 / C4473 / C3373 / C3372 / C2273 DocuCentre-VII C7773 / C6673 / C5573 / C4473 / C3373 / C3372 / C2273 Prepared by Customer Training Team © FUJIFILM Business Innovation Hong Kong Limited...
-
Page 2: Table Of Contents
CONTENTS 目錄 Fax Procedure ..............................1 Loading Document ..........................1 1.1.1 Document Feeder ........................1 1.1.2 Document Glass ..........................1 Specifying Destinations ..................... 2 1.2.1 Using the Numeric Keypad ...................... 3 1.2.2 Using the Address Book ......................4 1.2.3 Using the One Touch Button .................. -
Page 3: Fax Procedure
傳真步驟 ROCEDURE 放置原稿 OADING OCUMENT 1.1.1 Document Feeder 自動送稿裝置 放置文件前,請取下萬字夾和清走打釘。 Remove any paper clips and staples before loading a document. 1. 將文件正面朝上 (若是雙面文件, 將正面朝 1. Load the document face up (when the document is 2- sided, place the front side up) 上)放置在送稿裝置的中央。... -
Page 4: Specifying Destinations
選擇指定通訊目的地 1.2 S PECIFYING ESTINATIONS 1. 按一下首頁按鈕。 1. Press the Home button. 2. 選擇【傳真】。 2. Select [Fax / Internet Fax]. Page 2 of 17... -
Page 5: Using The Numeric Keypad
1.2.1 Using the Numeric Keypad 使用數字鍵 1. 選擇【鍵盤】。 1. Select [Keypad]. 2. Enter a fax number using the numeric 2. 用數字鍵輸入傳真號碼。 keypad. 3. If you enter an incorrect number, press the 3. 如果輸入數值錯誤,按 鍵並輸入正確數 button and re-enter the correct value. 值。... -
Page 6: Using The Address Book
1.2.2 Using the Address Book 使用電話簿 1. 選擇【裝置本體電話簿】。 1. Select [Public Entries]. 2. 選擇需要的傳真號碼,然後按【確認】。 2. Select the recipient numbers. Press [Close]. 注意:您可以在步驟 2 指定多個通信對象。 Note: You can select multiple numbers at Step 2. Page 4 of 17... -
Page 7: Using The One Touch Button
1.2.3 Using the One Touch Button 使用單鍵撥號鍵 You can use the One Touch Buttons to specify 可使用單鍵撥號鍵指定受信方。單鍵撥號鍵與短 recipients. One touch buttons correspond to the 縮號碼中登記的 0001-0070 號碼對應。 numbers registered for the address numbers from 0001 to 0070. 注意: Note: To specify multiple recipients, 若要指定多個通信對象,請連續... -
Page 8: Confirming The Fax Job In Job Status
確認傳真工作 1.3 C ONFIRMING THE OB IN TATUS 1. 按【工作確認】鍵。 1. Press the [Job Status] button. 2. 確認工作狀態。 2. Confirm the job status. Page 6 of 17... -
Page 9: General Settings
基本傳真 ENERAL ETTINGS 送信濃度 2.1 L IGHTEN ARKEN 傳真濃度有七種等級選擇。 You can select one out of seven density levels. Page 7 of 17... -
Page 10: Sided Scanning
雙面原稿輸送 IDED CANNING 單面 1 Sided 傳輸單面原稿時選擇。 Select to transmit 1-sided documents. 雙面(左右) 2 Sided (Head to Head) Select to transmit 2-sided documents (head to 傳輸雙面原稿(左右)時選擇。 head). 雙面(上下) 2 Sided (Head to Toe) Select to transmit 2-sided documents (head to 傳輸雙面原稿(上下)時選擇。... -
Page 11: Original Type
原稿畫質 2.3 O RIGINAL 文字 Text 傳輸僅帶有文字的原稿時選擇。 Transmitting a document that contains only text. 照片/ 文字 Photo & Text Transmitting a document that contains both text 傳輸帶有文字及照片的原稿時選擇。 and photos. 照片 Photo Transmitting a document that contains only 傳輸僅帶有照片的原稿時選擇。 photos. 送信畫質 2.4 R ESOLUTION Standard (200 x 100 dpi) -
Page 12: Acknowledgement Report
送信確認報表 CKNOWLEDGEMENT EPORT 不印出 No Transmission Report is printed. 不列印送信確認報表。 印出 A Transmission Report is automatically 傳輸完成時,自動列印送信確認報表。 printed. 發信方記録 RANSMISSION EADER 無 No header information is attached. 不附加發信方資訊。 有 附加發信方資訊。 Header information is attached. Page 10 of 17... -
Page 13: On-Hook
免持聽筒 2.7 O HOOK Use this feature when using Manual Send. 使用手動送信時,請使用此功能月已。 Entering a destination 輸入收件人 Use alphanumeric characters to specify a 使用英數字元指定收件人。按【啓動】開始傳真 destination. Then, Press the [Start] to start the 工作。 fax job. 線路中斷 Line Cut 切斷連線。 Cuts the line connected. Page 11 of 17... -
Page 14: Operations During Faxing
傳真期間的操作 PERATIONS URING AXING 停止傳真 3.1 S TOPPING THE 1. 按操作面板上的【暫停】鍵。 1. Press [Pause] on the touch screen. 2. 按【中止】。 2. Select [Delete]. 3. If the screen in step 1 or 2 does not appear, 3. 若未顯示步驟 1 或 2 中的畫面,按 press the [Job Status] button. - Page 15 4. 選擇要取消的工作。 4. Select the job to cancel. 5. 選擇【暫停】。 5. Select [Pause]. 6. 選擇【中止】。 6. Select [Delete]. Page 13 of 17...
-
Page 16: Previewing The Read Images During A Fax Job
傳真時預覽讀取的影像 3.2 P REVIEWING THE MAGES DURING A You can preview the read images while reading 讀取下一個文件時,您可預覽之前讀取的影像。 the next document. 1. 在【簡易傳真】或【傳真/網路傳真】畫面選擇 1. When a document starts to be read with [Preview] is turned on the [Simple Fax] or 【預覽】的狀態下開始掃描,顯示下方圖 2 的 [Fax/Internet Fax] screen, the screen on the below No.2 picture is displayed. - Page 17 4. 選擇【略圖顯示】。 4. Select [Thumbnail view]. 5. 選擇【擴大顯示】。 5. Select [Enlarged view]. 6. 已掃描所有文件後,選擇 6. When all documents have been scanned, select [Send (Last Original)]. 【儲存(無下一張)】 。 Page 15 of 17...
-
Page 18: Load The Next Document
放置下一份原稿 OAD THE OCUMENT 如果還有其他原稿,請在掃描原稿時,在顯示幕 If you have another document, select [Next Original] on the touch screen while the current 上選擇【有下一張原稿】。 document is being scanned. 1. Select [Next Original] while scanning is in 1. 請在掃描進行期間選擇【有下一張原稿】。 progress. 2. 放入下一份原稿。 2. Load the next document. 3. - Page 19 4. 所有原稿掃描之後,請選擇 4. When all documents have been scanned, select [Send (Last Original)]. 【送信(無下一張) 】 。 Page 17 of 17...
- Page 20 2513-2513 This document includes Fuji Xerox product(s), licensed from Xerox Corporation. The distributor of the product(s) is FUJIFILM Business Innovation Corp. Xerox, Xerox and Design, as well as Fuji Xerox and Design are registered trademarks or trademarks of Xerox Corporation in Japan and/or other countries.