
Related Manuals for Samsung Rugby II SGH-A847


Summary of Contents for Samsung Rugby II SGH-A847
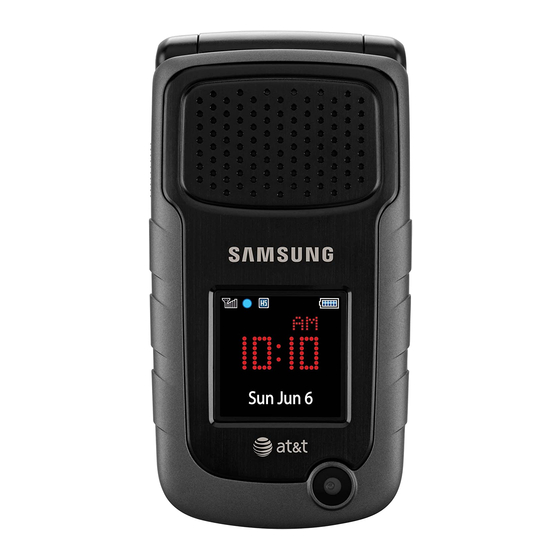
- Page 1 P O R T A B L E Q u a d - B A N D M O B I L E P H O N E User Manual Please read this manual before operating your phone, and keep it for future reference.
-
Page 2: Intellectual Property
Intellectual Property All Intellectual Property, as defined below, owned by or which is otherwise the property of Samsung or its respective suppliers relating to the SAMSUNG Phone, including but not limited to, accessories, parts, or software relating there to (the “Phone System”), is proprietary to Samsung and protected under federal laws, state laws, and international treaty provisions. - Page 3 T9 Text Input is licensed by Tegic Communications and is covered by U.S. Pat. 5,818,437; U.S. Pat. 5,953,541; U.S. Pat. 6,011,554 and other patents pending. ® ACCESS and NetFront™ are trademarks or registered trademarks of ACCESS Co., Ltd. in Japan and other countries. ®...
- Page 4 Your phone is equipped with an advanced voice processing chip that delivers clear mobile calls by suppressing background noise, intermittent sounds (like a siren or nearby conversation), and echoes, allowing you to hear and be heard nearly anywhere. How Does It Work? Based on the intelligence of the human hearing system, the technology: Captures, evaluates and distinguishes all the sound signals surrounding your phone, and the person you're speaking with.
- Page 5 MANUAL SHALL BE CONSTRUED TO CREATE AN EXPRESS OR IMPLIED WARRANTY OF ANY KIND WHATSOEVER WITH RESPECT TO THE PRODUCT. IN ADDITION, SAMSUNG SHALL NOT BE LIABLE FOR ANY DAMAGES OF ANY KIND RESULTING FROM THE PURCHASE OR USE OF THE PRODUCT OR ARISING FROM THE BREACH OF THE EXPRESS WARRANTY, INCLUDING INCIDENTAL, SPECIAL OR CONSEQUENTIAL DAMAGES, OR LOSS OF ANTICIPATED PROFITS OR BENEFITS.
-
Page 6: Table Of Contents
Table of Contents Section 1: Getting Started ...5 SIM Card Information ....... . 5 Activating Your Phone . - Page 7 FDN Mode ........54 Group Settings .
- Page 8 Your Handset ........149 Samsung Mobile Products and Recycling ....150 UL Certified Travel Adapter .
- Page 9 Emergency Calls ....... . . 162 FCC Notice and Cautions ......163 Other Important Safety Information .
-
Page 10: Section 1: Getting Started
Section 1: Getting Started This section describes the first steps to operating your phone. SIM Card Information When you subscribe for 3G cellular network services, you receive a plug-in SIM (Subscriber Identity Module) card loaded with your subscription details, such as your PIN, and available optional services. -
Page 11: Installing And Removing The Sim Card
Lift the battery up (1) and away (2) from the phone, as shown. Installing and Removing the SIM Card Important!: The plug-in SIM card and its contacts can be easily damaged by scratches or bending. Use caution when inserting or removing the card, and keep all SIM cards out of reach of children. -
Page 12: Installing The Microsd™ Card
To add additional memory to your phone, you can insert a microSD card into the memory card slot, located to the left of the SIM card, inside the phone. Use the following instructions and illustrations for proper insertion and removal. Note: The a847 supports microSD cards to a maximum size of 16GB. - Page 13 To reinstall the battery, with the battery cover open, align the battery tabs with the slots at the bottom of the phone (1). Press the battery down until it clicks into place (2). Make sure the battery is properly installed and not obstructing the SIM card before replacing the cover.
-
Page 14: Low Battery Indicator
Your phone is powered by a rechargeable Li-ion battery. Use the travel adapter to charge the battery, and use only Samsung approved batteries and chargers. Note: You must fully charge the battery before using your phone for the first time. A fully discharged battery requires up to 4 hours of charge time. -
Page 15: Turning The Phone On Or Off
If the battery level becomes too low, the phone automatically turns off. Recharge your battery. Turning the Phone On or Off Open the phone. Press and hold the key until the phone power-on screen displays. Note: Do not turn on the phone when mobile phone use is prohibited. If the phone asks, enter a password and press the Confirm soft key or the key. - Page 16 Highlight Voicemail and press the Select soft key or the key. Press the Edit soft key To edit the Voice Server Name, highlight Name and press to delete the current name and then use your keypad to enter a replacement name. –...
-
Page 17: Section 2: Understanding Your Phone
Section 2: Understanding Your Phone This section outlines some key features of your phone. It also displays the screen and the icons that are displayed when the phone is in use. Features of Your Phone Your phone is lightweight, easy-to-use and offers many significant features. - Page 18 The following list correlates to the open and front view illustrations. Main Display: This screen displays useful information needed to operate your phone. Navigation keys: This key allows you to scroll through phone menu options and provides a shortcut to phone functions from standby mode.
-
Page 19: Closed View Of Your Phone
Power On/Off/Menu Exit key: Ends a call. Press and hold this key for a few seconds to power your phone On or Off. While in the main menu, it returns the phone to standby mode and cancels your input. When you receive an incoming call, press to reject call. -
Page 20: Main Display Layout
navigate through the different menu options. When the phone is closed, press and hold these keys to toggle the display on or off. This key is also used when the Music Player is active. • If you are playing music and the backlight goes out, press this key to re-display the music player screen. - Page 21 Shows the received signal strength. The greater the number of bars, the stronger the signal. Displays the level of your battery. The more bars you see, the more power you have remaining. Displays when the phone is accessing services in a GPRS network.
- Page 22 Displays when Bluetooth wireless technology is active. When transferring data, this icon blinks red and blue. Displays when Bluetooth wireless technology is connecting with a device. It displays a solid red until the connection is set, then changes to a solid blue. Displays when a Bluetooth wireless headset is active and in use.
-
Page 23: My Shortcuts
Your phone offers a set of functions that can be customized for your ease and specific needs. These functions are arranged in menus and sub-menus, accessed using the two soft keys. Each menu and sub-menu allows you to view and alter the settings of a particular function. -
Page 24: Command Keys
To exit the menu structure without changing the settings, press the • key. Command Keys Functions for the soft keys are defined by what displays above each in the display. There are two soft keys, the left soft key and the right soft key Left soft key selection Left soft key... - Page 25 Use the End key to turn on/off your phone, disconnect calls, and return to the standby mode. • Press and hold the End key to turn on/off your phone. Briefly press once to disconnect a call. • Press to return to standby mode from any menu. •...
-
Page 26: Section 3: Menu Navigation
Section 3: Menu Navigation This section explains the menu navigation for your phone. It also includes an outline of all the available menus associated with your phone. Some menu options are controlled by the SIM provided by your service provider. Menu Navigation Menus and sub-menus can be accessed by scrolling through them using the Navigation keys or by using the shortcut keys. -
Page 27: Shortcuts
Numbered menu items, such as menus, sub-menus, and options can be quickly accessed by using their shortcut numbers. In Menu mode, Main Menus can be accessed by pressing the number keys (1 to 0, * and #) corresponding to their location on the screen. -
Page 28: Section 4: Call Functions
Section 4: Call Functions This section describes how to make or answer a call. It also includes the features and functionality associated with making or answering a call. Making a Call When the Idle screen displays, enter the area code and phone number, and press the key. -
Page 29: Making A Call From The Address Book
Manual Pause Dialing When you call automated systems, you are often required to enter a password or account number. Instead of manually entering the numbers each time, you can dial the numbers along with special characters called pauses. For more information, see “Adding Pauses to Contact Numbers”... -
Page 30: Answering A Call
When you receive a call the phone rings and displays the caller’s phone number, or name if stored in the Address Book. From the Idle Screen press the If the Any Key option in the Menu ➔ General Call Answer menu is activated, you can press any key to answer a call except for the Reject soft key. -
Page 31: Recent Calls
The recipient receives a Video Share pop-up to either Accept or Reject the Video Share call. They should press Accept to continue or Reject to reject the invitation. If the Auto Record option is On, REC displays on the upper right of the screen. - Page 32 Save to Address Book: allows you to save the number to your • Address Book on either the phone or SIM card. Send Message: allows you to send a Text or Multimedia message to • the caller. Delete: allows you to delete the Selected call or All calls. •...
-
Page 33: Call Details
At the Create Message screen, use the Alphanumeric keys to type in a message or press the Insert soft key to add items such as Picture, Video, Sound, Templates, Emoticon, Take Picture, Record Video, Record Sound, Favorites URL, or Contact Info. Press the Send to soft key when you are done with your message At the Recipient List screen, use the numeric keypad to... -
Page 34: Options During A Call
– hh:mm:ss: shows the duration of the call in hours, minutes, and seconds. Call Back To call back a missed call number: Press the View soft key. The most recently missed call displays. Scroll through the list of missed calls. Highlight the number to call back and press the Options soft key. - Page 35 Press Options soft key, highlight New Call and press the Select soft key or the key. Once connected, both calls display on the screen. Note: The caller currently on hold displays as greyed text on the screen. When you are engaged in an active call and also have a call on hold, you may switch between the two calls.
- Page 36 – Calendar: Temporarily accesses your calendar while maintaining the active call. – Notes: Temporarily accesses your notes while maintaining the active call. – Whisper Mode On/Off: Increases the microphone sensitivity level. Used in quiet environments such as theaters, meetings, etc. –...
- Page 37 Example: You wish to say something to person in the room, but do not want the person on the phone to hear you. To switch the microphone off temporarily with a single active call: Press the Mute soft key. Press the Unmute soft key to switch the microphone back To switch the microphone off temporarily with one active call and one on hold, or, one active call with Video Share enabled.
-
Page 38: Silent Mode
Press the Options soft key. Highlight End and press the Right Navigation key. Highlight Active Call, Held Call, or All Calls and press the Select soft key or the key. 3-Way Calling (Multi-Party Calling) The 3-Way or Multi-Party feature allows you to answer a series of incoming calls and place them on hold. -
Page 39: Section 5: Entering Text
Section 5: Entering Text This section outlines how to select the desired text input mode when entering characters into your phone. This section also describes how to use the T9 predictive text entry system to reduce the amount of key strokes associated with entering text. Using the Text Input Methods The Input Method option switches the key entry functions from ABC (Alphabetic), T9 Alphabetic (predictive text mode), 123... -
Page 40: Using The T9 Predictive Text Input Method
Changing the Text Input Mode When you are in a field that holds characters (such as in a text message), the text input mode indicator displays. Use the following steps to change the text input mode: To change the text input mode, press the –... -
Page 41: Using The Alphabetic Input Method
The word that you are typing displays on the screen. The word changes as you press additional keys. Enter the whole word before editing or deleting the keystrokes. When the word displays correctly, go to step 5. If the word doesn’t display correctly, press the display alternative word choices. -
Page 42: Using The Symbols Input Method
Note: The cursor moves to the right when you press a different key. When entering the same letter twice or a different letter on the same key, just wait for a few seconds for the cursor to move to the right automatically, and then select the next letter. -
Page 43: Section 6: Push To Talk
Section 6: Push to Talk This section describes the Push to Talk (PTT) feature which allows you to contact your family, friends, and co-workers instantly. Initializing Push to Talk Service From the Idle screen, press the – or – ➔ In Idle mode, press Menu PTT and press the Select soft key or the... - Page 44 Unavailable: This becomes your availability state if you power-off your phone, turn PTT off, or if the system detects you have moved out of coverage. Do Not Disturb: This becomes your availability state if you change My Availability to Do Not Disturb. In this state you may place PTT calls but cannot receive a PTT call.
- Page 45 Group Available: This icon only displays next to a group and lets the User know that at least one person in the group is logged into the PTT application and can receive a call. Group Unavailable: This icon only displays next to a group and lets the User know that everyone in the group is unavailable either because they have logged out of the service, or powered off their handsets.
- Page 46 Viewing Push To Talk Contacts ➔ In Idle mode, press Menu Push to Talk (PTT) Contacts. The PTT Contact list displays. Press the Options soft key to display the PTT Contacts Options: • Call Me Alert: allows you to send a message to an individual in your PTT Contacts whose status is Available, Silent/Vibrate, or Do Not Disturb.
- Page 47 • Add Group: this option lets you name and create a new PTT Group. • Edit: this option allows you to edit the contact you selected. If you originated the group you can perform one of the following: – Add a Member: lets you add a selected PTT Contact from your list to the group or add a New Contact to your list and to this PTT Group.
-
Page 48: Add Group
Press and hold the PTT key and begin speaking. Connecting to Dynamic Group displays. Release the key when you finish speaking. Deleting PTT Contacts ➔ In Idle mode, press Menu Push to Talk (PTT) Contacts and press the Select soft key or the Press the Options soft key, scroll to Delete and press the Right Navigation key. - Page 49 The Sending Create Group Request popup displays and group invitations are sent to each contact for their acceptance. The Invitation In Progress icon group until at least one member accepts. Note: When a participant accepts your invitation the group is now in their PTT Contacts and they may also place calls to the group.
-
Page 50: Making A Ptt Call
Press the Yes soft key to confirm deletion or press the No soft key to return to PTT Contacts list. Press the key to return to Idle mode. Deleting a Group Note: Only the creator or owner of the group can delete the a group. Members can only choose to leave a group. -
Page 51: Ptt Settings
For the best experience your ringer should be set to the highest volume. If your status is Available you hear a PTT Call tone and the caller's voice. If your status is Vibrate All your phone vibrates and you must press Accept or Reject soft key. •... -
Page 52: Pending Invitations
• My Availability : this option allows you to change your Availability status. Use the Up or Down Navigation key, to highlight Do Not Disturb or Available and press the Select soft key or the • Contact Alerts : this option allows you to be alerted when the availability status of a contact changes from Unavailable or Do Not Disturb to Available or Silent/Vibrate. -
Page 53: Call Waiting
While on a PTT call you are notified of incoming PTT calls. Accepting the incoming PTT call suspends the first call. Rejecting the incoming PTT call terminates it. While on a PTT call you are notified of incoming cellular calls. Accepting the incoming cellular call suspends the PTT call. -
Page 54: Section 7: Understanding Your Address Book
Section 7: Understanding Your Address Book This section allows you to manage your contacts by storing their name and number in your Address Book. You can sort Address Book entries by name, entry, or group. You can also synchronize your phone Address Book with AT&T Address Book, the network backup service. -
Page 55: Adding A New Contact
• AT&T Address Book: allows you to enable synchronization on any change made to your contacts between your phone Address Book and the AT&T Address Book, the network backup service. • Own Number: to display your current phone number (page 53). •... - Page 56 Note: Ringtones assigned to a contact will not be synchronized to AT&T Address Book. Adding More Fields to a Number While in the process of creating a new entry or editing an existing contact, you can add additional fields to the entry’s list of information.
-
Page 57: Using Contacts
When you call automated systems, you are often required to enter a password or account number. Instead of manually entering the numbers each time, you can store the numbers in your Contacts along with special characters called pauses. To add a pause to a Contact: ➔... -
Page 58: Address Book Entry Options
➔ Press the key or Options Address Book Entry Options To access the Address Book options, follow these steps: ➔ ➔ Press Menu Address Book entry from the list and press the Press Options and select from the following: • Edit: allows you to make changes to the contact information. •... -
Page 59: Fdn Mode
FDN (Fixed Dialing Number) mode, if supported by your SIM card, restricts your outgoing calls to a limited set of phone numbers. When this feature is enabled, you can make calls only to phone numbers stored in the FDN list on the SIM card. Note: FDN Mode must be set to On in the Menu ➔... - Page 60 ➔ Press Options Group Settings and press the Highlight the Picture field and press the Select an image and press Options key. The selected image displays in the Picture field and displays the name of the image to the right. Highlight the Ringtone field and press the Select an audio file and press Options ➔...
-
Page 61: Adding Speed Dial Entries
➔ In Idle mode, press Menu Address Book List and press the key. Highlight a position (2-9) on the keypad in which to assign the speed dial number and press Options Select Address Book or FDN Contacts and press the key. - Page 62 Press to return to Idle mode. Copying an Entry to the Phone ➔ In Idle mode, press Menu Address Book ➔ Management Copy Contacts from SIM and press the key. The phone displays a list of your current contacts stored on the SIM card. Note: If the entry’s associated Group image has a SIM location icon on it, then the entry exists on the SIM card.
-
Page 63: Yellow Pages Mobile
Press to return to Idle mode. Note: Entries on the FDN Address Book must be deleted from within the FDN Address Book Checking the Address Book’s Used Space You can check how many names and numbers are stored in the Address book, in both SIM card and the phone memory. -
Page 64: Section 8: Messaging
Section 8: Messaging This section describes how to send or receive different types of messages. It also includes the features and functionality associated with messaging. Types of Messages Your phone provides the following message types: Text Messages • • Multimedia Messages IM Messages •... - Page 65 • Video: allows you to attach a video clip to your message. • Sound: allows you to attach an audio clip to your message. • Templates: allows you to attach a template to your message. • Emoticon: allows you to add an emoticon (created by phone characters) to your message.
-
Page 66: Creating And Sending Multimedia Messages
You can add additional recipients from your Address Book by selecting one of the Empty fields and entering another number. – or – Select another Empty field and press Options Recipients and choose between Recent Contacts, Contacts, or Group and press the •... - Page 67 • Favorites URL: allows you to temporarily exit the message, access your Favorites list then select those URLs you would like to add to the current message. • Contact Info: allows you to choose an existing Address Book entry, then add it to your message. Select an Image, Sound, or Video and press the Note: A multimedia message should only be sent to a phone which can support the receipt and display of this message type.
-
Page 68: Attaching Business Card To A Message
• Press Options Back to return to the message. Press the Send soft key to send the message. Attaching Business Card to a Message To attach your Business Card to an outgoing message, follow these steps: Create a contract entry (the information stored in the entry is used as a business card). - Page 69 When a new Text message comes in, the display (in Idle mode) shows a new Message notification icon ( available sender’s information. ➔ In Idle mode, press Menu Messaging the Select soft key or the Select the message to retrieve and press the view the message.
-
Page 70: Using Message Options
Message options at the Inbox level differ according to what action was taken with the message. While viewing the list of messages in the Inbox, press the Options soft key to access the following message options: Options for SMS Messages Reply: allows you to reply to the message via Text message. -
Page 71: Outbox
This message box contains messages that were sent or will be sent. When you enter this menu, the list of messages in the Outbox displays with the recipients’ phone numbers or names, if available in your Address Book. ➔ In Idle mode, press Menu Messaging the Select soft key or the key. -
Page 72: Signing Into Your Mobile Email
Press the Sign In soft key or the Signing into Your Mobile Email Take your e-mail with you! With Mobile Email you can check your ® ® Yahoo! Mail, AOL , AIM, Windows Live Hotmail, AT&T Mail, Gmail, and other providers quickly and easily. ➔... -
Page 73: Auto Delete Inbox
• Auto Delete Inbox • Text Message • Multimedia Message • Voicemail • Push Message • Broadcast Message (SIM dependent) Press the Select soft key or the Auto Delete Inbox This option allows you to automatically delete older messages. ➔ In Idle mode, press Menu Messaging ➔... - Page 74 Get Delivery Report : when this option is enabled, the network informs – you whether or not your message was delivered. – Get Read Report : when this option is enabled, your phone sends a request for a reply along with your message to the recipient. Keep a Copy : you specify whether you want to keep a copy of the sent –...
-
Page 75: Templates
The following option is available: Voicemail: you can specify the default phone number used for access • of phone’s remote voicemail. Important!: Changing the Voicemail number can affect your ability to access your voicemail. Check with your provider’s Customer Service before changing. -
Page 76: Delete By Folder
This option allows you to delete some or all of your messages. ➔ In Idle mode, press Menu Messaging Folder and press the Select soft key or the Select the folder you want to delete the messages in by pressing the key to make a check mark. -
Page 77: Section 9: Appcenter
Section 9: AppCenter The AppCenter allows you to shop for Ringtones, Games, Color Graphics, and Answer Tones using the built-in browser. You can also access the MEdia Net Home site. ➔ Press Menu AppCenter to launch the AppCenter application. Ringtones This option allows you to shop for ringtones using the built-in browser. -
Page 78: Media Net Home
The MEdia Net menu option allows you to quickly access your MEdia Net homepage using the built-in browser. This page gives you quick access to information such as local weather, sports scores, horoscope information and quick links to the previously mentioned shopping sites. -
Page 79: Section 10: My Stuff
Section 10: My Stuff This section includes information on both on-board applications as well as applications that are purchased via AppCenter. In the My Stuff menu option, you can access Applications, Audio, Games, Online Locker, Pictures, Tools, Video, Other Files, and Used Space. -
Page 80: Games
The Games menu option allows you to play pre-loaded games on your phone and shop games using AppCenter. To access the Games menu option, use the following steps: ➔ In Idle mode, press Menu My Stuff the Select soft key or the displays. -
Page 81: Pictures
Accessing the Pictures Folder ➔ In Idle mode, press Menu My Stuff press the Select soft key or the Select a photo and press the Press the Back soft key or the Selecting and Using the Pictures Folder If you enter the Pictures folder through menu options, and press the Options soft key before selecting an existing graphic, the following options are available: Download: allows you to download a graphic from AppCenter. -
Page 82: Tools
The Tools folder provides access to and allows you to use the Camera, Voice Recognition, Record Audio, Alarms, use the Calendar and features, check your Recent Calls, create Tasks, create Notes, use the Calculator, use the Tip Calculator, use the Converter (for Currency, Length, Weight, Volume, Area, and Temperature), view the World Clock, set the Timer, and use the Stopwatch. - Page 83 Press the speaker key if you do not want this screen displayed in the future. Otherwise, press the Down volume key, located on the left side of your phone to highlight No and then press the speaker key A picture of your face should appear in the front display. Press the speaker key to take a picture.
- Page 84 White Balance: allows you to set the white balance for the camera. Choose Auto, Daylight, Incandescent, Fluorescent, or Cloudy. Night Shot Mode: allows you to set the camera to Night Shot Mode for taking photographs in low light conditions. Set to On or Off. Self Timer: delays the camera shutter by either 3, 5, or 10 seconds after you press the Effects: allows you to choose a custom color tone for your...
- Page 85 After you have taken a photo, you can use various options by pressing the Options soft key. Highlight an option and press the key. The following options are available: Send: allows you to attach the photo to a message, send it via Mobile •...
-
Page 86: Using The Camcorder
Set as: allows you to set the photo as your wallpaper on your Main • Display, Front Display, or set the photo as a Caller ID for a contact. Delete: allows you to delete the photo you have taken. • : allows you to rename the photo. - Page 87 Press the key to begin capturing video. Press the Stop soft key to stop the recording and save the video file to your Video folder. Save the video and press the Press the key to return to the camcorder preview. Tip: You can use the keypad to quickly change the camcorder options using the shortcut keys.
- Page 88 Timer: allows you to set a time delay before the camcorder takes the video clip. • 3 sec • 5 sec • 10 sec • Effects: allows you to choose a custom color tone for your video clip. Choose from the following: No Effects: automatically adjust the video for the best •...
- Page 89 After you have shot a video, press the Options soft key to select various options. Highlight an option and press the following options are available: : allows you to attach the video to a Multimedia Message, send • Send via it to Mobile Share, or send it to a Bluetooth device.
-
Page 90: Voice Recognition
Portrait/Landscape Mode: allows you to rotate the video to Portrait/ • Landscape format. Properties: allows you to view the properties for this video file. • Once the video completes playing, or you select the Stop option, the following options are available: Play: allows you to replay the video clip. - Page 91 following message displays “Sorry, no match found,” and voice recognition turns off. You must end your current Voice Commands call before you can make another call using Voice Commands. You can only originate the first call in a 3-way call using Voice Commands. Voice Recognition Tips Wait for the tone before you speak.
- Page 92 • Play: allows you to play the voice clip. • Record: allows you to save the current voice clip and begin another session. • My Voice Clips: allows you to view your audio clips. • Record Audio Settings: allows you to set up a recording preset: Default Name and Recording Time (1 minute, 2 minutes, 3 minutes, 4 minutes, 5 minutes, 60 minutes, or Limit for MMS).
- Page 93 This feature allows you to: set the alarm to ring at a specific time. • set the phone to switch on automatically and ring the alarm even if the • phone is switched off. To set the alarm: ➔ In Idle mode, press Menu My Stuff the Select soft key or the Highlight Alarms and press the Select soft key or the...
- Page 94 Press the key to save the changes. Note: To stop the alarm when it rings, press any key or press the volume keys. Press OK soft key to turn off the alarm. Setting Auto Power-up Alarms You can set the phone to ring the alarm when the time for an alarm comes, even if the phone is switched off.
- Page 95 • Private Other options for the Calendar include: • View: this option allows you to view the selected day. • View by: this option allows you to change the view mode to Day View, Week View, or Month View (depending on which view was selected).
- Page 96 • Repeat: allows you to set the number of repetitions allowed for this appointment (Daily, Weekly, or Monthly). Press the select this option. Once selected, the following settings are enabled. – Every: allows you to set the number of times the entry is to repeat in the selected time frame.
- Page 97 Viewing an Event ➔ In Idle mode, press Menu My Stuff the Select soft key or the Highlight Calendar and press the Select soft key or the key. The calendar displays with today’s date highlighted. Select the date of the event (s) you want to view and press key or use the Navigation keys to move to the date with an assigned event.
- Page 98 • Settings: this option allows you to configure the Calendar’s Starting Day (select either Sunday or Monday) and Default View Mode (select Month, Week, or Day view). • Missed Alarm Event: this option displays any missed events. • Used Space: this option displays a list of the different Calendar event categories along with the memory allocation for each.
-
Page 99: Tip Calculator
This option allows you to create notes to add to your events. ➔ In Idle mode, press Menu My Stuff the Select soft key or the Highlight Notes and press the Select soft key or the key. A blank screen displays. Press the Options soft key. Highlight Create, and press the Select soft key or the key. - Page 100 Note: To include a decimal point by pressing the The remaining fields indicate: • Tip($): the amount of the tip based on the figures entered. • You pay: your share of the total check amount. This value is based on the figure entered within the # paying field. Converter The conversion menu provides the following conversion categories:...
- Page 101 Highlight the Daylight Saving field and press to place a checkmark in the box. Press the Save soft key to save your changes. The new time zone will be displayed. Editing a Time Zone To edit a time zone, follow these steps: ➔...
-
Page 102: Video
Press the Stop soft key to stop the stopwatch. Press the Reset soft key to erase all times recorded. Video The Video menu option allows you to shop for video files using AppCenter. You can download the videos to your Video folder found within the My Stuff location. - Page 103 • On Phone: – Available: Shows amount of total available memory on your phone. – Applications: Shows amount of memory used to store application programs. – Audio: Shows amount of memory used to store Tones, Music, and Recorded Audio files. –...
-
Page 104: Section 11: Games & Applications
Section 11: Games & Applications Games The Games menu option allows you to access games that are on the phone and also shop for games using AppCenter. You can download new games and then save them to the Games folder. ➔... - Page 105 • AT&T Radio: This service allows you to stream commercial-free music, talk, news, and sports through your handset. • AT&T Social Net: is a single mobile application with a live connection to your favorite social networks such as Facebook, Twitter, Myspace, and the News. •...
-
Page 106: Shop Applications
(My Place). This application allows you to tap into local businesses, locations, and events, connecting you to your search in real-time. • Browser: allows you to access the internet using att.home. Follow the on-screen instructions. Shop Applications ➔ ➔ Press Menu My Stuff Applications Applications to launch AppCenter. -
Page 107: Section 12: At&T Music
Section 12: AT&T Music AT&T Music is a music service which provides you access to Music Player, Shop Music, MusicID, AT&T Radio, Music Videos, Community, and Music Applications. Note: The Music Player does not necessarily support all features of a particular file format nor all the variations of those formats. -
Page 108: Music Player Options
Highlight a folder from the folders available and press the key to open the folder. Highlight a song and press the Note: The maximum number of songs you can synchronize between your phone and your PC is 1000. Music Player Options The Music Player options menu configures your phone’s music playing options such as shuffling the music files, looping music files, adding songs to the playlist, and more. - Page 109 ➔ In Idle mode, press Menu AT&T Music ➔ All Music and press the Select soft key or the key. Note: All Music displays all of the downloaded songs or all of the songs stored on the phone or microSD card. Use the Up or Down Navigation key to select the song you want to listen to and press the Playing Music through a Stereo Bluetooth Device...
-
Page 110: Using Playlists
Once the music starts to play the music icon ( displays on the top of the screen. To hide the Music Player, press the Options soft key and select the Hide Player option or press the Press the Rewind (Left Navigation key) to navigate to the previous song. - Page 111 Press the Options soft key, select Add Tracks and press key. Highlight All, an individual song, or multiple songs and press the key to place a check mark beside your selection. Press the Add soft key and wait for the song to add to the current playlist.
-
Page 112: Shop Music/Tones
From the Windows Media Player application, ensure that the SGH-a847 device displays in the upper-right corner of the screen. If not, click on Next device until SGH-a847 displays. From the Windows Media Player application, in the upper-left corner of the screen, under Playlists, drag and... - Page 113 Use the Up or Down Navigation key to highlight your music store of choice (or select Ringtones), and press the Select soft key or the key. From the Categories listing, highlight the desired entry and press the key. Press the Back soft key to return to the previous page.
- Page 114 Plug the USB cable into the phone. From the Windows Media Player application, ensure that the SGH-a847 device displays in the upper-right corner of the screen. If not, click on Next device until SGH-a847 displays. From the Windows Media Player application, in the...
-
Page 115: Musicid
MusicID is an application which uses the onboard microphone to analyze a music sample and then identify the song. Once the application completes the analysis of the song sample, it then provides you with the name of the song, artist and album art as well as opportunities to buy related content. -
Page 116: Accessing Music Videos
Use the Up or Down Navigation key to highlight a specific radio channel and press the phone. Accessing Music Videos This page provides you with links to some of the most popular multimedia content. ➔ In Idle mode, press Menu AT&T Music and press the Select soft key or the key. - Page 117 Use the Up or Down Navigation key to select a site and press the key to make your selection. AT&T Music...
-
Page 118: Section 13: At&T Gps
Section 13: AT&T GPS AT&T GPS is an audible and visual, JAVA based driving aid that uses GPS navigation. The program is a separately licensed product that requires you to download the feature to your handset, and accept the license agreement before using. -
Page 119: At&T Family Map
accessing the product tour, and setting detailed application preferences. Press the key to return to Idle mode. Note: These services require the purchase of a subscription. AT&T Family Map AT&T FamilyMap provides peace of mind by being able to conveniently locate a family member from your wireless phone or PC and know that your family's location information is secure and private. -
Page 120: Trimble Outdoors
Press to start. The following menu icons display in the display: • Weather: allows you to check the local weather. • News: allows you to check Local News, Top US News, Sports, Entertainment, Technology, or Strange News. • Reviews: allows you to see reviews of Restaurants, Clubs, Bars, Hotels, Bakeries, Spas, etc. -
Page 121: Gps Timetrack
Xora GPS TimeTrack allows small and medium enterprises a GPS-enabled way to manage time. Xora GPS TimeTrack gives businesses timesheet data collection, job/work-order management, payroll integration and location tracking capabilities. This application is a separately licensed product that requires you to download the feature to your handset, and accept the license agreement before using. -
Page 122: Section 14: Mobile Web
Section 14: Mobile Web Your phone is equipped with att.net, your access to the mobile web. This section explains how to navigate att.net and introduces you to the basic features. Accessing the Mobile Web To access the Mobile Web browser: When the Idle screen displays, press Menu att.net homepage displays. -
Page 123: Navigating With The Mobile Web
To select an item, press an entry. To return to the previous page, press Back or press Press the Options soft key to access the following options: • Home [0]: returns you to the homepage where you started. • History: displays a list of the last sites visited. You can browse to any of these sites by selecting them in your History list. -
Page 124: Search The Internet
To perform an internet search using keywords, follow these steps: Select the Web tab. Press the Yahoo Search the Internet field and press Enter the keyword(s) to search using the keypad Press OK. A list of search results displays. Select a link or press to return. -
Page 125: Emptying The Cookies
When the Idle screen displays, press Menu ➔ then press Options Go to Bookmarks. Press a bookmark item in the Bookmarks list. Adding Bookmarks When the Idle screen displays, press Menu Highlight the URL field and press Enter the URL using the keypad Press the Options soft key, then select Add to Bookmarks. -
Page 126: Using Your History
The History list provides you with a list of the most recently visited websites. These entries are placeholders so you can return to previously unmarked web pages. When the Idle screen displays, press Menu ➔ then press Options History. Press an entry from the list to access the site. Press Clear to clear the history content. - Page 127 • Password: enter the user password required to connect to the network. • Protocol: set the connection protocol used by the WAP browser: WAP or HTTP. • Home URL: enter the URL address of the page to use as your homepage.
-
Page 128: Section 15: Mobile Video
Section 15: Mobile Video Your phone is equipped with a WAP (Wireless Application Protocol) browser which allows you to access the Internet and download media files directly to your phone. These media files display using the built-in Media Player. Mobile Video is a media service which allows you to stream media content (Weather, News, Sports highlights, etc.) directly to your phone. -
Page 129: Customizing Mobile Video
Updating the Favorites List You can edit and change the list of media providers which display in the Favorites section of the Mobile Video homepage. ➔ In Idle mode, press Menu Mobile Video ➔ Mobile Video Edit My Favorites. The screen is composed of two sections: •... -
Page 130: Section 16: Changing Your Settings
Section 16: Changing Your Settings This section includes procedures on how to use some of use some of your phone’s features, as well as how to change and customize the display settings, call handling, security settings, and other settings associated with your phone. Quick Tips Quick Tips connects you to the AT&T Quick Tips web page where you can find information on the operation of your phone. - Page 131 – Ringtone Volume: allows you to select the volume for the ringtone.The range is from 1-7. Message Tab: – Message Alert Type: allows you to select the way in which the selected alert is played when a new text or multimedia message is received. •...
-
Page 132: Display
Note: The Silent profile can also be activated by pressing and holding the key or by reducing the volume to 0. An on screen message notifies you that the Silent profile is now active. To deactivate this profile, press and hold the key again or increase the volume using the volume key. - Page 133 Dialing Display allows you to select the properties of those items • which are part of the display such as: – Font Type : allows you to select the font to display Navigation keys to make your selection. Choose from Normal 1 , Normal 2 , or Use Theme.
-
Page 134: Time & Date
Note: Light settings can affect the length of time before battery recharge is necessary. Brightness: allows you to adjust the display brightness for the LCD to • see it better in different lighting conditions. Press the Left or Right Navigation keys to adjust the brightness. Press the Save soft key or key to confirm your selection. -
Page 135: Phone
• Date Format: allows you to change the date format. Use the Left or Right Navigation key to select between the different options. Press the Save soft key to confirm the selection. Note: Automatic updates of time and date do not change the time set for alarm settings or calendar memos. -
Page 136: Own Number
The Shortcuts option allows you to change the applications assigned to your Navigation keys. Press a Navigation key and press the Options soft key. Highlight Change and press the application to assign to the previously pressed key. Press the Save soft key or the application. -
Page 137: Lock Applications
Note: This lock code is typically the last four digits of the current phone number or can be obtained from an AT&T customer service representative. Check PIN Code When the Check PIN Code feature is enabled, you must enter your PIN •... - Page 138 • Wildcard entries allow you to dial a range of number with a single entry: ex. 555 – All dialed numbers that begin with 555 are allowed. Numbers that do not match the conditions in the FDN list are restricted. –...
- Page 139 You can easily reset your phone to its default settings. To reset your phone: ➔ In Idle mode, select Menu Settings Phone. At the All Settings reset to factory defaults. Continue? prompt, press Yes to reset, or No to cancel. Enter your phone password, and press the Confirm soft key.
-
Page 140: Calls
The Airplane mode on/off confirmation displays. T-Coil Mode T-Coil mode allows you to use a hearing aid with a T-coil setting in connection with the handset. You can set this mode to Enable or Disable. When T-Coil Mode is activated, the on the Idle screen. -
Page 141: Voice Call
This feature allows you to select how your phone answers incoming calls. Highlight one of the following options: • Send Key: allows you to answer an incoming call by pressing either the Accept soft key or the • Open Flip: allows you to answer an incoming call by just opening the phone. -
Page 142: Call Restrictions
• Unreachable: allows you to forward Voice Calls to a designated number instead of your voicemail number when you are not in an area covered by your service provider or when your phone is switched off. • Cancel All: allows you to cancel all Call Forwarding features. Press the Select soft key to activate this feature. - Page 143 • Block All: blocks all outgoing calls. Press the Save soft key. Reject List The Reject List contains numbers that you do not want to call you. The incoming call is rejected but is sent to your voice mailbox. You can manually add numbers to be rejected from the Reject List or mark incoming calls from the Recent Calls menu to be added to the Reject List.
-
Page 144: Connectivity
This feature allows to you automatically redial the last number if the call was either cut off or you were unable to connect. Press the key to make your selection. Options include: • On: causes the phone to automatically redial the last number if the call was disconnected or the call was cut off. - Page 145 If the first item in the Bluetooth menu is Bluetooth:On, then Bluetooth is already activated. Discoverable The Discoverable option allows your phone to wirelessly transmit its phone name and status, when activated. This can be useful if you are attempting to connect additional Bluetooth devices. Allowing your phone to promote its visibility can pose a security risk and incite unauthorized connection.
-
Page 146: My Bluetooth Info
PC Studio application. This application installs the necessary USB drivers onto your machine. For a free download of PC Studio, go to ➔ ➔ Settings Connectivity ➔ Search for New Device and press the key. The phone searches for key. www.samsung.com/us/support ➔... - Page 147 USB connection is detected. • PC Studio: is set to launch PC Studio as the default application when a USB connection is detected. Navigate to www.samsung.com/us/support Studio. • Mass Storage: sets the USB connection to a mass storage device such as a zip drive.
- Page 148 Note: All Network Profiles are pre-configured and cannot be altered on this screen. Your phone is set up by default for connecting to the network. If you change the settings without first checking with your service provider, the web browser, MMS, and e-mail features may not work properly.
-
Page 149: Applications Settings
Profile: allows you to set the type of server. If you change from the • default AT&T IMS, you may not be able to use Video Sharing. Note: Setting the IMS setting to Off may save minutes and memory. Applications Settings The Applications Settings feature allows you to configure the functional parameters for most of the onboard applications. -
Page 150: Memory Management
Memory Management You can check clear of memory or view the Used (memory) Space for Shared Memory, Messaging, My Stuff, Calendar, Tasks, Notes, or the Address Book. You can also delete all the information from your phone: ➔ In Idle mode, press Menu Settings Management and press the Select soft key or the key. -
Page 151: Software Update
• Shared Memory • Messaging • My Stuff • Calendar • Tasks • Notes • Address Book Highlight an entry and press the Select soft key or the key to view the contents of a category’s memory. Highlight a specific entry or select All and press the key to select and delete all the entries in this category. -
Page 152: Section 17: Accessibility
Section 17: Accessibility TTY Settings TTY (also known as a TDD or Text Telephone) is a telecommunications device that allows people who are deaf or hard of hearing, or who have speech or language disabilities, to communicate via a telephone. This phone comes TTY-ready and only requires the insertion of the TTY device to enable this feature. -
Page 153: Section 18: Health And Safety Information
Section 18: Health and Safety Information This section outlines the safety precautions associated with using your phone. These safety precautions should be followed to safely use your phone. Health and Safety Information Exposure to Radio Frequency (RF) Signals Certification Information (SAR) Your wireless phone is a radio transmitter and receiver. -
Page 154: Please Note The Following Information When Using Your Handset
For body worn operation, this phone has been tested and meets FCC RF exposure guidelines when used with an accessory that contains no metal and that positions the handset a minimum of 1.5 cm from the body. Use of other accessories may not ensure compliance with FCC RF exposure guidelines. -
Page 155: Samsung Mobile Products And Recycling
For more information, refer to “Standard Limited Warranty” on page 139. Samsung Mobile Products and Recycling Samsung cares for the environment and encourages its customers to recycle Samsung mobile phones and genuine Samsung accessories. Go to: http://mobile.samsungusa.com/recycling/index.jsp... - Page 156 exposures are limited by Federal Communications Commission safety guidelines that were developed with the advice of FDA and other federal health and safety agencies. When the phone is located at greater distances from the user, the exposure to RF is drastically lower because a person's RF exposure decreases rapidly with increasing distance from the source.
- Page 157 FDA belongs to an interagency working group of the federal agencies that have responsibility for different aspects of RF safety to ensure coordinated efforts at the federal level. The following agencies belong to this working group: National Institute for Occupational Safety and Health •...
- Page 158 However, none of the studies can answer questions about long- term exposures, since the average period of phone use in these studies was around three years. What research is needed to decide whether RF exposure from wireless phones poses a health risk? A combination of laboratory studies and epidemiological studies of people actually using wireless phones would provide some of the data that are needed.
- Page 159 research needs in the context of the latest research developments around the world. What steps can I take to reduce my exposure to radio frequency energy from my wireless phone? If there is a risk from these products - and at this point we do not know that there is - it is probably very small.
-
Page 160: Medical Equipment
the source of the RF emissions, will not be placed against the head. On the other hand, if the phone is mounted against the waist or other part of the body during use, then that part of the body will absorb more RF energy. Wireless phones marketed in the U.S. -
Page 161: Road Safety
interference be found to occur, FDA will conduct testing to assess the interference and work to resolve the problem. Additional information on the safety of RF exposures from various sources can be obtained from the following organizations (Updated 12/1/2006): FCC RF Safety Program: •... - Page 162 Let the person you are speaking with know you are driving; if necessary, suspend the call in heavy traffic or hazardous weather conditions. Rain, sleet, snow, ice and even heavy traffic can be hazardous. Do not take notes or look up phone numbers while driving. Jotting down a "to do"...
-
Page 163: Responsible Listening
Caution!: Avoid potential hearing loss. Damage to hearing occurs when a person is exposed to loud sounds over time. The risk of hearing loss increases as sound is played louder and for longer durations. Prolonged exposure to loud sounds (including music) is the most common cause of preventable hearing loss. -
Page 164: Operating Environment
You can obtain additional information on this subject from the following sources: American Academy of Audiology 11730 Plaza American Drive, Suite 300 Reston, VA 20190 Voice: (800) 222-2336 Email: info@audiology.org Internet: http://www.audiology.org National Institute on Deafness and Other Communication Disorders National Institutes of Health 31 Center Drive, MSC 2320 Bethesda, MD 20892-2320... -
Page 165: Using Your Phone Near Other Electronic Devices
As with other mobile radio transmitting equipment, users are advised that for the satisfactory operation of the equipment and for the safety of personnel, it is recommended that the equipment should only be used in the normal operating position (held to your ear with the antenna pointing over your shoulder if you are using an external antenna). - Page 166 The wireless telephone industry has developed a rating system for wireless phones, to assist hearing device users find phones that may be compatible with their hearing devices. Not all phones have been rated. Phones that are rated have the rating on their box or a label located on the box.
-
Page 167: Potentially Explosive Environments
If you use any other personal medical devices, consult the manufacturer of your device to determine if it is adequately shielded from external RF energy. Your physician may be able to assist you in obtaining this information. Switch your phone off in health care facilities when any regulations posted in these areas instruct you to do so. -
Page 168: Fcc Notice And Cautions
To make an emergency call: If the phone is not on, switch it on. Key in the emergency number for your present location (for example, 911 or other official emergency number). Emergency numbers vary by location. Press the key. If certain features are in use (call barring, for example), you may first need to deactivate those features before you can make an emergency call. -
Page 169: Other Important Safety Information
phone warranty if said accessories cause damage or a defect to the phone. Although your phone is quite sturdy, it is a complex piece of equipment and can be broken. Avoid dropping, hitting, bending or sitting on it. Other Important Safety Information Only qualified personnel should service the phone or install the phone •... -
Page 170: Availability Of Various Features/Ring Tones
For the best care of your phone, only authorized personnel should service your phone and accessories. Faulty service may void the warranty. There are several simple guidelines to operating your phone properly and maintaining safe, satisfactory service. To ensure that the Hearing Aid Compatibility rating for your phone is •... - Page 171 Use only Samsung-approved batteries and recharge your battery only • with Samsung-approved chargers. When a charger is not in use, disconnect it from the power source. Do not leave the battery connected to a charger for more than a week, since overcharging may shorten its life.
-
Page 172: Care And Maintenance
For safe disposal options for Li-Ion batteries, contact your nearest Samsung authorized service center. Always recycle. Do not dispose of batteries in a fire. Care and Maintenance Your phone is a product of superior design and craftsmanship and should be treated with care. -
Page 173: Section 19: Warranty Information
Limited Warranty does not cover any battery if (i) the battery has been charged by a battery charger not specified or approved by SAMSUNG for charging the battery, (ii) any of the seals on the battery are broken or show evidence of tampering, or (iii) the battery has been used in equipment other than the SAMSUNG phone for which it is specified. - Page 174 SAMSUNG. If SAMSUNG determines that any Product is not covered by this Limited Warranty, Purchaser must pay all parts, shipping, and labor charges for the repair or return of such Product.
- Page 175 Limited Warranty. The agents, employees, distributors, and dealers of SAMSUNG are not authorized to make modifications to this Limited Warranty, or make additional warranties binding on SAMSUNG. Accordingly, additional...
-
Page 176: End User License Agreement For Software
Software. You may not rent, lease, lend, sublicense or provide commercial hosting services with the Software. 4. CONSENT TO USE OF DATA. You agree that Samsung and its affiliates may collect and use technical information gathered as part of the product support services related to the Software provided to you, if any, related to the Software. - Page 177 8. TERMINATION. This EULA is effective until terminated. Your rights under this License will terminate automatically without notice from Samsung if you fail to comply with any of the terms and conditions of this EULA. Upon termination of this EULA, you shall cease all use of the Software and destroy all copies, full or partial, of the Software.
- Page 178 WITH ANY PROVISION OF THIS EULA, HOWEVER CAUSED, REGARDLESS OF THE THEORY OF LIABILITY (CONTRACT, TORT OR OTHERWISE) AND EVEN IF SAMSUNG HAS BEEN ADVISED OF THE POSSIBILITY OF SUCH DAMAGES. SOME JURISDICTIONS DO NOT ALLOW THE LIMITATION OF LIABILITY FOR PERSONAL INJURY, OR OF INCIDENTAL OR CONSEQUENTIAL DAMAGES, SO THIS LIMITATION MAY NOT APPLY TO YOU.
- Page 179 To avoid unintended information leaks and other problems of this sort, it is recommended that the device be returned to Samsung’s Customer Care Center for an Extended File System (EFS) Clear which will eliminate all user memory and return all settings to default settings.
- Page 180 No reproduction in whole or in part allowed without prior written approval. Specifications and availability subject to change without notice.
-
Page 181: Index
Index Accessing a Menu Function Accessing AT&T Music Adding a New Contact Adding More Fields After a Call Deleting Fields Idle Screen Address Book Adding a New Contact Adding Pauses to Contact Numbers Address Book Entry Options Checking the Used Space Copying an entry to the Phone Copying Entry to Phone Copying Entry to SIM Card... - Page 182 Playing Music while Using the Phone Playlists Shop Music Transferring Music From the Digital Music Stores Transferring Music Windows Media Player Using AT&T Radio AT&T Navigator AT&T Social Net AT&T Yahoo! Audio Folder Auto Power-up Alarms Back Light Battery Installing and Removing Low Battery Indicator Bluetooth Activation...
- Page 183 Video Share Viewing All Calls Viewing Missed Calls Call Settings Auto Reply Call Ringtone Ringtone Volume Call Status Tones Call Connect Tone Minute Minder Call Waiting Activate Check Status Deactivate Calls General Voice Call Camcorder Accessing the Video Folder Camcorder Options Shooting Video Camcorder Options Camcorder Options after a Video is...
- Page 184 Using Numeric Input Method Using Predictive Text Using Symbols Input Method Family Map Changing the Status Creating New Numbers Front Display Greeting Message Wallpaper Games Getting Started Activating Your Phone Charging the Battery Installing the microSD Card SIM card information Turning phone on/off Voicemail Graphics...
- Page 185 Using Message Options Mobile Banking Mobile Email AT&T Yahoo! Windows Live Mail Mobile Video Adding a Video Alert Customizing My Purchases Updating Favorites Video Categories Mobile Web Entering Text in the Mobile Web Browser Navigating with the Mobile Web Using Bookmarks MobiTV MobiVJ M-Ratings...
- Page 186 Dynamic Call Quick Group Quick Group Shortcut Viewing Push To Talk Contacts PTT Contact Options PTT Group Options Push To Talk Add Contacts Add Group Help Making a PTT Call PTT Icons PTT Settings Push to Talk key Recent Calls Record Audio Audio Folder Right soft key...
- Page 187 Time Time Format Time Zone Time Zone Updating Tools Calculator Converter Notes Stopwatch Timer Tip Calculator World Clock T-Ratings Travel adapter Trimble Outdoors TTY Settings UL Certification Understanding Your Phone Closed View of Your Phone Features of Your Phone Open View of Your Phone Used Space Using Bookmarks Accessing a Website Using...