Table of Contents
Advertisement
Available languages
Available languages
Quick Links
Advertisement
Table of Contents

Related Manuals for Kohler K-8207


Summary of Contents for Kohler K-8207
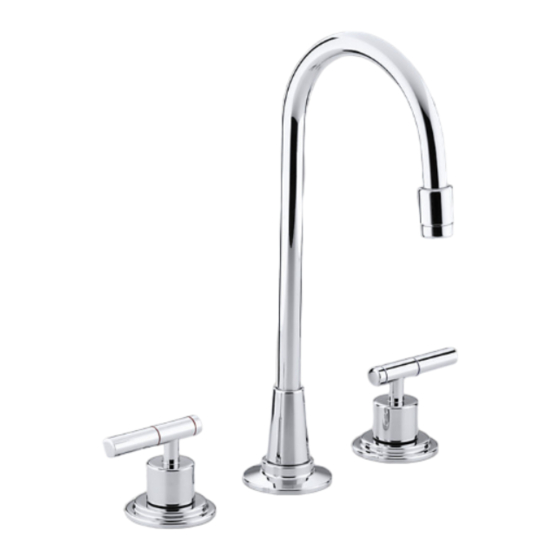
- Page 1 Installation Guide Entertainment Sink Base Faucet K–8207 M product numbers are for Mexico (i.e. K-12345M) Los números de productos seguidos de M corresponden a México (Ej. K-12345M) Français, page“ Français-1” Español, página“ Español-1” 113032-2-AB...
-
Page 2: Tools And Materials
Inspect the tubing for any sign of damage. Replace if necessary. If possible, install this faucet before installing the sink. Kohler Co. reserves the right to make revisions in the design of faucets without notice, as specified in the Price Book. - Page 3 Insert the plastic washer and rubber gasket into the top of the supply tee. Thread the supply tee onto the spout shank until hand tight. Align the arms of the supply tee so they face the left and right sides of the sink. Kohler Co. 113032-2-AB...
- Page 4 Rotate each valve body until the copper tubing faces towards the outside of the sink. Firmly hold the valve bodies in place and securely tighten the nuts with a wrench. Do not overtighten. Remove any excess putty or sealant. 113032-2-AB Kohler Co.
- Page 5 Apply thread sealant onto the threads of each supply tee inlet. Connect the flexible hoses to the supply tee inlet. To avoid kinking the hoses, loop them. Carefully tighten the hose with a wrench. Do not overtighten. Kohler Co. 113032-2-AB...
-
Page 6: Supply Connections
Insert a copper supply tube into each valve end body inlet and the shut-off valve outlet. Hand tighten the coupling nut. Slide the ferrule and coupling nut over the threads of each shut-off valve outlet. Hand tighten the coupling nut. 113032-2-AB Kohler Co. -
Page 7: Installation Checkout
Open both hot and cold valves and run water through the spout (if installed) for approximately one minute to remove debris. Check for leaks. Turn the valves off. Remove any debris from the aerator and reinstall (if spout is installed). Kohler Co. 113032-2-AB... -
Page 8: Guide D'installation
Inspécter la tuyauterie pour tout signe d’endommagement. Remplacer si nécessaire. Si possible, installer le robinet avant d’installer l’évier. Kohler Co. se réserve le droit d’apporter toutes modifications sur le design des robinets et ceci sans préavis, comme spécifié dans le catalogue des prix. - Page 9 T d’alimentation. Visser à la main le T d’alimentation sur la tige du bec. Aligner les braw du T d’alimentation de manière à ce qu’ils soient de face aux côtés gauche et droit de l’évier. Kohler Co. Français-2 113032-2-AB...
- Page 10 Maintenir en place fermement les poignées des valves et bien serrer les écrous avec une clé. Ne pas trop serrer. Retirer tout excédent de mastic de plombier ou joint d’étanchéité. 113032-2-AB Français-3 Kohler Co.
- Page 11 Appliquer du ruban d’étanchéité au filetage de chaque entrée de T d’alimentation. Connecter les tuyaux flexibles à l’entrée du T d’alimentation. Boucler les tuyaux pour éviter l’entortillement. Bien serrer le tuyau à l’aide d’une clé. Ne pas trop serrer. Kohler Co. Français-4 113032-2-AB...
-
Page 12: Connexions D'alimentation
Bien serrer l’écrou de couplage à la main. Glisser une bague d’extrémité et un écrou de couplage sur le filetage sortie d’extrémité de la valve de fermeture. Bien serrer l’écrou de couplage à la main. 113032-2-AB Français-5 Kohler Co. -
Page 13: Vérification De L'installation
à travers le bec (si installé) pendant environ une minute pour chasser tous les débris. Vérifier s’il y a des fuites. Fermer les valves. Retirer tous les débris de l’aérateur et le réinstaller (si le bec est installé). Kohler Co. Français-6 113032-2-AB... -
Page 14: Guía De Instalación
Revise las tuberías para ver si están dañadas. Reemplácelas de ser necesario. De ser posible, instale la grifería antes de instalar el fregadero. Kohler Co. se reserva el derecho de modificar el diseño de la grifería sin previo aviso, tal como se especifica en la lista de precios. - Page 15 Enrosque la T de suministro en el vástago del surtidor con la mano hasta que esté apretada. Alinee los brazos de la T de suministro de manera que estén hacia la derecha e izquierda del fregadero. Kohler Co. Español-2 113032-2-AB...
- Page 16 Gire cada cuerpo de válvula hasta que los tubos de cobre estén orientados hacia el exterior del fregadero. Sostenga firmemente los cuerpos de válvula en su lugar y apriete bien las tuercas con una llave. No apriete demasiado. Elimine el exceso de masilla de plomería o sellador. 113032-2-AB Español-3 Kohler Co.
- Page 17 Aplique cinta selladora de roscas a las roscas de cada entrada de la T de suministro. Conecte las mangueras flexibles a la entrada de la T de suministro. Enrolle las mangueras para evitar que se doblen. Apriete con cuidado la manguera utilizando una llave. No apriete demasiado. Kohler Co. Español-4 113032-2-AB...
- Page 18 Apriete la tuerca de acoplamiento a mano. Deslice el casquillo y la tuerca de acoplamiento por las roscas de la salida de cada llave de paso. Apriete la tuerca de acoplamiento a mano. 113032-2-AB Español-5 Kohler Co.
-
Page 19: Verificación De La Instalación
(si está instalado) durante un minuto aproximadamente para eliminar los residuos. Verifique que no haya fugas. Cierre las válvulas. Limpie el aireador y vuelva a instalarlo (en caso de que el surtidor esté instalado). Kohler Co. Español-6 113032-2-AB... - Page 20 USA: 1-800-4-KOHLER Canada: 1-800-964-5590 México: 001-877-680-1310 kohler.com ©2004 Kohler Co. 113032-2-AB...