Daikin VRV IV+ Service Manual
Hide thumbs
Also See for VRV IV+:
- Service manual (200 pages) ,
- Installer and user reference manual (176 pages) ,
- Installation and operation manual (52 pages)

Related Manuals for Daikin VRV IV+


Summary of Contents for Daikin VRV IV+
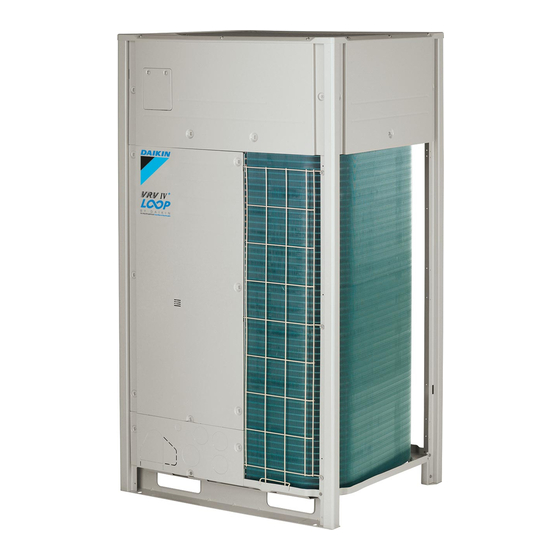
- Page 1 Service manual VRV IV+ Heat Recovery REYQ8U7Y1B REYQ10U7Y1B REYQ12U7Y1B REYQ14U7Y1B REYQ16U7Y1B REYQ18U7Y1B REYQ20U7Y1B REMQ5U7Y1B...
- Page 2 The present publication is drawn up by way of information only and does not constitute an offer binding upon Daikin Europe N.V.. Daikin Europe N.V. has compiled the content of this publication to the best of its knowledge. No express or implied warranty is given for the completeness, accuracy, reliability or fitness for particular purpose of its content and the products and services presented therein.
- Page 3 Version log Version log Version code Description Date ESIE18-15 Document release January 2020 ESIE18-15A Document release April 2020 ESIE18-15B See below May 2020 The following updates have been applied to the Service Manual: • Crankcase heater – Check procedures: Electrical check updated. •...
- Page 4 Table of contents Table of contents 1 General operation 2 Troubleshooting To access push buttons and 7-segment display......................14 To retrieve error codes and check error history ......................14 2.2.1 Via the indoor unit remote controller BRC1H ....................14 2.2.2 Via the outdoor unit ............................
- Page 5 Table of contents 2.3.53 H7-21-23-25 – Defective fan inverter PCB A7P ..................... 77 2.3.54 H7-22-24-26 – Defective fan inverter PCB A4P ..................... 78 2.3.55 H9-01-02-03 – Ambient temperature thermistor R1T abnormality ............. 78 2.3.56 HA-00 – Defrost fail alarm..........................79 2.3.57 J3-16-22-28 –...
- Page 6 Table of contents 2.3.122 P4-02-15-17 – Fin thermistor abnormality on fan inverter PCB A4P ............134 2.3.123 P4-03-16-18 – Fin thermistor abnormality on fan inverter PCB A7P ............135 2.3.124 P4-06-07-08 – Fin thermistor abnormality on inverter PCB A6P ..............136 2.3.125 P8-00 –...
- Page 7 Table of contents 2.3.190 UA-50 – Combination abnormality - High Temperature Hydrobox Detected Connected to a BS Unit ..180 2.3.191 UA-51 – Combination abnormality - Only Hydrobox Units Detected ............180 2.3.192 UA-53 – Combination abnormality - Branch Selector box Dip Switch Abnormality ........180 2.3.193 UF-01 –...
- Page 8 Table of contents 3.10.1 Checking procedures ............................274 3.10.2 Repair procedures ............................282 3.11 Main PCB ..................................290 3.11.1 Checking procedures ............................290 3.11.2 Repair procedures ............................293 3.12 Noise filter PCB ................................298 3.12.1 Checking procedures ............................298 3.12.2 Repair procedures ............................
- Page 9 Table of contents 6.2.2 Wiring diagram: Branch selector box......................393 Piping diagram ................................401 6.3.1 Piping diagram: Outdoor unit......................... 401 6.3.2 Refrigerant flow diagram: Outdoor unit ......................407 6.3.3 Piping diagram: Branch selector unit ......................432 Component overview..............................441 6.4.1 Component overview: REMQ5U + REYQ8~12U units ...................
- Page 10 KHRQ22M refnet branches are used. After the branch selector unit, one or more indoor units can be connected. To split the refrigerant circuit for the different indoor units from the same branch selector unit, Daikin optional accessory refnets (KHRQ22M) are used. REYQ8~20+REMQ5U7Y1B Service manual VRV IV+ Heat Recovery ESIE18-15B –...
- Page 11 General operation The HT (high temperature) Hydrobox is connected without branch selector unit: only use the HP (high pressure) gas line and the liquid line. Single Branch Selector (BS) Multi Branch Selector (BS) BS1Q10A BS4Q14A BS1Q16A BS6Q14A BS1Q25A BS8Q14A BS10Q14A BS12Q14A BS16Q14A There are 2 types of branch selector (BS) units, each of them available in different...
- Page 12 General operation Indoor Units The below illustration does not reflect allowed combinations or compatibility. The intention is to give an overview on piping installation for different types of units. a VRV IV+ HR outdoor unit b Refnet BHFQ23P for outdoor multi connection c Refnet KHRQ23M d Multi branch selector unit e Refnet KHRQ22M...
- Page 13 General operation VRV systems have combination limits for different types of indoor units and also limits for piping length and connection ratio for each indoor unit combination pattern. Refer to the Engineering Databook. The list below is only for reference of compatible units. Always refer to Engineering Databook for compatibility. Round flow Ceiling suspended cassette FXFQ...
- Page 14 Images are in English and for reference ONLY. For more details on the Madoka Assistant please refer to the BRC1H training course material which is available on the Daikin Business Portal. To retrieve the error code To indicate a system error, the controller displays on the messages zone of the home screen.
- Page 15 Troubleshooting Active error codes are also accessible through the Madoka Assistant for BRC1H. The active error is shown on the home screen. Active error Home screen Error(s) details Notifications screen 3 Tap the active error. Result: The detail(s) of the error(s) are shown on the Notifications screen. To check the error history To check the error history with the Madoka Assistant for BRC1H: Action...
- Page 16 Troubleshooting Action Image for reference Result Tap Errors and The Errors and warnings. warnings screen is displayed. Tap Error history. The Error history screen is displayed. 2.2.2 Via the outdoor unit Error codes and/or retry descriptions are accessible on “Mode 1: Monitor Mode”. The table below shows which setting shows the error codes that led to an outdoor unit forced stop and/or retry.
- Page 17 Troubleshooting Action Result Display Make sure the 7-segment display indication is as during normal operation. To enter “Mode 1”, push Mode 1 is accessed. the (BS1) button one time Push the (BS2) button as The setting is accessed many times as the setting (e.g.
- Page 18 Troubleshooting Warning Action Result Press. The error code appears on the screen. The content of the error/ warning is displayed. To Check the error history Action Result Go to the basic screen. Cool Set to °C Press at least 4 seconds while the The Service Settings screen is backlight of the screen is lit.
- Page 19 Troubleshooting 2.2.4 Via the wireless controller BRC4/7 To retrieve the error code INSPECTION/TEST button Unit No. UP button DOWN button MODE button Left digit Right digit 1 Press and hold INSPECTION/TEST button for 5 seconds. Result: The "unit indication" is displayed on screen and Unit No. is displayed as "0", blinking.
- Page 20 Troubleshooting 7 Press UP/DOWN buttons to change the right digit of the error code. Result: The right digit changes as indicated below. UP button DOWN button 8 Continue to change until the matching buzzer sound*** is generated. Result: ***Possible buzzer sounds: Continuous buzzer;...
- Page 21 Troubleshooting 3 Press TEST button. Result: Outdoor unit model code will be displayed. 4 Press TEST button. Result: TEST operation will be displayed. 5 Press TEST button for the last time to return to home screen. Result: The home screen appears. To check the error history To check the malfunction history, you will need to access Mode 40 on the BRC1D.
- Page 22 Troubleshooting 2.3 Error based troubleshooting 2.3.1 A3-01 – Multi BS Unit PCB Abnormality Trigger Effect Reset Open circuit detected on Indoor units connected to Auto reset when short X15A connector of branch this branch selector box circuit is detected on selector box.
- Page 23 Troubleshooting To solve the error code INFORMATION It is recommended to perform the checks in the listed order. 1 Perform a check of the main PCB. See "3.11 Main PCB" [ 290]. Possible cause: Faulty main PCB. 2 Check if the power supply is conform with the regulations. See "4.1 Electrical circuit" [ 356].
- Page 24 Troubleshooting INFORMATION Main, Sub 1 and Sub 2 indications are relevant in multiple outdoor unit configurations. Main outdoor unit is the unit to which F1‑F2 IN transmission line is connected. Main, Sub 1 and Sub 2 outdoor units can be identified by field setting 1‑00.
- Page 25 Troubleshooting INFORMATION Main, Sub 1 and Sub 2 indications are relevant in multiple outdoor unit configurations. Main outdoor unit is the unit to which F1‑F2 IN transmission line is connected. Main, Sub 1 and Sub 2 outdoor units can be identified by field setting 1‑00.
- Page 26 Troubleshooting Trigger Effect Reset High pressure switch Unit will stop operating. If field setting 2-15=1 opens due to high (default): When pressure pressure >safety value, drops below the reset "6.6 Safety value, via the indoor unit devices" [ 449]. remote controller, cycle OFF &...
- Page 27 Troubleshooting INFORMATION If all procedures listed above have been performed and the problem is still present, contact the helpdesk. 2.3.7 E3-02-04-06 – High pressure error Main error code Sub error code Unit Main Sub 1 Sub 2 INFORMATION Main, Sub 1 and Sub 2 indications are relevant in multiple outdoor unit configurations.
- Page 28 Troubleshooting Possible cause: Refrigerant overcharge. 6 Check for the presence of non‑condensables and/or humidity in the refrigerant circuit. See "4.2 Refrigerant circuit" [ 363]. Possible cause: Non‑condensables and/or humidity in the refrigerant circuit. 7 Check if the refrigerant circuit is clogged. See "4.2 Refrigerant circuit" [ 363].
- Page 29 Troubleshooting 2.3.9 E3-13-14-15 – Liquid stop valve check error Main error code Sub error code Unit Main Sub 1 Sub 2 INFORMATION Main, Sub 1 and Sub 2 indications are relevant in multiple outdoor unit configurations. Main outdoor unit is the unit to which F1‑F2 IN transmission line is connected.
- Page 30 Troubleshooting 2.3.10 E3-18 – Actuation of high pressure switch during test run Trigger Effect Reset High pressure switch is Unit will stop test run. If field setting 2-15=1 activated during test run. (default): Via the indoor unit remote controller, cycle OFF & ON. If field setting 2-15=0: Press BS3 on main PCB on outdoor unit, and then via...
- Page 31 Troubleshooting 2.3.11 E3-20-21-22 – Jumper open on main PCB Main error code Sub error code Unit Main Sub 1 Sub 2 INFORMATION Main, Sub 1 and Sub 2 indications are relevant in multiple outdoor unit configurations. Main outdoor unit is the unit to which F1‑F2 IN transmission line is connected.
-
Page 32: Low Pressure [Mpa]
Troubleshooting Trigger Effect Reset Low pressure control (by Unit will stop operating. Manual reset via user sensor) active due to interface. <safety value certain Automatic Reset when times within certain Low Pressure >reset minutes, see "6.6 Safety value, see "6.6 Safety devices" [ 449]. - Page 33 Troubleshooting 11 Check the F1‑F2 transmission line between the indoor units and outdoor unit. "4.1 Electrical circuit" [ 356]. Possible cause: Faulty or interruption in transmission line between indoor units and outdoor unit. INFORMATION If all procedures listed above have been performed and the problem is still present, contact the helpdesk.
- Page 34 Troubleshooting 7 Check liquid back issue. Check expansion valve operation. See "3.7 Expansion valve" [ 244]. Possible cause: Expansion valve CANNOT keep minimum superheat of 3 K while running as evaporator. 8 Check if the refrigerant circuit is correctly charged. See "4.2 Refrigerant circuit" [ 363].
- Page 35 Troubleshooting Possible cause: Clogged refrigerant circuit. 3 Perform a check of the oil return valve Y11S. See "3.13 Oil return valve" [ 302]. Possible cause: Faulty oil return valve Y11S . 4 Perform a check of the oil return valve Y12S. See "3.13 ...
- Page 36 Troubleshooting INFORMATION Main, Sub 1 and Sub 2 indications are relevant in multiple outdoor unit configurations. Main outdoor unit is the unit to which F1‑F2 IN transmission line is connected. Main, Sub 1 and Sub 2 outdoor units can be identified by field setting 1‑00.
- Page 37 Troubleshooting 2.3.16 E6-18-20-22 – Inverter overcurrent error Main error code Sub error code Unit Main Sub 1 Sub 2 INFORMATION Main, Sub 1 and Sub 2 indications are relevant in multiple outdoor unit configurations. Main outdoor unit is the unit to which F1‑F2 IN transmission line is connected.
- Page 38 Troubleshooting INFORMATION If all procedures listed above have been performed and the problem is still present, contact the helpdesk. 2.3.17 E7-01-13-25 – Outdoor unit fan motor M1F error Main error code Sub error code Unit Main Sub 1 Sub 2 INFORMATION Main, Sub 1 and Sub 2 indications are relevant in multiple outdoor unit configurations.
- Page 39 Troubleshooting 2.3.18 E7-02-14-26 – Outdoor unit fan motor M2F error Main error code Sub error code Unit Main Sub 1 Sub 2 INFORMATION Main, Sub 1 and Sub 2 indications are relevant in multiple outdoor unit configurations. Main outdoor unit is the unit to which F1‑F2 IN transmission line is connected.
- Page 40 Troubleshooting INFORMATION Main, Sub 1 and Sub 2 indications are relevant in multiple outdoor unit configurations. Main outdoor unit is the unit to which F1‑F2 IN transmission line is connected. Main, Sub 1 and Sub 2 outdoor units can be identified by field setting 1‑00.
- Page 41 Troubleshooting 1 Perform a check of the fan inverter PCB A7P. See "3.8 Fan inverter PCB" [ 259]. Possible cause: Faulty fan inverter PCB A7P. 2 Perform a check of the outdoor unit fan motor M2F. See "3.14 Outdoor unit motor" [ 307]. Possible cause: Faulty outdoor unit fan motor M2F.
- Page 42 Troubleshooting INFORMATION If all procedures listed above have been performed and the problem is still present, contact the helpdesk. 2.3.22 E7-10-22-34 – Fan inverter PCB A7P (integrated power module) overheated Main error code Sub error code Unit Main Sub 1 Sub 2 INFORMATION Main, Sub 1 and Sub 2 indications are relevant in multiple outdoor unit...
- Page 43 Troubleshooting 2.3.23 E9-01-05-08 – Electronic expansion valve Y1E malfunction Main error code Sub error code Unit Main Sub 1 Sub 2 INFORMATION Main, Sub 1 and Sub 2 indications are relevant in multiple outdoor unit configurations. Main outdoor unit is the unit to which F1‑F2 IN transmission line is connected.
- Page 44 Troubleshooting Possible cause: ▪ Faulty or disturbance of the power supply (imbalance >10%), ▪ Power drop, ▪ Short circuit. 8 Perform a power reset. If the error disappears and is raised again after a while, check for the presence of an external source causing electrical noise. "4.3 External factors" [ 372].
- Page 45 Troubleshooting 4 Perform a check of the refrigerant low pressure sensor. See "3.18 Refrigerant low pressure sensor" [ 333] Possible cause: Faulty refrigerant low pressure sensor. 5 Check if the refrigerant circuit is correctly charged. See "4.2 Refrigerant circuit" [ 363]. Possible cause: Refrigerant overcharge. 6 Check if the power supply is conform with the regulations.
- Page 46 Troubleshooting Possible cause: Faulty main PCB. 2 Perform a check of the Sub PCB. See "3.20 Sub PCB" [ 342]. Possible cause: Faulty Sub PCB. 3 Perform a check of the lower heat exchanger expansion valve. See "3.7 Expansion valve" [ 244]. Possible cause: Faulty lower heat exchanger expansion valve. 4 Perform check refrigerant...
- Page 47 Troubleshooting To solve the error code INFORMATION It is recommended to perform the checks in the listed order. INFORMATION When the power is switched ON, the outdoor unit main PCB checks all expansion valve coil windings by current check. 1 Perform a check of the main PCB. See "3.11 Main PCB" [ 290].
- Page 48 Troubleshooting INFORMATION Main, Sub 1 and Sub 2 indications are relevant in multiple outdoor unit configurations. Main outdoor unit is the unit to which F1‑F2 IN transmission line is connected. Main, Sub 1 and Sub 2 outdoor units can be identified by field setting 1‑00.
- Page 49 Troubleshooting 2.3.28 E9-26-27-28 – Electronic expansion valve (Y4E) malfunction Main error code Sub error code Unit Main Sub 1 Sub 2 INFORMATION Main, Sub 1 and Sub 2 indications are relevant in multiple outdoor unit configurations. Main outdoor unit is the unit to which F1‑F2 IN transmission line is connected.
- Page 50 Troubleshooting 8 Perform a power reset. If the error disappears and is raised again after a while, check for the presence of an external source causing electrical noise. "4.3 External factors" [ 372]. Possible cause: External source may cause interference. INFORMATION If all procedures listed above have been performed and the problem is still present, contact the helpdesk.
- Page 51 Troubleshooting 6 Check if the refrigerant circuit is correctly charged. See "4.2 Refrigerant circuit" [ 363]. Possible cause: Refrigerant overcharge. 7 Check if the power supply is conform with the regulations. See "4.1 Electrical circuit" [ 356]. Possible cause: ▪ Faulty or disturbance of the power supply (imbalance >10%), ▪...
- Page 52 Troubleshooting Possible cause: Faulty auto charge expansion valve. 3 Perform check refrigerant side thermistors. "3.21 Thermistors" [ 348]. Possible cause: Faulty refrigerant side thermistor(s). 4 Perform a check of the refrigerant low pressure sensor. See "3.18 Refrigerant low pressure sensor" [ 333] Possible cause: Faulty refrigerant low pressure sensor. 5 Check if the refrigerant circuit is correctly charged.
- Page 53 Troubleshooting INFORMATION When the power is switched ON, the outdoor unit main PCB checks all expansion valve coil windings by current check. 1 Perform a check of the main PCB. See "3.11 Main PCB" [ 290]. Possible cause: Faulty main PCB. 2 Perform a check of the lower heat exchanger expansion valve. See "3.7 Expansion valve" [ 244].
- Page 54 Troubleshooting Trigger Effect Reset Expansion valve Unit will stop operating. Power reset at outdoor overcurrent. unit. To solve the error code INFORMATION It is recommended to perform the checks in the listed order. INFORMATION When the power is switched ON, the outdoor unit main PCB checks all expansion valve coil windings by current check.
- Page 55 Troubleshooting 2.3.33 E9-51-52-53 – Electronic expansion valve thermal cutting error Main error code Sub error code Unit Main Sub 1 Sub 2 INFORMATION Main, Sub 1 and Sub 2 indications are relevant in multiple outdoor unit configurations. Main outdoor unit is the unit to which F1‑F2 IN transmission line is connected.
- Page 56 Troubleshooting 8 Perform a power reset. If the error disappears and is raised again after a while, check for the presence of an external source causing electrical noise. "4.3 External factors" [ 372]. Possible cause: External source may cause interference. INFORMATION If all procedures listed above have been performed and the problem is still present, contact the helpdesk.
-
Page 57: Discharge Temperature [˚C]
Troubleshooting 6 Check if the refrigerant circuit is correctly charged. See "4.2 Refrigerant circuit" [ 363]. Possible cause: Refrigerant overcharge. 7 Check if the power supply is conform with the regulations. See "4.1 Electrical circuit" [ 356]. Possible cause: ▪ Faulty or disturbance of the power supply (imbalance >10%), ▪... - Page 58 Troubleshooting 2 Perform check discharge pipe thermistor. "3.21 Thermistors" [ 348]. Possible cause: Faulty discharge pipe thermistor or connector fault. 3 Perform a check of the main PCB. See "3.11 Main PCB" [ 290]. Possible cause: Faulty main PCB. 4 Check if the refrigerant circuit is correctly charged. See "4.2 ...
- Page 59 Troubleshooting To solve the error code INFORMATION It is recommended to perform the checks in the listed order. 1 Perform check compressor body thermistors. "3.21 Thermistors" [ 348]. Possible cause: Faulty compressor body thermistor or connector fault. 2 Perform a check of the main PCB. See "3.11 Main PCB" [ 290].
- Page 60 Troubleshooting 3 Perform a check of the evaporator side expansion valve. See "3.7 Expansion valve" [ 244]. Possible cause: Faulty evaporator side expansion valve. 4 Check for objects near the indoor unit that may block the airflow. See "4.3 External factors" [ 372]. Possible cause: Airflow of the indoor unit is blocked.
- Page 61 Troubleshooting Trigger Effect Reset Discharge superheat Unit will stop. Manual reset via user <10˚C for 90 minutes interface. − Discharge Discharge condensation To solve the error code INFORMATION It is recommended to perform the checks in the listed order. 1 Perform check suction pipe...
- Page 62 Troubleshooting Possible cause: Indoor room temperature too low when in heating mode. Too cold rooms might create more subcool resulting in wet operation. INFORMATION If all procedures listed above have been performed and the problem is still present, contact the helpdesk. 2.3.39 F4-03-05-07 –...
- Page 63 Troubleshooting Possible cause: Faulty evaporator side expansion valve. 7 Check for objects near the indoor unit that may block the airflow. See "4.3 External factors" [ 372]. Possible cause: Airflow of the indoor unit is blocked. 8 Clean the air filters of the indoor unit(s). See service manual of the respective indoor unit(s).
- Page 64 Troubleshooting 1 Perform check suction pipe thermistor. "3.21 Thermistors" [ 348]. Possible cause: Faulty suction pipe thermistor or connector fault. 2 Perform check discharge pipe thermistor. "3.21 Thermistors" [ 348]. Possible cause: Faulty discharge pipe thermistor or connector fault. 3 Perform a check of the refrigerant high pressure sensor. See "3.17 Refrigerant high pressure sensor" [...
- Page 65 Troubleshooting 2.3.41 F4-09-11-13 – Wet operation error for compressor M2C Main error code Sub error code Unit Main Sub 1 Sub 2 INFORMATION Main, Sub 1 and Sub 2 indications are relevant in multiple outdoor unit configurations. Main outdoor unit is the unit to which F1‑F2 IN transmission line is connected.
- Page 66 Troubleshooting Possible cause: Faulty or clogged air filter. 9 Adjust external static pressure setting for ducted type indoor units, if necessary. 10 Perform a check of the indoor unit fan motor. See service manual of the respective indoor unit(s). Possible cause: Faulty indoor unit fan motor. 11 Perform a check of the indoor air thermistor.
- Page 67 Troubleshooting Possible cause: If liquid pipe temperature is close to evaporation temperature or flow is detected by expansion valve stethoscope then indoor unit expansion valve is bleeding while closed. Faulty indoor unit expansion valve. 4 Perform a check of the indoor unit fan motor. See service manual of the respective indoor unit(s).
- Page 68 Troubleshooting 6 Perform a check of the evaporator side expansion valve. See "3.7 Expansion valve" [ 244]. Possible cause: Faulty evaporator side expansion valve. 7 Check for objects near the indoor unit that may block the airflow. See "4.3 External factors" [ 372]. Possible cause: Airflow of the indoor unit is blocked.
- Page 69 Troubleshooting 2.3.44 F6-02 – Refrigerant overcharge detection during test-run Trigger Effect Reset Discharge superheat Unit will stop test run. Push BS3 (return) button <10˚C (SH − once. Discharge Discharge ) during test run. condensation Excessive subcool is detected from comparison of R1T ambient thermistor, R3T liquid thermistor, R11T de-icer thermistor to...
- Page 70 Troubleshooting Possible cause: Faulty indoor unit fan motor. 11 Perform check discharge pipe thermistor. "3.21 Thermistors" [ 348]. Possible cause: Faulty discharge pipe thermistor or connector fault. 12 Perform a check of the refrigerant high pressure sensor. See "3.17 Refrigerant high pressure sensor" [ 330].
- Page 71 Troubleshooting Possible cause: Faulty de–icer thermistor or connector fault. 4 Check if the refrigerant circuit is correctly charged. See "4.2 Refrigerant circuit" [ 363]. Possible cause: Refrigerant overcharge. 5 Check for the presence of non‑condensables and/or humidity in the refrigerant circuit. See "4.2 Refrigerant circuit" [ 363].
- Page 72 Troubleshooting 2.3.46 F9-01 – Branch selector box electronic expansion valve abnormality (high pressure/low pressure gas pipe) Trigger Effect Reset After power is supplied, Unit will stop running. Power reset at branch continuity has not been selector box. detected on the coil for expansion valve To solve the error code INFORMATION...
- Page 73 Troubleshooting 1 Locate the branch selector box by checking indoor unit remote controllers showing F9 error. Branch selector box that is connected to the indoor unit(s) that show F9 error is subject to further investigation. NOTICE Other indoor units in the circuit will show U9 Error. This means "There is an error in the circuit but it is not the unit that shows U9".
- Page 74 Troubleshooting Possible cause: Faulty expansion valve, loose connector, faulty expansion valve coil. 4 Perform a check of the branch selector box PCB. See "3.2.1 Branch selector PCB" [ 214]. Possible cause: Faulty branch selector box PCB. INFORMATION If all procedures listed above have been performed and the problem is still present, contact the helpdesk.
- Page 75 Troubleshooting 2.3.50 H3-03-05-07 – Transmission error on inverter PCB A6P Main error code Sub error code Unit Main Sub 1 Sub 2 INFORMATION Main, Sub 1 and Sub 2 indications are relevant in multiple outdoor unit configurations. Main outdoor unit is the unit to which F1‑F2 IN transmission line is connected.
- Page 76 Troubleshooting INFORMATION Main, Sub 1 and Sub 2 indications are relevant in multiple outdoor unit configurations. Main outdoor unit is the unit to which F1‑F2 IN transmission line is connected. Main, Sub 1 and Sub 2 outdoor units can be identified by field setting 1‑00.
- Page 77 Troubleshooting 1 Perform a check of the outdoor unit fan motor M2F. See "3.14 Outdoor unit motor" [ 307]. Possible cause: Faulty outdoor unit fan motor M2F. 2 Perform a check of the fan inverter PCB A7P. See "3.8 Fan inverter PCB" [ 259].
- Page 78 Troubleshooting 2.3.54 H7-22-24-26 – Defective fan inverter PCB A4P Main error code Sub error code Unit Main Sub 1 Sub 2 INFORMATION Main, Sub 1 and Sub 2 indications are relevant in multiple outdoor unit configurations. Main outdoor unit is the unit to which F1‑F2 IN transmission line is connected.
- Page 79 Troubleshooting Trigger Effect Reset Ambient temperature Unit will stop operating. Manual reset via user thermistor R1T read-out is interface. out of range. Automatic reset when thermistor read-out is within range. To solve the error code INFORMATION It is recommended to perform the checks in the listed order. 1 Perform a check of the outdoor air thermistor.
- Page 80 Troubleshooting INFORMATION If all procedures listed above have been performed and the problem is still present, contact the helpdesk. 2.3.57 J3-16-22-28 – Discharge thermistor R21T open circuit Main error code Sub error code Unit Main Sub 1 Sub 2 INFORMATION Main, Sub 1 and Sub 2 indications are relevant in multiple outdoor unit configurations.
- Page 81 Troubleshooting INFORMATION Main, Sub 1 and Sub 2 indications are relevant in multiple outdoor unit configurations. Main outdoor unit is the unit to which F1‑F2 IN transmission line is connected. Main, Sub 1 and Sub 2 outdoor units can be identified by field setting 1‑00.
- Page 82 Troubleshooting To solve the error code INFORMATION It is recommended to perform the checks in the listed order. 1 Perform check discharge pipe thermistor. "3.21 Thermistors" [ 348]. Possible cause: Faulty discharge pipe thermistor or connector fault. 2 Perform a check of the main PCB. See "3.11 Main PCB" [ 290].
- Page 83 Troubleshooting INFORMATION If all procedures listed above have been performed and the problem is still present, contact the helpdesk. 2.3.61 J3-47-49-51 – Compressor body thermistor R15T open circuit Main error code Sub error code Unit Main Sub 1 Sub 2 INFORMATION Main, Sub 1 and Sub 2 indications are relevant in multiple outdoor unit configurations.
- Page 84 Troubleshooting INFORMATION Main, Sub 1 and Sub 2 indications are relevant in multiple outdoor unit configurations. Main outdoor unit is the unit to which F1‑F2 IN transmission line is connected. Main, Sub 1 and Sub 2 outdoor units can be identified by field setting 1‑00.
- Page 85 Troubleshooting To solve the error code INFORMATION It is recommended to perform the checks in the listed order. 1 Perform check discharge pipe thermistor. "3.21 Thermistors" [ 348]. Possible cause: Faulty discharge pipe thermistor or connector fault. 2 Perform a check of the lower heat exchanger expansion valve. See "3.7 Expansion valve" [ 244].
- Page 86 Troubleshooting Trigger Effect Reset Compressor (M1C) Unit keeps running. Auto reset. discharge thermistor and compressor (M2C) discharge thermistor are cross-wired. To solve the error code INFORMATION It is recommended to perform the checks in the listed order. 1 Check the wiring of the discharge pipe thermistors on the main PCB. See "3.11 Main PCB" [ 290].
- Page 87 Troubleshooting INFORMATION If all procedures listed above have been performed and the problem is still present, contact the helpdesk. 2.3.66 J5-18-19-20 – Suction temperature thermistor R10T abnormality Main error code Sub error code Unit Main Sub 1 Sub 2 INFORMATION Main, Sub 1 and Sub 2 indications are relevant in multiple outdoor unit configurations.
- Page 88 Troubleshooting INFORMATION Main, Sub 1 and Sub 2 indications are relevant in multiple outdoor unit configurations. Main outdoor unit is the unit to which F1‑F2 IN transmission line is connected. Main, Sub 1 and Sub 2 outdoor units can be identified by field setting 1‑00.
- Page 89 Troubleshooting To solve the error code INFORMATION It is recommended to perform the checks in the listed order. 1 Perform a check of the upper heat exchanger gas pipe thermistor. See "3.21 Thermistors" [ 348]. Possible cause: Faulty upper heat exchanger gas pipe thermistor. 2 Perform a check of the main PCB.
- Page 90 Troubleshooting INFORMATION If all procedures listed above have been performed and the problem is still present, contact the helpdesk. 2.3.70 J7-01-02-03 – Main liquid pipe thermistor R3T malfunction Main error code Sub error code Unit Main Sub 1 Sub 2 INFORMATION Main, Sub 1 and Sub 2 indications are relevant in multiple outdoor unit configurations.
- Page 91 Troubleshooting INFORMATION Main, Sub 1 and Sub 2 indications are relevant in multiple outdoor unit configurations. Main outdoor unit is the unit to which F1‑F2 IN transmission line is connected. Main, Sub 1 and Sub 2 outdoor units can be identified by field setting 1‑00.
- Page 92 Troubleshooting To solve the error code INFORMATION It is recommended to perform the checks in the listed order. 1 Perform a check of the upper heat exchanger liquid temperature thermistor. See "3.21 Thermistors" [ 348]. Possible cause: Faulty upper heat exchanger liquid temperature thermistor. 2 Perform a check of the main PCB.
- Page 93 Troubleshooting INFORMATION If all procedures listed above have been performed and the problem is still present, contact the helpdesk. 2.3.74 J8-11-12-13 – Autocharge thermistor R14T abnormality Main error code Sub error code Unit Main Sub 1 Sub 2 INFORMATION Main, Sub 1 and Sub 2 indications are relevant in multiple outdoor unit configurations.
- Page 94 Troubleshooting INFORMATION Main, Sub 1 and Sub 2 indications are relevant in multiple outdoor unit configurations. Main outdoor unit is the unit to which F1‑F2 IN transmission line is connected. Main, Sub 1 and Sub 2 outdoor units can be identified by field setting 1‑00.
- Page 95 Troubleshooting To solve the error code INFORMATION It is recommended to perform the checks in the listed order. 1 Perform a check of the gas pipe thermistor of the subcool heat exchanger. See "3.21 Thermistors" [ 348]. Possible cause: Faulty gas pipe thermistor of the subcool heat exchanger. 2 Perform a check of the main PCB.
- Page 96 Troubleshooting 2.3.78 JA-06-08-10 – High pressure sensor S1NPH abnormality Main error code Sub error code Unit Main Sub 1 Sub 2 INFORMATION Main, Sub 1 and Sub 2 indications are relevant in multiple outdoor unit configurations. Main outdoor unit is the unit to which F1‑F2 IN transmission line is connected.
- Page 97 Troubleshooting Trigger Effect Reset High pressure sensor Unit will stop operating. Manual reset via user S1NPH read-out short interface. circuit or out of range. Automatic reset when sensor read-out is within range. To solve the error code INFORMATION It is recommended to perform the checks in the listed order. 1 Perform a check of the refrigerant high pressure sensor.
- Page 98 Troubleshooting Possible cause: Faulty refrigerant low pressure sensor. 2 Perform a check of the main PCB. See "3.11 Main PCB" [ 290]. Possible cause: Faulty main PCB. INFORMATION If all procedures listed above have been performed and the problem is still present, contact the helpdesk.
- Page 99 Troubleshooting 2.3.82 L1-01-07-11 – Inverter PCB A3P abnormality Main error code Sub error code Unit Main Sub 1 Sub 2 INFORMATION Main, Sub 1 and Sub 2 indications are relevant in multiple outdoor unit configurations. Main outdoor unit is the unit to which F1‑F2 IN transmission line is connected.
- Page 100 Troubleshooting INFORMATION Main, Sub 1 and Sub 2 indications are relevant in multiple outdoor unit configurations. Main outdoor unit is the unit to which F1‑F2 IN transmission line is connected. Main, Sub 1 and Sub 2 outdoor units can be identified by field setting 1‑00.
- Page 101 Troubleshooting Trigger Effect Reset Main PCB detects voltage/ Unit will stop operating. Manual reset via user current errors on output interface. waveform or current Power reset at outdoor read-out. unit. To solve the error code INFORMATION It is recommended to perform the checks in the listed order. 1 Perform a check of the main PCB.
- Page 102 Troubleshooting To solve the error code INFORMATION It is recommended to perform the checks in the listed order. 1 Perform a check of the main PCB. See "3.11 Main PCB" [ 290]. Possible cause: Faulty main PCB or wrong capacity setting. 2 Perform a check of the inverter PCB A3P. See "3.10 Inverter PCB" [ 274].
- Page 103 Troubleshooting 2 Perform a check of the inverter PCB A3P. See "3.10 Inverter PCB" [ 274]. Possible cause: Faulty inverter PCB A3P or non‑compatible inverter PCB. 3 Perform a check of the compressor. See "3.3 Compressor" [ 221]. Possible cause: Faulty compressor. 4 Check if the power supply is conform with the regulations. See "4.1 Electrical circuit" [ 356].
- Page 104 Troubleshooting Possible cause: ▪ Faulty or disturbance of the power supply (imbalance >10%), ▪ Power drop, ▪ Short circuit. INFORMATION If all procedures listed above have been performed and the problem is still present, contact the helpdesk. 2.3.88 L1-18-23-43 – Inverter PCB A6P current detection primary circuit Main error code Sub error code Unit...
- Page 105 Troubleshooting INFORMATION If all procedures listed above have been performed and the problem is still present, contact the helpdesk. 2.3.89 L1-19-24-44 – Inverter PCB A6P current detection secondary circuit Main error code Sub error code Unit Main Sub 1 Sub 2 INFORMATION Main, Sub 1 and Sub 2 indications are relevant in multiple outdoor unit configurations.
- Page 106 Troubleshooting 2.3.90 L1-20-25-45 – Power transistor error on inverter PCB A6P Main error code Sub error code Unit Main Sub 1 Sub 2 INFORMATION Main, Sub 1 and Sub 2 indications are relevant in multiple outdoor unit configurations. Main outdoor unit is the unit to which F1‑F2 IN transmission line is connected.
- Page 107 Troubleshooting INFORMATION Main, Sub 1 and Sub 2 indications are relevant in multiple outdoor unit configurations. Main outdoor unit is the unit to which F1‑F2 IN transmission line is connected. Main, Sub 1 and Sub 2 outdoor units can be identified by field setting 1‑00.
- Page 108 Troubleshooting Trigger Effect Reset Fan inverter PCB A4P fails Unit will stop operating. Manual reset via user reading/writing memory interface. (EEPROM error). Power reset at outdoor unit. To solve the error code INFORMATION It is recommended to perform the checks in the listed order. 1 Perform a check of the fan inverter PCB A4P.
- Page 109 Troubleshooting INFORMATION If all procedures listed above have been performed and the problem is still present, contact the helpdesk. 2.3.94 L1-36-38-40 – Inverter PCB A3P Eeprom error Main error code Sub error code Unit Main Sub 1 Sub 2 INFORMATION Main, Sub 1 and Sub 2 indications are relevant in multiple outdoor unit configurations.
- Page 110 Troubleshooting Trigger Effect Reset Inverter PCB A6P fails Unit will stop operating. Manual reset via user reading/writing memory interface. (EEPROM error). Power reset at outdoor unit. To solve the error code INFORMATION It is recommended to perform the checks in the listed order. 1 Perform a check of the inverter PCB A6P.
- Page 111 Troubleshooting 4 Check if the power supply is conform with the regulations. See "4.1 Electrical circuit" [ 356]. Possible cause: ▪ Faulty or disturbance of the power supply (imbalance >10%), ▪ Power drop, ▪ Short circuit. INFORMATION If all procedures listed above have been performed and the problem is still present, contact the helpdesk.
- Page 112 Troubleshooting INFORMATION If all procedures listed above have been performed and the problem is still present, contact the helpdesk. 2.3.98 L2-01-02-03 – Power supply abnormality during test run Main error code Sub error code Unit Main Sub 1 Sub 2 INFORMATION Main, Sub 1 and Sub 2 indications are relevant in multiple outdoor unit configurations.
- Page 113 Troubleshooting 2.3.99 L2-04-05-06 – Power supply abnormality during normal operation Main error code Sub error code Unit Main Sub 1 Sub 2 INFORMATION Main, Sub 1 and Sub 2 indications are relevant in multiple outdoor unit configurations. Main outdoor unit is the unit to which F1‑F2 IN transmission line is connected.
- Page 114 Troubleshooting 2.3.100 L4-01-02-03 – Inverter PCB A3P high fin temperature Main error code Sub error code Unit Main Sub 1 Sub 2 INFORMATION Main, Sub 1 and Sub 2 indications are relevant in multiple outdoor unit configurations. Main outdoor unit is the unit to which F1‑F2 IN transmission line is connected.
- Page 115 Troubleshooting 7 Check if there is discharge air by-pass on installation location. Possible cause: External noise. Check further on how to eliminate external factors. 8 Perform a check of the inverter PCB A3P. See "3.10 Inverter PCB" [ 274]. Possible cause: Faulty inverter PCB A3P. INFORMATION If all procedures listed above have been performed and the problem is still present, contact the helpdesk.
- Page 116 Troubleshooting 4 Check (by touching) if refrigerant is flowing through the radiant cooling refrigerant circuit. The radiant cooling refrigerant circuit should be warm if refrigerant is flowing. If no refrigerant flow, perform a check of the liquid cooling expansion valve, see "3.7 Expansion valve" [ 244].
- Page 117 Troubleshooting DANGER: RISK OF ELECTROCUTION Confirm the rectifier voltage is below 10 V DC before proceeding, see "To check the rectifier voltage" [ 356]. 2 Check that the thermal interface grease is applied properly on the (PCB or refrigerant piping) contact surface of the heat sink. Adjust if needed. Possible cause: Thermal interface grease NOT applied properly on the heat sink.
- Page 118 Troubleshooting Trigger Effect Reset Thermistor located inside Unit will stop operating. Manual reset via remote the power module of the controller. inverter PCB for Outdoor unit power reset. compressor detects a temperature higher than a certain value. To solve the error code INFORMATION It is recommended to perform the checks in the listed order.
- Page 119 Troubleshooting 2.3.104 L5-03-05-07 – Output overcurrent detection on inverter PCB A3P Main error code Sub error code Unit Main Sub 1 Sub 2 INFORMATION Main, Sub 1 and Sub 2 indications are relevant in multiple outdoor unit configurations. Main outdoor unit is the unit to which F1‑F2 IN transmission line is connected.
- Page 120 Troubleshooting 2.3.105 L5-14-15-16 – Output overcurrent detection on inverter PCB A6P Main error code Sub error code Unit Main Sub 1 Sub 2 INFORMATION Main, Sub 1 and Sub 2 indications are relevant in multiple outdoor unit configurations. Main outdoor unit is the unit to which F1‑F2 IN transmission line is connected.
- Page 121 Troubleshooting 2.3.106 L8-03-06-07 – Overcurrent on inverter PCB A3P except start-up Main error code Sub error code Unit Main Sub 1 Sub 2 INFORMATION Main, Sub 1 and Sub 2 indications are relevant in multiple outdoor unit configurations. Main outdoor unit is the unit to which F1‑F2 IN transmission line is connected.
- Page 122 Troubleshooting 2.3.107 L8-11-12-13 – Overcurrent on inverter PCB A6P except start-up Main error code Sub error code Unit Main Sub 1 Sub 2 INFORMATION Main, Sub 1 and Sub 2 indications are relevant in multiple outdoor unit configurations. Main outdoor unit is the unit to which F1‑F2 IN transmission line is connected.
- Page 123 Troubleshooting 2.3.108 L9-01-05-06 – Stall prevention by inverter PCB A3P Main error code Sub error code Unit Main Sub 1 Sub 2 INFORMATION Main, Sub 1 and Sub 2 indications are relevant in multiple outdoor unit configurations. Main outdoor unit is the unit to which F1‑F2 IN transmission line is connected.
- Page 124 Troubleshooting INFORMATION Main, Sub 1 and Sub 2 indications are relevant in multiple outdoor unit configurations. Main outdoor unit is the unit to which F1‑F2 IN transmission line is connected. Main, Sub 1 and Sub 2 outdoor units can be identified by field setting 1‑00.
- Page 125 Troubleshooting Trigger Effect Reset When inverter PCB A3P Unit will stop operating. Manual reset via user detects phase loss to interface. compressor on U, V, W. To solve the error code INFORMATION It is recommended to perform the checks in the listed order. 1 Check if the power supply is conform with the regulations.
- Page 126 Troubleshooting 1 Check if the power supply is conform with the regulations. See "4.1 Electrical circuit" [ 356]. Possible cause: ▪ Faulty or disturbance of the power supply (imbalance >10%), ▪ Power drop, ▪ Short circuit. 2 Perform a check of the inverter PCB A6P. See "3.10 Inverter PCB" [ 274].
- Page 127 Troubleshooting 2.3.113 LC-14-15-16 – Transmission abnormality main PCB/inverter PCB A3P Main error code Sub error code Unit Main Sub 1 Sub 2 INFORMATION Main, Sub 1 and Sub 2 indications are relevant in multiple outdoor unit configurations. Main outdoor unit is the unit to which F1‑F2 IN transmission line is connected.
- Page 128 Troubleshooting INFORMATION Main, Sub 1 and Sub 2 indications are relevant in multiple outdoor unit configurations. Main outdoor unit is the unit to which F1‑F2 IN transmission line is connected. Main, Sub 1 and Sub 2 outdoor units can be identified by field setting 1‑00.
- Page 129 Troubleshooting INFORMATION Main, Sub 1 and Sub 2 indications are relevant in multiple outdoor unit configurations. Main outdoor unit is the unit to which F1‑F2 IN transmission line is connected. Main, Sub 1 and Sub 2 outdoor units can be identified by field setting 1‑00.
- Page 130 Troubleshooting 2.3.116 LC-30-31-32 – Transmission abnormality main PCB/inverter PCB A6P Main error code Sub error code Unit Main Sub 1 Sub 2 INFORMATION Main, Sub 1 and Sub 2 indications are relevant in multiple outdoor unit configurations. Main outdoor unit is the unit to which F1‑F2 IN transmission line is connected.
- Page 131 Troubleshooting 2.3.117 LC-33-34-35 – Transmission abnormality main PCB/sub PCB Main error code Sub error code Unit Main Sub 1 Sub 2 INFORMATION Main, Sub 1 and Sub 2 indications are relevant in multiple outdoor unit configurations. Main outdoor unit is the unit to which F1‑F2 IN transmission line is connected.
- Page 132 Troubleshooting Trigger Effect Reset Inverter PCB A3P detects Unit will stop operating. Manual reset via user power unbalance >4%. interface. Automatic reset. To solve the error code INFORMATION It is recommended to perform the checks in the listed order. 1 Check if the power supply is conform with the regulations. See "4.1 Electrical circuit" [ 356].
- Page 133 Troubleshooting Possible cause: ▪ Faulty or disturbance of the power supply (imbalance >10%), ▪ Power drop, ▪ Short circuit. 2 Perform a check of the inverter PCB A6P. See "3.10 Inverter PCB" [ 274]. Possible cause: Faulty inverter PCB A6P. INFORMATION If all procedures listed above have been performed and the problem is still present, contact the helpdesk.
- Page 134 Troubleshooting INFORMATION Main, Sub 1 and Sub 2 indications are relevant in multiple outdoor unit configurations. Main outdoor unit is the unit to which F1‑F2 IN transmission line is connected. Main, Sub 1 and Sub 2 outdoor units can be identified by field setting 1‑00.
- Page 135 Troubleshooting Trigger Effect Reset Fan inverter PCB A4P Unit will stop operating. Manual reset via user detects open or short interface. circuit or out of range on Automatic reset when fin fin thermistor. temperature is within range. To solve the error code INFORMATION It is recommended to perform the checks in the listed order.
- Page 136 Troubleshooting Trigger Effect Reset Fan inverter PCB A7P Unit will stop operating. Manual reset via user detects open or short interface. circuit or out of range on Automatic reset when fin fin thermistor. temperature is within range. To solve the error code INFORMATION It is recommended to perform the checks in the listed order.
- Page 137 Troubleshooting Trigger Effect Reset Inverter PCB A6P detects Unit will stop operating. Manual reset via user open or short circuit or interface. out of range on fin Automatic reset when fin thermistor. temperature is within range. To solve the error code INFORMATION It is recommended to perform the checks in the listed order.
- Page 138 Troubleshooting 3 Adjust external static pressure setting for ducted type indoor units, if necessary. 4 Restart refrigerant auto‑charge function. See installer reference guide for more information. INFORMATION If all procedures listed above have been performed and the problem is still present, contact the helpdesk.
- Page 139 Troubleshooting To solve the error code 1 Continue refrigerant charging. INFORMATION If all procedures listed above have been performed and the problem is still present, contact the helpdesk. 2.3.129 PF-00 – Long test run failed Trigger Effect Reset Long test run failed Unit will stop test run.
- Page 140 Troubleshooting Trigger Effect Reset Main PCB detects other Unit will stop operating. Manual reset via user type PCB than set in interface. EEPROM or wrong dip Power reset at outdoor switch setting on spare unit. part main PCB. To solve the error code INFORMATION It is recommended to perform the checks in the listed order.
- Page 141 Troubleshooting 1 Check if the correct spare part is installed for the main PCB. See "3.11 Main PCB" [ 290]. Check dips switch setting for spare part main PCB. Possible cause: Incorrect spare part main PCB or incorrect dips switch setting. 2 Perform a check of the main PCB. See "3.11 Main PCB" [ 290].
- Page 142 Troubleshooting INFORMATION If all procedures listed above have been performed and the problem is still present, contact the helpdesk. 2.3.133 PJ-12-13-14 – Capacity setting mismatch for inverter PCB A6P Main error code Sub error code Unit Main Sub 1 Sub 2 INFORMATION Main, Sub 1 and Sub 2 indications are relevant in multiple outdoor unit configurations.
- Page 143 Troubleshooting To solve the error code 1 Refer to U0-05 or U0-06 to proceed. 2.3.135 U0-05 – Refrigerant shortage detection Trigger Effect Reset Refrigerant shortage Unit keeps running. Auto reset. detection during cooling. To solve the error code INFORMATION It is recommended to perform the checks in the listed order. 1 Check that all stop valves of the refrigerant circuit are open.
- Page 144 Troubleshooting 2.3.136 U0-06 – Refrigerant shortage detection Trigger Effect Reset Refrigerant shortage Unit keeps running. Auto reset. detection during heating. To solve the error code INFORMATION It is recommended to perform the checks in the listed order. 1 Check that all stop valves of the refrigerant circuit are open. See "4.2 Refrigerant circuit" [ 363].
- Page 145 Troubleshooting 2.3.137 U0-08-09-10 – Refrigerant shortage detection by high pressure sensor Main error code Sub error code Unit Main Sub 1 Sub 2 INFORMATION Main, Sub 1 and Sub 2 indications are relevant in multiple outdoor unit configurations. Main outdoor unit is the unit to which F1‑F2 IN transmission line is connected.
- Page 146 Troubleshooting INFORMATION If all procedures listed above have been performed and the problem is still present, contact the helpdesk. 2.3.138 U1-01-05-07 – Reverse phase detection Main error code Sub error code Unit Main Sub 1 Sub 2 INFORMATION Main, Sub 1 and Sub 2 indications are relevant in multiple outdoor unit configurations.
- Page 147 Troubleshooting 2.3.139 U1-04-06-08 – Reverse phase detection Main error code Sub error code Unit Main Sub 1 Sub 2 INFORMATION Main, Sub 1 and Sub 2 indications are relevant in multiple outdoor unit configurations. Main outdoor unit is the unit to which F1‑F2 IN transmission line is connected.
- Page 148 Troubleshooting INFORMATION Main, Sub 1 and Sub 2 indications are relevant in multiple outdoor unit configurations. Main outdoor unit is the unit to which F1‑F2 IN transmission line is connected. Main, Sub 1 and Sub 2 outdoor units can be identified by field setting 1‑00.
- Page 149 Troubleshooting To solve the error code INFORMATION It is recommended to perform the checks in the listed order. INFORMATION Main PCB checks L1‑N on connector X1A for sinus waveform each time crossing the zero‑line. Interval between each zero‑crossing is 10 miliseconds when the power supply is 50 Hz.
- Page 150 Troubleshooting Trigger Effect Reset Inverter PCB A3P detects Unit will stop operating. Power reset at outdoor DC voltage cannot reach unit. or maintain minimum 500 V DC. No zero cross is detected by main PCB through at least 10 seconds. Abnormal voltage drop is detected by DC voltage detection circuit.
- Page 151 Troubleshooting Trigger Effect Reset Inverter PCB A3P detects Unit will stop operating. Power reset at outdoor DC voltage cannot reach unit. or maintain minimum 500 V DC. No zero cross is detected by main PCB through at least 10 seconds. Abnormal voltage drop is detected by DC voltage detection circuit.
- Page 152 Troubleshooting Trigger Effect Reset Inverter PCB A3P detects Unit will stop operating. Power reset at outdoor DC voltage cannot reach unit. or maintain minimum 500 V DC. No zero cross is detected by main PCB through at least 10 seconds. Abnormal voltage drop is detected by DC voltage detection circuit.
- Page 153 Troubleshooting Trigger Effect Reset Inverter PCB A6P detects Unit will stop operating. Power reset at outdoor DC voltage cannot reach unit. or maintain minimum 500 V DC. No zero cross is detected by main PCB through at least 10 seconds. Abnormal voltage drop is detected by DC voltage detection circuit.
- Page 154 Troubleshooting Trigger Effect Reset Inverter PCB A6P detects Unit will stop operating. Power reset at outdoor DC voltage cannot reach unit. or maintain minimum 500 V DC. No zero cross is detected by main PCB through at least 10 seconds. Abnormal voltage drop is detected by DC voltage detection circuit.
- Page 155 Troubleshooting Trigger Effect Reset Inverter PCB A6P detects Unit will stop operating. Power reset at outdoor DC voltage cannot reach unit. or maintain minimum 500 V DC. No zero cross is detected by main PCB through at least 10 seconds. Abnormal voltage drop is detected by DC voltage detection circuit.
- Page 156 Troubleshooting 1 Check if communication between outdoor unit and indoor units is initialised. Check field setting 1‑10 for count of indoor units, see "6.9 Field settings" 455]. If less indoor units shown than expected, communication between 1 or more indoor unit(s) and outdoor unit is NOT correct. Check the F1‑F2 transmission line between the indoor unit and outdoor unit, see "4.1 Electrical circuit" [...
- Page 157 Troubleshooting 2.3.150 U3-04 – Test run ended abnormally Trigger Effect Reset Test run ended Unit will NOT operate. Restart test run. abnormally. To solve the error code INFORMATION It is recommended to perform the checks in the listed order. 1 Check for an indoor unit related error code. See "2.3.205 Indoor unit related error codes" [...
- Page 158 Troubleshooting Possible cause: Faulty or interruption in transmission line between indoor units and outdoor unit. 2 Check the F1‑F2 transmission line between the indoor units and outdoor unit. "4.1 Electrical circuit" [ 356]. Possible cause: Faulty or interruption in transmission line between indoor units and outdoor unit.
- Page 159 Troubleshooting 2.3.153 U3-07 – Transmission abnormality on test run Trigger Effect Reset Test run could NOT start Unit will NOT operate. Restart test run. or abort due to transmission issues. To solve the error code INFORMATION It is recommended to perform the checks in the listed order. 1 Check if communication between outdoor unit and indoor units is initialised.
- Page 160 Troubleshooting 2 Check the F1‑F2 transmission line between the indoor units and outdoor unit. "4.1 Electrical circuit" [ 356]. Possible cause: Faulty or interruption in transmission line between indoor units and outdoor unit. 3 Perform a test run from the outdoor unit. See installer reference guide for more information.
- Page 161 Troubleshooting 6 Set field setting 2‑5 of the outdoor unit to 1 to start the indoor units connected to that outdoor unit on forced fan operation, see "6.9 Field settings" 455]. If any of these indoor units is NOT operating, check the indoor unit(s) that have power black‑out or malfunctioning PCB.
- Page 162 Troubleshooting 6 Set field setting 2‑5 of the outdoor unit to 1 to start the indoor units connected to that outdoor unit on forced fan operation, see "6.9 Field settings" 455]. If any of these indoor units is NOT operating, check the indoor unit(s) that have power black‑out or malfunctioning PCB.
- Page 163 Troubleshooting Trigger Effect Reset Conflict in settings and Unit keeps running. Auto reset when correct configuration for settings apply on DTA104A61,62. DTA104A61,62. To solve the error code INFORMATION It is recommended to perform the checks in the listed order. 1 Check the Q1‑Q2 communication between the outdoor units. See "4.1 Electrical circuit" [ 356].
- Page 164 Troubleshooting Possible cause: No cool/heat master set when multiple units are wired to the same cool/heat zone. 2 If unified cool/heat selection is NOT present, set the DTA104A61,62 cool/heat setting to IND. 3 Check wiring and configuration of option DTA104A61, 62. See option handbook on Business Portal for more information.
- Page 165 Troubleshooting 2.3.161 U7-04 – Transmission abnormality between main outdoor unit and sub 2 outdoor unit Trigger Effect Reset Main PCB on main Forced stop. Auto reset. outdoor unit detects transmission abnormality on a multi installation. To solve the error code INFORMATION It is recommended to perform the checks in the listed order.
- Page 166 Troubleshooting 3 Perform a check of the main PCB of the sub 1 outdoor unit. See "3.11 Main PCB" [ 290]. Possible cause: Faulty main PCB of the sub 1 outdoor unit. 4 Perform a check of the main PCB of the sub 2 outdoor unit. See "3.11 ...
- Page 167 Troubleshooting To solve the error code INFORMATION It is recommended to perform the checks in the listed order. 1 Maximum 3 outdoor units are allowed in the installation. Change the installation if needed. 2 Check the Q1‑Q2 communication between the outdoor units. See "4.1 Electrical circuit" [ 356].
- Page 168 Troubleshooting 2.3.166 U7-24 – Duplication of address setting on multiple DTA104A61,62 installation Trigger Effect Reset Bad configuration of Forced stop. DTA104A61,62 power option DTA104A61,62 reset. PCB. To solve the error code INFORMATION It is recommended to perform the checks in the listed order. 1 Check wiring and configuration of option DTA104A61, 62.
- Page 169 Troubleshooting indoor unit(s) that have power black‑out or malfunctioning PCB. See service manual of the respective indoor unit for more information. Possible cause: Power black‑out or malfunctioning PCB on indoor unit(s). 5 Perform a check of the main PCB. See "3.11 Main PCB" [ 290].
- Page 170 Troubleshooting 2.3.170 UA-16 – Combination abnormality - More than 64 indoor units detected on same system Trigger Effect Reset Main PCB on main Forced stop. Automatic reset after re- outdoor unit detects initialization detects less more than 64 indoor units than 64 compatible on same system.
- Page 171 Troubleshooting 2.3.172 UA-18 – Combination abnormality - Outdoor unit not compatible with indoor units (refrigerant type) Trigger Effect Reset Main PCB on main Forced stop. Automatic reset after outdoor unit detects re‑initialization detects compatibility issues. compatible units. Outdoor unit NOT compatible with indoor units (refrigerant type).
- Page 172 Troubleshooting 2.3.174 UA-20 – Combination abnormality - Non-compatible outdoor unit in multi-combination Trigger Effect Reset Main PCB on main Forced stop. Automatic reset after outdoor unit detects re‑initialization detects compatibility issues. compatible units. Outdoor unit NOT compatible with multi combination. To solve the error code INFORMATION It is recommended to perform the checks in the listed order.
- Page 173 Troubleshooting 1 An only multi combination compatible type outdoor unit is detected on a single installation. Check databook for proper combination. Possible cause: REMQ Unit detected without multi combination. Install REMQ unit in a multi installation. 2 Check the Q1‑Q2 communication between the outdoor units. See "4.1 Electrical circuit" [ 356].
- Page 174 Troubleshooting 1 Locate the branch selector box by checking indoor unit remote controllers showing this error. Branch selector box that is connected to the indoor unit(s) that show this error is subject to further investigation. NOTICE Other indoor units in the circuit will show U9 Error. This means "There is an error in the circuit but it is not the unit that shows U9".
- Page 175 Troubleshooting INFORMATION If all procedures listed above have been performed and the problem is still present, contact the helpdesk. 2.3.180 UA-27 – Branch selector box Abnormality - no branch selector box detected Trigger Effect Reset No branch selector Alarm status ON. Auto recovery when box(es) detected by transmission is normal.
- Page 176 Troubleshooting 2.3.181 UA-28 – Branch selector box Abnormality - non-compatible branch selector box detected Trigger Effect Reset Non-compatible branch Alarm status ON. Auto recovery when selector box(es) detected transmission is normal. on F1-F2 wiring. To solve the error code INFORMATION It is recommended to perform the checks in the listed order.
- Page 177 Troubleshooting NOTICE Other indoor units in the circuit will show U9 Error. This means "There is an error in the circuit but it is not the unit that shows U9". 3 Check total index and total count for indoor units. See Data book on Business Portal for more information.
- Page 178 Troubleshooting Possible cause: REMQ-U unit installed as standalone unit. 4 Perform a check of the main PCB of the main outdoor unit. See "3.11 Main PCB" [ 290]. Possible cause: Faulty main PCB of the main outdoor unit. INFORMATION If all procedures listed above have been performed and the problem is still present, contact the helpdesk.
- Page 179 Troubleshooting INFORMATION If all procedures listed above have been performed and the problem is still present, contact the helpdesk. 2.3.187 UA-39 – Combination abnormality - Incorrect combination Trigger Effect Reset Main PCB on main Forced stop. Automatic reset after re- outdoor unit detects initialization detects compatibility issues.
- Page 180 Troubleshooting To solve the error code INFORMATION It is recommended to perform the checks in the listed order. 1 Check for improper combination of units. See the combination table in the Databook for more information. Change the installation with ONLY compatible type units.
- Page 181 Troubleshooting To solve the error code 1 Check dip switch settings for multi branch selector boxes. Possible cause: Wrong dipswitch setting. 2 Apply correct dip switch setting while branch selector box power is OFF. After correcting the dip switch, turn on the power and perform a communication reset on the outdoor unit PCB.
- Page 182 Troubleshooting Possible cause: Power black‑out or malfunctioning PCB on indoor unit(s). 5 Perform a check of the indoor unit pipe thermistors, see service manual of the respective indoor unit(s) for more information. Possible cause: Faulty indoor unit pipe thermistor. INFORMATION If all procedures listed above have been performed and the problem is still present, contact the helpdesk.
- Page 183 Troubleshooting 2.3.195 UF-11 – Wiring and piping mismatch - Excess connection ratio Trigger Effect Reset Minimum 1 indoor unit Forced stop. Perform test run. fails to perform cross pipe check during test run. To solve the error code INFORMATION It is recommended to perform the checks in the listed order. 1 Check that all stop valves of the refrigerant circuit are open.
- Page 184 Troubleshooting To solve the error code INFORMATION It is recommended to perform the checks in the listed order. 1 Set field setting 2‑5 of the outdoor unit to 1 to start the indoor units connected to that outdoor unit on forced fan operation, see "6.9 ...
- Page 185 Troubleshooting To solve the error code INFORMATION It is recommended to perform the checks in the listed order. 1 Set field setting 2‑5 of the outdoor unit to 1 to start the indoor units connected to that outdoor unit on forced fan operation, see "6.9 ...
- Page 186 Troubleshooting Possible cause: No input at field setting 2–14 (2–14 = 0) when field setting 2– 88 = 0. 2 Set field setting 2–88 to 0, see "6.9 Field settings" 455] to enable the outdoor unit to perform long test run to be able to judge refrigerant amount. 3 Check if test run was interrupted.
- Page 187 Troubleshooting Possible cause: Faulty ambient air thermistor. 2 Perform refrigerant leak check when the outdoor temperature is above 20°C. INFORMATION If all procedures listed above have been performed and the problem is still present, contact the helpdesk. 2.3.201 E-4 – Refrigerant leak check is interrupted - too low pressure is detected Trigger Effect Reset...
- Page 188 Troubleshooting 2.3.203 NG – Refrigerant leak check function detects refrigerant leak Trigger Effect Reset Result of refrigerant leak Result of last 3 refrigerant No reset required. check function deviates leak check function is more than 15% compared stored on Mode 1 items to result of test run.
- Page 189 Troubleshooting Error code Description A6-01 Fan motor locked A6-10 Fan motor overcurrent A6-11 Fan position detection error A7-00 No detection contact swing motor A8-01 Fan motor power supply voltage error A9-01 Expansion valve motor fault detection A9-02 Expansion valve bleeding AF-00 Float switch open during thermo OFF AH-03...
- Page 190 Troubleshooting Error code Description CJ-03 Air thermistor on Remote controller open circuit U4-01 Communication error between indoor unit and outdoor unit U9-01 Error on other indoor unit UA-13 Combination error: indoor unit – outdoor unit (refrigerant) UA-15 Outdoor unit not compatible with self‑cleaning panel UE-00 Communication error with central controller device REYQ8~20+REMQ5U7Y1B...
- Page 191 Troubleshooting 2.3.206 Overview of error codes Main Sub code Description code Main Sub 1 Sub 2 Multi Branch Selector Box PCB Abnormality Outdoor Unit Main PCB (A1P) Error Outdoor Unit Main PCB (A1P) Error 03 Current Leak Detection 08 Open Circuit on Earth Leakage Detection Core 05 Actuation of High Pressure Switch 06 High Pressure Error High Pressure Switch Reset Error...
-
Page 192: Discharge Temperature [˚C]
Troubleshooting Main Sub code Description code Main Sub 1 Sub 2 05 Compressor Discharge Temperature Too High 22 Compressor Body Temperature Too High Wet Operation Caution 06 Wet Alarm for Compressor (M1C) 07 Wet Alarm for Compressor (M2C) 12 Wet Operation Error for Compressor (M1C) 13 Wet Operation Error for Compressor (M2C) Indoor Unit Wet Operation Alarm Refrigerant Overcharge Detection by High Pressure Sensor S1NPH... - Page 193 Troubleshooting Main Sub code Description code Main Sub 1 Sub 2 03 Main Liquid Pipe Thermistor (R3T ) Malfunction 08 Liquid Temperature Thermistor (R5T) Malfunction 03 Heat Exchanger Upper Liquid Temperature Thermistor (R4T) Malfunction 10 Heat Exchanger Upper Lower Liquid Pipe Thermistor (R5T) Malfunction 13 Autocharge Thermistor (R14T) Malfunction 03 Subcool Heat Exchanger Gas Thermistor (R6T) Malfunction 10 Subcool Heat Exchanger Gas Thermistor (R6T) Out of Range...
- Page 194 Troubleshooting Main Sub code Description code Main Sub 1 Sub 2 07 Overcurrent on Inverter PCB (A3P) except start-up 13 Overcurrent on Inverter PCB (A6P) except start-up 06 Stall Prevention by Inverter PCB (A3P) 12 Stall Prevention by Inverter PCB (A6P) 15 Inverter PCB (A3P) Output Phase Abnormality 18 Inverter PCB (A6P) Output Phase Abnormality Transmission Abnormality Main PCB (A1P to A3P, A6P, A4P, A7P)
- Page 195 Troubleshooting Main Sub code Description code Main Sub 1 Sub 2 11 Inverter Circuit Power Supply Abnormality - Inverter PCB (A3P) Abnormal Voltage 12 Inverter Circuit Power Supply Abnormality - Inverter PCB (A3P) Phase Loss 13 Inverter Circuit Power Supply Abnormality - Inverter PCB (A3P) DC Circuit Not Charging 28 Inverter Circuit Power Supply Abnormality - Inverter PCB (A6P) Abnormal Voltage 29 Inverter Circuit Power Supply Abnormality - Inverter PCB (A6P) Phase Loss...
- Page 196 Troubleshooting Main Sub code Description code Main Sub 1 Sub 2 Combination Abnormality Combination Abnormality - Mix of R22, R407C, R410A Type Units Detected Combination Abnormality - More Than 64 Indoor Units Detected On Same System Combination Abnormality - Local Setting Abnormality Combination Abnormality - Outdoor Unit Not Compatible With Indoor Units (Refrigerant Type) Combination Abnormality - Local Set Alarm...
- Page 197 Troubleshooting Main Sub code Description code Main Sub 1 Sub 2 Refrigerant Leak Check cannot be performed - Outdoor Air Temperature is out of range. Refrigerant Leak Check is interrupted - Too Low Pressure is Detected Refrigerant Leak Check cannot be performed - A unit which is not compatible with Leak Detection Function is installed Refrigerant Leak Check Function detects refrigerant leak Refrigerant Leak Check Function detects no refrigerant leak...
- Page 198 Troubleshooting 2.4 Symptom based troubleshooting 2.4.1 Normal operating conditions Below items are a guideline on how to check normal operating conditions of the unit. Still, values are for reference ONLY and working conditions outside of this range do NOT necessarily address abnormalities and errors. Operating conditions are a result of several items to check together.
- Page 199 Troubleshooting ▪ The system does not start immediately after the power supply is turned on. Wait one minute until the micro computer is prepared for operation. 2.4.3 Symptom: Cool/Heat cannot be changed over ▪ When the display shows (change-over under centralized control), it shows that this is a slave user interface.
- Page 200 Troubleshooting 2.4.9 Symptom: The user interface reads "U4" or "U5" and stops, but then restarts after a few minutes This is because the user interface is intercepting noise from electric appliances other than the air conditioner. The noise prevents communication between the units, causing them to stop.
- Page 201 Troubleshooting 2.4.16 Symptom: The display shows "88" This is the case immediately after the main power supply switch is turned on and means that the user interface is in normal condition. This continues for 1 minute. 2.4.17 Symptom: The compressor in the outdoor unit does not stop after a short heating operation This is to prevent refrigerant from remaining in the compressor.
-
Page 202: Normal
Troubleshooting 2.4.20 Symptom: Unit operation problems Symptom Possible failure Root cause Repair Unit(s) do not operate Unit(s) do not operate Missing or abnormal power Check Power Supply. See supply (reverse phase, "4.1 Electrical missing phase, abnormal circuit" [ 356] voltage…) to the outdoor unit Indoor unit(s) do not Check power supply to the... - Page 203 Troubleshooting Symptom Possible failure Root cause Repair Operation stops and then Outdoor unit performing Retry mode triggered by an Check field setting 1-23, restarts after 3 minutes. 'retry' operation error 1-24, 1-25 for latest retry content. See "6.9 Field settings" [ 455]. Refer to error code found for further troubleshooting.
- Page 204 Troubleshooting Symptom Possible failure Root cause Repair Disturbing operation noise Faulty Inverter PCB output Instable output voltage Check Power Supply, see and vibration from inverter PCB to "4.1 Electrical compressor(s) circuit" [ 356]. Restore the power supply in conform with the requirements. Check inverter PCB(s) and perform a power transistor check, see...
- Page 205 Troubleshooting Mode: Heating Low pressure High pressure Running current Dirty air filters Higher than normal Higher than normal Higher than normal Air by-pass between air Higher than normal Higher than normal Higher than normal inlet/outlet @indoor unit Non condensables (i.e air) Higher than normal Higher than normal Higher than normal...
- Page 206 Components 3 Components 3.1 4-way valve 3.1.1 Checking procedures INFORMATION It is recommended to perform the checks in the listed order. To perform a mechanical check of the 4-way valve Prerequisite: Stop the unit operation via the central controller. Prerequisite: Turn OFF the respective circuit breaker. Prerequisite: Remove the required plate work, see "3.15 Plate work" [...
- Page 207 Components Is the measured value correct? Action Continue with the next step. Replace the 4‑way valve coil, see "3.1.2 Repair procedures" [ 211]. When outdoor temperature is mild and unit can switch between heating and cooling INFORMATION This procedure is ONLY possible when the outdoor temperature is within the temperature range for both Heating and Cooling operation mode.
- Page 208 Components When outdoor temperature does not allow the unit to run in cooling or heating mode INFORMATION Follow this procedure when the outdoor temperature is outside the temperature range for one of the operation modes (Heating or Cooling). The unit CANNOT operate in the mode for which the outdoor temperature is outside its temperature range.
- Page 209 Components Y4S valve: ▪ Cooling mode* ▪ Oil Return operation in Cooling ▪ Defrost/Oil return operation in Heating ▪ Oil Return operation in Simultaneous Cooling/Heating * Y4S may also be ON if low load condition Y5S valve: ▪ Cooling mode ▪...
- Page 210 Components 4 Connect a manifold to one of the service ports of the refrigerant circuit and check the pressure (suction, discharge). Compare with normal operation conditions of the unit. Refrigerant pressure correct? Action Replace the body of the 4‑way valve, "3.1.2 Repair procedures" [ 211].
- Page 211 Components 9 Connect a manifold to one of the service ports of the refrigerant circuit and check the pressure (suction, discharge). Compare with normal operation conditions of the unit. Refrigerant pressure correct? Action Replace the body of the 4‑way valve, "3.1.2 Repair procedures" [ 211].
- Page 212 Components INFORMATION The cutting locations of the 4‑way valve pipes can differ due to the pipe cutter needing sufficient space to go around the pipes. It is up to the technician to define the best cutting locations. If any refrigerant pipes are cut, these need to be replaced during installation of the 4‑way valve body.
- Page 213 Components a 4‑way valve pipe b 4‑way valve c Putty d Insulation 5 Install the putty (if available) and the insulation (if available) in their original location. 6 Install the 4‑way valve coil on the 4‑way valve body, see "3.1.2 Repair procedures" [ 211].
- Page 214 Components 3.2 Branch selector box PCB 3.2.1 Checking procedures INFORMATION It is recommended to perform the checks in the listed order. To perform a power check of the branch selector box PCB Prerequisite: Stop the unit operation via the central controller. Prerequisite: Turn OFF the respective circuit breaker.
- Page 215 Components 3 Check the power supply to the unit, see "4.1.1 Checking procedures" [ 356]. Does the Unit receive power? Action Correct the wiring from the main power supply terminal to the Branch selector box PCB, see "4.1.2 Repair procedures" [ 361]. Adjust the power supply to the unit, see "4.1.2 Repair procedures" [ 361].
- Page 216 Components To check the wiring of the branch selector box PCB Prerequisite: First perform all earlier checks of the Branch selector box PCB, see "3.2.1 Checking procedures" [ 214]. Prerequisite: Stop the unit operation via the central controller. Prerequisite: Turn OFF the respective circuit breaker. 1 Check that all wires are properly connected and that all connectors are fully plugged‑in.
- Page 217 Components BS4~16Q-A a Fuse Blown fuse on the Branch selector box Action PCB? Replace the blown fuse, see "3.20.2 Repair procedures" [ 345]. Return to "3.20.1 Checking procedures" [ 342] of the Branch selector box PCB and continue with the next procedure. To check the DIP switches of the branch selector box PCB 1 To check the correct position of the DIP switches, refer to the Installation manual.
- Page 218 Components INFORMATION Mark the wires before removal from the wire terminals. 3 Disconnect all connectors from the Branch selector box PCB. INFORMATION The step below is only applicable for branch selector boxes BS4~16Q-A PCB. 4 Disconnect bridged connector X15A. 5 Carefully pull the Branch selector box PCB at the side and unlatch the PCB supports one by one using a small pair of pliers.
- Page 219 Components BS1Q-A a PCB support BS4~16Q-A a PCB support 3 Connect all connectors to the Branch selector box PCB. 4 Connect the transmission wiring to the F1/F2 terminals. INFORMATION The step below is only applicable for branch selector boxes BS4~16Q-A PCB. 5 Install the bridged connector X15A.
- Page 220 Components 1 Remove the fuse from the PCB. BS1Q-A a Fuse BS4~16Q-A a Fuse 2 To install a fuse on the branch selector box PCB, see "3.2.2 Repair procedures" [ 217]. To install a fuse on the branch selector box PCB WARNING For continued protection against risk of fire, replace only with same type and rating of fuse.
- Page 221 Components BS1Q-A a Fuse BS4~16Q-A a Fuse Is the problem solved? Action No further actions required. Return to "3.2.1 Checking procedures" [ 214] of the Branch selector box PCB and continue with the next procedure. 3.3 Compressor 3.3.1 Checking procedures INFORMATION It is recommended to perform the checks in the listed order. To perform an auditive check of the compressor Prerequisite: First perform a power transistor check of the inverter PCB, see "3.10 Inverter...
- Page 222 Components 1 Open the compressor insulation. 2 Turn ON the power using the respective circuit breaker. 3 Start the unit operation via the central controller. 4 Listen to the compressor when it tries to operate. Judge if a mechanical lock is present.
- Page 223 Components INFORMATION The compressor dampers may look different. Compressor dampers and piping are in Action a good condition? Perform an electrical check of the compressor, see "3.3.1 Checking procedures" [ 221]. Replace the compressor, see "3.3.2 Repair procedures" [ 227]. To perform an electrical check of the compressor 1 First perform a mechanical check of the compressor, see "3.3.1 ...
- Page 224 Components Faston connector CAUTION Before measuring the compressor motor windings resistance, measure the resistance of the multimeter probes by holding the probes against each other. If the measured resistance is NOT 0 Ώ, this value MUST be substracted from the measured winding resistance.
- Page 225 Components Faston connector 7 Install the compressor insulation. 8 Turn ON the power using the respective circuit breaker. 9 Start the unit operation via the central controller. 10 Once the compressor operates, measure the U-V-W inverter voltages. All measurements MUST be the same. Inverter voltage measurements are Action correct?
- Page 226 Components Compressor wire terminals cover 3 Disconnect the Faston connectors from the compressor wire terminals U, V and W. INFORMATION Note the position of the Faston connectors on the compressor wire terminals to allow correct connection during installation. Faston connector 4 Set the Megger voltage to 500 V DC or 1000 V DC.
- Page 227 Components 3.3.2 Repair procedures To remove the transportation stay (only for 14+16 HP) The transportation stays for protecting the unit during transport must be removed. Proceed as shown in the figure and procedure below. NOTICE If the unit is operated with the transportation stay attached, abnormal vibration or noise may be generated.
- Page 228 Components (12.3 N·m) (12.3 N·m) d e c To remove the compressor insulation Prerequisite: Stop the unit operation via the central controller. Prerequisite: Turn OFF the respective circuit breaker. Prerequisite: Remove the required plate work, see "3.15 Plate work" [ 315]. 1 Detach all the strips (a). a Strip 2 Detach the strip (b) of the top jacket (c).
- Page 229 Components d Body jacket e Compressor 5 To install the compressor insulation, see "3.3.2 Repair procedures" [ 227]. To remove the compressor Prerequisite: Stop the unit operation via the central controller. Prerequisite: Turn OFF the respective circuit breaker. Prerequisite: Remove the required plate work, see "3.15 Plate work" [ 315].
- Page 230 Components Faston connector Remove the crankcase heater, see "To remove the crankcase heater" [ 236]. 4 Cut the compressor pipes (below the soldered joint) using a pipe cutter. Compressor pipe 5 Remove the all the nuts and remove the compressor from the unit. Compressor Damper 6 Remove the 3 dampers from the compressor.
- Page 231 Components INFORMATION The compressor dampers may look different. 7 Remove the bushings and keep them for re-use. 8 To install the compressor, see "3.3.2 Repair procedures" [ 227]. To install the compressor 1 Check the state of the dampers. Replace if worn. 2 Install the 3 dampers in the correct location on the unit.
- Page 232 Components Compressor pipe CAUTION Overheating the compressor pipes (and the oil inside the compressor pipes) will damage or destroy the compressor. 6 After soldering is done, stop the nitrogen supply after the component has cooled‑down. 7 Connect the Faston connectors to the compressor wire terminals U, V and W Faston connector 8 Install the cover of the compressor wire terminals.
- Page 233 Components Compressor wire terminals cover 9 Add refrigerant refrigerant circuit, "4.2.2 Repair procedures" [ 368]. Install the crankcase heater, see "To install the crankcase heater" [ 237] 10 Install the compressor insulation, see "3.3.2 Repair procedures" [ 227]. Is the problem solved? Action No further actions required. Return to the troubleshooting of the specific error and continue with the next procedure.
- Page 234 Components a Strip 4 Attach all the strips (a). 3.4 Crankcase heater 3.4.1 Checking procedures INFORMATION It is recommended to perform the checks in the listed order. To perform an electrical check of the crankcase heater Prerequisite: Stop the unit operation via the central controller. Prerequisite: Turn OFF the respective circuit breaker.
- Page 235 Components 4 Remove the crankcase heater from the compressor and wait for 5 minutes (until the heater element reaches ambient temperature). 5 Disconnect the crankcase heater connector from the appropriate PCB. 6 Measure the resistance on the crankcase heater connector. Result: The resistance MUST be 1.8 kΩ±10%.
- Page 236 Components 3 Connect the Megger ground test lead directly to the crankcase heater ground wire. CAUTION Do NOT connect the Megger ground test lead to any other ground wire. 4 Measure the insulation resistance between the phase and ground wire. The measured insulation resistance MUST be >100 MΩ.
- Page 237 Components To install the crankcase heater 1 Install the crankcase heater on the compressor. 2 Attach the spring to fix the crankcase heater. Spring Crankcase heater 3 Route the crankcase heater harness towards the switch box. 4 Connect the crankcase heater connector to the appropriate PCB. WARNING When reconnecting a connector to the PCB, do NOT apply force, as this may damage the connector or connector pins of the PCB.
- Page 238 Components 3 Check that pins 1 and 4 on connector X101A are bridged. Result: If the pins are NOT bridged, install the bridge. Connector X101A 4 Check the wiring from pins 2 and 3 of connector X101A to the current sensor. 5 Disconnect the current sensor connector from the connector X101A on the main PCB and measure the resistance between pins 2 and 3 of the current sensor connector.
- Page 239 Components b Tie wrap c Ferrite core d Screw connections e Power wiring 2 Remove the necessary tie wraps from the wiring of the current sensor and the power wiring. 3 Remove the ferrite core. 4 Loosen the screw connections to disconnect the power wiring. 5 Slide the current sensor on the power wiring and remove the current sensor.
- Page 240 Components 3.6 E-bridge 3.6.1 Checking procedures To perform a functional check of the E-bridge NOTICE Below check procedure will only be relevant if indoor units are in cooling mode with high load condition (Y4S and Y5S MUST be OFF). Prerequisite: Stop the unit operation via the central controller. Prerequisite: Turn OFF the respective circuit breaker.
- Page 241 Components INFORMATION If non-return valve a is blocked: ▪ Discharge pressure will increase. ▪ Liquid pressure will drop ▪ R4T and R5T temperatures will rise. ▪ R3T and to R7T temperatures will be drastically lower compared to R4T and R5T. Is the non-retune valve a blocked Action Replace the non-return valve a, see...
- Page 242 Components INFORMATION If non-return valve d is blocked: ▪ Liquid pressure and also discharge pressure will increase. ▪ Suction pressure will drop ▪ R3T and R7T temperatures will be drastically higher compared to R5T and R5T. Is the non-return valve d blocked? Action Replace the non-return valve d, see "3.6.2 Repair...
- Page 243 Components c Cut here d Cut here e Cut here f Cut above non‑return valve block g Cut below non‑return valve block 2 Remove the complete E-Bridge from the unit so that you have easier access to non‑return valves. 3 Depending on the non‑return valve block you need to replace, use a pipe cutter to cut the pipe above and below the appropriate non‑return valve block.
- Page 244 Components 4 After soldering is done, stop the nitrogen supply after the component has cooled‑down. 5 Install the E‑Bridge to its location on the outdoor unit. 6 Supply nitrogen to the refrigerant circuit. The nitrogen pressure MUST NOT exceed 0.02 MPa. 7 Wrap a wet rag around the E‑Bridge and solder the refrigerant pipes.
- Page 245 Components Does the expansion valve open? Action Perform an electrical check of the expansion valve, see "Checking procedures" [ 244]. Replace the expansion valve body, see "Repair procedures" [ 247]. To perform an electrical check of the expansion valve 1 First perform a mechanical check of the expansion valve, see "Checking procedures" [ 244].
- Page 246 Components Connector Is the measured resistance correct? Action Perform an operation check of the expansion valve, see "Checking procedures" [ 244]. Replace the expansion valve coil, "Repair procedures" [ 247]. To perform an operation check of the expansion valve Prerequisite: First perform an electrical check of the expansion valve, see "Checking procedures" [ 244].
- Page 247 Components Phase Energizing status Ф1 Ф2 Ф3 Ф4 ▪ Opening sequence for Y2E andY5E: Valve closing: 8 > 7 > 6 > 5 > 4 > 3 > 2 > 1 Valve opening: 1 > 2 > 3 > 4 > 5 > 6 > 7 > 8 Phase Energizing status Ф1...
- Page 248 Components a Tie strap b Expansion valve cover c Expansion valve motor 3 Pull the expansion valve motor to remove it from the expansion valve body. INFORMATION It may be needed to turn the expansion valve coil 1/8 turn counter clockwise to unlock it.
- Page 249 Components 4 Supply nitrogen to the refrigerant circuit. The nitrogen pressure MUST NOT exceed 0.02 MPa. 5 Heat the ends of the expansion valve pipes using an oxygen acetylene torch and remove the expansion valve pipe ends. 6 Stop the nitrogen supply when the piping has cooled down. 7 To install the expansion valve body, see "Repair procedures" [...
- Page 250 Components a Expansion valve motor b Pipe 2 Route the expansion valve motor harness towards the appropriate PCB. 3 Connect the expansion valve motor connector to the appropriate PCB. WARNING When reconnecting a connector to the PCB, do NOT apply force, as this may damage the connector or connector pins of the PCB.
- Page 251 Components 5 Install the insulation cap on the expansion valve motor (if applicable). Is the problem solved? Action No further actions required. Return to "Checking procedures" [ 244] of the expansion valve and continue with the next procedure. To install the expansion valve motor with bracket 1 Install the expansion valve motor on the expansion valve body.
- Page 252 Components 3.7.2 Branch selector box expansion valve Checking procedures INFORMATION It is recommended to perform the checks in the listed order. To perform a mechanical check of the expansion valve Prerequisite: Power OFF the unit for 3 minutes. Then turn ON the unit and listen to the expansion valve assembly.
- Page 253 Components BS4~16Q-A Suction gas X21A 150 ±15 Ω ✔ ✔ ✔ ✔ ✔ ✔ pipe HP/LP gas X22A 150 ±15 Ω pipe Subcool X23A 46 ±3 Ω Suction gas X24A 150 ±15 Ω ✔ ✔ ✔ ✔ ✔ ✔ pipe HP/LP gas X25A 150 ±15 Ω pipe Subcool X26A...
- Page 254 Components Suction gas Y19E X27A 150 ±15 Ω ✔ ✔ ✔ ✔ pipe HP/LP gas Y20E X28A 150 ±15 Ω pipe Subcool Y21E X29A 46 ±3 Ω Suction gas Y22E X30A 150 ±15 Ω ✔ ✔ ✔ ✔ pipe HP/LP gas Y23E X31A 150 ±15 Ω pipe Subcool Y24E...
- Page 255 Components Suction gas Y37E X21A 150 ±15 Ω ✔ pipe HP/LP gas Y38E X22A 150 ±15 Ω pipe Subcool Y39E X23A 46 ±3 Ω Suction gas Y40E X24A 150 ±15 Ω ✔ pipe HP/LP gas Y41E X25A 150 ±15 Ω pipe Subcool Y42E X26A 46 ±3 Ω Suction gas Y43E X27A...
- Page 256 Components Is the measured resistance correct? Action Perform an operation check of the expansion valve, see "Checking procedures" [ 244]. Replace the expansion valve coil, "Repair procedures" [ 247]. To perform an operation check of the expansion valve Prerequisite: First perform an electrical check of the expansion valve, see "Checking procedures" [ 252].
- Page 257 Components ▪ Opening sequence for subcool expansion valves: Valve closing: 8 > 7 > 6 > 5 > 4 > 3 > 2 > 1 Valve opening: 1 > 2 > 3 > 4 > 5 > 6 > 7 > 8 Phase Energizing status Ф1...
- Page 258 Components a Subcool expansion valve motor b Gas pipe expansion valve motor c HP/LP gas pipe expansion valve motor 2 Pull the expansion valve coil to remove it from the expansion valve body. INFORMATION It may be needed to turn the expansion valve coil 1/8 turn counter clockwise to unlock it.
- Page 259 Components 4 Fix the expansion valve coil harness using new tie straps. 5 Install the insulation cap on the expansion valve motor (if applicable). Is the problem solved? Action No further actions required. Return to "Checking procedures" [ 252] of the expansion valve and continue with the next procedure.
- Page 260 Components Is the measured output voltage on the Action inverter PCB correct? Correct the wiring between the fan inverter PCB and the inverter PCB, see "4.1.2 Repair procedures" [ 361]. Perform a check of the inverter PCB, "3.10.1 Checking procedures" [ 274]. To check the HAP LED of the fan inverter PCB 1 First perform a power check of the fan inverter PCB, see "Checking procedures" [...
- Page 261 Components Is the correct spare part for the fan Action inverter PCB installed? Replace the fan inverter PCB, see "Repair procedures" [ 263]. To check the wiring of the fan inverter PCB Prerequisite: First perform all earlier checks of the fan inverter PCB, see "Checking procedures" [ 259].
- Page 262 Components Blown fuse on the fan inverter PCB? Action Return to "Checking procedures" [ 259] of the fan inverter PCB and continue with the next procedure. To perform a power transistor check of the fan inverter PCB Prerequisite: Stop the unit operation via the central controller. Prerequisite: Turn OFF the respective circuit breaker.
- Page 263 Components Is the problem solved? Action No further actions required. Return to the troubleshooting of the specific error and continue with the next procedure. Repair procedures To remove the fan inverter PCB Prerequisite: Stop the unit operation via the central controller. Prerequisite: Turn OFF the respective circuit breaker.
- Page 264 Components INFORMATION Bridge connector X4A is not supplied with the spare part PCB. Transfer the bridge connector X4A 5 Loosen and remove the 4 screws that fix the fan inverter PCB assembly. 6 Loosen and remove the 2 screws that fix the fan inverter PCB to the heat sink plate.
- Page 265 Components a Cable clamp b Fan connector X1A 8 Connect fan connector X1A. 9 Reinstall the cable clamp. Is the problem solved? Action No further actions required. Return to "Checking procedures" [ 259] of the fan inverter PCB and continue with the next procedure.
- Page 266 Components a Pin 1 b Pin 3 Is the measured voltage on the PCB Action correct? Return to "Checking procedures" [ 265] procedures of the PCB and continue with the next procedure. Continue with the next step. 3 Measure the output voltage on connector X601A on the inverter PCB. Result: The measured voltage MUST be 18 V DC.
- Page 267 Components Does the HAP LED blink in regular Action intervals (approximately 1 Hz)? Replace the fan inverter PCB, see "Repair procedures" [ 269]. To check if the correct spare part is installed Prerequisite: First perform all earlier checks of the fan inverter PCB, see "Checking procedures" [ 265].
- Page 268 Components a Fuse Blown fuse on the fan inverter PCB? Action Replace the fan inverter PCB, see "Repair procedures" [ 269]. Return to "Checking procedures" [ 265] of the fan inverter PCB and continue with the next procedure. To perform a power transistor check of the fan inverter PCB Prerequisite: Stop the unit operation via the central controller.
- Page 269 Components Fan inverter PCB A4P Fan inverter PCB A7P c / c' Connector P11 d / d' Connector N11 e / e' Connector X1A, pin U f / f' Connector X1A, pin V g / g' Connector X1A, pin W X1A, pin U X1A, pin V 0,45...
- Page 270 Components 2 Disconnect all other connectors from the fan inverter PCB. INFORMATION Bridge connector X4A is not supplied with the spare part PCB. Transfer the bridge connector X4A 3 Loosen and remove the 2 screws that fix the fan inverter PCB to the heat sink plate.
- Page 271 Components Prerequisite: Turn OFF the respective circuit breaker. Prerequisite: Remove the required plate work, see "3.15 Plate work" [ 315]. 1 Recuperate the refrigerant from the refrigerant circuit, see "4.2.2 Repair procedures" [ 368]. 2 Fill the refrigerant circuit with nitrogen until pressurized just below operating pressure of the high pressure switch.
- Page 272 Components 8 Measure the resistance between the pins 1‑2 of the high pressure switch connector. Result: The switch MUST be open. 9 Lower the pressure of the nitrogen in the refrigerant circuit just below reset pressure of the high pressure switch. 10 Measure the resistance between the pins 1‑2 of the high pressure switch connector.
- Page 273 Components 6 Remove the high pressure switch from the unit. 7 Supply nitrogen to the refrigerant circuit. The nitrogen pressure MUST NOT exceed 0.02 MPa. 8 Heat the end of the high pressure switch pipe using an oxygen acetylene torch and remove the high pressure switch pipe end. 9 Stop the nitrogen supply when the piping has cooled down.
- Page 274 Components 3.10 Inverter PCB 3.10.1 Checking procedures INFORMATION It is recommended to perform the checks in the listed order. To perform a power check of the inverter PCB Prerequisite: Stop the unit operation via the central controller. Prerequisite: Turn OFF the respective circuit breaker. Prerequisite: Remove the required plate work, see "3.15 Plate work" [...
- Page 275 Components ▪ Turn OFF and then ON the power to the unit, ▪ Turn OFF the power supply to the main PCB by unplugging and then plugging the connector X1A; ▪ Create a forced thermo‑ON condition by setting field setting 2–6 = 1 (forced thermo‑ON indoor) or field setting 2–20 = 1 (manual refrigerant charge).
- Page 276 Components 2 Check that all wires are properly connected and that all connectors are fully plugged‑in. 3 Check that no connectors or wires are damaged. 4 Check that the wiring corresponds with the wiring diagram, see "6.2 Wiring diagram" [ 385]. INFORMATION Correct the wiring as needed.
- Page 277 Components a Connector X3A b Power terminal assembly For double fan units 3 Measure the voltage on the rectifier voltage check connector (a) X5A to check inverter PCB A3P (c). Result: The measured voltage should be approximately 560 V DC. 4 Measure the voltage on the rectifier voltage check connector (b) X6A to check inverter PCB A6P (d).
- Page 278 Components 1 Open the compressor insulation. DANGER: RISK OF ELECTROCUTION Confirm the rectifier voltage is below 10 V DC before proceeding, see "To check the rectifier voltage" [ 356]. 2 Remove the cover of the compressor wire terminals. Compressor wire terminals cover 3 Disconnect the Faston connectors from the compressor wire terminals U, V and W.
- Page 279 Components a Wire terminal U b Wire terminal V c Wire terminal W d Wire terminal L1B e Wire terminal L2B f Wire terminal L3B g Wire terminal P1 h Faston connector terminal N31 i Measuring point P 4 Check the diode module and the power module in reference with the tables below.
- Page 280 Components Are the test results OK? Action Diode module and power module are OK. Perform a power transistor check of the inverter PCB, see "3.10.1 Checking procedures" [ 274]. Replace the inverter PCB, see "3.10.2 Repair procedures" [ 282]. To perform a power transistor check of the inverter PCB Prerequisite: First check the rectifier voltage of the inverter PCB, see "3.10.1 Checking procedures" [...
- Page 281 Components Faston connector CAUTION Power transistor check mode is activated ONLY on the main PCB of the main outdoor unit. When there is more than 1 compressor in the unit or if the system is a multi‑combination, all inverter PCB’s will perform a power transistor check. All compressor wiring of all available compressors MUST be disconnected and safely secured before power transistor check mode is activated.
- Page 282 Components 9 Turn OFF the unit via the circuit breaker. DANGER: RISK OF ELECTROCUTION Confirm the rectifier voltage is below 10 V DC before proceeding, see "To check the rectifier voltage" [ 356]. 10 Disconnect the Inverter Analyzer from the Faston connectors. 11 Connect the compressor wiring to the wire terminals U, V and W of the compressor.
- Page 283 Components a Screw b Power terminal assembly c Screw d Cable clamp e Connectors X1A and X2A f Wiring g Tie wrap 3 Loosen and remove the 2 screws that fix the cable clamps. 4 Unplug the fan connectors X1A and X2A. 5 Unplug the wiring from the main board.
- Page 284 Components 13 Loosen and remove the 2 screws that fix the heat pipe. 14 Loosen and remove the screw that fixes the ground wire. 15 Using a flat screwdriver, separate the heat pipe from the heat sink. a Flat screwdriver b Heat pipe c Heat sink d Screw...
- Page 285 Components 23 Remove the 4 screws that fix the compressor inverter PCB. 24 Disconnect all wiring from the compressor inverter PCB. 25 The compressor inverter PCB is fixed to the heat sink element with screws, through the screw holes on the PCB. Remove the screws to remove the PCB from the heat sink element.
- Page 286 Components e Screw f Heat sink 31 Remove the screws that fix the inverter PCB to the heat sink. WARNING Thermal grease is applied to the heat sinks. Use gloves when separating the heat sinks from the inverter boards. 32 Unlatch the PCB supports one by one using a small pair of pliers. 33 Remove the inverter PCB.
- Page 287 Components a Power terminal assembly b Screw c Heat sink d Inverter PCB e Compressor cable f Screw g Screw 6 Put the compressor inverter PCB assembly (d) in vertical position. 7 Install the 4 screws (b) that fix the heat sink (c). 8 Turn the power terminal assembly (a) to the right.
- Page 288 Components a Screw b Cable clamp c Tie wrap d Tie wrap e Cables f Cables g Screw h Compressor inverter assembly i Screw j Thermistor clamp k Screw l Heat pipe m Ground wire n Screw 13 Install the screw (n) to fix the ground wire (m). 14 Install the 2 screws (k) to fix the heat pipe (l).
- Page 289 Components 23 Install the screws (a) to fix the power terminal assembly (b). For double fan units 24 Clean the heat sink surface and apply a thin layer of heat sink compound to the heat sink surface. 25 Install the inverter PCB on its correct location. 26 Latch the PCB supports (c) to fix the PCB.
- Page 290 Components 3.11 Main PCB 3.11.1 Checking procedures INFORMATION It is recommended to perform the checks in the listed order. To perform a power check of the main PCB Prerequisite: Stop the unit operation via the central controller. Prerequisite: Turn OFF the respective circuit breaker. Prerequisite: Remove the required plate work, see "3.15 Plate work" [...
- Page 291 Components Connector X37A Is the measurement correct? Action Return to "3.11.1 Checking procedures" [ 290] of the main PCB and continue with the next procedure. Replace the main PCB, see "3.11.2 Repair procedures" [ 293]. To check the HAP LED of the main PCB Prerequisite: First perform a power check of the main PCB, see "3.11.1 Checking procedures" [...
- Page 292 Components Is the correct spare part for the main Action PCB installed? Return to "3.11.1 Checking procedures" [ 290] of the main PCB and continue with the next procedure. Replace the main PCB, "3.11.2 Repair procedures" [ 293]. To check the wiring of the main PCB Prerequisite: First perform all earlier checks of the main PCB, see "3.11.1 Checking procedures" [...
- Page 293 Components Any blown fuses on the main PCB? Action Return to "3.11.1 Checking procedures" [ 290] of the main PCB and continue with the next procedure. To check the varistors of the main PCB Prerequisite: First perform all earlier checks of the main PCB, see "3.11.1 Checking procedures" [ 290].
- Page 294 Components Prerequisite: Turn OFF the respective circuit breaker. 1 Remove the required plate work, see "3.15 Plate work" [ 315]. Cable clamp 2 Unlatch the cable clamp at the top right corner of the main PCB to facilitate the removal of the PCB. Connector Wire terminal PCB support...
- Page 295 Components Connector Wire terminal PCB support 3 Connect all connectors to the main PCB assembly. Connector X40A Connector X41A 4 Pay attention to connectors X40A and X41A when re-connecting wiring: the black/white wiring should be connected to X40A and the red/black wiring should be connected to X41A.
- Page 296 Components To set the DIP switches of the spare part main PCB If a spare part main PCB is installed in your unit, the DIP switches need to be set. By default (factory settings) all switches are in off position. ON position OFF position Shows the position of a switch...
- Page 297 Components To remove a fuse of the main PCB Prerequisite: Stop the unit operation via the central controller. Prerequisite: Turn OFF the respective circuit breaker. Prerequisite: Remove the required plate work, see "3.15 Plate work" [ 315]. 1 Remove the fuse from the PCB. Fuse 2 To install the fuse on the main PCB, see "3.11.2 Repair...
- Page 298 Components 3.12 Noise filter PCB 3.12.1 Checking procedures INFORMATION It is recommended to perform the checks in the listed order. To perform a power check of the noise filter PCB Prerequisite: Stop the unit operation via the central controller. Prerequisite: Turn OFF the respective circuit breaker. Prerequisite: Remove the required plate work, see "3.15 Plate work" [...
- Page 299 Components 1 Visit your local spare parts webbank. 2 Enter the model name of your unit and check if the installed spare part number corresponds with the spare part number indicated in the webbank. Is the correct spare part for the noise Action filter PCB installed? Return to...
- Page 300 Components Is the output voltage on the noise filter Action PCB correct? Return to "3.12.1 Checking procedures" [ 298] of the noise filter PCB and continue with the next procedure. Replace the noise filter PCB, see "3.12.2 Repair procedures" [ 301]. To check the fuses of the noise filter PCB Prerequisite: First perform all earlier checks of the noise filter PCB, see "3.12.1 Checking procedures" [...
- Page 301 Components Is the problem solved? Action Return to the troubleshooting of the specific error and continue with the next procedure. 3.12.2 Repair procedures To correct the wiring from the main power supply terminal to the noise filter PCB Prerequisite: Stop the unit operation via the central controller. Prerequisite: Turn OFF the respective circuit breaker.
- Page 302 Components To install the noise filter PCB 1 Install the noise filter PCB on its correct location. 2 Latch the PCB supports to fix the noise filter PCB. Connector PCB supports 3 Connect all the wires to the connectors of the noise filter PCB. INFORMATION The connectors on the PCB can be screw- or Faston-type, depending on the model.
- Page 303 Components To perform an electrical check of the oil return valve Prerequisite: Stop the unit operation via the central controller. Prerequisite: Turn OFF the respective circuit breaker. Prerequisite: Remove the required plate work, see "3.15 Plate work" [ 315]. 1 Unplug the oil return valve connector from the appropriate PCB. 2 Measure the resistance of the oil return valve coil.
- Page 304 Components For the Y11S and Y12S valves 3 Connect the service monitoring tool to the unit and check the pressure difference between the high and low pressure. Once the pressure difference between the high and low pressure exceeds 0,3 MPa and the compressor is running, Y11S and Y12S are energized.
- Page 305 Components To remove the oil return valve body Prerequisite: Recuperate the refrigerant from the refrigerant circuit, see "4.2.2 Repair procedures" [ 368]. 1 Remove the oil return valve coil from the oil return valve body, see "3.13.2 Repair procedures" [ 304]. 2 Cut the oil return valve pipes using a pipe cutter. Oil return valve pipe Oil return valve body 3 Remove the oil return valve.
- Page 306 Components Oil return valve pipe Oil return valve body 5 Install the insulation in the original location. 6 Install the oil return valve coil on the oil return valve body, see "3.13.2 Repair procedures" [ 304]. 7 Add refrigerant refrigerant circuit, "4.2.2 Repair procedures" [ 368].
- Page 307 Components 3.14 Outdoor unit fan motor 3.14.1 Single fan outdoor unit Checking procedures INFORMATION It is recommended to perform the checks in the listed order. To perform a mechanical check of the propeller fan blade assembly Prerequisite: First perform a power transistor check of the fan inverter PCB, see "3.8 Fan inverter PCB" [ 259].
- Page 308 Components 3 Activate Cooling or Heating operation via the Cool/Heat master user interface. 4 Check the functioning of the outdoor unit fan. Outdoor unit fan … Action Rotates continuously (without DC fan motor assembly is OK. Return to interruption) the troubleshooting of the specific error and continue with the next procedure.
- Page 309 Components Prerequisite: Turn OFF the respective circuit breaker. 1 Remove the required plate work, see "3.15 Plate work" [ 315]. 2 Loosen and remove the screw using an Allen key. 3 Remove the axle cover. 4 Pull the propeller fan blade from the fan motor axle. Screw Allen key Axle cover...
- Page 310 Components Fan motor cable Tie wrap Screw Fan motor 6 Remove the 4 screws that fix the DC fan motor assembly. 7 Remove the DC fan motor assembly from the unit. 8 To install the DC fan motor assembly, see "Repair procedures" [ 308].
- Page 311 Components Screw Allen key Axle cover Propeller fan blade assembly Is the problem solved? Action No further actions required. Return to "Checking procedures" [ 307] of the outdoor unit fan motor and continue with the next procedure. 3.14.2 Double fan outdoor unit INFORMATION "6.4 Component overview" [...
- Page 312 Components One or both propeller fan blade Action assemblies are damaged? Perform a mechanical check of the DC fan motor assembly, see "Checking procedures" [ 311]. To perform a mechanical check of the DC fan motor assembly Prerequisite: First perform a mechanical check of the propeller fan blade assembly, see "Checking procedures" [...
- Page 313 Components INFORMATION Winding resistance values above are given for reference. You should NOT be reading a value in kΩ or a short‑circuit. Make sure that the propeller fan blade does NOT rotate, as this could affect resistance measurements. 9 Measure the insulation resistance for the motor terminals. Measurements between each phase and ground must be >1°MΩ.
- Page 314 Components INFORMATION Use a pulley remover if the propeller cannot be removed manually. 5 To install the propeller fan blade assembly, see "Repair procedures" [ 313]. To remove the DC fan motor assembly 1 Remove the propeller fan blade assembly from the DC fan motor assembly, "Repair procedures" [ 313].
- Page 315 Components 8 Install the propeller fan blade assembly, see "Repair procedures" [ 313]. 9 Install the plate work of the outdoor unit, see "3.15 Plate work" [ 315]. To install the propeller fan blade assembly 1 Install the propeller fan blade assembly on the DC fan motor assembly. CAUTION Do NOT install a damaged propeller fan blade assembly.
- Page 316 Components a Main PCB b Screw c Power supply terminal assembly d Screw 2 Remove the 4 screws that fix the main PCB assembly. 3 Remove the 3 screws that fix the power supply terminal assembly. a Main PCB b Power input wiring c Noise filter PCB 4 Slightly tilt the main PCB assembly to access the power input wiring on the noise filter PCB.
- Page 317 Components a Main PCB b Noise filter PCB c Reactor 6 Completely tilt the main PCB assembly to get full access to the noise filter PCB and the reactor. 3.15.2 To access the switch box on double fan units Prerequisite: Stop the unit operation via the central controller. Prerequisite: Turn OFF the respective circuit breaker.
- Page 318 Components 4 Loosen and remove the short screw (c) that fixes the grounding wire to the heat sinks. 5 Loosen and remove the screw (d) that fixes the Thermistor R1T mounting bracket. 6 Using a screwdriver, carefully separate both heat sinks from the inverter PCB’s.
- Page 319 Components To remove the service plate a Screw b Service plate 2 Loosen and remove the 2 screws (a) that fix the service plate assembly. 3 Remove the service plate assembly (b) from the unit. To remove the upper front plate a Screw b Upper front plate 4 Loosen and remove the 7 screws (a) that fix the upper front plate assembly.
- Page 320 Components To remove the front plate a Screw b Front plate 6 Loosen and remove the 7 screws (a) that fix the front plate assembly. 7 Lift the front plate assembly (b) and remove it from the unit. To remove the switch box cover DANGER: RISK OF ELECTROCUTION Wait for at least 10 minutes after the circuit breaker has been turned OFF, to be sure the rectifier voltage is below 10 V DC before proceeding.
- Page 321 Components To remove the lower front plate a Screw b Lower front plate 10 Loosen and remove the 3 screws (a) that fix the lower front plate assembly. 11 Lift the lower front plate assembly (b) and remove it from the unit. To remove the side plate a Screw b Side plate...
- Page 322 Components To remove the upper side plate a Screw b Upper side plate 14 Loosen and remove the 6 screws (a) that fix the upper side plate assembly. 15 Lift the upper side plate assembly (b) and remove it from the unit. To remove the top plate a Screw b Top plate...
- Page 323 Components To remove the service plate Screw Service plate 2 Loosen and remove the 2 screws (a) that fix the service plate assembly. 3 Remove the service plate assembly (b) from the unit. To remove the upper front plate Screw Upper front plate 4 Loosen and remove the 7 screws (a) that fix the upper front plate assembly.
- Page 324 Components To remove the front plate Screw Front plate 6 Loosen and remove the 7 screws (a) that fix the front plate assembly. 7 Lift the front plate assembly (b) and remove it from the unit. To remove the switch box cover DANGER: RISK OF ELECTROCUTION Wait for at least 10 minutes after the circuit breaker has been turned OFF, to be sure the rectifier voltage is below 10 V DC before proceeding.
- Page 325 Components To remove the lower front plate Screw Lower front plate 10 Loosen and remove the 3 screws (a) that fix the lower front plate assembly. 11 Lift the lower front plate assembly (b) and remove it from the unit. To remove the side plate Screw Side plate...
- Page 326 Components To remove the upper side plate Screw Upper side plate 14 Loosen and remove the 6 screws (a) that fix the upper side plate assembly. 15 Lift the upper side plate assembly (b) and remove it from the unit. To remove the top plate Screw Top plate...
- Page 327 Components a Screw b Switch box cover c Branch selector box PCB To remove the top plate 4 Loosen and remove the top plate screws. 5 Lift the top plate and remove it from the unit. a Screw b Cover REYQ8~20+REMQ5U7Y1B Service manual VRV IV+ Heat Recovery...
- Page 328 Components 3.16 Reactor 3.16.1 Checking procedures To perform an electrical check of the reactor Prerequisite: Stop the unit operation via the central controller. Prerequisite: Turn OFF the respective circuit breaker. 1 Remove the required plate work, see "3.15 Plate work" [ 315]. 2 Access the switch box, see "3.15 Plate work" [...
- Page 329 Components 2 Access the switch box, see "3.15 Plate work" [ 315]. a Screw b Faston connector c Screw 3 Remove the screws or Faston connectors to disconnect the wires from the reactor. 4 Remove the 4 screws that fix the reactor to the switch box. 5 To install the reactor, see "3.16.2 Repair procedures" [...
- Page 330 Components 3.17 Refrigerant high pressure sensor 3.17.1 Checking procedures To perform an electrical check of the refrigerant pressure sensor Prerequisite: Stop the unit operation via the central controller. Prerequisite: Turn OFF the respective circuit breaker. Prerequisite: Remove the required plate work, see "3.15 Plate work" [ 315].
- Page 331 Components V (DC) Detected pressure MPa 0.98 1.12 1.26 1.40 1.54 1.68 1.82 1.96 2.10 2.24 2.38 2.52 2.66 2.80 2.94 3.08 3.22 3.36 3.50 3.64 3.78 3.92 4.06 4.20 4.34 4 Measure the voltage on X32A: pins 1–3 (= refrigerant pressure sensor output signal).
- Page 332 Components The measured voltage is inside the Action expected range? Refrigerant pressure sensor is OK. Return to the troubleshooting of the specific error and continue with the next procedure. Continue with the next step. 6 Unplug the refrigerant pressure sensor connector X32A and measure the voltage (power supply) between pins 3–4 on main PCB.
- Page 333 Components 7 Stop the nitrogen supply when the piping has cooled down. 8 To install refrigerant pressure sensor, "3.17.2 Repair procedures" [ 332]. To install the refrigerant pressure sensor 1 Install the refrigerant pressure sensor in the correct location. 2 Supply nitrogen to the refrigerant circuit. The nitrogen pressure MUST NOT exceed 0.02 MPa.
- Page 334 Components Prerequisite: Remove the required plate work, see "3.15 Plate work" [ 315]. 1 Turn ON the power of the unit. 2 Connect a pressure gauge to the refrigerant charge port. Read the pressure. 3 Using the graphic below, determine the expected sensor output voltage based on the pressure obtained in the previous step.
- Page 335 Components V (DC) Detected pressure (MPa) 1.32 1.37 1.43 1.49 1.54 1.60 1.66 1.72 1.77 INFORMATION The refrigerant pressure sensor connector MUST be plugged into the appropriate PCB. 4 Measure the voltage on X31A: pins 2–3 (= refrigerant pressure output signal) on the main PCB.
- Page 336 Components 3.18.2 Repair procedures To remove the refrigerant pressure sensor Prerequisite: Stop the unit operation via the central controller. Prerequisite: Turn OFF the respective circuit breaker. Prerequisite: Remove the required plate work, see "3.15 Plate work" [ 315]. Prerequisite: Recuperate the refrigerant from the refrigerant circuit, see "4.2.2 Repair procedures" [ 368].
- Page 337 Components Refrigerant pressure sensor Refrigerant pressure sensor pipe CAUTION Overheating the pressure sensor will damage or destroy it. 4 After soldering is done, stop the nitrogen supply after the component has cooled‑down. 5 Route the refrigerant pressure sensor harness towards the appropriate PCB. 6 Connect the refrigerant pressure sensor connector to the appropriate PCB.
- Page 338 Components Is the solenoid valve coil firmly fixed Action and not visually damaged? Perform an electrical check of the solenoid valve, see "3.19.1 Checking procedures" [ 337]. Fix or replace the solenoid valve coil, "3.19.2 Repair procedures" [ 339]. To perform an electrical check of the solenoid valve Prerequisite: First perform a mechanical check of the solenoid valve, see "3.19.1 Checking procedures" [...
- Page 339 Components To perform an operation check of the solenoid valve Prerequisite: First perform an electrical check of the solenoid valve, see "3.19.1 Checking procedures" [ 337]. 1 With the unit operating, check if the solenoid valve is open or closed. INFORMATION Check the solenoid valve status using the service monitoring tool. On a single unit the solenoid valve is open when the unit is operating.
- Page 340 Components Screw Solenoid valve coil Solenoid valve body 2 Remove the solenoid valve coil from the solenoid valve body. 3 Disconnect the solenoid valve connector from the main PCB. 4 Cut all tie straps that fix the solenoid valve harness. 5 To install the solenoid valve coil, see "3.19.2 Repair procedures" [...
- Page 341 Components 6 Stop the nitrogen supply when the piping has cooled down. 7 To install the solenoid valve body, see "3.19.2 Repair procedures" [ 339]. To install the solenoid valve body 1 Install the solenoid valve body in the correct location. 2 Supply nitrogen to the refrigerant circuit. The nitrogen pressure MUST NOT exceed 0.02 MPa.
- Page 342 Components Screw Solenoid valve coil Solenoid valve body 2 Route the solenoid valve harness towards the switch box. 3 Connect the solenoid valve connector to the main PCB. WARNING When reconnecting a connector to the PCB, do NOT apply force, as this may damage the connector or connector pins of the PCB.
- Page 343 Components 2 Measure the voltage on connector X1A of the Sub PCB. The voltage MUST be 230 V AC±10%. a Connector X1A Does the Sub PCB receive power? Action Return to "3.20.1 Checking procedures" [ 342] of the sub PCB and continue with the next procedure. Continue with the next step.
- Page 344 Components 2 Enter the model name of your unit and check if the installed spare part number corresponds with the spare part number indicated in the webbank. Is the correct spare part for the Sub Action PCB installed? Return to "3.20.1 Checking procedures" [ 342] of the Sub PCB and...
- Page 345 Components Blown fuse on the Sub PCB? Action Return to "3.20.1 Checking procedures" [ 342] of the Sub PCB and continue with the next procedure. To check the varistor of the Sub PCB Prerequisite: First perform all earlier checks of the Sub PCB, see "3.20.1 Checking procedures" [ 342].
- Page 346 Components Is the problem solved? Action Return to "3.20.1 Checking procedures" [ 342] of the Sub PCB and continue with the next procedure. To remove the Sub PCB Prerequisite: Stop the unit operation via the central controller. Prerequisite: Turn OFF the respective circuit breaker. 1 Remove the required plate work, see "3.15 Plate work" [...
- Page 347 Components To remove a fuse of the Sub PCB Prerequisite: Stop the unit operation via the central controller. Prerequisite: Turn OFF the respective circuit breaker. Prerequisite: Remove the required plate work, see "3.15 Plate work" [ 315]. 1 Remove the fuse from the PCB. a Fuse 2 To install a fuse on the Sub PCB, see "3.20.2 Repair...
- Page 348 Components 3.21 Thermistors 3.21.1 Refrigerant side thermistors Checking procedures INFORMATION It is recommended to perform the checks in the listed order. To perform a mechanical check of the specific thermistor Prerequisite: Stop the unit operation via the central controller. Prerequisite: Turn OFF the respective circuit breaker. Prerequisite: Remove the required plate work, see "3.15 Plate work" [...
- Page 349 Components Name Symbol Location (PCB) Connector Type (pins) Upper heat Main X30A:3‑4 exchanger liquid temperature thermistor Lower heat Main X30A:5‑6 exchanger liquid temperature thermistor Gas pipe Main X30A:7‑8 thermistor of the subcool heat exchanger Liquid pipe Main X30A:9‑10 thermistor of the subcool heat exchanger...
- Page 350 Components Name Symbol Location (PCB) Connector Type (pins) Compressor R15T Main X19A: 5-6 (M1C for REMQ5U + REYQ8~12U, M2C for REYQ18+20U) Body Thermistor Compressor R21T Main X19A:1-2 M1C Discharge Thermistor Compressor R22T Main X19A:3‑4 M2C discharge thermistor 4 Determine the thermistor resistance that matches the measured temperature.
- Page 351 Components T °C kΩ T °C kΩ T °C kΩ T °C kΩ –9 106.03 23.91 6.91 –8 100.41 22.85 6.65 –7 95.14 21.85 6.41 –6 90.17 20.90 6.65 –5 85.49 20.00 6.41 –4 81.08 19.14 6.18 –3 76.93 18.32 5.95 –2 73.01...
- Page 352 Components ▪ E.g. R3T thermistor: ▪ Measured temperature with contact thermometer: 23.1°C, ▪ Resistance value determined through temperature (using the table for type 1 thermistors): Resistance at 23°C: 21.85 kΩ, Resistance at 24°C: 20.90 kΩ, ▪ Disconnect connector and measure resistance between X30A pin 1‑2: Measured resistance: 21.8 kΩ, ▪...
- Page 353 Components Tie strap Insulation Thermistor wire Clip Thermistor holder Thermistor 3 Slide the insulation aside. 4 Pull the clip that fixes the thermistor. 5 Remove the thermistor from the thermistor holder. 6 Cut all tie straps that fix the thermistor harness. 7 Disconnect the thermistor connector from the appropriate PCB.
- Page 354 Components Tie strap Insulation Thermistor wire Clip Thermistor holder Thermistor 2 Route the thermistor harness towards the appropriate PCB. 3 Connect the thermistor connector to the appropriate PCB. INFORMATION Some of the thermistors are wired to the same connector. See connector and pin information of the thermistors at the start of the electrical check procedure and "6.2 Wiring diagram" [...
- Page 355 Components 3.21.2 Other thermistors Checking procedures To perform an electrical check of the fin thermistor 1 Stop operation of the outdoor unit and wait for at least 30 minutes. 2 Measure the ambient temperature close to the outdoor unit. 3 Connect the service checker tool to the outdoor unit. 4 Read the temperature of the specific PCB fin thermistor.
- Page 356 Third party components 4 Third party components 4.1 Electrical circuit 4.1.1 Checking procedures To check the power supply of the unit Prerequisite: Stop the unit operation via the central controller. Prerequisite: Turn OFF the respective circuit breaker. Prerequisite: Remove the required plate work, see "3.15 Plate work" [ 315].
- Page 357 Third party components For single fan units 3 Measure the voltage on the rectifier voltage check connector (a) X3A, located above the power terminal assembly (b). Result: The measured voltage should be below 10 V DC. a Connector X3A b Power terminal assembly For double fan units 4 Measure the voltage on the rectifier voltage check connector (a) X5A to check inverter PCB A3P (c).
- Page 358 Third party components To check F1-F2 transmission To check the F1-F2 wiring 1 Check that the wiring: is within installation length limits, is of the proper wire type, is of the proper wire thickness, is properly fixed to the terminals, is executed according to the installation manual, with no star connections.
- Page 359 Third party components For example: if the measurements at the indoor unit side are distorted while central controller and outdoor unit seem OK, you can suppose that the failure in transmission is related to the indoor unit side. 7 Set time base (horizontal) to 50 µs/div to 100 µs. Voltage axis (vertical) should be set to 2V/div to 5V.
- Page 360 Third party components Faulty Waveform. Possible reasons: ▪ Transmission circuit failure on a PCB. After checking and correcting possible causes of F1-F2 transmission problems, perform a communication reset (see "4.1.2 Repair procedures" [ 361]). To check the communication between outdoor units Q1 and Q2 are connection terminals for the transmission wiring between multi outdoor units.
- Page 361 Third party components To check the wiring between the outdoor unit and the indoor unit 1 Check that all wires are properly connected and that all connectors are fully plugged‑in. 2 Check that no connectors or wires are damaged. 3 Check that the wiring corresponds with the wiring diagram, see "6.2 ...
- Page 362 Third party components To perform a communication reset NOTICE If an indoor unit and/or branch selector box is/are powered OFF when communication reset is performed, the outdoor unit will delete the indoor unit/ branch selector box information since this/these unit will not be identified during re- initialization.
- Page 363 Third party components 2 Push BS3 (RETURN) and hold it for 5 seconds until the 7-segment display shows "000". Then release BS3. Result: After a while, voltage will drop to almost 0 V DC. At this stage it means that re-initialization has started. Result: Depending on the system size, voltage will rise to 16 V DC and hit 0 V back again several times.
- Page 364 Third party components c High pressure/low pressure gas stop valve 2 Check if the stop valves are completely open. The refrigerant circuit stop valves are Action open? Return to the troubleshooting of the specific error and continue with the next procedure. Open the stop valves of the refrigerant circuit, see "4.2.2 Repair...
- Page 365 Third party components To check if the refrigerant circuit is correctly charged Due to the relationship to pressure control and electronic expansion valve control, the amount of refrigerant needs to be examined according to operating conditions. Refer to the procedures shown below for correct examination. Refrigerant overcharge diagnosis 1 High pressure rises.
- Page 366 Third party components 2 The superheated degree of suction gas rises. Consequently, the electronic expansion valve turns open more than normal or completely open for average output. 3 Low pressure drops to cause the unit not to reach cooling capacity (or heating capacity).
- Page 367 Third party components To check for non-condensables in the refrigerant circuit Prerequisite: Stop the unit operation via the central controller. Prerequisite: Turn OFF the respective circuit breaker. 1 Wait for the refrigerant to reach the outdoor temperature. 2 Connect a manometer to the service port. 3 Measure the pressure of the refrigerant.
- Page 368 Third party components NOTICE Make sure to use a recommended bubble test solution from your wholesaler. Do not use soap water, which may cause cracking of flare nuts (soap water may contain salt, which absorbs moisture that will freeze when the piping gets cold), and/or lead to corrosion of flared joints (soap water may contain ammonia which causes a corrosive effect between the brass flare nut and the copper flare).
- Page 369 Third party components Is the problem solved? Action No further actions required. Return to the troubleshooting of the specific error and continue with the next procedure. To replace the clogged/leaking part of the refrigerant circuit 1 See the correct procedure for the component that needs to be repaired. See also "Repair information" [...
- Page 370 Third party components Service tool Remark Recovery cylinder Compatible with the refrigerant to be recovered Vacuum pump 2-stage, equipped with solenoid valve 2 Setup a vacuum line between recovery unit discharge and the recovery bottle. Without this additional setup, the discharge line from the recovery device to the refrigerant cylinder would not have been vacuumed.
- Page 371 Third party components 4 Activate refrigerant recovery / vacuum mode by setting field setting mode 2-21 to 1 (see "6.9 Field settings" [ 455]). To make sure that refrigerant cycle is completely connected and there are no dead-zones because of closed expansion- or solenoid valves, entering the refrigerant recovery / vacuum mode ensures that: All indoor unit expansion valves get fully opened, all outdoor unit expansion valves get fully opened,...
- Page 372 Third party components ▪ Pipe expansion / flare making: Remove any burrs on the cut surface using the correct tool such as reamer or scraper (note that excessive deburring can thin the pipe walls and cause cracking of the pipe). Make sure the flare has the correct size (use a flare gauge).
- Page 373 Third party components INFORMATION If the outdoor temperature is outside the range of operation, the unit may NOT operate or may NOT deliver the required capacity. INFORMATION If difference between the ambient temperature and temperature at air inlet of the outdoor unit heat exchanger is >5 ...
- Page 374 Maintenance 5 Maintenance 5.1 Maintenance shedule To ensure optimal availability of the unit, certain checks and inspections on the unit and the field wiring have to be carried out at regular intervals. See the checking procedures in this manual for inspection of the components mentioned below.
- Page 375 Maintenance 5.2 Maintenance procedures for outdoor units 5.2.1 To check the general status of the unit Prerequisite: Switch off all the indoor units. Prerequisite: Stop the unit operation (via the central controller). 1 Turn OFF the respective circuit breaker. DANGER: RISK OF ELECTROCUTION Confirm the rectifier voltage is below 10 V DC before proceeding, see "To check the rectifier...
- Page 376 Maintenance 15 Clean outdoor unit heat exchanger see "5.2.3 To clean the outdoor unit heat exchanger" [ 376]. 16 Clean outdoor unit fan propellers. 17 Check latest error codes and latest retries, see "2.2 To retrieve error codes and check error history" [ 14].
- Page 377 Maintenance 5.3 Maintenance procedures for indoor units 5.3.1 To check the general status of the unit Prerequisite: Switch off all the indoor units. Prerequisite: Stop the unit operation (via the user interface, central controller, operation switch, …). 1 Clean the cover plates, see "5.3.2 To clean the cover plates" [ 378].
- Page 378 Maintenance 12 Check if power supply is in conform with legislation. See "To check if the power supply is conform with the regulations" [ 356]. 13 Check and tighten the power supply wiring on the dedicated terminal. 14 Check the insulation on piping and refrigerant branches. Replace or fix insulation where necessary.
- Page 379 Maintenance 2 Clear the indoor unit heat exchanger from dust, leaves,… using a fin-comb or compressed air/N CAUTION Avoid bending or damaging the hair fins of the indoor unit heat exchanger during the cleaning process. Is the problem solved? Action No further actions required.
- Page 380 Maintenance 11 Check the insulation on piping. Replace or fix insulation where necessary. 12 Check the DIP switch settings. See the installation manual for more information. 13 Log the maintenance in the log-book. After outdoor unit and indoor unit (see "5.3 ...
- Page 381 Direct expansion: Maintenance – VRV Installer General info Company name One time maintenance Contractual maintenance Contact person Performed by End customer Company Name Technician Street – N° Certificate Zip code – City Date Country Maintenance Outdoor unit (air cooled) Outdoor unit (water cooled) Heat exchanger Clean Cleaned...
- Page 382 Heat exchanger Clean Cleaned Heat recovery heat exchanger Clean Cleaned/replaced Not OK Not OK Drainage drain pan Clean Cleaned Heat exchanger Clean Cleaned Not OK Not OK Not applicable Fan motor/blades Drainage drain pan Clean Cleaned Clean Cleaned Not OK Not OK Not applicable Unit outside state...
- Page 383 Air curtain Hydrobox Air filter Clean Cleaned/replaced Filter water circuit Clean Cleaned Not OK Not OK Heat exchanger Unit outside state Clean Cleaned Clean Cleaned Not OK Unit inside state Clean Cleaned Fan motor/blades Clean Cleaned Not OK Tighten electrical connections Not OK Unit outside state Clean...
- Page 384 Technical data 6 Technical data 6.1 Detailed information setting mode 6.1.1 Detailed information setting mode: Outdoor unit See the installer reference guide on business portal for more information. 6.1.2 Detailed information setting mode: Remote controller See the installer reference guide on business portal for more information. REYQ8~20+REMQ5U7Y1B Service manual VRV IV+ Heat Recovery...
- Page 385 Technical data 6.2 Wiring diagram 6.2.1 Wiring diagram: Outdoor unit Refer to the wiring diagram sticker on the unit. The abbreviations used are listed below: INFORMATION The wiring diagram on the outdoor unit is only for the outdoor unit. For the indoor unit or optional electrical components, refer to the wiring diagram of the indoor unit.
- Page 386 Technical data Blue White Green Legend for wiring diagram 5~12 HP: Printed circuit board (main) Printed circuit board (noise filter) Printed circuit board (inverter) Printed circuit board (fan) Printed circuit board (sub) BS1~BS3 (A1P) Push button switch (MODE, SET, RETURN) C* (A3P) Capacitor DS1, DS2 (A1P)
- Page 387 Technical data Thermistor (liquid, main) Thermistor (heat exchanger, liquid pipe upper) Thermistor (heat exchanger, liquid pipe lower) Thermistor (subcool heat exchanger gas) Thermistor (subcool heat exchanger liquid) Thermistor (heat exchanger, gas upper) Thermistor (heat exchanger, gas lower) R10T Thermistor (suction) R11T Thermistor (heat exchanger, de-icer) R12T...
- Page 388 Technical data X10A Connector (bottom plate heater) Legend for wiring diagram 14~20 HP: Printed circuit board (main) A2P, A5P Printed circuit board (noise filter) A3P, A6P Printed circuit board (inverter) A4P, A7P Printed circuit board (fan) Printed circuit board (sub) BS1~BS3 (A1P) Push button switch (MODE, SET, RETURN) C* (A3P)
- Page 389 Technical data Q1RP (A1P) Phase reversal detect circuit R24 (A4P, A7P) Resistor (current sensor) R300 (A3P, A6P) Resistor (current sensor) Thermistor (air) Thermistor (liquid, main) Thermistor (heat exchanger, liquid pipe upper) Thermistor (heat exchanger, liquid pipe lower) Thermistor (subcool heat exchanger gas) Thermistor (subcool heat exchanger liquid) Thermistor (heat exchanger, gas upper) Thermistor (heat exchanger, gas lower)
- Page 390 Technical data Solenoid valve (heat exchanger upper) Y11S Solenoid valve (M1C oil return) Y12S Solenoid valve (M2C oil return) Noise filter (ferrite core) Z*F (A2P, A5P) Noise filter (with surge absorber) Connector for optional accessories: X10A Connector (bottom plate heater) REYQ8~20+REMQ5U7Y1B Service manual VRV IV+ Heat Recovery...
- Page 391 Technical data REMQ5U + REYQ8~12U (Note 7) (Note 8) (Note 6) (Note 5) (Note 3) (Note 3) (Note 3) indoor outdoor outdoor (F1)(F2) (F1)(F2) (Q1)(Q2) 2D120651A El. compo.box (Front side) (Rear side) REYQ8~20+REMQ5U7Y1B Service manual VRV IV+ Heat Recovery ESIE18-15B – 2020.05...
- Page 392 Technical data REYQ14~20U 2D120652A REYQ8~20+REMQ5U7Y1B Service manual VRV IV+ Heat Recovery ESIE18-15B – 2020.05...
- Page 393 Technical data 6.2.2 Wiring diagram: Branch selector box Branch selector box BS1Q-A Notes This wiring diagram applies to the BS unit only. Symbols (see below). When using the cool /heat selector (optional accessory), connect it to terminals A, B and C on X2M. As for wiring to the indoor unit (F1) (F2) and outdoor unit (F1) (F2).
- Page 394 Technical data Translation of text on wiring diagram English Translation Indoor unit Indoor unit Outdoor unit Outdoor unit See note *** See note *** BS unit top BS unit top Power supply Power supply To outdoor unit To outdoor unit To indoor unit To indoor unit See note 7...
- Page 395 Technical data Branch selector box BS4~16Q-A Notes This wiring diagram applies to the BS unit only. Symbols (see below). For wiring for the terminal block on X2M ~ X6M (operation) , refer to the installation manual attached to the product. The factory settings of DIP switch (DS1, DS2) are as follows.
- Page 396 Technical data Y3E, Y6E, Y9E, Electric expansion valve (Sub cool) Y12E, Y15E, Y18E, Y21E, Y24E , Y27E , Y30E , Y33E, Y36E, Y39E, Y42E, Y45E, Y48E Optional accessories: X15A Connector (drain up kit abnormal signal) Translation of text on wiring diagram English Translation Indoor...
- Page 397 Technical data Branch selector box BS4Q-A Power supply BS4Q14A Power Supply X15A Note 5 (note 5) LAYOUT OF EL. COMPO. BOX t i n t i n (Note3) BS unit (F1) (F2) (Note3) (Note3) (Note3) (Note3) (Note3) indoor indoor indoor indoor outdoor BS unit...
- Page 398 Technical data Branch selector box BS6Q-A + BS8Q-A BS6-8Q14A Power Supply (Note 5) TO X4A(A1P) TO X5A(A1P) t i n t i n t i n t i n (Note3) BS unit (F1) (F2) (Note3) (Note3) (Note3) Indoor Indoor Outdoor BS unit (F1) (F2) (F1) (F2)
- Page 399 Technical data Branch selector box BS10Q-A + BS12Q-A BS10-12Q14A Power Supply Case of BS12Q14AV1 Case of BS10Q14AV1 (Note5) TO X4A(A2P) TO X5A(A1P) D unit C unit t i n t i n t i n t i n (Note3) BS unit (Note3) (Note3)(Note3) Indoor Indoor...
- Page 400 Technical data Branch selector box BS16Q-A BS16Q14A Power Supply (Note5) t i n t i n t i n t i n t i n t i n t i n t i n (Note3) BS unit (F1) (F2) e t o e t o e t o e t o...
- Page 401 Technical data 6.3 Piping diagram 6.3.1 Piping diagram: Outdoor unit Piping diagram: 5~12 HP a Stop valve (liquid) b Service port c Stop valve (high pressure/low pressure) d Stop valve (gas) e Charge port REYQ8~20+REMQ5U7Y1B Service manual VRV IV+ Heat Recovery ESIE18-15B –...
- Page 402 Technical data Piping diagram: 14~20 HP a Stop valve (liquid) b Service port c Stop valve (high pressure/low pressure) d Stop valve (gas) e Charge port REYQ8~20+REMQ5U7Y1B Service manual VRV IV+ Heat Recovery ESIE18-15B – 2020.05...
- Page 403 Technical data Charge port / Service port Stop valve Filter Check valve Pressure relief valve Thermistor Solenoid valve Heat sink (PCB) Capillary tube Expansion valve 4‑way valve Propeller fan High pressure switch Low pressure sensor High pressure sensor Oil separator Accumulator Heat exchanger Compressor...
- Page 404 Technical data Component functionalities Symbol Component Major function Compressor Inverter driven compressor operates in multi- steps according to T for cooling and T heating. Compressor Inverter driven compressor operates in multi- steps according to T for cooling and T heating. Fan motor When outdoor coil is used as condenser, the fan operation is controlled by T...
- Page 405 Technical data Symbol Component Major function Y12S Solenoid Valve (oil Controls amount of oil return from oil separator 2 oil separator to compressor. return) S1NPH Pressure sensor Detects discharge pressure. In cooling: mainly (high) to control fan speed of outdoor unit. In heating: mainly to control compressor capacity.
- Page 406 Technical data Symbol Component Major function Thermistor (upper This detects temperature of gas pipe for air heat exchanger, heat exchanger. Used to exercise the constant gas pipe) control of superheated degree when an evaporator is used for outdoor unit heat exchanging.
- Page 407 Technical data 6.3.2 Refrigerant flow diagram: Outdoor unit REMQ5 + REYQ8~12 Cooling mode EVL EVH EVL EVH EVSC EVSC EVSC R14T R11T S1NPH S1PH R21T 10-12HP R15T Y11S R10T R12T 1 Indoor unit, unit OFF, fan OFF, indoor electronic expansion valve 0 pulse 2 Indoor unit, unit ON, cooling, thermo OFF, fan ON, indoor electronic expansion valve 0 pulse 3 Indoor unit, unit ON, cooling, thermo ON, fan ON, Indoor electronic expansion valve...
- Page 408 Technical data 5 Branch selector box, electronic expansion valve high pressure OFF, electronic expansion valve low pressure OFF 6 Branch selector box, electronic expansion valve high pressure ON, electronic expansion valve low pressure ON Y1E Subcool Control Y2E Superheat control Y3E Subcool Control (0 pulse in low load) Y4E 0 Pulse Y5E Heat Sink Cooling Control...
- Page 409 Technical data REMQ5 + REYQ8~12 Heating mode EVL EVH EVL EVH EVSC EVSC EVSC R14T R11T S1NPH S1PH R21T 10-12HP R15T Y11S R10T R12T 1 Indoor Unit, Unit OFF, Fan OFF, Indoor electronic expansion valve 192 pulse 2 Indoor Unit, Unit ON, Heating, Thermo OFF, Fan Low Load Speed, Indoor electronic expansion valve 192 pulse 3 Indoor Unit, Unit ON, Heating, Thermo ON, Fan ON 4 Branch selector box, electronic expansion valve high pressure OFF, electronic...
- Page 410 Technical data Y1E Superheat Control (Subcool Control in low loads) Y2E Superheat control Y3E Superheat Control (0 pulse in low load) Y4E Gas Purge Control Y5E Heat Sink Cooling Control Y2S ON Y3S OFF Y4S ON Y5S ON (OFF in low load) REYQ8~20+REMQ5U7Y1B Service manual VRV IV+ Heat Recovery...
- Page 411 Technical data REMQ5 + REYQ8~12 Simultaneous cooling/heating operation EVL EVH EVL EVH EVSC EVSC EVSC R14T R11T S1NPH S1PH R21T 10-12HP R15T Y11S R10T R12T 1 Indoor Unit, Unit ON, Heating, Thermo OFF, Fan Low Load Speed, Indoor EEV 192 pulse 2 Indoor Unit, Unit ON, Heating, Thermo ON, Fan ON 3 Indoor Unit, Unit ON, Cooling, Thermo ON, Fan ON...
- Page 412 Technical data Y1E Superheat Control (when heat exchanger is evaporator) or Subcool Control (when heat exchanger is condenser) Y2E Superheat control Y3E Superheat Control (when heat exchanger is evaporator) or Subcool Control (when heat exchanger is condenser) Y4E Gas Purge Control Y5E Heat Sink Cooling Control Y2S ON Y3S OFF...
- Page 413 Technical data REMQ5 + REYQ8~12 Oil return operation in cooling EVL EVH EVL EVH EVSC EVSC EVSC R14T R11T S1NPH S1PH R21T 10-12HP R15T Y11S R10T R12T 1 Indoor Unit, Unit OFF, Fan OFF, Indoor electronic expansion valve 192 pulse 2 Indoor Unit, Unit ON, Cooling, Thermo OFF, Fan ON, Indoor electronic expansion valve 192 pulse 3 Indoor Unit, Unit ON, Cooling, Thermo ON, Fan ON, Indoor electronic expansion...
- Page 414 Technical data 6 Branch selector box, electronic expansion valve high pressure ON, electronic expansion valve low pressure ON Y1E Subcool Control Y2E 0 pulse Y3E Subcool Control Y4E 0 pulse Y5E Heat Sink Cooling Control Y2S ON Y3S ON Y4S OFF Y5S OFF REYQ8~20+REMQ5U7Y1B Service manual...
- Page 415 Technical data REMQ5 + REYQ8~12 Defrost/oil return operation in heating EVL EVH EVL EVH EVSC EVSC EVSC R14T R11T S1NPH S1PH R21T 10-12HP R15T Y11S R10T R12T 1 Indoor Unit, Unit OFF, Fan OFF, Indoor electronic expansion valve 224 pulse 2 Indoor Unit, Unit ON, Heating, Thermo OFF, Fan ON, Indoor electronic expansion valve 224 pulse 3 Indoor Unit, Unit ON, Heating, Thermo ON, Fan ON, Indoor electronic expansion...
- Page 416 Technical data 6 Branch selector box, electronic expansion valve high pressure ON, electronic expansion valve low pressure ON Y1E Subcool Control Y2E OFF Y3E Subcool Control Y4E 0 pulse Y5E Heat Sink Cooling Control Y2S ON Y3S ON Y4S OFF Y5S OFF REYQ8~20+REMQ5U7Y1B Service manual...
- Page 417 Technical data REMQ5 + REYQ8~12 Oil return operation in simultaneous cooling/heating EVL EVH EVL EVH EVSC EVSC EVSC R14T R11T S1NPH S1PH R21T 10-12HP R15T Y11S R10T R12T 1 Indoor Unit, Unit ON, Heating, Thermo OFF, Fan ON, Indoor electronic expansion valve 224 pulse 2 Indoor Unit, Unit ON, Heating, Thermo ON, Fan ON, Indoor electronic expansion valve subcool Control...
- Page 418 Technical data 6 Branch selector box, electronic expansion valve high pressure OFF, electronic expansion valve low pressure ON, subcool electronic expansion valve OFF Y1E Superheat Control Y2E OFF Y3E Subcool Control Y4E 0 pulse Y5E Heat Sink Cooling Control Y2S ON Y3S OFF Y4S OFF Y5S ON...
- Page 419 Technical data REYQ14~20 Cooling operation EVL EVH EVL EVH EVSC EVSC EVSC R14T R11T S1NPH S1PH S2PH R22T R21T 18-20HP R15T R10T R12T 1 Indoor Unit, Unit OFF, Fan OFF, Indoor electronic expansion valve 0 pulse 2 Indoor Unit, Unit ON, Cooling, Thermo OFF, Fan ON, Indoor electronic expansion valve 0 pulse 3 Indoor Unit, Unit ON, Cooling, Thermo ON, Fan ON, Indoor electronic expansion valve superheat control...
- Page 420 Technical data 6 Branch selector box, electronic expansion valve high pressure ON, electronic expansion valve low pressure ON Y1E Subcool Control Y2E Superheat Control Y3E Subcool Control (0 pulse in low load) Y4E 0 pulse Y5E Heat Sink Cooling Control Y2S ON Y3S ON Y4S OFF (ON in low load)
- Page 421 Technical data REYQ14~20 Heating operation EVL EVH EVL EVH EVSC EVSC EVSC R14T R11T S1NPH S1PH S2PH R22T R21T 18-20HP R15T R10T R12T 1 Indoor Unit, Unit OFF, Fan OFF, Indoor electronic expansion valve 192 pulse 2 Indoor Unit, Unit ON, Heating, Thermo OFF, Fan Low Load speed, Indoor electronic expansion valve192 pulse 3 Indoor Unit, Unit ON, Heating, Thermo ON, Fan ON 4 Branch selector box, electronic expansion valve high pressure OFF, electronic...
- Page 422 Technical data Y1E Superheat Control (Subcool control in low loads) Y2E Superheat Control Y3E Superheat Control (0 pulse in low load) Y4E Gas Purge Control Y5E Heat Sink Cooling Control Y2S ON Y3S OFF Y4S ON Y5S ON (OFF in low load) REYQ8~20+REMQ5U7Y1B Service manual VRV IV+ Heat Recovery...
- Page 423 Technical data REYQ14~20 Simultaneous cooling/heating operation EVL EVH EVL EVH EVSC EVSC EVSC R14T R11T S1NPH S2PH S1PH R22T R21T 18-20HP R15T R10T R12T 1 Indoor Unit, Unit ON, Heating, Thermo OFF, Fan Low Load Speed, Indoor EEV 192 pulse 2 Indoor Unit, Unit ON, Heating, Thermo ON, Fan ON 3 Indoor Unit, Unit ON, Cooling, Thermo ON, Fan ON 4 Branch selector box, electronic expansion valve high pressure OFF, electronic...
- Page 424 Technical data Y1E Superheat Control (when heat exchanger is evaporator) or Subcool Control (when heat exchanger is condenser) Y2E Superheat control Y3E Superheat Control (when heat exchanger is evaporator) or Subcool Control (when heat exchanger is condenser) Y4E Gas Purge Control Y5E Heat Sink Cooling Control Y2S ON Y3S OFF...
- Page 425 Technical data REYQ14~20 Oil return operation in cooling EVL EVH EVL EVH EVSC EVSC EVSC R14T R11T S1NPH S2PH S1PH R22T R21T 18-20HP R15T R10T R12T 1 Indoor Unit, Unit OFF, Fan OFF, Indoor electronic expansion valve 192 pulse 2 Indoor Unit, Unit ON, Cooling, Thermo OFF, Fan ON, Indoor electronic expansion valve 192 pulse 3 Indoor Unit, Unit ON, Cooling, Thermo ON, Fan ON, Indoor electronic expansion valve superheat Control...
- Page 426 Technical data 6 Branch selector box, electronic expansion valve high pressure ON, electronic expansion valve low pressure ON Y1E Subcool Control Y2E 0 pulse Y3E Subcool Control Y4E 0 pulse Y5E Heat Sink Cooling Control Y2S ON Y3S ON Y4S OFF Y5S OFF REYQ8~20+REMQ5U7Y1B Service manual...
- Page 427 Technical data REYQ14~20 Defrost/oil return operation in heating EVL EVH EVL EVH EVSC EVSC EVSC R14T R11T S1NPH S1PH S2PH R22T R21T 18-20HP R15T R10T R12T 1 Indoor Unit, Unit OFF, Fan OFF, Indoor electronic expansion valve 224 pulse 2 Indoor Unit, Unit ON, Heating, Thermo OFF, Fan ON, Indoor electronic expansion valve 224 pulse 3 Indoor Unit, Unit ON, Heating, Thermo ON, Fan ON, Indoor electronic expansion valve Open...
- Page 428 Technical data 6 Branch selector box, electronic expansion valve high pressure ON, electronic expansion valve low pressure ON Y1E Subcool Control Y2E OFF Y3E Subcool Control Y4E 0 pulse Y5E Heat Sink Cooling Control Y2S ON Y3S ON Y4S OFF Y5S OFF REYQ8~20+REMQ5U7Y1B Service manual...
- Page 429 Technical data REYQ14~20 Oil return operation in simultaneous cooling/heating EVL EVH EVL EVH EVSC EVSC EVSC R14T R11T S1NPH S1PH S2PH R22T R21T 18-20HP R15T R10T R12T 1 Indoor Unit, Unit ON, Heating, Thermo OFF, Fan ON, Indoor electronic expansion valve 224 pulse 2 Indoor Unit, Unit ON, Heating, Thermo ON, Fan ON, Indoor electronic expansion valve subcool control...
- Page 430 Technical data 6 Branch selector box, electronic expansion high pressure valve OFF, electronic expansion valve low pressure ON, Subcool electronic expansion valve OFF Y1E Superheat Control Y2E OFF Y3E Subcool Control Y4E 0 pulse Y5E Heat Sink Cooling Control Y2S ON Y3S OFF Y4S OFF Y5S ON...
- Page 431 Technical data Red Lines High pressure, high temperature gas Green Lines High pressure, high temperature liquid Blue Lines Low pressure, low temperature gas a Low Pressure Gas Pipe b Dual Pressure Gas Pipe c Liquid Pipe d Field piping (liquid) b Field piping (gas) c Refrigerant charge port d Fan...
- Page 432 Technical data 6.3.3 Piping diagram: Branch selector unit BS1Q-A Branch selector box piping diagram a Liquid pipe (indoor unit side pipe connections) b Gas pipe (indoor unit side pipe connections) c Liquid pipe (outdoor unit side pipe connections) d High pressure/low pressure gas pipe (outdoor unit side pipe connections) e Suction gas pipe (outdoor unit side pipe connections) f Subcool heat exchanger (double-tube) g Filter...
- Page 433 Technical data BS4Q-A Branch selector box Piping diagram a Liquid pipe (outdoor unit side pipe connections) b Suction gas pipe (outdoor unit side pipe connections) c High pressure/low pressure gas pipe (outdoor unit side pipe connections) d Filter e Subcool heat exchanger (double-tube) f Subcool electronic expansion valve g Suction pipe electronic expansion valve h High pressure/low pressure electronic expansion valve...
- Page 434 Technical data BS6Q-A Branch selector box piping diagram a Liquid pipe (outdoor unit side pipe connections) b Suction gas pipe (outdoor unit side pipe connections) c High pressure/low pressure gas pipe (outdoor unit side pipe connections) d Filter e Subcool heat exchanger (double-tube) f Subcool electronic expansion valve g Suction pipe electronic expansion valve h High pressure/low pressure electronic expansion valve...
- Page 435 Technical data BS8Q-A Branch selector box piping diagram a Liquid pipe (outdoor unit side pipe connections) b Suction gas pipe (outdoor unit side pipe connections) c High pressure/low pressure gas pipe (outdoor unit side pipe connections) d Filter e Subcool heat exchanger (double-tube) f Subcool electronic expansion valve g Suction pipe electronic expansion valve h High pressure/low pressure electronic expansion valve...
- Page 436 Technical data BS10Q-A Branch selector box piping diagram a Liquid pipe (outdoor unit side pipe connections) b Suction gas pipe (outdoor unit side pipe connections) c High pressure / low pressure gas pipe (outdoor unit side pipe connections) d Filter e Subcool heat exchanger (double-tube) f Subcool electronic expansion valve g Suction pipe electronic expansion valve...
- Page 437 Technical data BS12Q-A Branch selector box piping diagram a Liquid pipe (outdoor unit side pipe connections) b Suction gas pipe (outdoor unit side pipe connections) c High pressure/low pressure gas pipe (outdoor unit side pipe connections) d Filter e Subcool heat exchanger (double-tube) f Subcool electronic expansion valve g Suction pipe electronic expansion valve h High pressure/low pressure electronic expansion valve...
- Page 438 Technical data i5, j5 Indoor unit E i6, j6 Indoor unit F i7, j7 Indoor unit G i8, j8 Indoor unit H i9, j9 Indoor unit I i10, j10 Indoor unit J i11, j11 Indoor Unit K i12, j12 Indoor Unit L i = gas pipe, j = liquid pipe REYQ8~20+REMQ5U7Y1B Service manual...
- Page 439 Technical data BS16Q-A Branch selector box piping diagram a Liquid pipe (outdoor unit side pipe connections) b Suction gas pipe (outdoor unit side pipe connections) c High pressure/low pressure gas pipe (outdoor unit side pipe connections) REYQ8~20+REMQ5U7Y1B Service manual VRV IV+ Heat Recovery ESIE18-15B –...
- Page 440 Technical data d Filter e Subcool heat exchanger (double-tube) f Subcool electronic expansion valve g Suction pipe electronic expansion valve h High pressure/low pressure electronic expansion valve i1, j1 Indoor unit A i2, j2 Indoor unit B i3, j3 Indoor unit C j4, j4 Indoor unit D i5, j5 Indoor unit E i6, j6 Indoor unit F...
- Page 441 Technical data 6.4 Component overview 6.4.1 Component overview: REMQ5U + REYQ8~12U units INFORMATION For more detailed information about the thermistors, see "To perform an electrical check of the specific thermistor" [ 348]. a Upper heat exchanger gas thermistor R8T b Lower heat exchanger gas thermistor R9T c Upper heat exchanger 4‑way valve Y5S d High pressure sensor e Suction thermistor R10T...
- Page 442 Technical data z Electronic expansion valve (receiver gas) Y4E aa Electronic expansion valve (liquid cooling) Y5E bb Electronic expansion valve (subcool) Y2E cc Solenoid valve (liquid pipe) Y2S dd Fan motor M1F REYQ8~20+REMQ5U7Y1B Service manual VRV IV+ Heat Recovery ESIE18-15B – 2020.05...
- Page 443 Technical data 6.4.2 Component overview: REYQ14~20U units INFORMATION For more detailed information about the thermistors, see "To perform an electrical check of the specific thermistor" [ 348]. f g i j k a Fan motor M1F b Fan motor M2F c Upper heat exchanger 4‑way valve Y5S d Lower heat exchanger 4‑way valve Y4S e High pressure / low pressure 4‑way valve Y3S f Electronic expansion valve (receiver gas) Y4E...
- Page 444 Technical data n Receiver gas thermistor R13T o Solenoid valve (liquid pipe) Y2S p Compressor suction thermistor R12T q High pressure switch S1PH r High pressure switch S2PH s Gas pipe thermistor of the subcool heat exchanger R6T t Main liquid pipe thermistor R3T u Low pressure sensor v Oil return valve (M1C) Y11S w Compressor M2C discharge thermistor R22T...
- Page 445 Technical data 6.5 Switchbox overview 6.5.1 Single fan units Switchbox Front view Fan motor (M1F) Rear view Compressor (M1C) Sub PCB (A5P) Main PCB (A1P) Rectifier voltage check connector (X3A) Main supply connection terminal (X1M) M1F connector (X1A) Reactor (L1R) Noise filter PCB (A2P) Fan inverter PCB (A4P) Inverter PCB (A3P)
- Page 446 Technical data 6.5.2 Double fan units Switchbox Sub PCB (A8P) Fan motor (M1F) Main PCB (A1P) Fan motor (M2F) M1F connector (X1A) Compressor (M2C) Fan inverter PCB for M1F (A4P) Compressor (M1C) Noise filter PCB (A5P) Rectifier voltage check connector for A6P (X6A) Noise filter PCB (A2P) Rectifier voltage check connector for A3P (X5A) Reactor L2R for A6P)
- Page 447 Technical data 6.5.3 Branch selector box BS1Q-A a X1M b A1P BS4Q-A a X1M b X3M c X4M d X2M e A1P BS6Q-A / BS8Q-A a X1M b X3M c X4M d X2M e A1P f A2P REYQ8~20+REMQ5U7Y1B Service manual VRV IV+ Heat Recovery ESIE18-15B –...
- Page 448 Technical data BS10Q-A / BS12Q-A a X1M b X3M c X4M c X4M d X5M d X2M e A1P f A2P f A3P BS16Q-A a X1M b X3M c X4M d X5M d X6M d X2M e A1P f A2P f A3P f A4P REYQ8~20+REMQ5U7Y1B...
- Page 449 Technical data 6.6 Safety devices Wiring Component Description Trigger Error Action type symbol Current sensor Earth leakage T1A > 75 mA (± 25%) Drop control protection S1PH, High pressure High pressure High pressure >4.0 MPa (+0.00, Forced stop S2PH switch protection -0.15) Reset: high pressure <3.0 MPa ±0.15 S1NPH...
- Page 450 Technical data Wiring Component Description Trigger Error Action type symbol R15T Compressor body Overheat Temperature >135˚C for 3 times Forced stop thermistor protection within 100 minutes Reset: Temperature <100˚C R21T, Discharge pipe Overheat Temperature >120˚C for 2 times Forced stop R22T thermistor protection within 10 minutes...
- Page 451 Technical data 6.7 Field information report See next page. REYQ8~20+REMQ5U7Y1B Service manual VRV IV+ Heat Recovery ESIE18-15B – 2020.05...
- Page 452 In case a problem occurred on the unit which could not be resolved by using the content of this service manual or in case you have a problem which could be resolved but of which the manufacturer should be notified, we advise you to contact your distributor.
- Page 453 Application information Application (house, apartment, office,…): New project or reimbursement: Piping layout / Wiring layout (simple schematic): Unit / Installation information Model name: Serial number: Installation / commissioning date: Software version user interface: Software version outdoor PCB: Provide pictures of the field settings overview (viewable on the user interface).
- Page 454 Technical data 6.8 Service tools 1 For an overview of the available service tools, check the Business Portal: http://www.mydaikin.eu. 2 Go to the tab After-sales support on the left navigation pane and select Technical support. 3 Click the button Service tools. An overview of the available service tools for the different products is shown.
- Page 455 Technical data 6.9 Field settings 6.9.1 To access mode 1 or 2 1 Check if the unit is in normal mode. If NOT in normal mode, push BS1 to return to normal mode. 7‑segment display indication state will be as shown: Result: 2 7‑segment display indications: Blinking...
- Page 456 Technical data 2 Push BS1 one time. Result: Mode 1 is accessed: 3 Push BS2 10 times. Result: Mode 1 setting 10 is addressed: 4 Push BS3 one time; the value which is returned (depending on the actual field situation), is the amount of indoor units which are connected to the system. Result: Mode 1 setting 10 is addressed and selected, return value (e.g.
- Page 457 Technical data 3 Push BS2 18 times. Result: Mode 2 setting 18 is addressed: 4 Push BS3 1 time; the value which is returned (depending on the actual field situation), is the status of the setting. In the case of [2‑18], default value is "0", which means the function is not active.
- Page 458 Technical data 6.9.4 Mode 1: Field settings In mode 1 you can make field settings to configure the system. The LEDs give a binary representation of the setting/value number. This column shows the number of times you have to push the SET button (BS2) to access the field setting. N°...
- Page 459 Technical data N° Item Display Content 10 Number of indoor units 1.10 Shows total amount of connected indoor units on a single F1/F2 in line. Possible 0 ˜ 63 13 Number of outdoor units 1.13 Shows total amount of outdoor units connected on a single F1/F2 out line. Possible 0 ˜ 63 15 Number of units in zone 1.15...
-
Page 460: Table Of Contents
Technical data N° Item Display Content 34 Remaining days until next refrigerant 1.34 Off: refrigerant leak check not active or leak check operation possible 1 ˜ 366 35 Result of last automatic refrigerant leak 1.35 Normal check Outdoor temperature out of range Indoor temperature out of range 36 Result of 2nd last automatic refrigerant 1.36... - Page 461 Technical data 6.9.5 Mode 2: Field settings In mode 2 you can make field settings to configure the system. The LEDs give a binary representation of the setting/value number. This column shows the number of times you have to push the SET button (BS2) to access the field setting. The bold content is the default setting.
- Page 462 Technical data N° Item Display Content Additional refrigerant charge 2.14 "Additional refrigerant charge amount amount" [ 372] Outdoor unit fan high static pressure 2.18 Deactivated setting Activated Additional refrigerant charge 2.20 operation Refrigerant recovery mode 2.21 Nighttime low noise operation level 2.22 setting (combined with 2-26 and Level 1...
- Page 463 Technical data N° Item Display Content Forced demand setting 2.32 Step 1 (2-30) on Step 2 (2-31) on Forced low fan speed to thermo on 2.34 Cooling and heating indoor units if total indoor thermo Heating only on > 130% connection ratio Never Outdoor unit is lower than the 2.35...
- Page 464 Technical data N° Item Display Content Multi outdoor main/sub setting 2.51 Auto Forced master Forced sub 1 Forced sub 2 Drainpan heater output signal 2.52 Compressor operation output at X17A Drainpan heater function activated, output at X10A Drainpan heater function activated, output at X10A Capacity‑less heating 2.70...
- Page 465 Technical data N° Item Display Content Detailed refrigerant check during 2.88 Enabled test-run Disabled Multi tenant setting (soft) 2.90 Disabled Enabled [24 hours] REYQ8~20+REMQ5U7Y1B Service manual VRV IV+ Heat Recovery ESIE18-15B – 2020.05...
- Page 466 Technical data 6.9.6 Overview of field settings for indoor units The overview lists all possible settings for the indoor units. The availability of the setting depends on the indoor unit type, see "Field settings as per type indoor unit". Bold content is default setting. Mode code Description function...
- Page 467 Technical data Mode code Description function code Description selection 11(21) Fan setting of heating Standard Slight increase Increase Sensitivity presence sensor High sensitive Low sensitive Standard Disable presence sensor Airflow adjustment Manual setting (see mode 23-6 below) ESP auto judgment completed Start ESP auto judgment (if control set to fan only + ON) Compensation by floor sensor...
- Page 468 Technical data Mode code Description function code Description selection 12(22) Optional board KRP1A… output Indoor unit turned ON by X1X2 thermostat Operation output Malfunction output T1T2 input signal Forced OFF ON/OFFcontrol External protection device input Forced OFF - multi tenant Thermostat differential to set 1.0°C (FXFQ, FXZQ, FXCQ, FXKQ, point...
- Page 469 Technical data Mode code Description function code Description selection 13(23) Air flow amount setting (ceiling Standard height) High Extra high Number of air outlet 4-blow 4-blow directions panel 3-blow directions 2-blow directions Swing pattern setting if 4 swing All direction simultaneously swing motors Opposite sides synchronization swing...
- Page 470 Technical data Mode code Description function code Description selection 15(25) Air cleaner Not equipped Equipped Thermostat OFF excess humidity Not equipped Equipped Direct duct connection Not equipped Equipped Drain pump operation heating Not equipped operation (if humidifier is used) Equipped Filter sign By timer By external input...
- Page 471 Technical data 6.9.7 Field settings as per type of indoor unit The overview lists all possible settings for the indoor units. The availability of the setting depends on the indoor unit type, see "Field settings as per type indoor unit". Field setting Code Indoor...
- Page 472 Technical data Field setting Code Indoor BRC… FXKQ-M FXFQ-B FXCQ-A FXSQ-A FXUQ-A FXMQ-P FXHQ-A FXDQ-A FXZQ-A FXAQ-A FXLQ-P FXNQ-A Biddle EKEQM spare spare REYQ8~20+REMQ5U7Y1B Service manual VRV IV+ Heat Recovery ESIE18-15B – 2020.05...
- Page 476 ESIE18-15B 2020.05 Verantwortung für Energie und Umwelt...