Advertisement
Quick Links
https://appliancetechmanuals.com
Installation assistance available at:
YAMAHA
®
YXZ
®
www.rockfordfosgate.com/rftech
AMPLIFIER
INSTALLATION KIT
RFYXZ-K8
Serial Number:
Date of Purchase:
600 South Rockford Drive • Tempe, Arizona 85281 United States
Direct: (480) 967-3565 • Toll Free: (800) 669-9899
R O C K F O R D F O S G A T E . C O M
Installation & Operation
Advertisement

Related Manuals for Rockford Fosgate Yamaha YXZ RFYXZ-K8


Summary of Contents for Rockford Fosgate Yamaha YXZ RFYXZ-K8
- Page 1 https://appliancetechmanuals.com Installation assistance available at: YAMAHA ® ® www.rockfordfosgate.com/rftech AMPLIFIER INSTALLATION KIT RFYXZ-K8 Serial Number: Date of Purchase: 600 South Rockford Drive • Tempe, Arizona 85281 United States Direct: (480) 967-3565 • Toll Free: (800) 669-9899 R O C K F O R D F O S G A T E . C O M Installation &...
- Page 2 12 Warranty ©2016 Rockford Corporation. All Rights Reserved. ROCKFORD FOSGATE and associated logos where applicable are registered trademarks of Rockford Corporation in the United States and/or other countries. All other trademarks are the property of their respective owners. Specifications subject to change without notice.
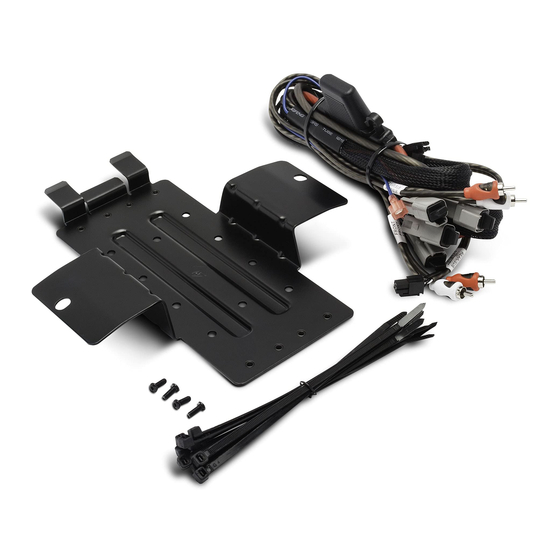
- Page 3 https://appliancetechmanuals.com Amplifier Bracket Assembly AMPLIFIER BRACKET Amplifier (Not Included) Amplifier Mounting Bracket TYPICAL ASSEMBLY Fig. 1...
- Page 4 https://appliancetechmanuals.com Wire Harness Schematic PMX-2 Source Unit Front Left Front Right Rear Left Rear Right Front RCA Input Rear/Sub RCA Input Front RCA Input Rear/Sub RCA Input Front Output Fuse 12V Battery...
- Page 5 Models may differ from year to year depending on factory options and aftermarket accessories added. • This kit are specifically designed to work with Rockford Fosgate’s PMX series compact digital media receivers and speaker enclosures. • With the addition of an amplifier or source unit, be sure that your current charging system is in proper working order.
- Page 6 https://appliancetechmanuals.com Installation There are (4) mounting bolts holding the seat frame in place. Remove these Step 4 - Remove Passenger Side Panel bolts using a 12mm socket and rachet. Then, lift the seat assembly out. After the center console is out of the way, remove these (5) plastic rivets with a flat blade screwdriver.
- Page 7 https://appliancetechmanuals.com Installation NOTE: The tongue has (2) tabs that go above the plastic panel and (1) below. Step 5 - Amplifier Mounting Bracket Using the supplied screws, attach the amplifier to the bracket. Mount There are (2) holes that the bracket needs to align with. the amplifier with the input connections closest to the tongue end of the NOTE: On the driver’s side, the panel will need to be pulled up to get the bracket.
- Page 8 https://appliancetechmanuals.com Installation Once all connections are made at the amplifier, begin to route the harness Plug the RCA’s from the main harness into the back of the PMX-2 and slide down the passenger side of the vehicle following the main vehicle harness. radio into the center console.
- Page 9 https://appliancetechmanuals.com Installation Once the system checks out, set the gains using the Clip Indicator lights on the amplifier. NOTE: Refer to the amplifier’s installation manual or Yamaha YXZ installation video for setup. Reassemble the vehicle once all wiring is secure and the system is working properly.
- Page 10 https://appliancetechmanuals.com...
- Page 11 https://appliancetechmanuals.com...
- Page 12 What is Covered This warranty applies only to Rockford Fosgate products sold to consumers by authorized Rockford Fosgate dealers in the United States of America. Prod- ucts purchased by consumers from an Authorized Rockford Fosgate Dealer in another country are covered only by that country’s Distributor and not by Rockford Corporation.