Table of Contents
Advertisement
Quick Links
Advertisement
Table of Contents

Related Manuals for Aiphone GT-1C7W


Summary of Contents for Aiphone GT-1C7W
- Page 1 GT-1C7W/GT-1C7W-L Residential/Tenant Station...
-
Page 2: General Precautions
PRECAUTIONS Be sure to follow the instruction Prohibited Do not dismantle unit Keep unit away from water General Precautions WARNING (Negligence could result in death or serious injury.) CAUTION Notice (Negligence could result in injury to people or damage to property.) - Page 4 PRECAUTIONS Emergency alarm Part names and functions Notifi cation Initial set-up Settings list Preparing a microSDHC card Adjusting screen brightness Changing the sound settings Connecting with a mobile device Changing the time settings Changing the display language Cleaning mode Setting of notifi cation LED Other settings Receiving a call Updating a fi...
-
Page 5: Operation Panel
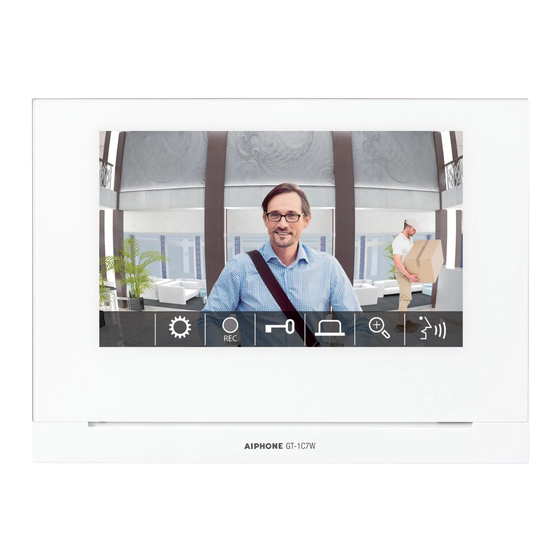
Operation panel Color LCD touchscreen Wireless LAN antenna B Wireless LAN antenna A RESET button microSDHC card slot Microphone Speaker Notifi cation LED (Orange) Indicates the current status of the station by lighting up or fl ashing. Station status Indication pattern fi... - Page 6 How to read screen MENU screen fi fi fi fi fi While communicating with the entrance station fi Navigation buttons fi...
-
Page 7: Initial Setup
Initial set-up Setting the current date and time Set the day, month, year, hour, and minute individually by taping fi If the monitor is o , tap the screen to turn on the LANGUAGE 1/2 screen. When the setting has fi nished, tap To correct date and time Tap desired display language, then tap Date/Time... - Page 8 Preparing a microSDHC card About microSDHC card Inserting/removing a microSDHC card fi Specifi cations Inserting a microSDHC card In standby mode, insert a microSDHC card into the card slot. Removing a microSDHC card Lightly push on the card to pop out.
- Page 9 Formatting a microSDHC card fi From the MENU screen, tap Other Settings . fi To continue confi guring the settings, tap Tap microSDHC Card Format microSDHC card .
-
Page 10: Connecting With A Mobile Device
Connecting with a mobile device Flow of the settings Connect the station with Wi-Fi. ( P. 11) Connect a mobile device with the Wi-Fi. (See the instruction manual of each mobile device.) Register a mobile device to the station. ( P. - Page 11 Connecting the station with Wi-Fi Press the WPS button on the Wi-Fi router, and then tap Connecting using "Auto Connect (WPS)" From the MENU screen, tap Other Settings . If the connection is failed fi Connecting using "Manual Setup" fi Confi...
- Page 12 Searching SSID When inputting SSID manually From the MENU screen, tap Other Settings . From the MENU screen, tap Other Settings . fi To continue confi guring the settings, tap fi Tap Network Manual Setup . To continue confi guring the settings, tap Tap Network Manual Setup .
-
Page 13: Setting Ip Address
Number of registerd Apps confi rmation Setting IP address message From the MANUAL SETUP screen, tap IP Address . fi Confi gure the settings for each item. Item Description IP Address/ Subnet Mask (v4 only)/ Prefix (v6 only)/ Default Gateway/ DNS Server fi... -
Page 14: Connection Check
Connection check Confi rming the current network settings fi From the MENU screen, tap Other Settings . From the MENU screen, tap Other Settings . fi To continue confi guring the settings, tap fi Tap Network Manual Setup . To continue confi guring the settings, tap Tap Network Status . -
Page 15: Selecting The Antenna
Enabling or disabling the network Selecting the antenna connection From the MENU screen, tap From the MENU screen, tap Other Settings . Other Settings . fi fi To continue confi guring the settings, tap To continue confi guring the settings, tap Tap Network Tap Network Network Advanced Settings... -
Page 16: Using The Keyboard
Using the keyboard Full keyboard Alphanumeric input mode (lower case) Symbol input mode Alphanumeric input mode (upper case) For number input For hexadecimal number input... - Page 17 Connecting a mobile device with a Registering a mobile device to the station Wi-Fi router Operation with a mobile device Run the AIPHONE Type GT from the icon on the Home screen. Registering a mobile device to the station Allow this app to send notifi cations.
- Page 18 Read the screen for the End User Licence Select Agree or Disagree and tap Agreement carefully and tap Next . AIPHONE Type GT Operation with the station From the MENU screen, tap Other Settings . fi To continue confi guring the settings, tap Tap Register / Delete Apps Register Apps .
- Page 19 If the following error message appears Operation with a mobile device Enter the one-time password displayed on the screen of the station within the expiration time, and tap Next . Start . Enter the user name of the mobile device and tap Register .
- Page 20 Deleting the mobile device from the station. From the MENU screen, tap Other Settings . fi To continue confi guring the settings, tap Tap Register / Delete Apps Delete Apps . Tap the mobile device to delete. fi To delete App, tap...
-
Page 21: Answering A Call
When receiving a call from a entrance station or guard station Answering a call To answer the call To end the communication Speak to the visitor. Other features... - Page 22 Operation during receiving a call or communication Releasing the door Activating doctor call While being called or communicating, tap To enable doctor call. Tap YES . Activating an external unit such as lightning equipment While being called or communicating, tap fi...
-
Page 23: Pan/Tilt Operation
Changing the display to the full-screen Pan/tilt operation mode When in zoom view, tap , or Tap on the center of the screen. To restore the normal display mode. Tap the screen. Zoom In/Zoom Out to zoom in, and touch to zoom out. - Page 24 Manual recording Recording Automatic recording when a video is displayed. More Information fi fl...
-
Page 25: Adjusting The Screen Brightness
Communication using touch-to-talk Adjusting the screen brightness While in communication, tap to adjust the screen brighter, and To speak, tap to adjust the screen darker. Adjusting the receiving volume To listen, tap to adjust the volume higher, and adjust the volume lower. - Page 26 Turning on/o visibility enhancement Turning on/o the light control To turn on the visibility enhancement To turn on the light control To turn o the light control To turn o the visibility enhancement again.
- Page 27 Switching to surveillance camera video image when video image at the entrance station is displayed. To return to the video image at the entrance station again.
- Page 28 From the MENU screen, tap Tap the entrance station to monitor. Speak when the guard answers. fi To end monitoring, tap Available functions during monitoring...
- Page 29 Screens and icons Recording list During play or play standby 25 December 2020 10:25 25 December 2020 10:25 1/1000 Pause Protect...
-
Page 30: Playing Recordings
Playing recordings Protecting recordings From the MENU screen, tap To protect a recording on the recording list From the MENU screen, tap of the recording to protect. Tap the recording to view. To protect the currently-selected To play, tap recording while in standby 25 December 2020 10:25 1/1000 Pause... -
Page 31: Deleting A Recording
To cancel the protection of the currently- Deleting a recording selected recording While in standby, tap Tap OFF . To delete a recording Protect To delete a recording from the recording list On the recording list, tap icon of the recording to delete. - Page 32 To delete all recordings Copying recordings from the built-in memory onto a microSDHC card Insert the microSDHC card into the residential/ From the MENU screen, tap tenant station. Other Settings . To delete all the recordings in the built-in memory, remove any microSDHC card inserted in fi...
- Page 33 When the emergency alarm switch is pressed and locked (or when there is a line - o trouble) fi When receiving a call from the guard station To end the communication fi fl To answer the call and communicate with the guard station. fi...
- Page 34 fi fi From the MENU screen, tap Tap Check of the notifi cation to view. fi fi...
- Page 35 Relevant Item Details page Brightness Volume Receive Ringtone Touch Sounds Date / Time Current Time Date / Time Format Time Zone Daylight Saving Time Language Cleaning Mode Notifi cation LED fi fi fi Other Settings Register / Delete Apps microSDHC Card Video Quality Station Information fi...
- Page 36 Settings Default From the MENU screen, tap Tap Brightness . to adjust the screen brighter, and to adjust the screen darker. to apply changes.
-
Page 37: Adjusting Ringtone Volume
Adjusting receiving volume Enabling/Disabling the touch sound Settings Default Volume From the MENU screen, tap Settings Receive . Default Volume From the MENU screen, tap Touch Sounds . to adjust the volume higher, and adjust the volume lower. Tap ON to enable or OFF to disable the touch sound. -
Page 38: Setting The Time Zone
Setting the current date and time to apply changes. Daylight Saving Time None Selecting the display format of the List of time zones date and time fi Settings Display example fi dd/mm/yyyy 23:59 mm/dd/yyyy 23:59 dd/mm/yyyy 11:59 PM mm/dd/yyyy 11:59 PM dd/mm/yyyy PM11:59 mm/dd/yyyy PM11:59 Default: dd/mm/yyyy 23:59... -
Page 39: Setting Daylight Saving Time
Setting daylight saving time Settings Description None +1(h) Date/Time From the MENU screen, tap Daylight Saving Time . Set whether to utilize daylight saving time. fi fi Settings Default to apply changes. From the MENU screen, tap Notifi cation LED . Tap ON to turn notifi... -
Page 40: Adjusting Video Quality
Registering/Deleting a mobile Tap Video Quality . device • Downloading the App to the mobile device • Registering a mobile device to the station • Deleting the mobile device from the station to improve the quality or to lower the quality. Setting a microSDHC card •... -
Page 41: Viewing Station Information
Confi guring the settings for automatically Viewing station information updating the station fi fi fi Viewing a notifi cation for updating the Settings fi station Default From the MENU screen, tap Other Settings . From the MENU screen, tap Other Settings . fi... -
Page 42: Configuring Network Settings
Confi guring network settings Confi rming the related regulations • Connecting using "Auto Connect (WPS)" From the MENU screen, tap • Connecting using "Manual Setup" Other Settings . • Confi rming the current network settings • Other Wi-Fi settings fi To continue, tap Initializing user settings Regulatory . - Page 43 fi • Automatic update through the network. • Receiving a notifi cation for available updates through the network. • Updating the station by using a microSDHC card on which the newest version of the fi rmware is stored. Automatic update through the To update, tap network fi...
-
Page 44: Cleaning The Exterior Surfaces
Updating the station by using a To perform the updating, tap microSDHC card on which the newest version of the fi rmware is fi stored fi Install a microSDHC card on which the newest version of the fi rmware is stored. When the microSDHC card is recognized, tap fi... - Page 45 fi fl fi fi fi fi fi fi fi fi...
- Page 46 fi Important safety information...
- Page 47 ISED WEEE NBTC RF Exposure Information (SAR) Supplier’s Declaration of Conformity 47CFR §2.1077 Compliance Information Unique Identifi er: GT-1C7W, GT-1C7W-L Responsible Party – U.S. Contact Information FCC Compliance Statement...
- Page 48 fi fi AIPHONE CO., LTD., NAGOYA, JAPAN fl...