
Related Manuals for Spektrum DX7s


Summary of Contents for Spektrum DX7s
- Page 1 Instruction Manual Bedienungsanleitung Manuel d’utilisation Manuale di istruzioni Manual de instrucciones SD Logo is a trademark of SD-3C, LLC...
- Page 2 WARNING AGAINST COUNTERFEIT PRODUCTS Thank you for purchasing a genuine Spektrum product. Always purchase from a Horizon Hobby, Inc. authorized dealer to ensure authentic high-quality Spektrum product. Horizon Hobby, Inc. disclaims all support and warranty with regards, but not limited to, compatibility and performance of counterfeit products or products claiming compatibility with DSM or Spektrum.
-
Page 3: Table Of Contents
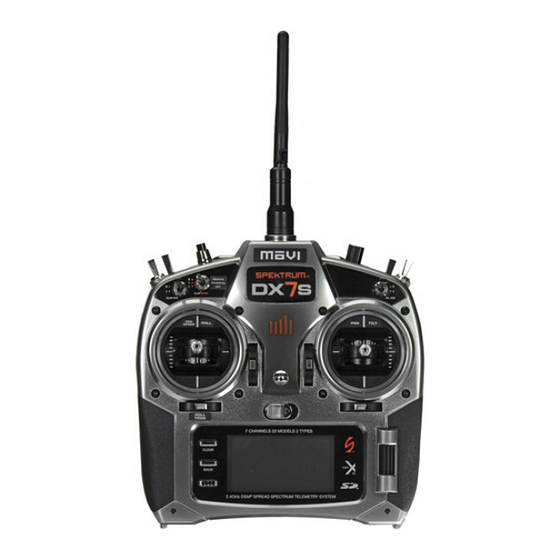
This manual covers the versatile Spektrum DX7s 7-channel computerized transmitter. Please visit www.spektrumrc.com for current information and firmware updates for DX7s programming. This transmitter’s field-proven features are ready to be applied to your model’s setup, control and tuning. BOX CONTENTS •... -
Page 4: Quick Start Guide
Horizon Hobby Product Support office or go to A. Insert the bind plug in the receiver’s BIND/DATA port. In horizonhobby.com to find a local Spektrum distributor in your systems using a separate battery pack and 3-wire switch, country of service. -
Page 5: Charging Your Transmitter
Charging Your Transmitter For first use, charge the included NiMH battery pack for 10 to The DX7s includes a rechargeable NiMH battery pack. The DX7s 12 hours until fully charged. Use the included 12V power supply. has a built-in multi-chemistry charger designed to charge 4-cell If you purchase the optional LiPo battery pack (SPMB4000LPTX), NiMH and 2-cell LiPo batteries at a charge rate of 200mAh. -
Page 6: Transmitter Functions
The transmitter comes with a thin, clear, plastic film applied to some front panels for protec- tion during shipping. Humidity and use may cause this film to come off. Carefully remove this film as desired. SPEKTRUM DX7s • RADIO INSTRUCTION MANUAL... -
Page 7: Binding
4. Connect battery to ESC and turn on ESC switch, if available. 7. Remove the bind plug from the receiver. The receiver’s LED will rapidly flash when the receiver is ready to bind. 5. While pressing the Trainer/Bind button, power on the trans- mitter. SPEKTRUM DX7s • RADIO INSTRUCTION MANUAL... -
Page 8: Using The Transmitter
Use an SD Card and the Transfer SD Card screen in the System Setup list to to do the following: • Import (copy) models from another DX7s transmitter • Export (transfer) models to another DX7s transmitter • Update AirWare™ software in the transmitter •... -
Page 9: Navigation
The Model Select function is used to change to a different model memory, typically when switching from the current model. You can store up to 20 models in the DX7s model memory. Access the model select function through the System Setup mode or through Direct Model Access (pressing the Clear and Back buttons at the same time). -
Page 10: Selecting A Region (Eu Version)
Gyro (requires Gyro channel) Governor (requires Governor channel) Servo Setup Tail Curve (used for non-tail lock gyros) D/R & Expo Mixing Throttle Cut Range Test Throttle Curve Timer Pitch Curve Monitor Swashplate (made available by Swash Type) SPEKTRUM DX7s • RADIO INSTRUCTION MANUAL... -
Page 11: System Setup
The Model Select function is used to change to a different model memory, typically when switching from the current model. You can store up to 20 models in the DX7s model memory. Access the model select function through the System Setup mode or through Direct Model Access (pressing the Clear and Back buttons at the same time). -
Page 12: Model Copy
4. Put throttle and switches in the desired failsafe positions (normally low throttle and neutral sticks) and put the trans- The DX7s is ready to operate with telemetry modules. Please mitter into bind mode. scroll through available options on the Telemetry Screen for 5. -
Page 13: Frame Rate
V-Tail and Elevon Wing selections may require attention to Servo named types. Available wing and tail types are shown in the Setup Reverse to make model respond correctly to controls. See screenshot illustrations below. Appendix for more recommendations. SPEKTRUM DX7s • RADIO INSTRUCTION MANUAL... -
Page 14: Differential
Assign a switch to enable differential values during flight or select “On” so that differential is always enabled. Flap System The DX7s flap system supports programming Norm (normal), Mid (middle—only available when using the three-position Flap Switch) and Land (landing) flap and elevator positions. Use of flaps can enable takeoff and landing in shorter distances. -
Page 15: Throttle, Pitch And Tail Curves
You can also assign values to available switch positions (from one to three rates are available, depending on the switch assigned). Make sure the gyro operates correctly and compensates in the correct direction. SPEKTRUM DX7s • RADIO INSTRUCTION MANUAL... -
Page 16: Governor
A. The aileron stick input tilts the swashplate to the right and left. B. The elevator stick input tilts the swashplate forward and back. C. The pitch/throttle stick input moves the whole swashplate up and down. SPEKTRUM DX7s • RADIO INSTRUCTION MANUAL... -
Page 17: Function List
0% is low throttle with mid trim. You may use negative values. Make sure the throttle goes to the desired position as shown in the servo monitor on the left side of the screen. SPEKTRUM DX7s • RADIO INSTRUCTION MANUAL... -
Page 18: Range Test
2. Press the button on the Flight Log until the F- frame losses especially when flying a new model. are displayed. All Spektrum aircraft transmitters incorporate a range testing 3. Stand 30 paces (approximately 90 feet/28 meters) away system which, when activated, decreases output power for a from the model, then face the model with the transmitter in range test. -
Page 19: Timer
(e.g., servo reversing, travel adjust, sub- Slave trim, trims). Use Slave mode when flying with the DX7s as a slave when the master radio has activated its Pilot Link. In this case, there is Programmable no need to match programming between the slave and master With Programmable, you can program the transmitter to transfer transmitter. -
Page 20: Failsafes
3. LED lights will continue to blink. 4. Move transmitter’s control sticks and switches to the desired Preset Failsafe positions then turn it on in bind mode. 5. The system should connect in less than 15 seconds. SPEKTRUM DX7s • RADIO INSTRUCTION MANUAL... -
Page 21: Receiver And Servo Information
1. When setting up large or complex aircraft with multiple high- NOTICE: The DSMX DX7s is compatible with all current Spe- torque servos, use a current and voltmeter (HAN172). Plug ktrum DSM2 and DSMX aircraft receivers, but NOT compatible the voltmeter in an open channel port in the receiver, and with the original DSM AR6000 receiver. -
Page 22: Appendix
Mode Conversion You can change Modes in your DX7s transmitter among Modes 1, 2, 3 and 4. Make mode changes in the transmitter using the System Settings Screen. Exit the System Settings Screen to save the new Mode number. Power off the transmitter and disconnect the battery. -
Page 23: Installing Optional Lipo Battery Pack
6. Install the optional LiPo battery pack into the transmitter. 7. Install the battery cover. NOTICE: When installing a LiPo battery pack, always set the bat- tery chemistry to LiPo in the Systems Setting screen to correctly set the low voltage alarm. SPEKTRUM DX7s • RADIO INSTRUCTION MANUAL... -
Page 24: Servo Control
Once both elevons move in the correct direction with aileron stick movement, check the elevator direction. With up elevator, both elevons should go up and vice versa. If the elevator direction is incorrect, switch the servo channels in the receiver. SPEKTRUM DX7s • RADIO INSTRUCTION MANUAL... -
Page 25: Troubleshooting Guide
Description SPMA9568 Battery Door, DX7s Painted SPM6707 Spektrum Double Transmitter Case Foam, Aircraft SPMB2000NMTX 2000mAh 4.8V TX Pack: DX8, DX7s SPM6708 Spektrum Single Stand Up Transmitter Case SPM6831 Replacement Antenna: DX8, DX7s SPM6709 Spektrum Single Stand Up Transmitter Case SPM9551... -
Page 26: Ama National Model Aircraft Safety Code
Please see your local or regional modeling association’s guidelines (j) Not operate a turbine-powered aircraft, unless in compliance with the AMA turbine regulations. (AMA Document #510-A). for proper, safe operation of your model aircraft. SPEKTRUM DX7s • RADIO INSTRUCTION MANUAL... -
Page 27: Fcc Information
This device complies with part 15 of the FCC rules. Operation is subject to the following two conditions: (1) This device may When operating your Spektrum transmitter, please be sure to not cause harmful interference, and (2) this device must accept... - Page 28 Visa, MasterCard, American Express, and Discover cards. By submitting any item to Horizon for service, you are agreeing to Horizon’s Terms and Conditions found on our website http://www.horizonhobby. com/Service/Request/. SPEKTRUM DX7s • RADIO INSTRUCTION MANUAL...
-
Page 29: Warranty And Service Contact Information
Declaration of Conformity (in accordance with ISO/IEC 17050-1) No. HH20110602 Product(s): SPM DX7s Channel Transmitter Telemetry System Item Number(s): SPM7800 Equipment class: Instructions for disposal of WEEE by users The object of declaration described above is in conformity with the... -
Page 30: Acro Model Setup
FLAP RATE SWITCH F. MODE SPEED NORM FLAP SYSTEM LAND CHANNEL ACTIVATION RATE 1 RATE 2 SW POS TRIM ELE - FLP AIL - RUD MIX 1 CHANNEL MIX 2 MIXING MIX 3 MIX 4 MIX 5 MIX 6 SPEKTRUM DX7s... - Page 31 SW POS TRIM CYCLIC AIL - THROTTLE CYCLIC ELE - THROTTLE CYCLIC AIL - THROTTLE MIX 1 CHANNEL MIXING MIX 2 MIX 3 MIX 4 MIX 5 MIX 6 SWITCH POSITION AILE ELEV RUDD DUAL RATE • EXPO SPEKTRUM DX7s...
- Page 32 © 2011 Horizon Hobby, Inc. The Spektrum trademark is used with permission of Bachmann Industries, Inc. All other marks and logos are trademarks or registered trademarks of Horizon Hobby, Inc. US 7,391,320. Other patents pending. www.spektrum-rc.com Created 5/11 16798 SPM7800...