Table of Contents
Advertisement
Quick Links
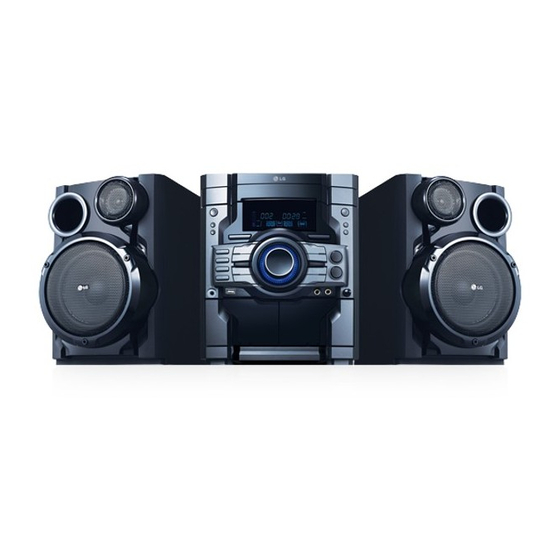
MDD64K
(MDD64K, MDS64V)
MDD104K
(MDD104K, MDS104V)
MDT354K
(MDT354K, MDS354V/W)
RDD264K
(RDD264K, RDS264V)
P/NO : MFL41698470
MDD64-A5U_ENG.indd 1
R
àÌÚÂÌÂÚ ‡‰ÂÒ : http://www.lge.com
àÌÙÓχˆËÓÌ̇ ÒÎÛÊ·‡ LG :
- Russia : 7-(495)771-76-76
- Ukraine : (380-44)490-7777, 8-800-303-0000
- Kazakhstan : 7-(727)272-22-22, 8-8000-805-805
ëÓÍ ÒÎÛÊ·˚ ÔË·Ó‡ — 7 ÎÂÚ ÒÓ ‰Ì Ô‰‡˜Ë ÚÓ‚‡‡ ÔÓÚ·ËÚÂβ.
ENGLISH
êYCCKNâ
Қазақ тілі
O'ZBEK
ìäêÄ∫çëúäÄ
2009.5.1 12:45:47 PM
Advertisement
Table of Contents

Related Manuals for LG MDD64K


Summary of Contents for LG MDD64K
- Page 1 MDT354K (MDT354K, MDS354V/W) RDD264K (RDD264K, RDS264V) àÌÚÂÌÂÚ ‡‰ÂÒ : http://www.lge.com àÌÙÓχˆËÓÌ̇ ÒÎÛÊ·‡ LG : - Russia : 7-(495)771-76-76 - Ukraine : (380-44)490-7777, 8-800-303-0000 - Kazakhstan : 7-(727)272-22-22, 8-8000-805-805 ëÓÍ ÒÎÛÊ·˚ ÔË·Ó‡ — 7 ÎÂÚ ÒÓ ‰Ì Ô‰‡˜Ë ÚÓ‚‡‡ ÔÓÚ·ËÚÂβ. P/NO : MFL41698470 MDD64-A5U_ENG.indd 1...
-
Page 2: Safety Precaution
® Partner, nergy To ensure proper use of this product, please read this owner’s manual carefully and LG has determined that this retain it for future reference. Shall the unit require maintenance, contact an authorized product or product models meet service center. -
Page 3: Table Of Contents
Contents Safety Precaution Recording to USB Contents Recording to TAPE Synchronized Recording from CD to TAPE Setting up Hooking up the unit Karaoke Basic Playback Main Unit Reserving the Song Remote control Karaoke Menu Playback Initial Setting the Area Code Adjust the general settings 8-10 Language Codes... -
Page 4: Setting Up
Setting up Attaching the speakers to the unit Be careful of the following Connect the black end of each wire to the terminals marked - (minus) and the • Be careful to make sure children not to put their hands or any objects into the other end to the terminals marked + (plus). -
Page 5: Hooking Up The Unit
Hooking up the unit VIDEO OUT jack connection Connect the VIDEO OUT jack on the unit COMPONENT VIDEO OUT to the corresponding input jacks on your TV (PROGRESSIVE SCAN) jacks using a Video cable. connection Connect one end of the component (Y PB PR) cable to the COMPONENT VIDEO OUT (PROGRESSIVE SCAN) jack on the unit and other end to the... -
Page 6: Main Unit
CD II Pauses REC/PAUSE(USB/TAPE) RDS (optional) Radio data system USB Selects USB function LG EQ DEMO In power off state to You can choose fixed sound demonstrate the function on display impression window. To cancel it, press 1/\ or DUBB. -
Page 7: Remote Control
You can control the sound level, input source, and RETURN (O): Moving back wards in the menu. power switching of LG TVs as well. Hold POWER (TV) REC (z): Recording to USB/ TAPE. and press PR/CH (+/–) button repeatedly until the TV STOP (x): Stops playback or recording. -
Page 8: Initial Setting The Area Code
Initial Setting the Area Code Adjust the general settings When you use this unit for the first time, you have to set the Area ON REMOTE Code as shown below. 1 Display setup menu SETUP ON REMOTE 2 Select a desired option on the first level 1 Display setup menu SETUP 3 Move to second level... - Page 9 Adjust the display settings 2.1 Speaker Setup (MDT354) TV Aspect – Select which screen aspect to use based on the shape of your TV screen. ON REMOTE [4:3]: Select when a standard 4:3 TV is connected. 1 Open the settings menu SETUP [16:9]: Select when a 16:9 wide TV is connected.
-
Page 10: Setting The Sound Mode
Setting the sound mode Adjust the lock settings To access the lock options, you must enter the 4-digit password. If you have not USER EQ yet entered a password you are prompted to do so. Enter a 4-digit password. Enter it again to verify. If you make a mistake while entering number, press 1 Press USER EQ. -
Page 11: Setting The Clock
Enjoying a pre-programmed sound field ON UNIT The system has a number of pre-set surround sound fields. You can select a desired sound mode by using EQ/ LG EQ. 1 Turn the power on 1/ | The displayed items for the Equalizer may be different depending on sound... -
Page 12: Displaying Disc Information
Displaying Disc Information Playing a Disc ON REMOTE ON UNIT ON REMOTE 1 Open the disc tray 1 Press DISPLAY Z OPEN/CLOSE Z OPEN/CLOSE 2 Insert a disc 2 Select an item 3 Close the disc tray 3 Adjust the Display menu settings Z OPEN/CLOSE Z OPEN/CLOSE 4 To Start playback... - Page 13 ® DviX 1.5 times faster playback Changing the character set to display DivX subtitle correctly 1 If the subtitle does not display properly, press and hold S-TITLE about 3 1 Press when a disc is already playing to watch and listen. seconds to display the language code menu.
-
Page 14: Viewing Photo Files
Viewing photo files Creating your own program You can play the contents of a disc in the order you want by arranging the order of the songs on the disc. The program is cleared when the disc is removed. ON UNIT ON REMOTE 1 Select a desired music then press PROG./MEMO. -
Page 15: Listening To The Radio
Listening to the radio Listening to the cassette tapes ON REMOTE ON UNIT ON UNIT ON REMOTE 1 Open the tape door Z PUSH EJECT 1 Select FM/ AM TUNER FUNCTION 2 Insert the tape 2 Select the radio station TUNING(-/+) TUN. -
Page 16: Listening To Music From Your External Device
Using an USB device Listening to music from your external device You can enjoy media files saved on an USB device by connecting the USB device to the USB port of the unit. The unit can be used to play the music from many types of external device. If you want to operate other function, see the CD playback section. -
Page 17: Recording To Usb
When you are recording, look out for the following Recording to USB • You can check the recording percentage rate for the USB record on the You can record a various sound source to USB. screen during the recording. (AUDIO, MP3/ WMA CD only) •... -
Page 18: Recording To Tape
Synchronized Recording from Recording to TAPE You can record a various sound source to TAPE. CD to Tape ON UNIT ON REMOTE ON UNIT ON REMOTE 1 Open the tape deck. PUSH EJECT PUSH EJECT 1 Open the tape deck and then insert >... -
Page 19: Karaoke Basic Playback
To adjust ECHO Volume Karaoke Basic Playback You can give an echo effect to the sound from the microphones. Press the ECHO VOL. + on the remote control to increase the echo volume or ON REMOTE ECHO VOL. - decrease it. (MIN, 1~14, MAX steps) 1 Check if the system is connected. -
Page 20: Karaoke Menu Playback
Select one among followings when you selected CLASSIC LIST in the previous Karaoke MENU Playback step. ON REMOTE 1. CLASSIC LIST 2. COMPOSER LIST 1 To move to the main menu, press MENU Select initial of song title or entire title. The main menu appears on the screen. -
Page 21: Language Codes
Language Codes Use this list to input your desired language for the following initial settings: Disc Audio, Disc Subtitle, Disc Menu. Language Code Language Code Language Code Language Code Language Code Language Code Afar 6565 Croatian 7282 Hausa 7265 Lingala 7678 Quechua 8185... -
Page 22: Troubleshooting
Troubleshooting Symptom Cause Correction POWER No power The power cord is not plugged in. Plug in the power cord. RADIO No sound The function switch is not set to the Radio mode. Set the switch to the Radio mode. There are electronic devices near the unit. Set the unit far from the devices. -
Page 23: Types Of Playable Discs
About the x Symbol Display Types of Playable Discs “ x ” may appear on your TV display during operation and indicates that the Logo function explained in this owner’s manual is not available on that specific DVD Type video disc. DVD-VIDEO: Discs such as movies that can Regional code be purchased or rented. -
Page 24: Specifications
Specifications General Power supply Refer to main label. Power consumption Refer to main label. Net Weight MDD64: 5.4 kg MDD104: 5.5 kg MDT354: 5.8 kg RDD264: 5.7 kg External dimensions (W x H x D) 272 x 334 x 344 mm Operating conditions Temperature: 5°C to 35°C, Operation status: Horizontal Operating humidity...