
Summary of Contents for Nakamichi EQ-Z1825
- Page 1 65-C1661-MA CE8545(英文版) 145x205mm 封面四色印刷, 內頁单色印刷 EQ-Z1825 User Manual 7 BAND AUDIO EQUALIZER nakamichicaraudio.com nakamichi.global nakamichi.caraudio...
-
Page 2: Specifications
For the best performance, we recommend that you have your Nakamichi product installed by an authorized Nakamichi dealer. If you would like to install this product on your own, we recommend for you to go through this manual to familiarize yourself with all the installation requirements and procedures. - Page 3 SPECIFICATIONS 1. Audio Equalizer 6. Mounting Brackets 2pcs 2. User Manual 2pcs 7. High Input Line 3. Mounting Screw (Ø3 X 7mm) 4pcs 8. Line Fuse 4. Mounting Screw (Ø4 X 16mm) 4pcs 9. Wiring Plug 5. Gasket 8pcs All specifications subject to change without notice. DIMENSIONS 182mm 2 EN...
-
Page 4: Panel Controls And Features
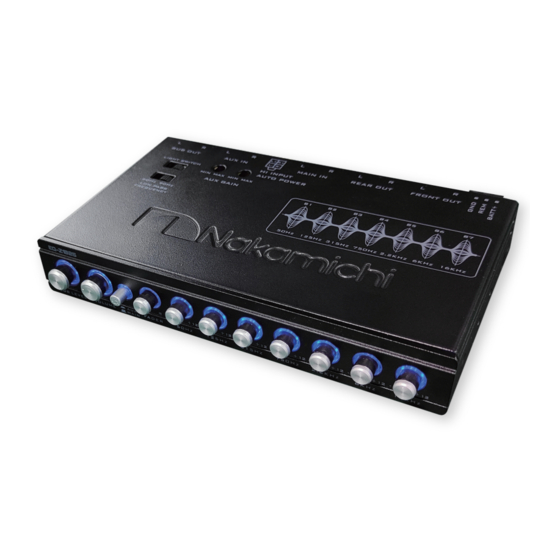
PANEL CONTROLS AND FEATURES Subwoofer Volume Master Volume Aux In(Auxiliary) Switch Fader Control Equalizer Gain Controls Low-pass Frequency Switch Aux Gain Control Hi Input Auto Power PRECAUTIONS Do not operate this product in ways other than those described in this manual. ●... -
Page 5: Installation And Wiring
INSTALLATION AND WIRING Installation of mobile audio and video components requires experience with a variety of mechanical and electrical procedures. Although this manual provides general installation and operation instructions, it does not show the exact installation methods for your particular vehicle. If you do not have the required knowledge and experience to successfully complete the installation, consult an authorized dealer about professional installation options. -
Page 6: Troubleshooting
INSTALLATION AND WIRING Auxiliary Source Source Unit Remote Turn-on HI level SPK Input (Optional) BATTERY Hi input Auto power Battery+ (1) REM (2) Front Out Main In Sub Out GND (3) Rear Out Aux In Chassis Ground Front Amp / Rear Amp SUB Amp TROUBLESHOOTING THE UNIT DOES NOT WORK;... - Page 7 OPERATIONS SETTING SYSTEM VOLUME ● Turn the master volume and subwoofer level controls to their minimum settings. Turn the source unit on and increase the volume until you hear distortion. ● Reduce the volume to just below the distortion point (approximately 80% of full volume). This is the maximum usable musical signal for the source unit.
- Page 8 Made in China | 中國製造...