
Related Manuals for VTech SN5127


Summary of Contents for VTech SN5127
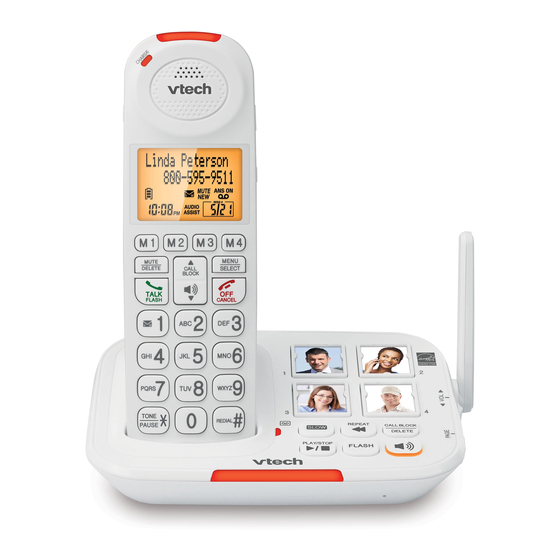
- Page 1 Go to www.vtechphones.com to register your product for enhanced warranty support and latest VTech product news. SN5127 Amplified Cordless Answering System with Big Buttons and Display User’s manual...
- Page 2 Please review this manual thoroughly to Unplug this product from the wall outlet ensure proper installation and operation before cleaning. Do not use liquid or of this innovative and feature rich VTech aerosol cleaners. Use a damp cloth for product. cleaning.
- Page 3 11. To reduce the risk of electric shock, do not not put a charged handset into the cradle, disassemble this product, but take it to if the phone is located in an environment an authorized service facility. Opening or containing concentrations of flammable removing parts of the telephone base or or flame-supporting gases, unless there handset other than specified access doors...
- Page 4 • Do not open or mutilate the battery. you should not think of cordless telephone Released electrolyte is corrosive and may conversations as being as private as those on cause burns or injury to the eyes or skin. The corded telephones. electrolyte may be toxic if swallowed.
-
Page 5: Table Of Contents
Table of contents Insert photos for speed dial keys .... 18 Dial a speed dial number ......18 Delete a speed dial entry ......18 What’s in the box ........1 Alarm reminder and melody ....19 Overview ..........2 Set alarm reminder ........19 Telephone base overview ...... - Page 6 Missed call indicator ........30 Retrieve voicemail from telephone service ..........54 Dial a caller ID log entry ......30 Retrieve voicemail ........54 Save a caller ID log entry to the phonebook ..........30 Set your voicemail number .......54 Delete the caller ID log entries ....31 Turn off the new voicemail indicators ..
-
Page 7: What's In The Box
What’s in the box Your telephone package contains the following items. Save your sales receipt and original packaging in the event warranty service is necessary. • To purchase a replacement battery or power adapter, visit our website at www.vtechphones.com or call 1 (800) 595-9511. -
Page 8: Overview
Overview Telephone base overview 7 – PLAY/STOP 1 – Antenna • Play messages. 2 – • Stop playing messages. • Adjust the listening volume during 8 – Visual ringer indicator message playback. • On when the telephone is in use, •... -
Page 9: Handset Overview
Handset overview • Press to call the preset speed dial memory number 2. • Press to call the preset speed dial memory number 3. • Press to call the preset speed dial memory number 4. 6 – • Show the menu. •... - Page 10 • Delete digits or characters when entering numbers or names. 11 – • Set or dial your voicemail number. 15 – CHARGE light • On when the handset is charging. 12 – 16 – Visual ringer indicator • Scroll up while in a menu, or in the •...
-
Page 11: Display Icons Overview
Display icons overview Telephone base lights overview The battery icon flashes when Visual ringer • Flashes when the telephone the battery is low and needs indicator base is ringing. charging. • On when the telephone is in use, or when the answering The battery icon animates system is answering an when the battery is charging. -
Page 12: Connect
Connect Mount the telephone base You can choose to connect the telephone base for desktop usage or wall mounting. • Use only the adapters provided. • Make sure the telephone is not connected to the switch controlled electric outlet. • The adapter’s prongs are not designed to hold the weight of the telephone. -
Page 13: Install And Charge The Battery
Install and charge the battery Charge the handset battery Place the handset in the charging cradle to Install the battery charge. Install the battery as shown below. 12 hrs • Use only the rechargeable batteries provided or replacement batteries (model BT205662). -
Page 14: Battery Backup Mode
Battery backup mode Battery Battery Action indicators status When there is a power failure, the handset The screen The battery Charge displays Put HS on base to power base is blank, or has no or without and Out of range OR No pwr at base displays Place very little interruption... -
Page 15: Before Use
Before use Check for dial tone Press TALK. If you hear a dial tone, the After you install your telephone or power installation is successful. returns following a power outage, the If you do not hear a dial tone: cordless handset will prompt you to set the •... -
Page 16: Configure Your Telephone
Configure your telephone SOS emergency call The AUDIO ASSIST/SOS button on the Use the handset menu cordless handset can function as SOS 1. Press MENU on the cordless handset in emergency button. It lets you quickly idle mode to enter the main menu. page other system devices and call 2. -
Page 17: How Does Sos Emergency Call Work
How does SOS emergency call • When none of the preset SOS numbers answer, the telephone re-calls the work? preset SOS numbers in sequence until • To make an emergency call, press the call is answered. The telephone and hold AUDIO ASSIST/SOS on the will call all the preset SOS numbers for right side of the cordless handset for 3 times before aborting the operation... -
Page 18: Enable Or Disable Internal Sos Alert
Enable or disable internal SOS alert 5. Speak towards the handset microphone. Press 5 when you finish Internal SOS alert is enabled by default. recording. The handset announces When you press and hold the AUDIO “Recorded.” ASSIST/SOS button to make an emergency call, the telephone pages all registered Play or reset SOS message system devices for 20 seconds. -
Page 19: Ringer Volume
Ringer volume Set date and time You can set the ringer volume level of the cordless handset and telephone base to • Make sure you set the date and time one of five levels or turn the ringer off. including the year correctly; otherwise the 1. -
Page 20: Caller Id Announce
Caller ID announce Set voicemail number The caller ID announce feature lets you If you subscribe to a voicemail service offered by your telephone service know who’s calling without having to look at the display. When you have an incoming provider, you can save your voicemail call, the handset and/or the telephone number to... -
Page 21: Key Tone
Key tone Home area code The cordless handset is set to beep with You can program your home area code each key press. You can adjust the key tone so that when you receive or dial a call volume or turn it off. If you turn off the key within your local area, only seven digits tone, there are no beeps when you press are shown or dialed, and the telephone... -
Page 22: Dial Mode
Photo speed dial Dial mode The dial mode is preset to touch-tone There are four photo speed dial direct dialing. If you have pulse (rotary) service, memory keys 1 to 4 on the telephone you need to change the dial mode to base, and four direct memory keys M1 to pulse dialing before using the telephone. -
Page 23: Store A Photo Speed Dial Entry
Store a photo speed dial entry Edit a photo speed dial entry 1. Press MENU on the cordless handset in 1. Press MENU on the cordless handset in idle mode to enter the main menu. idle mode to enter the main menu. 2. -
Page 24: Insert Photos For Speed Dial Keys
Insert photos for speed dial keys Dial a speed dial number You can insert photos into the photo speed Using the telephone base: dial compartments on the telephone base, • Press one of the photo speed dial or write the contact names on cards and keys on the telephone base to dial the insert them into the compartments. -
Page 25: Alarm Reminder And Melody
Alarm reminder and melody Turn off a reminder 1. Press MENU on the cordless handset in The reminder feature helps remind you idle mode to enter the main menu. of important events. You can set alarm 2. Press q or p to choose Reminder and reminders that remind you at specific then press SELECT. -
Page 26: Rename Reminders
Telephone operations Rename reminders You can rename the reminders to give Telephone base control key panel: them names that are meaningful to you. 1. Press MENU on the cordless handset in idle mode to enter the main menu. 2. Press q or p to scroll to Reminder and then press SELECT. -
Page 27: Make A Call
Make a call Make SOS emergency call Using a cordless handset: Using a cordless handset: • Press TALK or • Press and hold AUDIO ASSIST/SOS on , and then dial the telephone number. the cordless handset for 3 seconds. The telephone base announces, “Emergency mode is activated“, and pages all •... -
Page 28: Photo/Memory Speed Dial
Cancel SOS emergency call: Volume You can cancel an SOS emergency call at Slide the VOL control on the cordless any time. handset or on the telephone base: • Press TALK or CANCEL on the handset; • to adjust the speaker volume level when on a call;... -
Page 29: Audio Assist
Audio Assist Join a call in progress ® The Audio Assist feature enhances the When you are already on an outside call clarity and loudness of your caller’s voice with the cordless handset or the telephone on the handset earpiece when you are base, the other handset or the telephone on a call, or listening to a message or an base can join the call. -
Page 30: Chain Dialing
Chain dialing Find handset Use this feature to initiate a dialing You can use the Page/Intercom feature to sequence from numbers stored in the find your misplaced cordless handset. phonebook or caller ID log or redial while To start intercom paging: you are on a call. -
Page 31: Redial List
Redial list Intercom The cordless handset stores the last 10 You can use the intercom feature for telephone numbers dialed. Entries are conversations between the telephone base shown in reverse chronological order. and the cordless handset. If you have two When there are already 10 entries, the or more cordless handsets, you can make oldest entry is deleted to make room for... -
Page 32: Answer An Incoming Call During An Intercom Call
Answer an incoming call during an 2. To answer the intercom call on the destination handset, press TALK or intercom call . The cordless handset displays When you receive an outside call during Intercom. an intercom call, there is an alert tone. -OR- •... -
Page 33: Phonebook
Phonebook 2. To answer the intercom call on the destination handset, press TALK or The phonebook can store up to 50 entries, . The cordless handset displays which are shared by all handsets. Each Intercom. entry may consist of a telephone number -OR- with up to 30 digits, and a name with up to To answer the intercom call on the... -
Page 34: Review A Phonebook Entry
Save a redial entry to the then you hear a confirmation tone. phonebook While entering names and numbers, you can: 1. Press and hold REDIAL when the • Press DELETE to backspace and erase a cordless handset is not in use. digit or character. -
Page 35: Edit A Phonebook Entry
Caller ID Edit a phonebook entry 1. Search for the desired entry in the If you subscribe to caller ID service, phonebook (see Review a phonebook information about each caller appears after entry or Alphabetical search). the first or second ring. If you answer a call 2. -
Page 36: Memory Match
Memory match Dial a caller ID log entry When the incoming telephone number • Review the caller ID log entries, and matches the last seven digits of a when your desired entry shows on telephone number in your phonebook, the handset screen, press TALK on the the screen displays the stored name of the handset to dial. -
Page 37: Delete The Caller Id Log Entries
Smart call blocker * Delete the caller ID log entries 1. Review the caller ID log entries. If you have subscribed to caller ID service, then you can use the Smart call blocker 2. When the desired caller ID log entry feature to screen incoming calls. -
Page 38: Set Smart Call Blocker On/Off
Call category Call control • Smart call blocker is set to on, and to allow Calls without Option 1: Screening with numbers caller name all incoming calls by default. When Smart call blocker is on, the first ring of all incoming If you have selected this Numbers that calls will be muted. -
Page 39: Set Welcome Calls
Set welcome calls Save a caller ID log to allow list: 1. Press MENU on the cordless handset in Add allow list entry: idle mode to enter the main menu. Add numbers to the allow list that you want 2. Press q or p to scroll to Caller ID log, to allow their calls to get through to you. - Page 40 Edit an allow list entry Delete all allow list entries: 1. Press CALL BLOCK on the cordless 1. Search for the desired entry in the allow list (see Review allow list entry). handset when it is not in use. 2. When the desired entry appears, press -OR- SELECT.
- Page 41 Add star name list entry: Save a caller ID log to star name list: 1. Press MENU on the cordless handset in Add names (up to 15 characters) of organizations like schools, medical offices, idle mode to enter the main menu. and pharmacies that use robocalls to 2.
-
Page 42: Set Unwelcome Calls
Delete star name list entry: Set unwelcome calls 1. Press CALL BLOCK on the cordless Add block list entry: handset when it is not in use. Add numbers to the block list that you -OR- want to block them from calling. The block Press MENU to enter the main menu list stores up to 1,000 entries. - Page 43 Save a caller ID log to block list: Edit a block list entry 1. Press MENU on the cordless handset in 1. Search for the desired entry in the allow list (see Review block list entry). idle mode to enter the main menu. 2.
-
Page 44: Control Calls Without Numbers
Delete all block list entries: Control calls without numbers 1. Press CALL BLOCK on the cordless Use this setting to control “out of area” calls or calls with numbers that are set to handset when it is not in use. “Private”. -
Page 45: Control Uncategorized Calls
Control uncategorized calls 4. If you select Screening, press q or p to choose one of the following Use this setting to control calls with options, and then press SELECT. numbers that are not in your phonebook, • w/Caller name - ask the caller to allow list or block list, or have no caller ID say his/her name before the call number display. -
Page 46: Screening Announcements
4. If you select Screening, press q or Screening announcements p to choose one of the following If you have set to screen calls without options, and then press SELECT. numbers and/or screen uncategorized • w/Caller name - ask the caller to calls, the callers of one or all of the say his/her name before the call following incoming call categories will... - Page 47 3. Press q or p to scroll to Play annc, Reset all your screening and then press SELECT. announcements: 4. Press q or p to scroll to w/ Caller 1. Press CALL BLOCK on the cordless name, and then press SELECT. handset when it is not in use.
-
Page 48: Voice Guide To Set Smart Call Blocker
Voice guide to set Smart call Screen calls without numbers blocker If Smart call blocker is on, and your telephone is set to screen calls without This feature is an easy and alternative way number, the telephone will not ring when for you to do the basic setup of Smart call receiving incoming calls that are “out of blocker. - Page 49 • If you receive a call waiting call without Forward a screened call to the answering number while on a call, Smart call blocker system: will not screen the new call. You can press • Press 4 on the handset or telephone TALK or on the cordless handset to take base to to forward the call to the...
-
Page 50: Screen Uncategorized Calls
Screen uncategorized calls • While a call is being screened, you can press TALK or on the cordless handset to stop If Smart call blocker is on, and your screening and answer the call. telephone is set to screen uncategorized •... -
Page 51: Option While On A Screened Call
Options for screened uncategorized End a screened call: • If you do not want to take the call, press calls on the cordless handset to end the 1. When the telephone starts ringing, call. and the screen displays Screened call, press TALK or on the handset or Option while on a screened call... -
Page 52: Sound Settings
Sound settings Handset and base ringer volume You can adjust the cordless handset and telephone base ringer volume levels, or Key tone turn the ringer off. The cordless handset is set to beep with If you turn both handset and base ringer each key press. -
Page 53: Temporary Ringer Silencing
About the built-in answering Temporary ringer silencing system and voicemail service When the telephone is ringing, you can temporarily silence the ringer without For message recording, your telephone disconnecting the call. The next call rings has a built-in answering system, and it also normally at the preset volume. -
Page 54: Set Your Built-In Answering System
Set your built-in answering Default announcement system The telephone is preset with a greeting that answers calls with “Hello, please leave The answering system can record and a message after the tone.” You can use this store up to 99 messages. Each message preset announcement, or replace it with can be up to three minutes in length. -
Page 55: Delete The Announcement
Delete the announcement Voice guide to set Answering system 1. Press MENU on the cordless handset in idle mode to enter the main menu. This feature is an alternative way for you 2. Press q or p to choose Answering to do the basic setup of the answering sys then press SELECT. -
Page 56: Set Number Of Rings
Set number of rings Turn the call screening on or off You can set the answering system to You can hear incoming messages at the answer an incoming call after two, three, telephone base while they are being four, five or six rings; or toll saver. recorded. -
Page 57: Use Your Built-In Answering System
Use your built-in answering Message playback system If you have new messages, the telephone plays only the new messages (oldest first). If there are no new messages, New message indication the telephone plays back all messages When there are new answering system (oldest first). -
Page 58: Delete All Messages
Delete all messages • Press DELETE to delete the playing message. The handset announces, You can only delete old (reviewed) “Message deleted,” and then advances messages. You cannot delete new to the next message. messages until you review them. You •... -
Page 59: Call Screening
Call screening Record, play or delete memos Memos are your own recorded messages To screen a call at the telephone base: used as reminders for yourself or others If the answering system and call screening using the same answering system. You can are on, the announcement and the record your own memos using a system incoming message broadcast at the... -
Page 60: Use The Built-In Answering System And Voicemail Service
Use the built-in answering Retrieve voicemail from system and voicemail service telephone service You can use your answering system and Voicemail is a feature available from most voicemail service together by setting telephone service providers. It may be your answering system to answer before included with your telephone service, or voicemail service answers as described may be optional. -
Page 61: Turn Off The New Voicemail Indicators
Remote access 3. Press q or p to choose Voicemail # and then press SELECT. A two-digit security code is required to 4. Use the dialing keys to enter the access the answering system remotely voicemail number (up to 30 digits). from any touch-tone telephone. -
Page 62: Set Your Remote Access Code
Expand your telephone system • If you do not press any key within 20 seconds, the remote access call automatically disconnects. Add and register expansion • When the answering system memory is full, handset the telephone announces, “Memory is full. Enter the remote access code.”... -
Page 63: Add And Register Photo Speed Dial Handset
Add and register photo speed dial Device setup handset You can add VTech compatible Cordless You can add a new photo speed dial audio doorbell, ULE Cordless extension handset (SN5307, purchased separately) ringer and ULE Wearable home SOS to your telephone system. The SN5307... -
Page 64: Add And Register A New Device
Add and register a new device To register an Audio doorbell: 1. When the telephone is not in use, press and hold PAGE at the telephone • You need to register your newly purchased base for about five seconds until the devices to the telephone base before use. -
Page 65: Audio Doorbell
Audio doorbell To register a Wearable home SOS pendant: (Model SN7021 , purchased 1. When the telephone is not in use, separately) press and hold PAGE at the telephone base for about five seconds until the If you have purchased and registered an visual ringer indicator light turns on. -
Page 66: Answer, Decline Or Record A Doorbell Call
Answer, decline or record a Record a doorbell call doorbell call You can record conversations between you at the telephone and the visitor at your When a visitor presses your Audio door, after you answer the doorbell call doorbell, all your devices chime and with the telephone. -
Page 67: Divert Doorbell Calls
Divert doorbell calls Set auto call divert to preset number 1. Press MENU on the cordless handset in You can divert all doorbell calls to a preset idle mode to enter the main menu. external number, or decline a doorbell call and forward the doorbell call to the preset 2. -
Page 68: Test Device Signal Strength
Test device signal strength Cancel all call diverts To cancel all call diverts to the preset You can check the signal strength of number: your devices (SN7014/SN7021/SN7022, 1. Press MENU on the cordless handset in all purchased separately), for example, idle mode to enter the main menu. -
Page 69: Test Audio Doorbell's Signal Strength
Test Audio doorbell’s signal Test SOS pendant’s signal strength strength 1. Press MENU on the cordless handset in idle mode to enter the main menu. 1. Press MENU on the cordless handset in 2. Press q or p to choose Set device idle mode to enter the main menu. -
Page 70: Device Monitoring
Device monitoring Rename a device You can rename a device. If there are additional devices registered to the telephone base, the names of the 1. Press MENU on the cordless handset in registered devices appear in the Devices idle mode to enter the main menu. menu of the cordless handset. -
Page 71: Screen Messages
Screen messages An extension phone, Line in use or one of the handsets is An incoming call is in use. Blocked call blocked. The battery needs to Low battery be recharged. There are no call Block list block entries. is empty The mute function is Microphone turned off and the... - Page 72 The telephone The registration is not Number Registration number you try to successful. already failed save is already in the saved phonebook. The handset or Registering pendant registration The telephone base Out of range is in progress. has lost power, or Please wait OR no pwr at the handset is out of...
-
Page 73: General Product Care
General product care The system is To screen recording a message. call, press Press SELECT to Taking care of your telephone [SELECT] screen a call on a Your telephone contains sophisticated handset. electronic parts, so it must be treated with You have transferred Transferred care. -
Page 74: Frequently Asked Questions
Frequently asked questions The battery Make sure the handset is does not placed in the telephone Below are the questions most frequently charge in the base or charger correctly. handset or asked about the cordless telephone. If you If the battery is completely the handset cannot find the answer to your question, depleted, charge the... - Page 75 There is The handset may be out of The telephone Caller ID is a subscription interference range. Move it closer to the does not service. You must subscribe during a telephone base. receive caller to this service from your telephone ID or the telephone service provider If you subscribe to high-...
- Page 76 The answering Make sure that the System You may have set Smart system does answering system is on. screens all my call blocker to screen calls not answer incoming calls. without numbers and If toll saver is activated, the after the uncategorized calls.
- Page 77 Blocking all If you want to block The answering Make sure you enter the unknown calls. all unknown calls with system does correct remote access numbers that are not in not respond code. your directory or allow to remote Make sure you are list, change the settings to commands.
-
Page 78: The Rbrc® Seal
The RBRC® seal FCC, ACTA and IC regulations The RBRC® seal on the nickel-metal FCC Part 15 hydride battery indicates that VTech NOTE: This equipment has been Communications, Inc. is voluntarily tested and found to comply with participating in an industry program to... - Page 79 FCC Part 68 and ACTA (2) this device must accept any interference received, including interference that may This equipment complies with Part 68 cause undesired operation. Privacy of of the FCC rules and with technical communications may not be ensured when requirements adopted by the using this telephone.
- Page 80 Industry Canada If this equipment is malfunctioning, it must be unplugged from the modular jack until This device contains licence-exempt the problem has been corrected. Repairs transmitter(s)/receiver(s) that comply to this telephone equipment can only be with Innovation, Science and Economic made by the manufacturer or its authorized Development Canada’s licence-exempt agents.
-
Page 81: California Energy Commission Battery Charging Testing Instructions
California Energy Commission For C-UL compliance only battery charging testing Mesures de sécurité importantes instructions Afin de réduire les risques d’incendie, de This telephone is set up to comply with the blessures corporelles ou d’électrocution, energy-conserving standards right out of suivez toujours ces mesures préventives de the box. - Page 82 à département de service à la clientèle moins que la ventilation soit adéquate. de VTech dans les cas suivants : Une flammèche dans un tel endroit • Lorsque le cordon d’alimentation est pourrait provoquer un incendie ou endommagé...
- Page 83 Pile où l’on utilise de l’oxygène médical sans ventilation adéquate; des gaz • N’utilisez que la pile incluse ou l’équivalent. industriels (dissolvants de nettoyage, Pour commander une pile de recharge, des vapeurs d’essence, etc.); une fuite visitez notre site Web au de gaz naturel, etc.
- Page 84 • Ils ne doivent PAS placer le téléphone ou prévenir de telles interférences, sans fil directement sur le stimulateur ne placez pas le socle du téléphone cardiaque, tel que dans une poche de sans fil près ou sur un téléviseur ou chemise, lorsque celui-ci est en marche.
-
Page 85: Limited Warranty
2. Product that has been damaged due United States of America and Canada. to repair, alteration or modification What will VTech do if the Product is by anyone other than an authorized not free from defects in materials and service representative of VTech;... - Page 86 (an unwritten warranty VTech assumes no risk for damage or loss that the Product is fit for ordinary use) of the Product in transit. If the Product...
-
Page 87: Technical Specifications
Technical specifications Frequency Crystal controlled PLL synthesizer control Transmit Handset: frequency 1921.536-1928.448 MHz Telephone base: 1921.536-1928.448 MHz Channels Nominal Maximum power allowed by effective FCC and IC. range Actual operating range may vary according to environmental conditions at the time of use. Power Handset: requirements... - Page 88 And your life. VTech Communications, Inc. A member of THE VTECH GROUP OF COMPANIES. VTech is a registered trademark of VTech Holdings Limited. Specifications are subject to change without notice. © 2020 VTech Communications, Inc. All rights reserved. 02/20. SN5127_WEBCIB_V4.0_20200228...