
Related Manuals for Edimax BR-6473AX


Summary of Contents for Edimax BR-6473AX
- Page 1 Questo manuale d’istruzione è fornito da trovaprezzi.it. Scopri tutte le offerte per Edimax BR-6473AX o cerca il tuo prodotto tra le migliori offerte di Router BR-6473AX User Manual 12-2019 / v1.0...
-
Page 2: Table Of Contents
Contents I. Product Information ..........1 II. Package Contents ............ 2 II-1. System Requirements ..............2 II-2. Hardware Overview ..............3 II-3. LED Status .................. 5 III. Hardware Installation ..........6 III-1. AP & Router Mode ..............8 IV. Quick Setup ............. 9 V. -
Page 3: Product Information
574Mbps (2.4 GHz) and 2402Mbps (5 GHz) is well suited for your home. The BR-6473AX with beamforming + 4X internal antennas delivers fast and reliable long range Wi-Fi coverage to every corner of your home. -
Page 4: Package Contents
II. Package Contents Before start using this product, please check if there is anything missing in the package, and contact your dealer to claim the missing item(s): Power Adapter (12V) BR-6473AX Quick Installation Guide Ethernet Cable II-1. System Requirements - Existing cable/DSL modem & router... -
Page 5: Ii-2. Hardware Overview
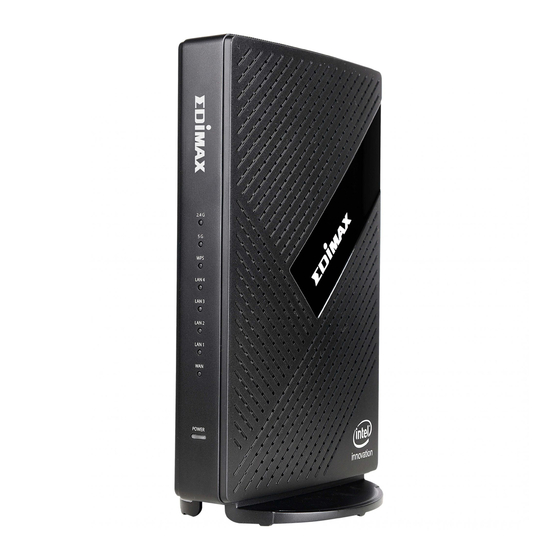
II-2. Hardware Overview... - Page 6 Description LED (2.4G, 5G, WPS, LAN1, LAN2, LAN3, LAN4, WAN, POWER) Selector Switch (Router and AP mode) WPS Button RESET Button LAN4 Port LAN3 Port LAN2 Port LAN1 Port WAN Port DC Power Jack...
-
Page 7: Ii-3. Led Status
LED Status II-3. Function Color Status Description Internet connection is ready. 2.4GHz Wi-Fi not active. Blue & 5GHz Flashing Activity. Sending or receiving data. WPS connection established. (WPS LED blinks for 2 seconds to indicate a BLUE Blinking successful connection) LAN port is connected. -
Page 8: Hardware Installation
III. Hardware Installation This section will guide you through the steps to set up the BR-6473AX. 1. Plug the included AC adapter into the router’s power jack and the other end into an electrical socket. Note: Ensure the “POWER” LED lights on GREEN (Router Mode). - Page 9 2. Connect an Ethernet cable to the "LAN" port on your XDSL/Cable modem. And connect your modem to the router of the “WAN” port with an Ethernet cable. NOTE: Ensure the “WAN” LED lights on BLUE.
-
Page 10: Iii-1. Ap & Router Mode
III-1. AP & Router Mode You can change the operation mode via the selector switch behind the router. Move the selector switch left or right to change the operation mode (AP, router mode). NOTE: Please unplug the AC adapter when changing the operation mode. -
Page 11: Quick Setup
Quick Setup This quick installation section will help you setup your router in its default router mode and configure its basic settings. Please follow the steps below: 1. Please find the default User Name “admin” and unique 8 digits default Password “XXXXXXXX”... - Page 12 2. Open a web browser, and you will be prompted for a username and password. Enter the Username and the password. Click the “Sign in” button. 3. Click the “Auto Detect” button to run the Easy Setup. NOTE: In the Easy Setup, you can configure the router to access the Internet with different modes, such as DHCP, Static IP and PPPoE.
- Page 13 DHCP If you use DHCP, please wait while the router setting is completed.
- Page 14 Click the “Setup Complete” button to complete the setup. Static IP: Enter IP address, default gateway, subnet mask and DNS1/DNS2. Click the “next” button to proceed to the next step.
- Page 15 IP Address Displays the IP address of this router. Default Displays the IP address of the default gateway. Gateway Subnet Mask Specify a subnet mask. The default value is 255.255.255.0. DNS1 For static IP users, the default value is blank. DNS2 For static IP users, the default value is blank.
- Page 16 PPPoE: Enter the Username / Password and click the “next” button.
- Page 17 Click the “Setup Complete” button to complete the setup. If settings failed or Ethernet cable is not connected properly, you will be prompted to check the following settings below,...
-
Page 18: Wi-Fi Settings
V. Wi-Fi Settings In this page allows you to configure the Wi-Fi, guest Wi-Fi and WPS settings that suit your needs. V-1. Main Wi-Fi You can change the basic settings for 2.4GHz and 5GHz. - Page 19 Wireless 2.4GHZ (5GHz) / SSID 2.4GHz/ 5GHz Enable/ Disable SSID Displays the SSID name(s) for the specified frequency. Authentication Displays the authentication method for the specified SSID. Methods Encryption Key Displays the encryption type for the specified SSID. Channel Set the channel width: 2.4 GHz - 20MHz (lower performance but less interference).
-
Page 20: Guest Wi-Fi
V-2. Guest Wi-Fi You can setup an additional “Guest” Wi-Fi network so guest users can enjoy Wi-Fi connectivity without accessing your primary networks. Guest Wi-Fi Guest Wi-Fi Enable/ Disable SSID Displays the SSID name(s) for the guest Wi-Fi. Authentication Displays the authentication method for the specified SSID. Methods Encryption Key Displays the encryption type for the guest Wi-Fi. -
Page 21: Wps
V-3. WPS WPS is a simple way to establish connections between WPS compatible devices. WPS can be activated on compatible devices by pushing a WPS button on the compatible device or from within the compatible device’s firmware / configuration interface (known as PBC or “Push Button Configuration”). - Page 22 You can also activate WPS via hardware, 1. Press and hold the WPS button for 2 seconds to activate WPS. 2. WPS feature is enabled on your router when the WPS LED blinking BLUE light.
-
Page 23: Administration
Administration Centralized administration makes setup and management fast and easy. In this page you can check system information, system log and statistics etc.. -
Page 24: Vi-1. System Information
VI-1. System Information “System Information” page displays basic system information, internet information and Wi-Fi & guest 2.4GHz/5GHz information. -
Page 25: Vi-2. Password
Password VI-2. In this page you can reset the password of your router. Please follow the steps below to reset the password, 1. Enter the new password. 2. Confirm your password. 3. Click the “Apply” button to save the change. -
Page 26: Vi-3. Firmware Upgrade
Firmware Upgrade VI-3. You can upgrade firmware on router by either OTA or manual update. Please follow the steps below to upgrade firmware. 1. Click “Check Version” to check if the current firmware is up to date or not. - Select “Local File” to upload the firmware file to the router. - Select Online Upgrade to update the firmware via OTA. -
Page 27: Vi-4. Backup And Restore
2. Click the “Upgrade” and “OK” button to start upgrading the firmware. Backup and Restore VI-4. In this page you can reset the router to factory settings, backup and restore all the settings on the router. - Page 28 Please follow the steps below to back up and restore the settings on you router, 1. Click the “Save” button to backup all the settings. 2. Click the “Select Files” button, and select the backup file that you want to upload.
- Page 29 If you experience problems with your router, you can reset the device back to its factory settings. There are 2 ways to reset the device. Hardware Reset: 1. Press and hold the reset button on the router for at least 5 seconds then release the button.
-
Page 30: Vi-5. System Log
Web-Based Setup Page: Click the “Reset” and “OK” button to reset the router to factory settings. System Log VI-5. “System log” displays system operation information such as up time and connection processes. This information is useful for administrators. - Page 31 To backup the system log, please click the “Save to File” button and press “Save”.
-
Page 32: Vi-6. Statistic
To clear the system log, please click the “Clear” button. Statistic VI-6. Your router stats can be found in this page, such as Ethernet LAN/WAN, 2.4GHz/5GHz Wireless. -
Page 33: Vi-7. Time Zone
Time Zone VI-7. Select the time zone of your country/region. If your country/region is not listed, please select another country/region whose time zone is the same as yours. VII. Security The router provides various security options, for example, access control and DMZ. -
Page 34: Vii-1. Access Control
VII-1. Access Control MAC Access Control is a security feature that can help to prevent unauthorized users from connecting to your router. This function allows you to define a list of network devices permitted to connect to the router. Devices are each identified by their unique MAC address. -
Page 35: Vii-2. Port Forwarding
VII-2. Port Forwarding A port forward opens specific ports on your router and is a way of making a computer network accessible to any networking application. -
Page 36: Vii-3. Dmz
VII-3. DMZ DMZ Network exists to protect the hosts most vulnerable to attack and as a subnetwork containing an organization's exposed, outward-facing services. It acts as the exposed point to an untrusted networks, commonly the Internet. Please follow the steps below to setup DMZ on your router, 1. - Page 37 COPYRIGHT Copyright Edimax Technology Co., Ltd. all rights reserved. No part of this publication may be reproduced, transmitted, transcribed, stored in a retrieval system, or translated into any language or computer language, in any form or by any means, electronic, mechanical, magnetic, optical, chemical, manual or otherwise, without the prior written permission from Edimax Technology Co., Ltd.
- Page 38 Federal Communication Commission Interference Statement This equipment has been tested and found to comply with the limits for a Class B digital device, pursuant to Part 15 of FCC Rules. These limits are designed to provide reasonable protection against harmful interference in a residential installation.
- Page 39 EU Declaration of Conformity English: This equipment is in compliance with the essential requirements and other relevant provisions of Directive 2014/53/EU, 2014/35/EU. Français: Cet équipement est conforme aux exigences essentielles et autres dispositions de la directive 2014/53/EU, 2014/35/EU. Čeština: Toto zařízení je v souladu se základními požadavky a ostatními příslušnými ustanoveními směrnic 2014/53/EU, 2014/35/EU.
- Page 40 Declaration of Conformity We, Edimax Technology Co., Ltd., declare under our sole responsibility, that the equipment described below complies with the requirements of the European Radio Equipment directives. Equipment: AX3000 Dual-Band Router Model No.: BR-6473AX The following European standards for essential requirements have been followed:...
- Page 41 Notice According to GNU General Public License Version 2 This product includes software that is subject to the GNU General Public License version 2. The program is free software and distributed without any warranty of the author. We offer, valid for at least three years, to give you, for a charge no more than the costs of physically performing source distribution, a complete machine-readable copy of the corresponding source code.
- Page 42 intact all the notices that refer to this License and to the absence of any warranty; and give any other recipients of the Program a copy of this License along with the Program. You may charge a fee for the physical act of transferring a copy, and you may at your option offer warranty protection in exchange for a fee.
- Page 43 6. Each time you redistribute the Program (or any work based on the Program), the recipient automatically receives a license from the original licensor to copy, distribute or modify the Program subject to these terms and conditions. You may not impose any further restrictions on the recipients’...